The Spring Message of the Day App is a Gluon code sample. Refer to the Gluon website for a full list of Gluon code samples.
In this tutorial, we’ll explain how to create an app that receives messages from a web application using Spring Boot and Gluon CloudLink, and deploy it on Android and iOS devices.
Before you start, make sure to check the list of prerequisites for each platform, and you have installed the Gluon plugin for your IDE.
Note: This tutorial will use the plugin for NetBeans, but it works as well on IntelliJ and Eclipse.
Code: The code for this project can be found in the samples repository at GitHub.
The sample is located under the directory springmotd. The reader can clone this repository or create the entire project from scratch, based on the following steps.
Creating the client project
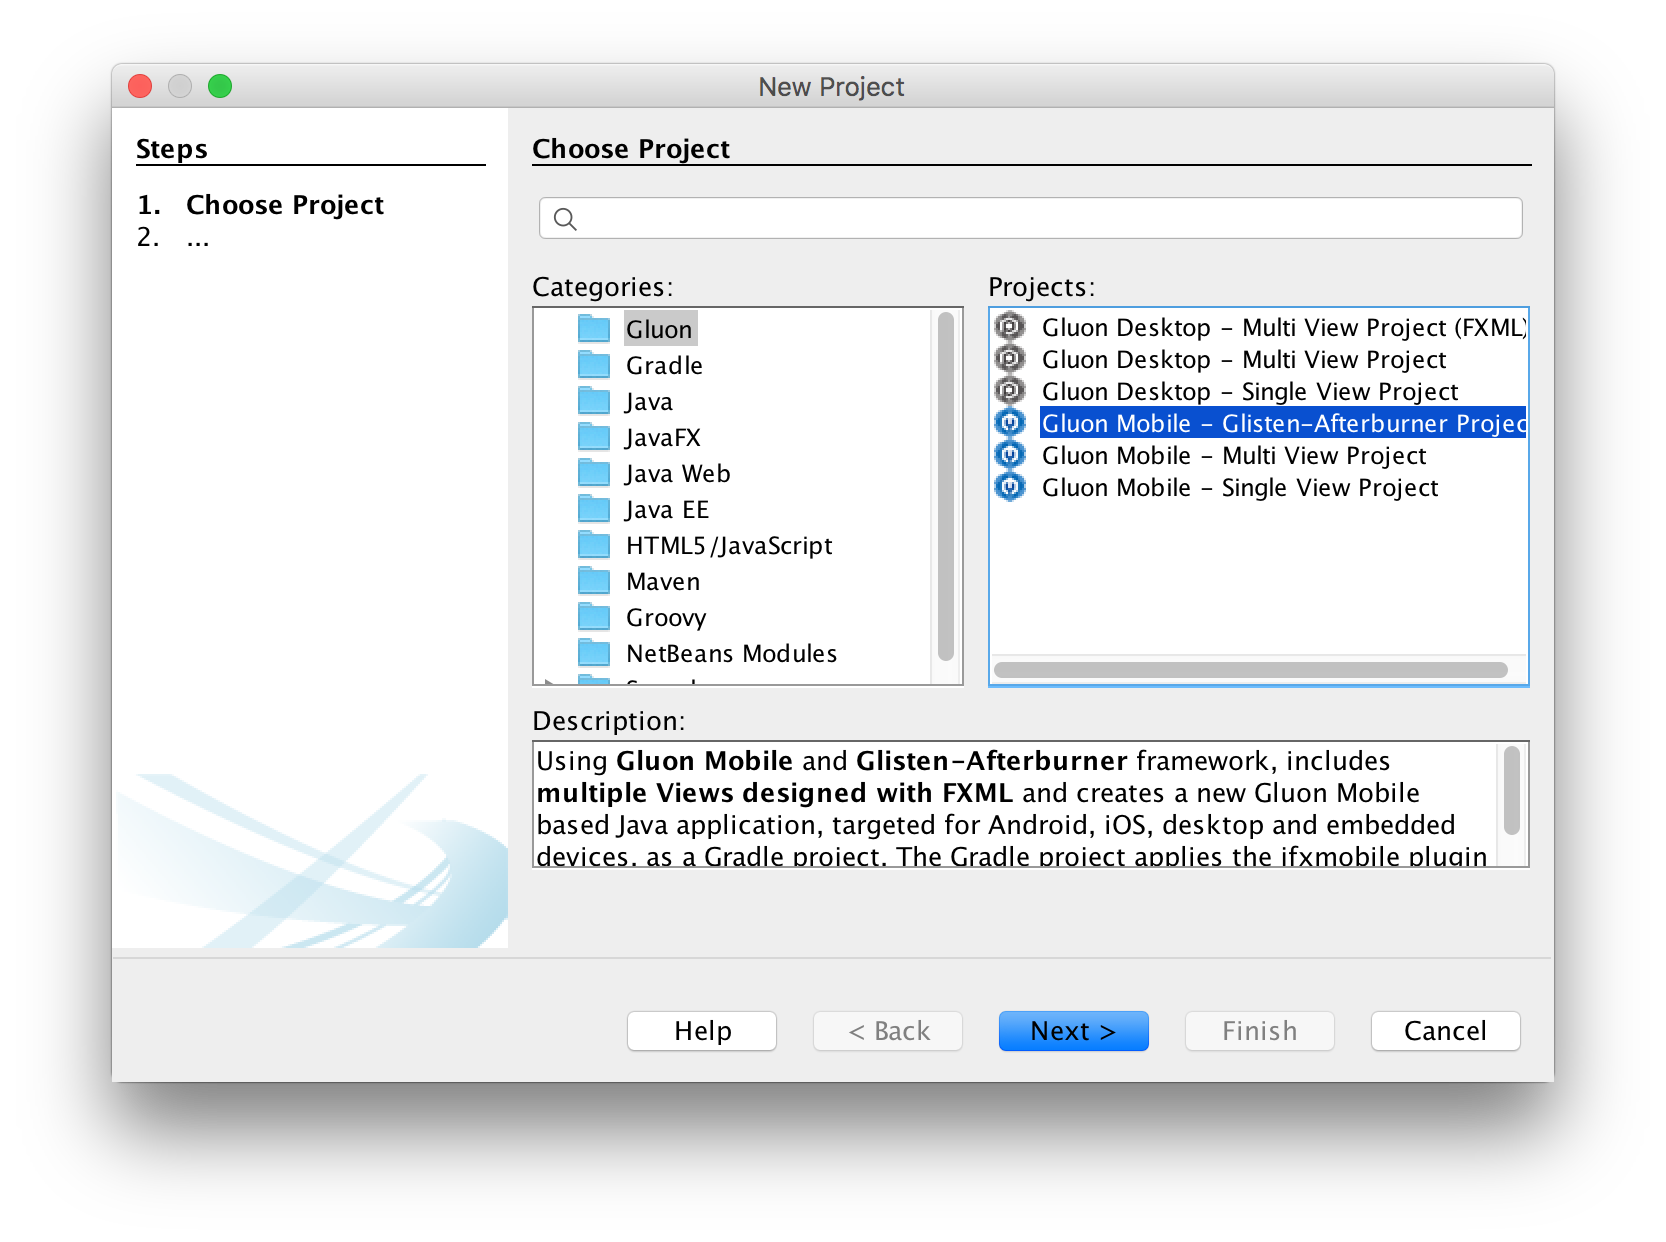
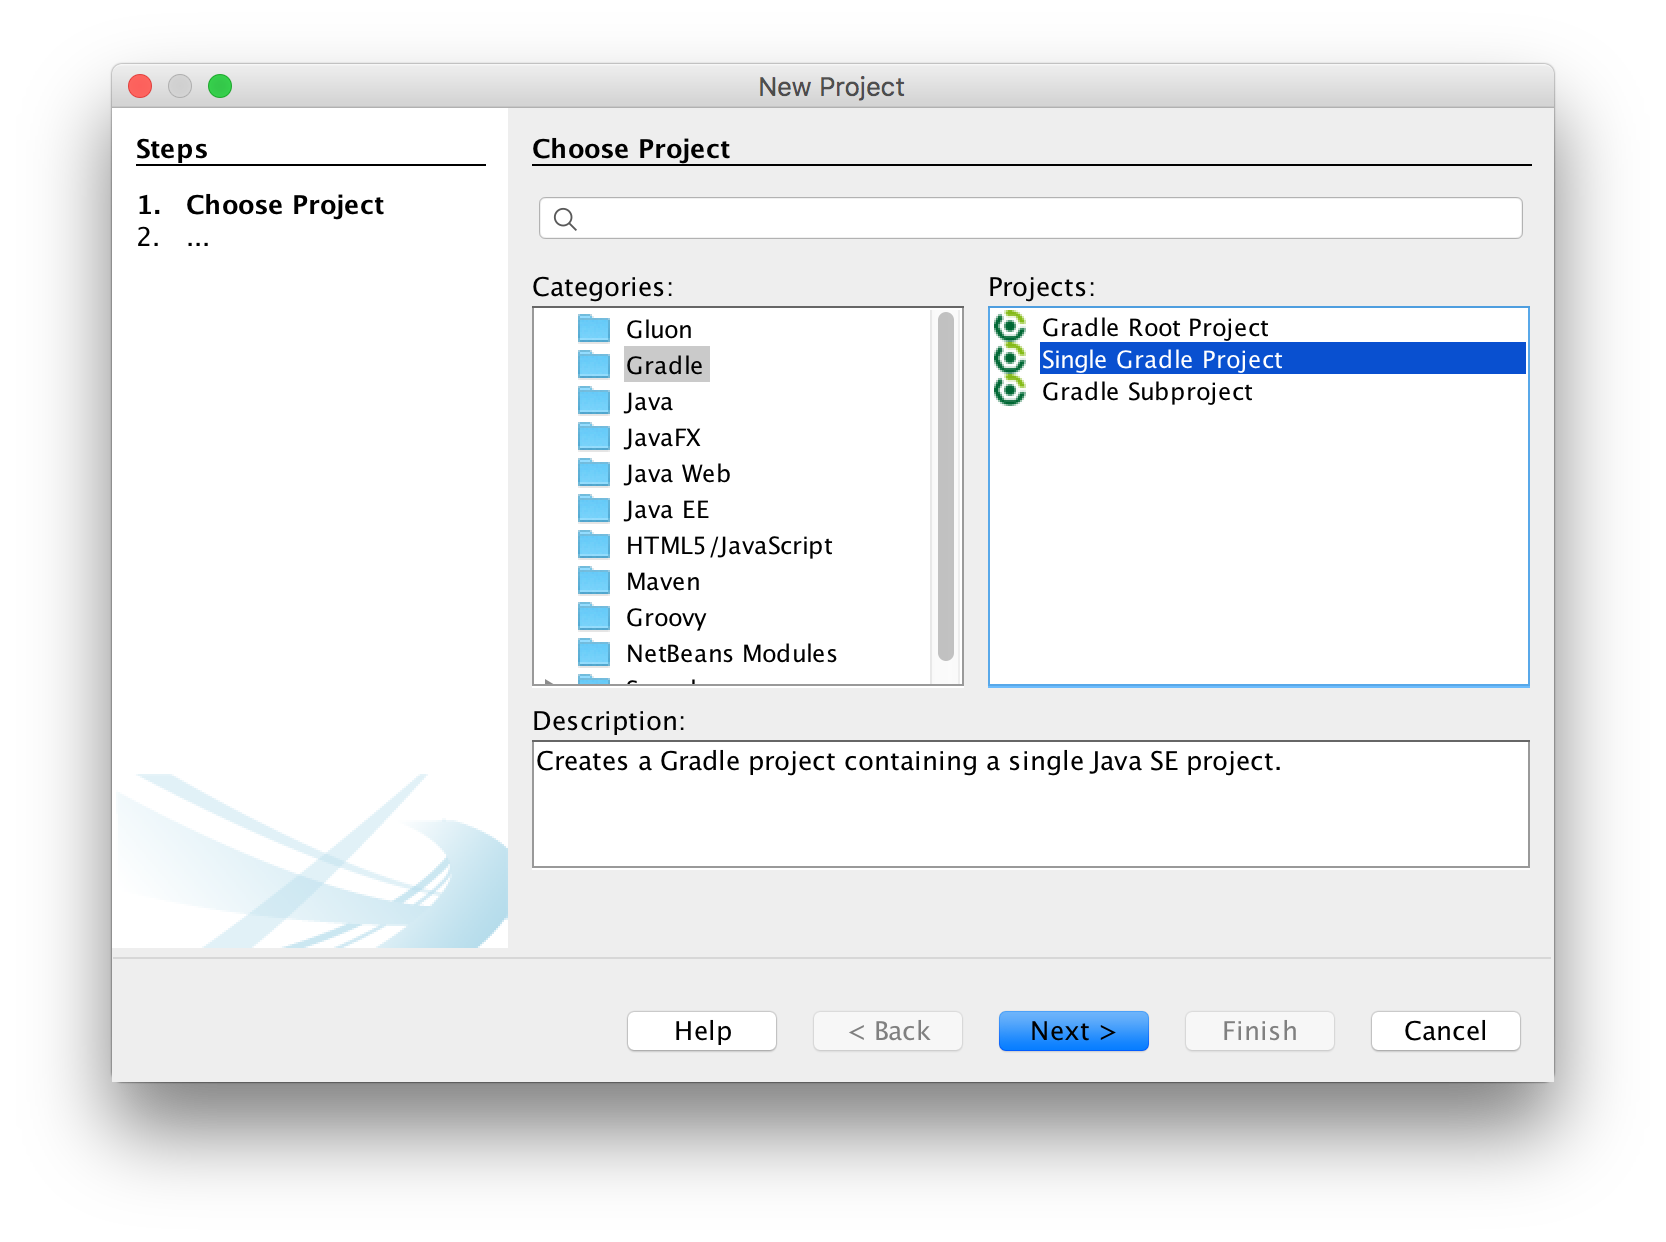
Let’s create a new project using the Gluon plugin. In NetBeans, click File→New Project… and select Gluon on the left. Select Gluon Mobile - Glisten-Afterburner Project from the list of available Projects:
Add a proper name to the application (client), find a proper location, add the package name and change the main class name if required.
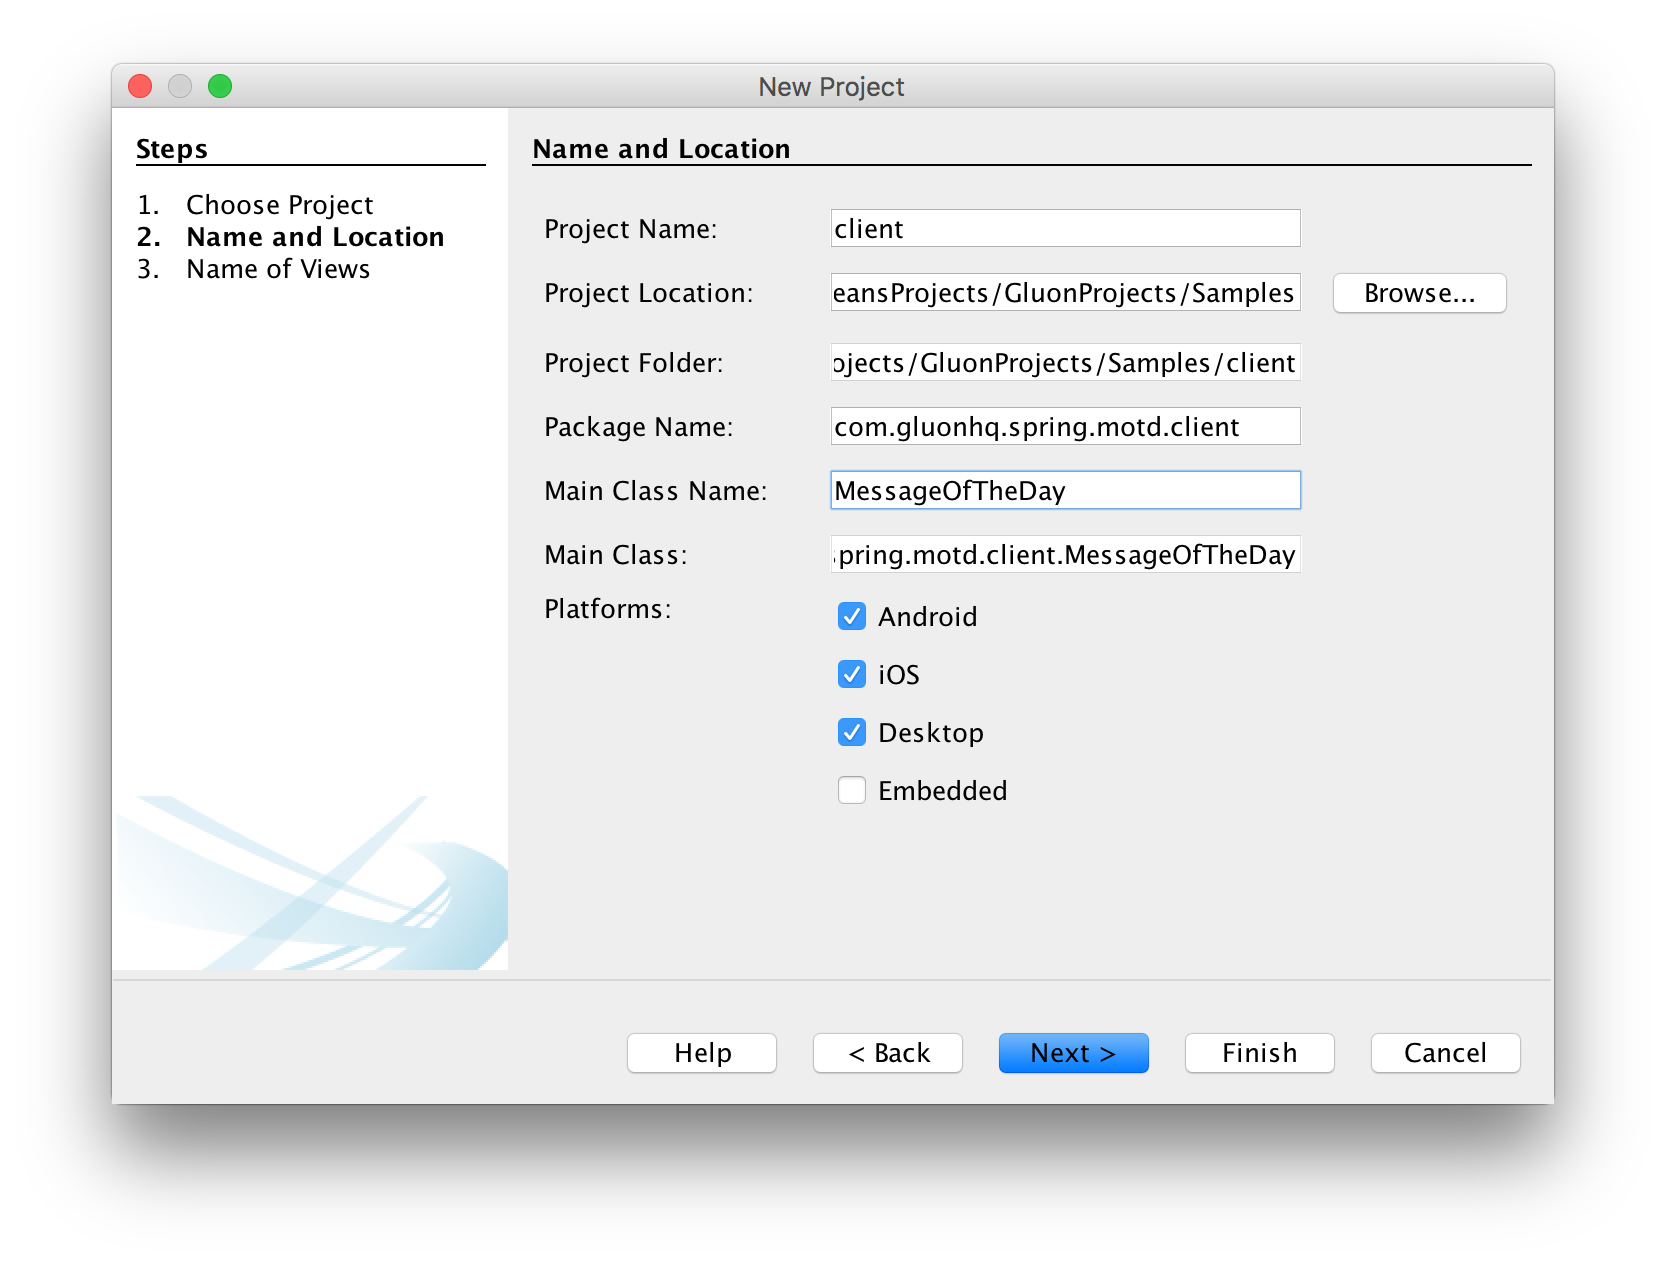
Press Next and change the name of the primary view to Main.

Press Finish and the project will be created and opened.
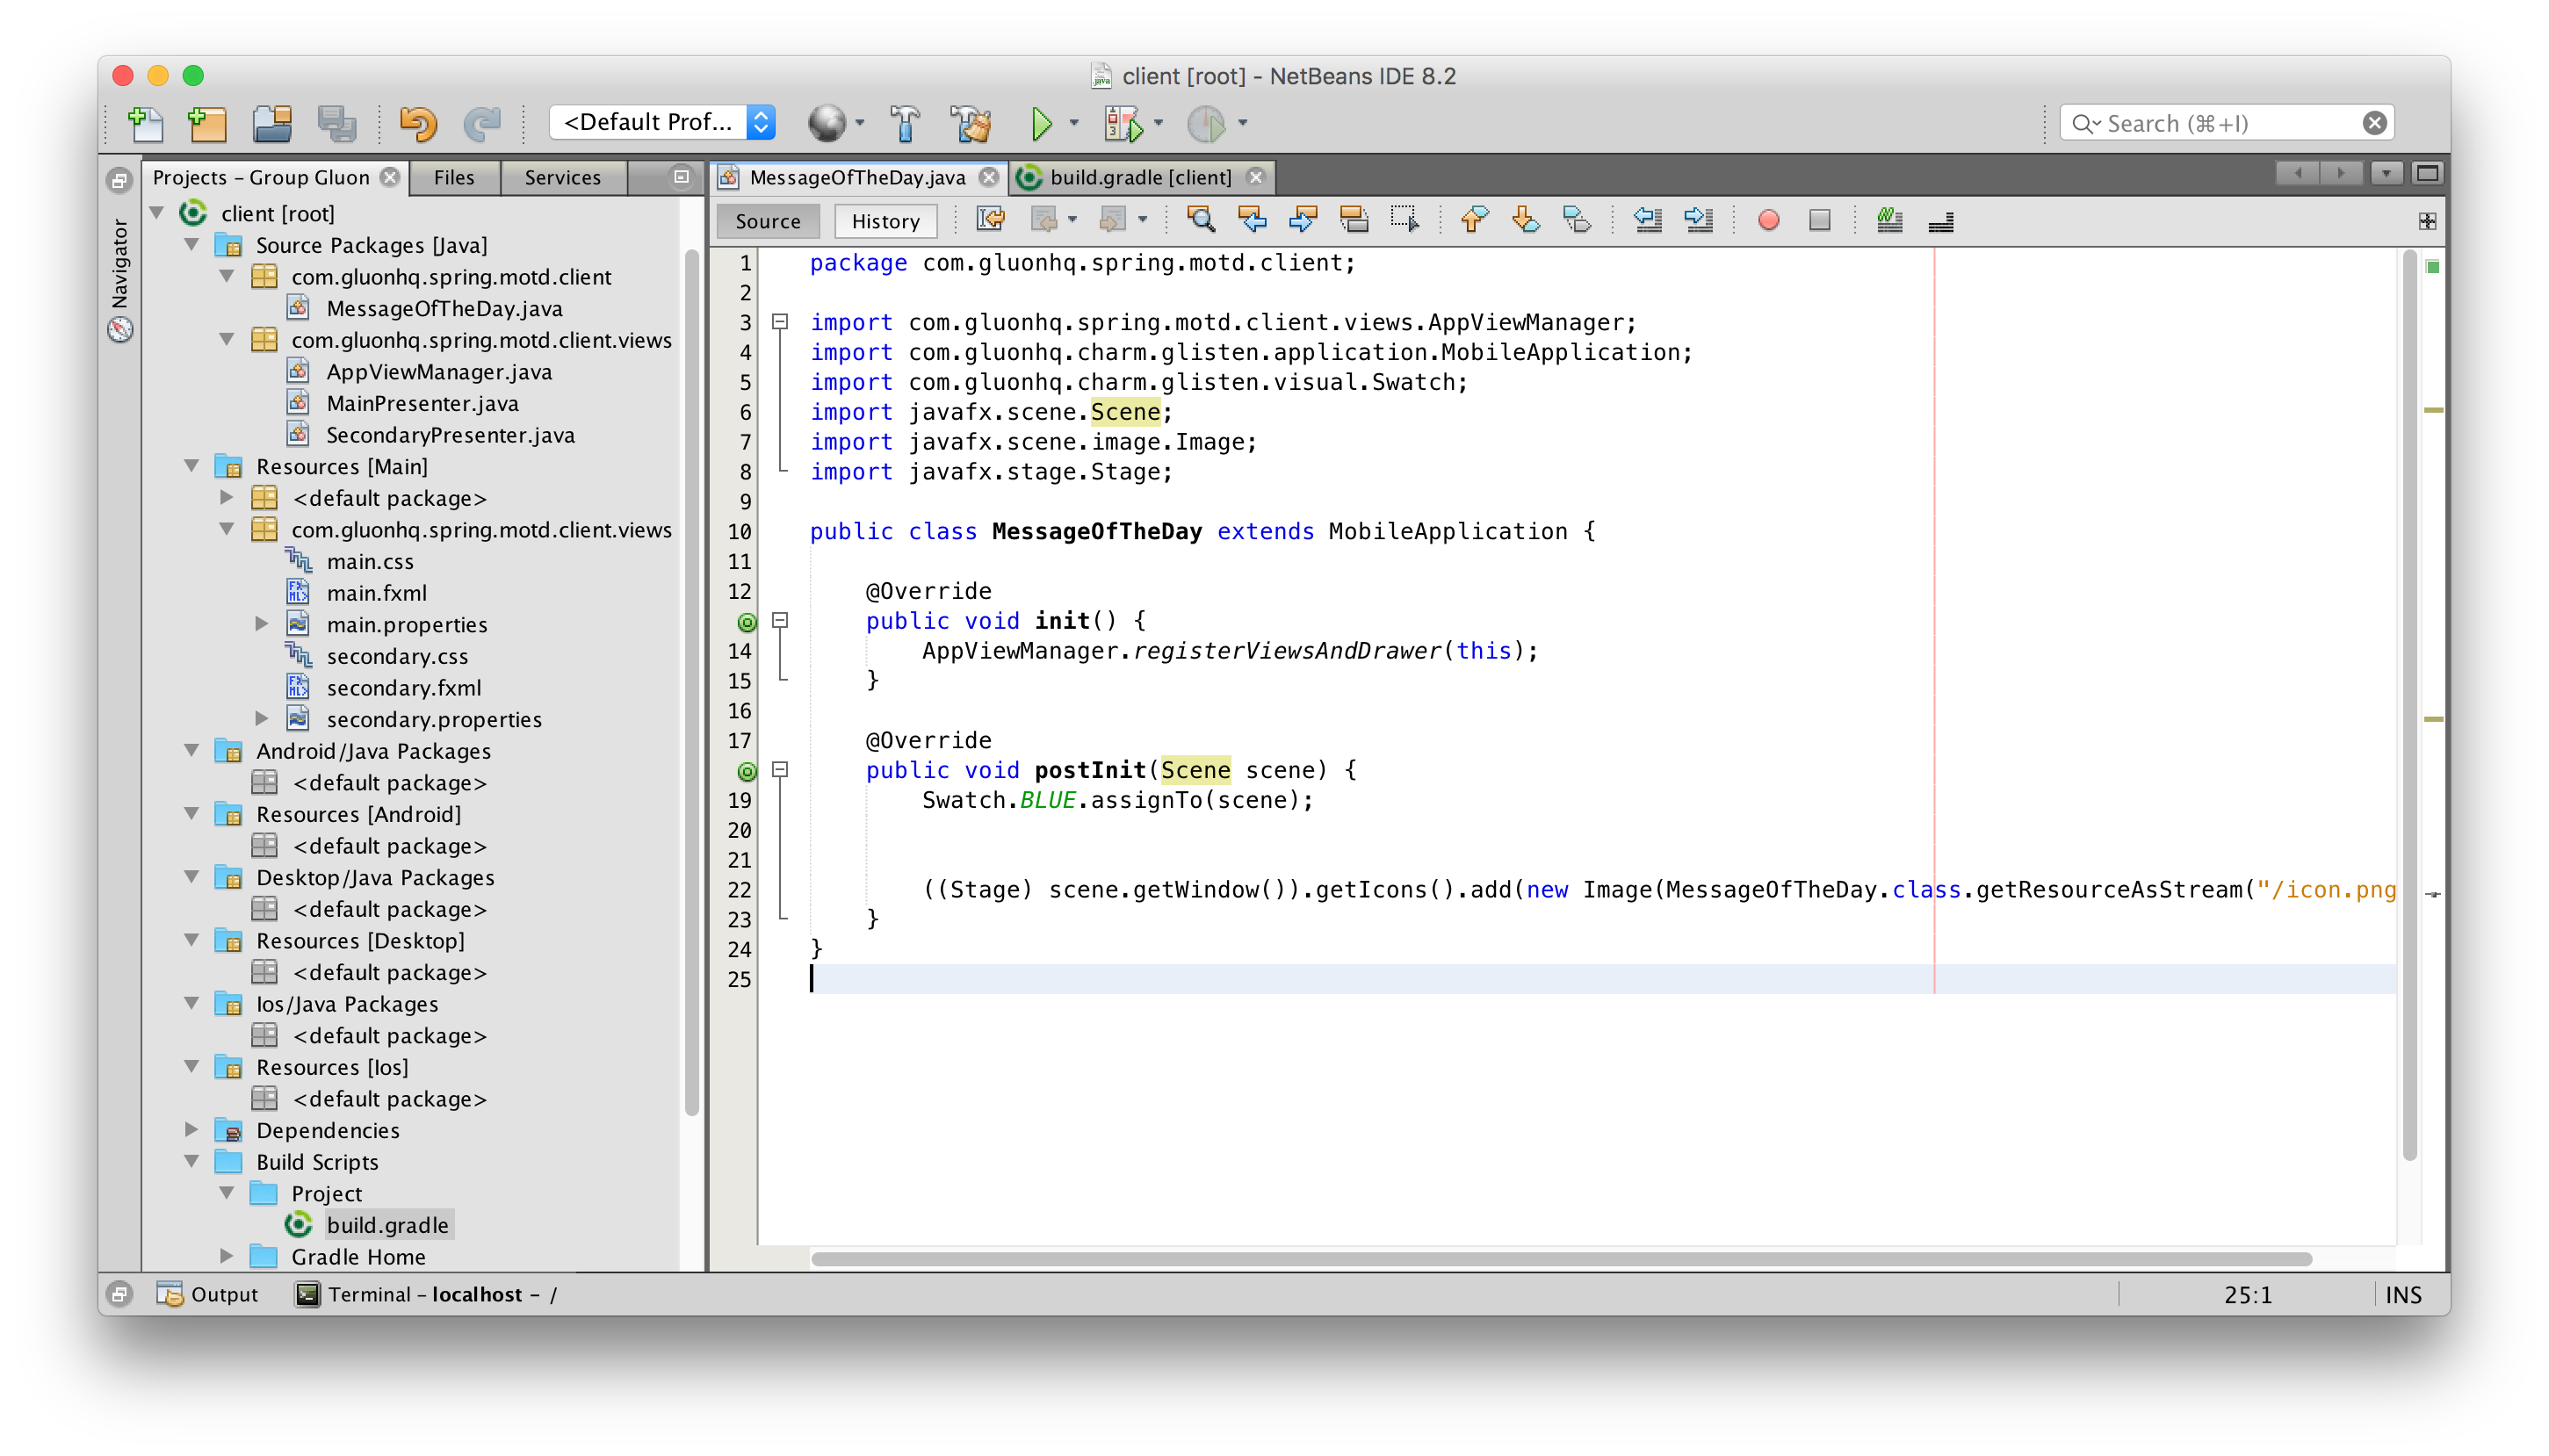
Modifying the Project
For this sample we don’t need the secondary view, so we can just leave it there for a possible future use, or we can get rid of the related files (SecondaryPresenter.java, secondary.css, secondary.properties and secondary.fxml), and remove the AppView instance from the AppViewManager.
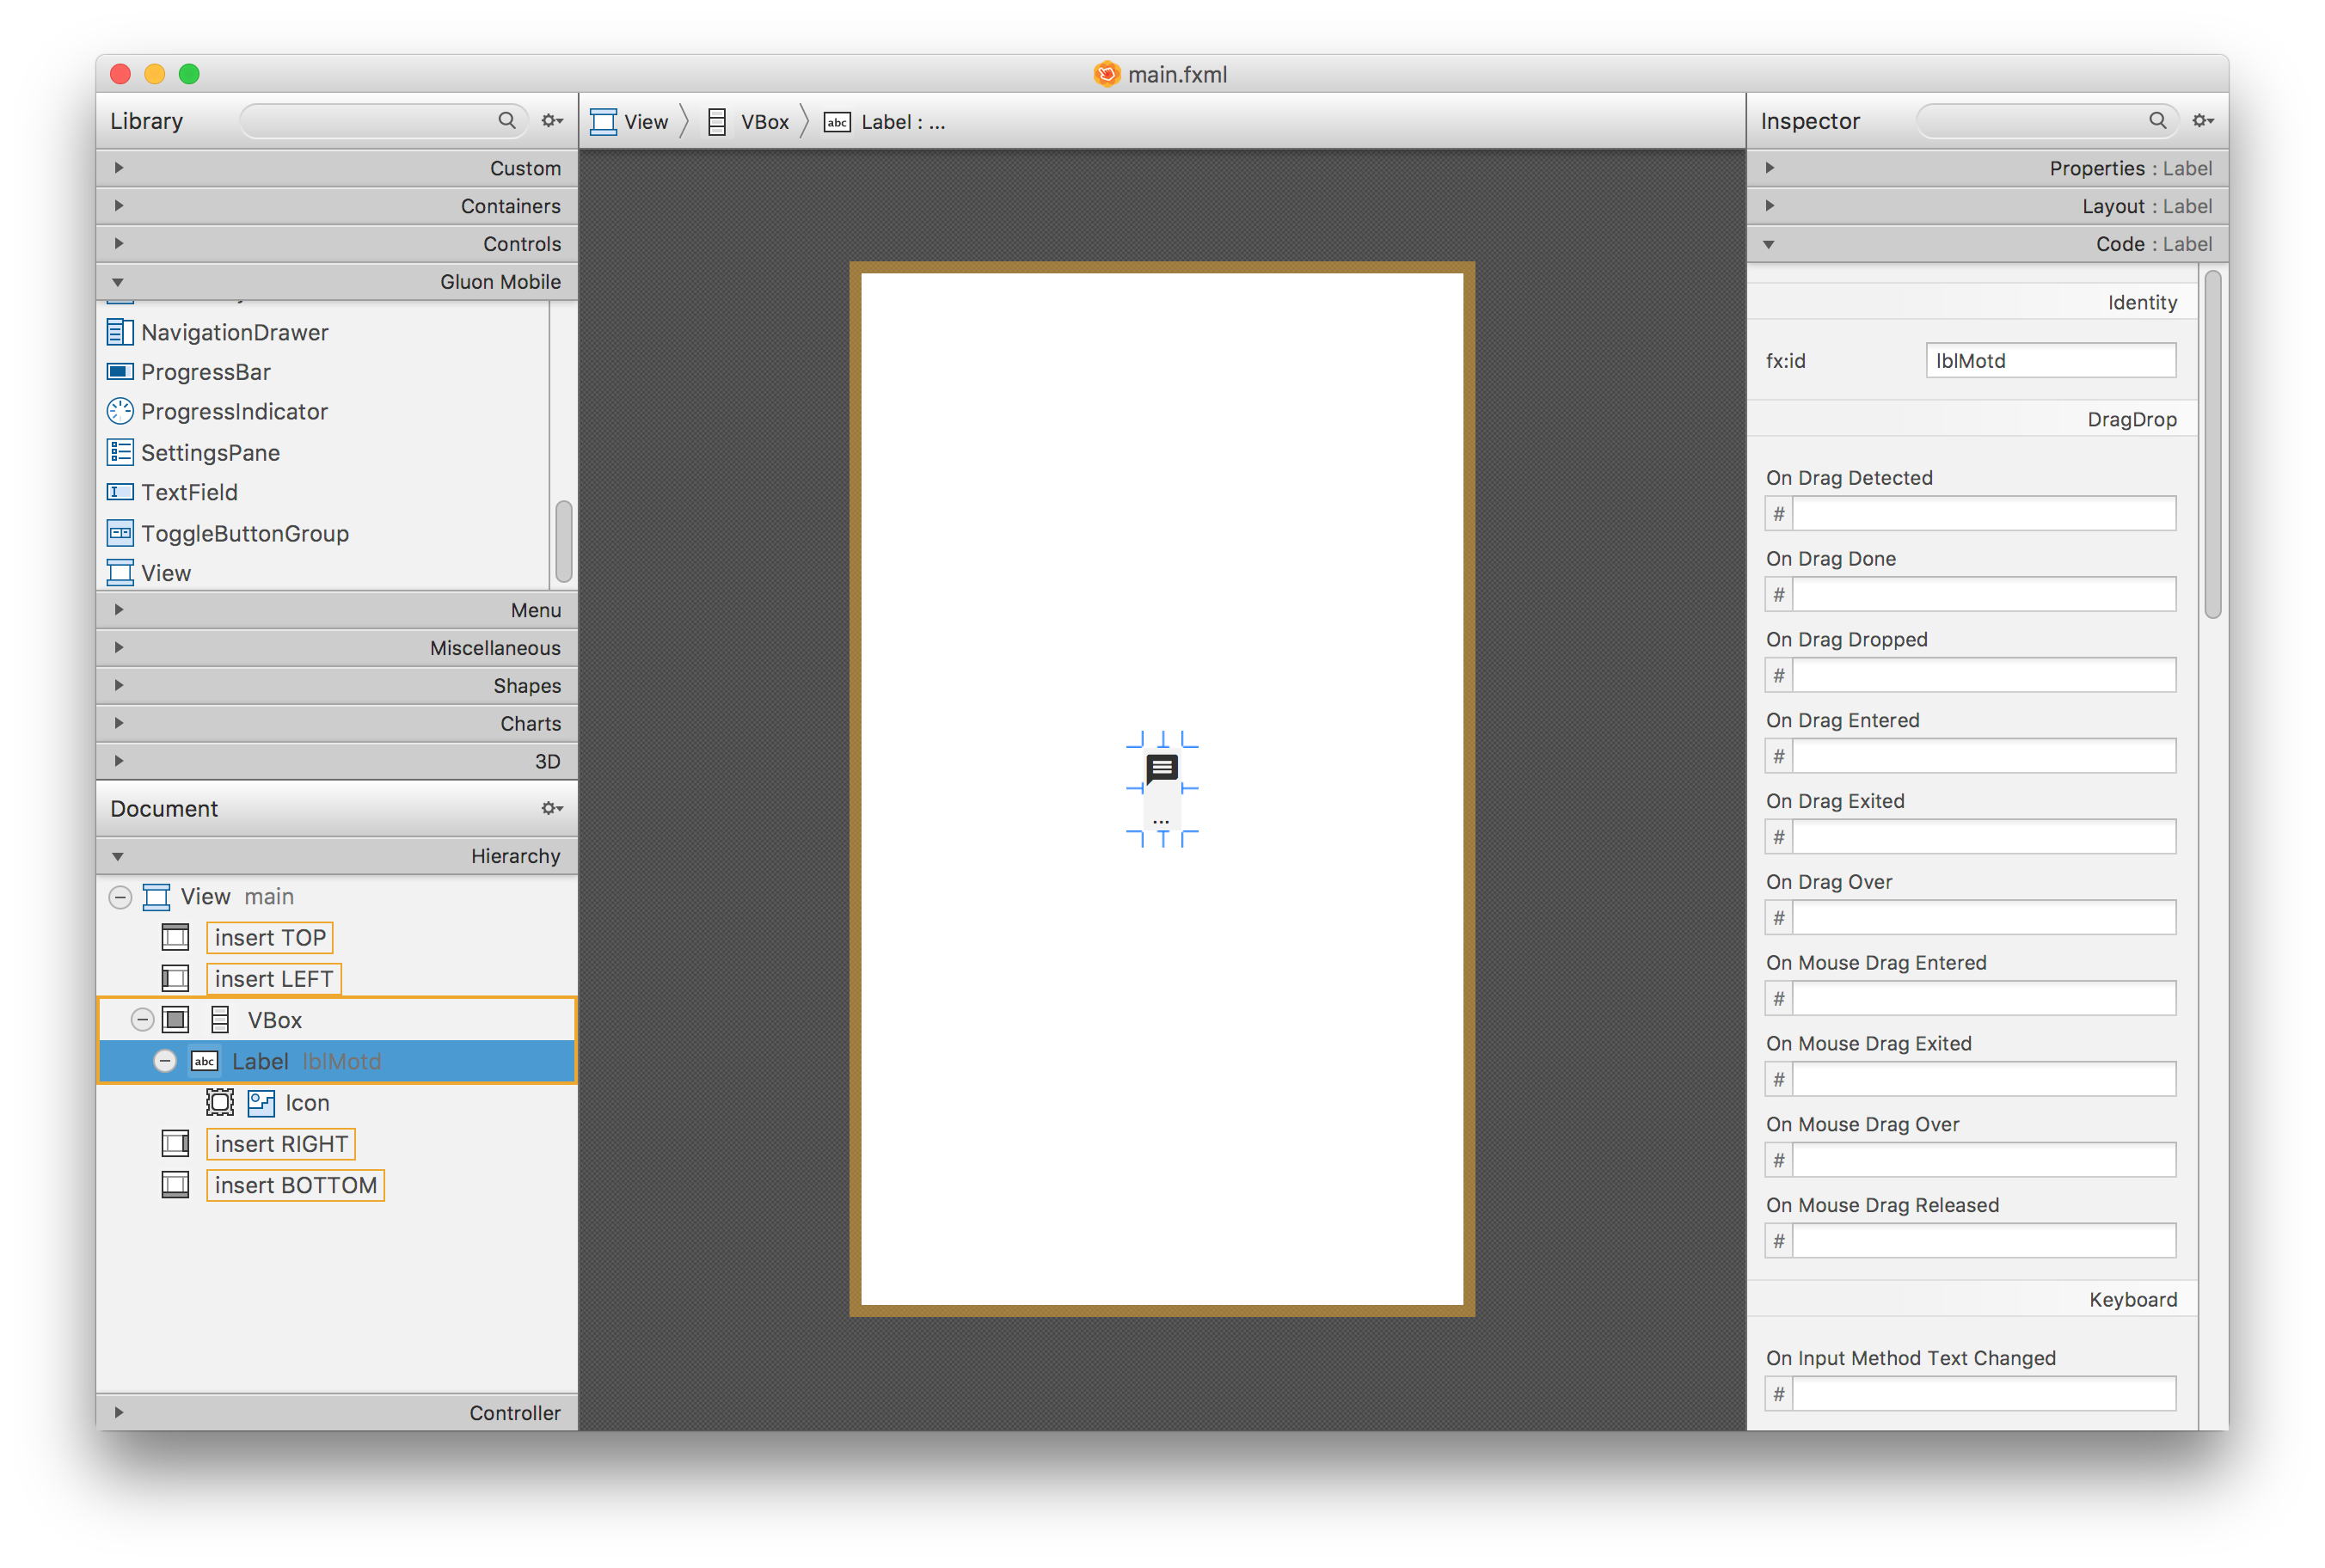
The FXML files can be edited with Scene Builder. Since the version 8.3.0, the Gluon Charm dependencies are included, and you can easily design Gluon Mobile views.
We’ll modify the default main.fxml file, just to leave a Label for the incoming message.
and update its presenter:
public class MainPresenter extends GluonPresenter<MessageOfTheDay> {

    @FXML
    private View main;

    @FXML
    private Label lblMotd;

    @FXML
    private ResourceBundle resources;

    public void initialize() {
        main.showingProperty().addListener((obs, oldValue, newValue) -> {
            if (newValue) {
                AppBar appBar = getApp().getAppBar();
                appBar.setNavIcon(MaterialDesignIcon.MENU.button(e ->
                        getApp().getDrawer().open()));
                appBar.setTitleText(resources.getString("message.text"));
            }
        });
    }
}
and css file:
.label {
    -fx-text-fill: #666666;
    -fx-font-size: 1.2em;
}

.icon > .label {
    -fx-text-fill: -primary-swatch-700;
    -fx-font-size: 3em;
}
The service
We’ll add a service that takes care of retrieving data from Gluon CloudLink.
Gluon Dashboard
First of all, you need a valid subscription to Gluon CloudLink. If you don’t have it yet, get it from here (there is also a 30-day free trial). Sign up and get a valid account on Gluon CloudLink and then access the Gluon CloudLink Dashboard at https://gluon.io.
Sign in using your Gluon account credentials (those provided when creating the account).
Go to the Credentials link, Client tab, and you will find a pair of key/secret tokens. Click on the download button to download the file gluoncloudlink_config.json, and then store it under your project src/main/resources/ folder.
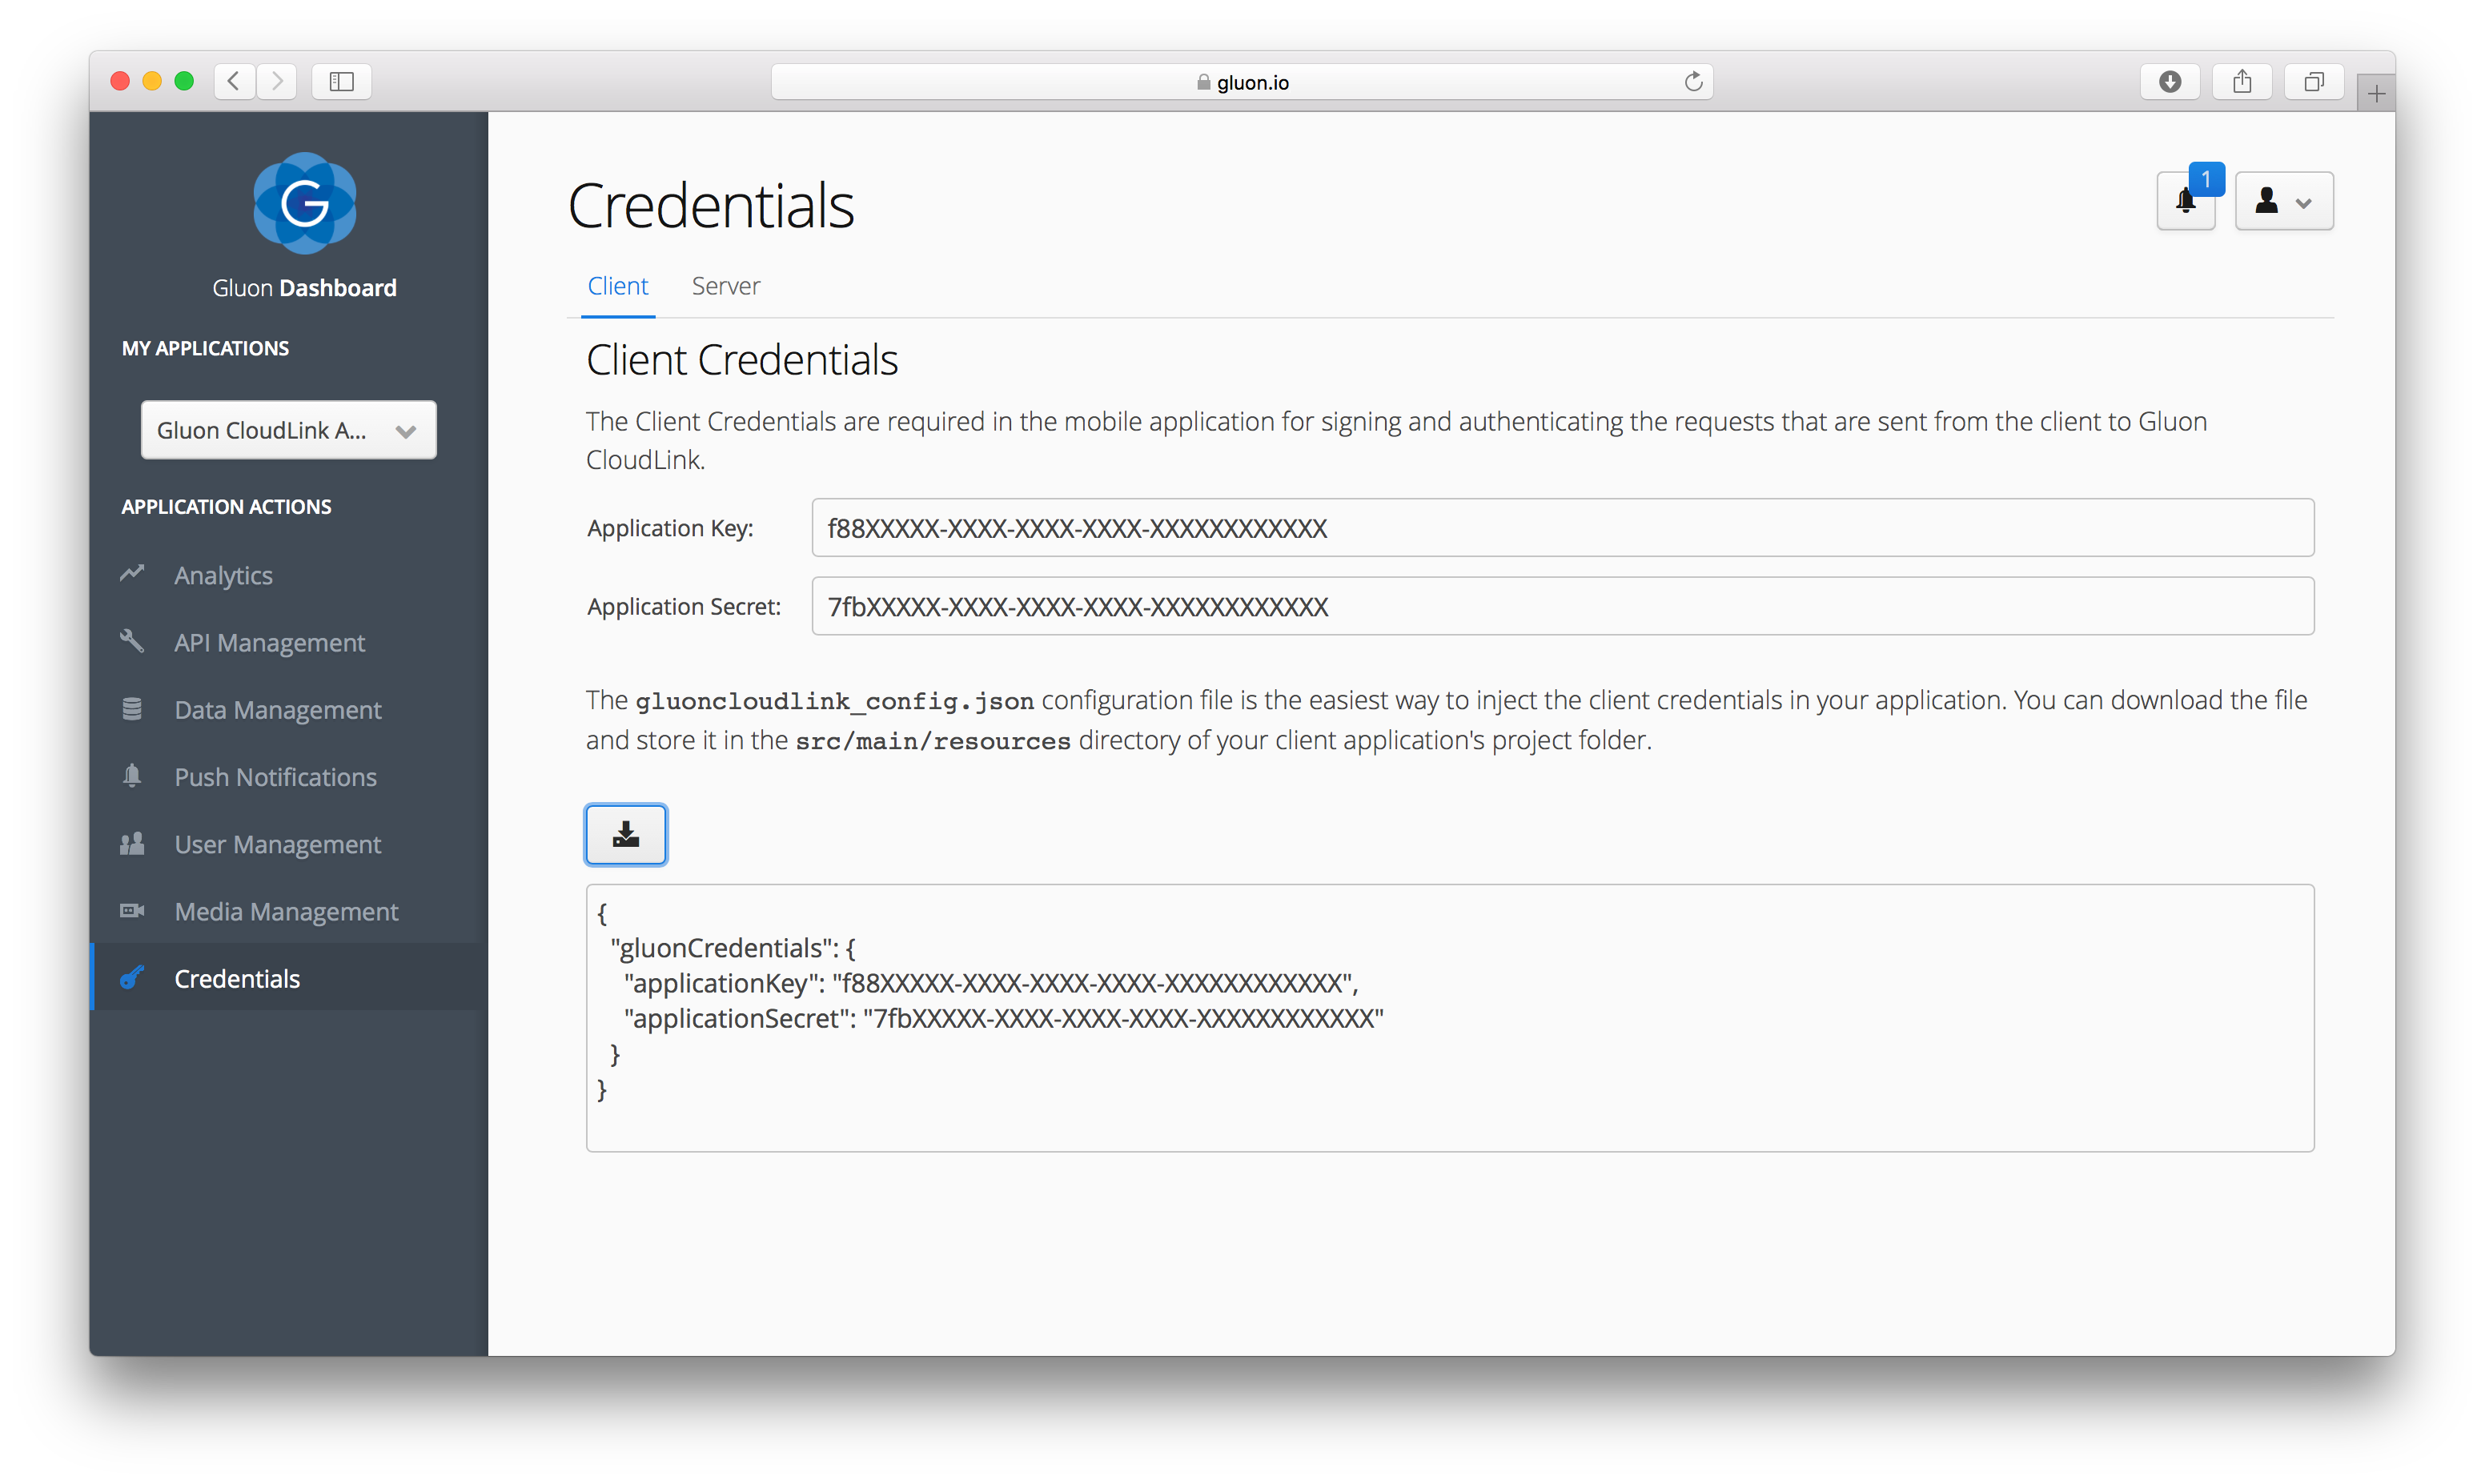
The content of the file is a JSON object with the key and secret that will grant access to Gluon CloudLink:
{
  "gluonCredentials": {
    "applicationKey" : "f88XXXXX-XXXX-XXXX-XXXX-XXXXXXXXXXXX",
    "applicationSecret": "7fbXXXXX-XXXX-XXXX-XXXX-XXXXXXXXXXXX"
  }
}
Service class
We can now build a new DataClient, which is the access point to the Data Storage service of Gluon CloudLink. We add a
method that we annotate with @PostContruct. This method will be called by the Afterburner framework, immediately after
the class has been constructed.
public class Service {

    private DataClient dataClient;

    @PostConstruct
    public void postConstruct() {
        dataClient = DataClientBuilder.create()
                .operationMode(OperationMode.CLOUD_FIRST)
                .build();
    }
}
Based on the DataClient instance, we can retrieve a GluonObservableObject, using the method
DataClient.createObjectDataReader(). We define an identifier for this object and the type of class that we want to
retrieve, in this case String.class.
public class Service {

    private static final String MOTD = "spring-motd-v1";

    public GluonObservableObject<String> retrieveMOTD() {
        GluonObservableObject<String> motd = DataProvider
                .retrieveObject(dataClient.createObjectDataReader(MOTD, String.class, SyncFlag.OBJECT_READ_THROUGH));
        motd.initializedProperty().addListener((obs, ov, nv) -> {
            if (nv && motd.get() == null) {
                motd.set("This is the first Message of the Day!");
            }
        });
        return motd;
    }
}
Injecting the Service
Back to MainPresenter, we can inject a singleton instance of the Service by using the @Inject annotation. We then
call service.retrieveMOTD() to retrieve the object from Gluon CloudLink, binding the returned observable object to the
text property of the label.
public class MainPresenter extends GluonPresenter<MessageOfTheDay> {
@Inject
private Service service;
public void initialize() {
...
lblMotd.textProperty().bind(service.retrieveMOTD());
}
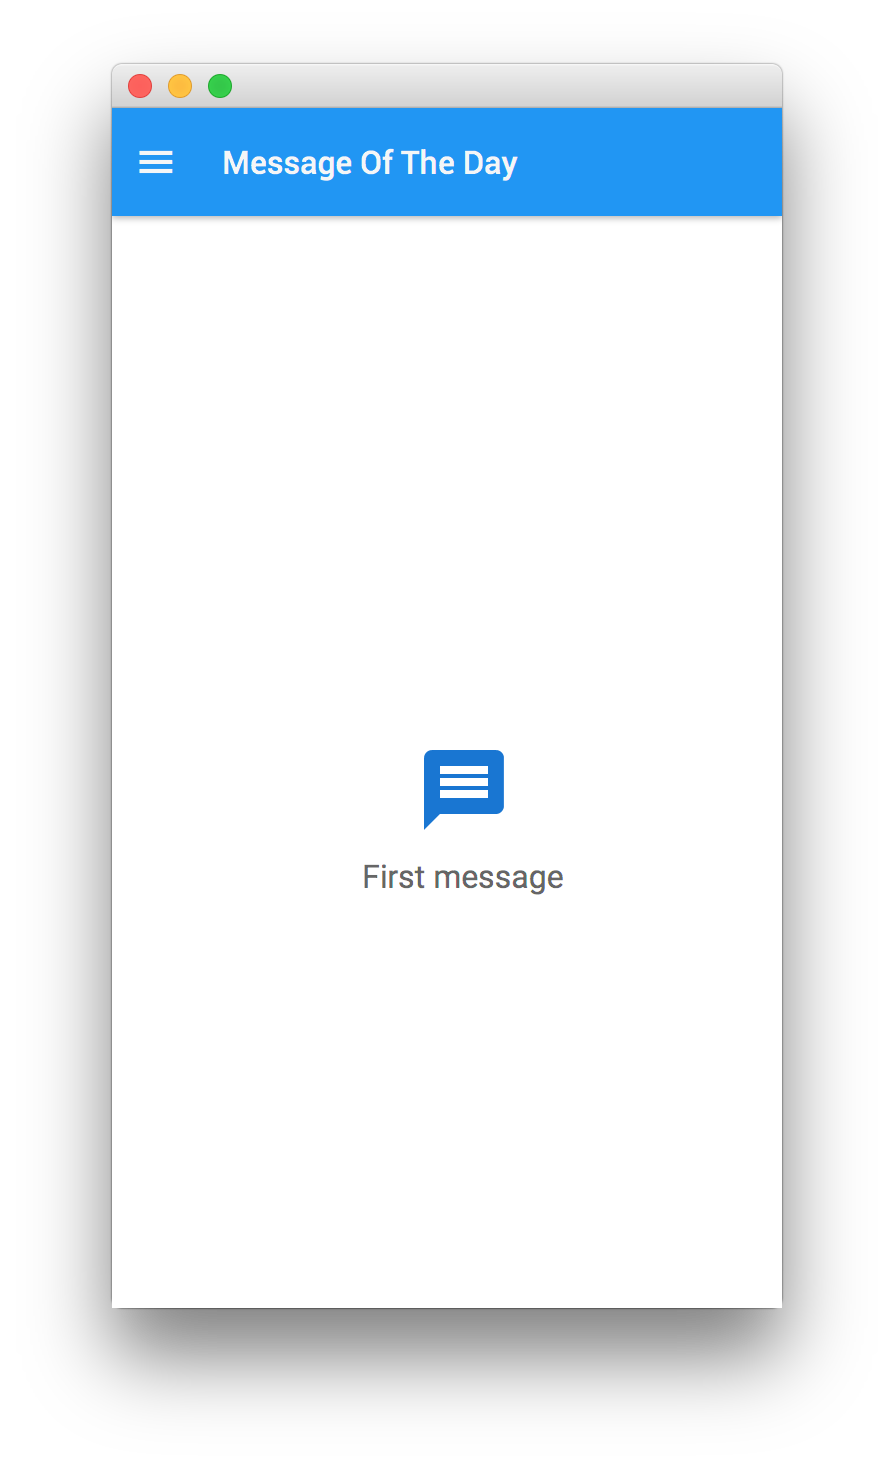
}Testing the Client
Time to test the client application on Desktop, before deploying to mobile.
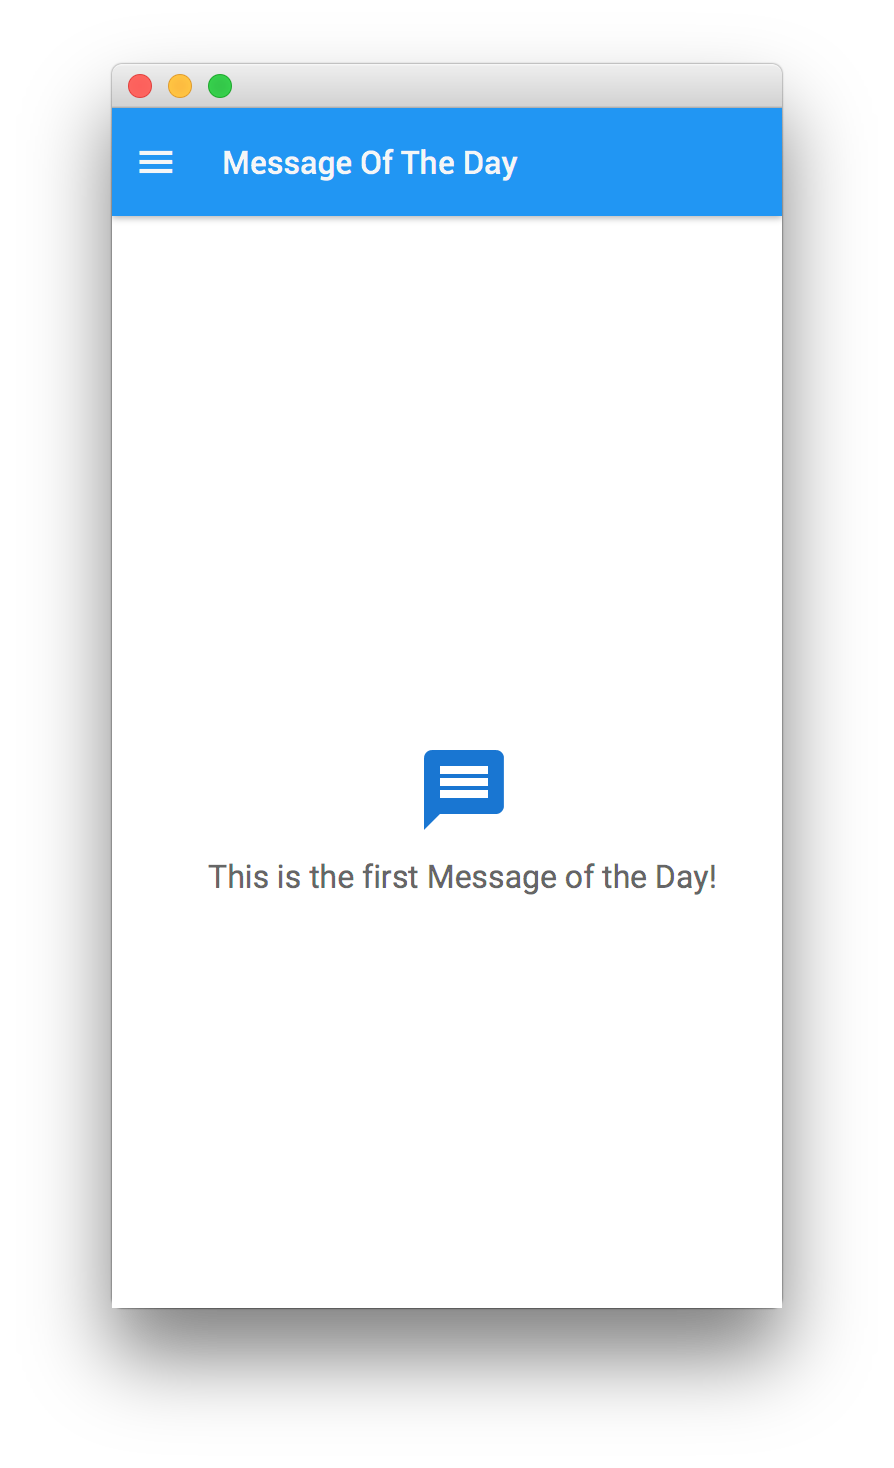
Since we don’t have the web application to send messages yet, there is no object available and we return the default message.
If everything works as expected, run Tasks→android→androidInstall to deploy on Android, or Tasks→launch→launchIOSDevice to deploy on iOS.
The server project
To create the web application with Spring Boot, we’ll make use of its plugin for gradle.
First of all, we create a regular gradle project from NetBeans,
named server, with our main class com.gluonhq.spring.motd.server.MotdApplication:

Now, we add the plugin to the build script, and include the required dependencies:
buildscript {
    repositories {
        jcenter()
    }

    dependencies {
        classpath 'org.springframework.boot:spring-boot-gradle-plugin:1.5.3.RELEASE'
    }
}

apply plugin: 'java'
apply plugin: 'org.springframework.boot'

repositories {
    jcenter()
}

dependencies {
    // Gluon CloudLink Enterprise SDK
    compile 'com.gluonhq:cloudlink-enterprise-sdk-spring:1.2.0'

    // Spring Boot
    compile 'org.springframework.boot:spring-boot-starter-web'

    // Webjars
    compile "org.webjars:bootstrap:3.3.7-1"
    compile "org.webjars:jquery:3.1.1"
}

jar {
    // omit the version from the jar file name
    version = ''
}
Application class
We define now the Spring Application class:
@SpringBootApplication
public class MotdApplication extends SpringBootServletInitializer {

    public static void main(String[] args) {
        new SpringApplicationBuilder(MotdApplication.class)
                .application()
                .run(args);
    }

}
REST Services
To deal with the REST requests from the web application, we’ll add the FrontHandler class, to process a GET request to retrieve the current value of the object (getMessage), and a POST request, to set a new value (updateMessage).
We define the proper mapping path names: front and motd.
@RestController
@RequestMapping("front")
public class FrontHandler {

    private static final String CHARSET = "charset=UTF-8";

    @RequestMapping(value = "motd", method = RequestMethod.GET, produces = MediaType.APPLICATION_JSON_VALUE + "; " + CHARSET)
    public String getMessage(@RequestParam("object") String object) {
        return "";
    }

    @RequestMapping(value = "motd", method = RequestMethod.POST, produces = MediaType.APPLICATION_JSON_VALUE + "; " + CHARSET)
    public String updateMessage(@RequestParam("object") String object, @RequestParam("message") String message) {
        return "";
    }
}
Now to implement those methods, we define a service that connects to CloudLink, to get or set the object.
The GluonService
To pull or push data from CloudLink we’ll use the Gluon CloudLink Enterprise SDK. This client API is a Java wrapper that calls into the Gluon CloudLink Enterprise SDK REST endpoints.
A valid Server Key is required for authenticating each request. From the Gluon Dashboard, navigate to the Credentials
page and select the Server tab to access the Server Key for your application:
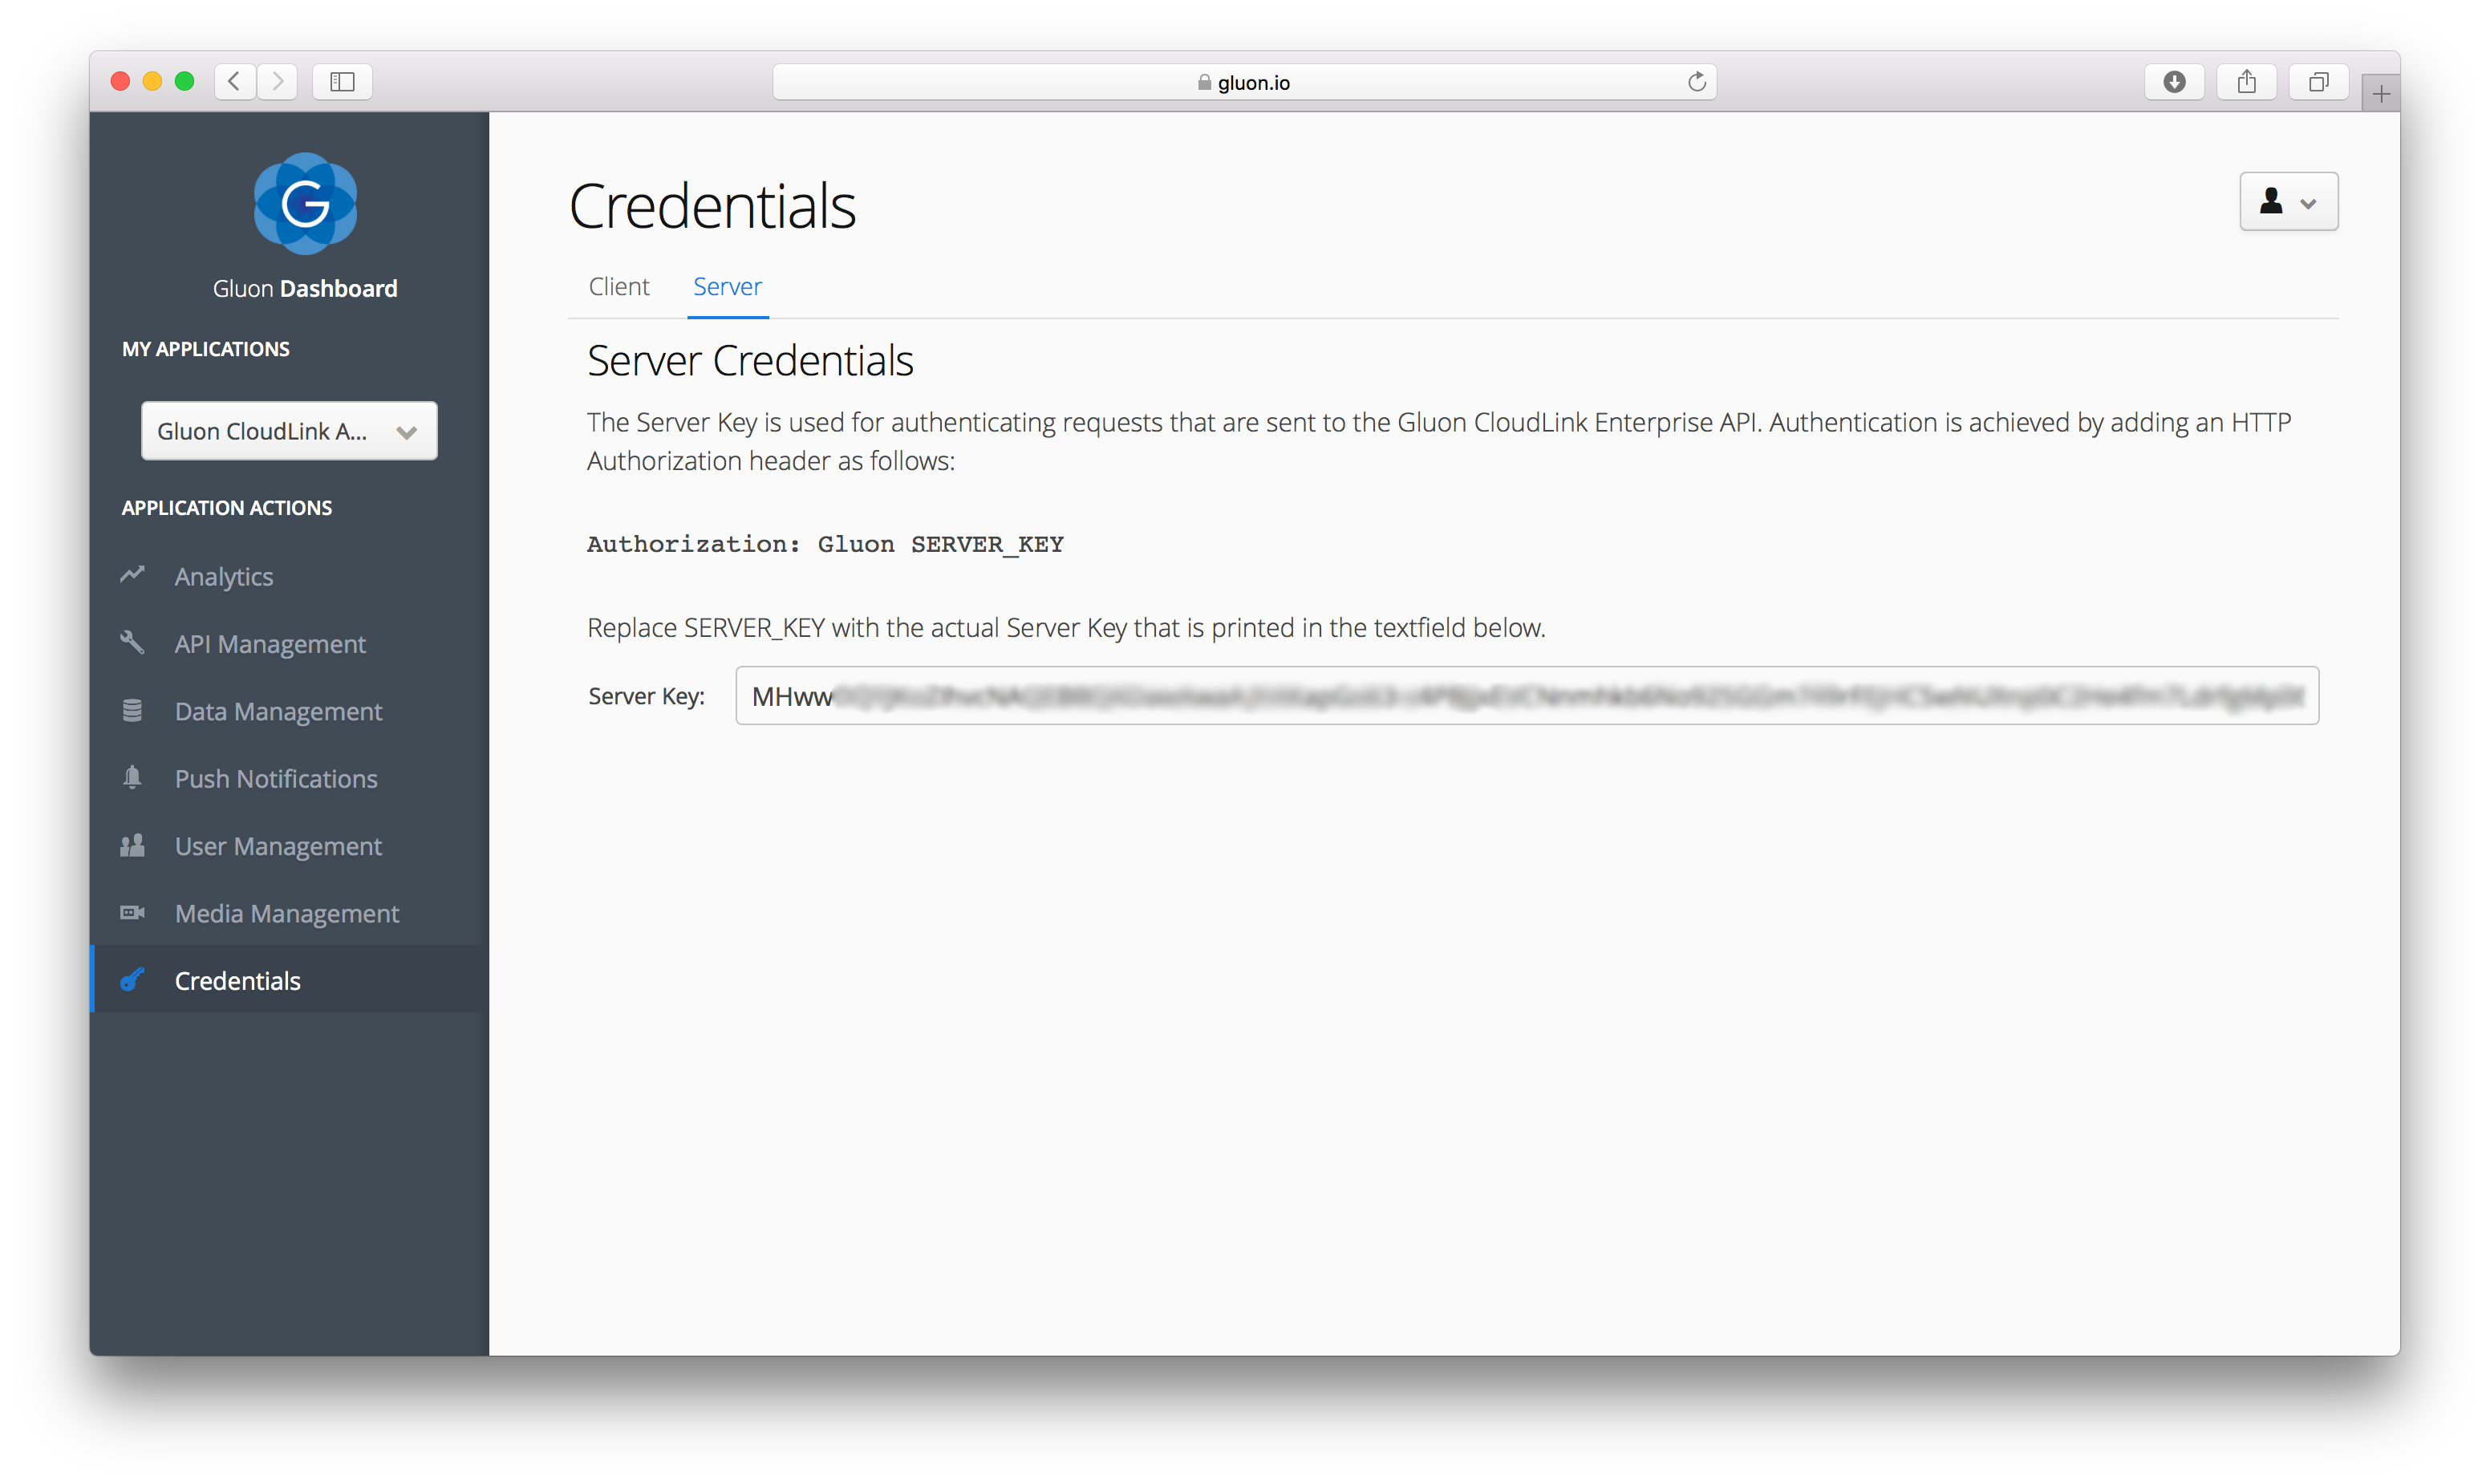
The Server Key is injected as a property into the Spring Boot application by specifying it
in the application.properties:
gluon.cloudlink.endpoint=https://cloud.gluonhq.com
gluon.cloudlink.serverKey=MHwwDQXXXXXXXXXXX...
These properties are used when autowiring an instance of the Gluon CloudLink Enterprise SDK
in the GluonService class. That class contains two methods, one for retrieving the current value
for the object with identifier spring-motd-v1 and one for updating the value. If the object did
not yet exist, it will be initialized with an empty string value.
@Service
public class GluonService {

    private final CloudLinkClient gclClient;

    @Autowired
    public GluonService(CloudLinkClient cloudLinkClient) {
        this.gclClient = cloudLinkClient;
    }

    @Async
    public String getMessage(String objectIdentifier) {
        String object = gclClient.getObject(objectIdentifier);
        if (object != null) {
            return object;
        } else {
            // add the object with an empty value if it does not yet exist
            return gclClient.addObject(objectIdentifier, "");
        }
    }

    @Async
    public String updateMessage(String objectIdentifier, String message) {
        return gclClient.updateObject(objectIdentifier, message);
    }
}
Now we can inject the service in our FrontHandler class and finish the implementation of both methods:
@RestController
@RequestMapping("front")
public class FrontHandler {

    @Autowired
    private GluonService gluonService;

    @RequestMapping(value = "motd", method = RequestMethod.GET, produces = MediaType.TEXT_PLAIN_VALUE + "; " + CHARSET)
    public String getMessage(@RequestParam("object") String object) {
        return gluonService.getMessage(object);
    }

    @RequestMapping(value = "motd", method = RequestMethod.POST, produces = MediaType.TEXT_PLAIN_VALUE + "; " + CHARSET)
    public String updateMessage(@RequestParam("object") String object, @RequestParam("message") String message) {
        return gluonService.updateMessage(object, message);
    }
}
Webpage
We’ll add a web page with a basic form where you can set a text message that will be used as the value for the message object in Gluon CloudLink. Whenever the message is being updated, all active clients will automatically receive the updated value.
We have to define two REST requests: one to retrieve the current value of the object and one for updating it.
Note that we have to use the same identifier for the object as the one we used in the mobile
client application: spring-motd-v1.
<!DOCTYPE html>
<html xmlns="http://www.w3.org/1999/xhtml" class="en">
    <head>
        <meta http-equiv="Content-Type" content="text/html; charset=UTF-8">
        <meta name="description" content="Gluon CloudLink demo for Spring - Message of the Day">
        <meta name="title" content="Gluon Spring MOTD">
        <title>Spring-Boot Message of the Day</title>

        <link rel="stylesheet" type="text/css" href="/webjars/bootstrap/3.3.7-1/css/bootstrap.min.css">
    </head>

    <body>
        <div class="container">
            <div id="body" class="row">
                <div class="page-header">
                    <h1>Message of the Day</h1>
                    <h4>An application demonstrating Gluon CloudLink and Spring Boot.</h4>
                </div>

                <div class="row">
                    <form id="add-form" class="form-inline">
                        <div class="form-group" style="width: 60%;">
                            <input type="hidden"  id="object" name="object" value="spring-motd-v1"/>
                            <input type="text" class="form-control" placeholder="Type a message" name="message" id="message" style="width: 100%;"/>
                        </div>
                        <button type="button" class="btn btn-default" id="add-item">Update Message</button>
                    </form>
                </div>
                <div id="messages" class="hide" role="alert" style="width: 60%;">
                    <button type="button" class="close" data-hide="alert" aria-label="Close">×</button>
                    <div id="messages_content"></div>
                </div>
            </div>
        </div>
        <script type="text/javascript" src="/webjars/jquery/3.1.1/jquery.min.js"></script>
        <script type="text/javascript" src="/webjars/bootstrap/3.3.7-1/js/bootstrap.min.js"></script>
        <script type="text/javascript">
            $(function() {
                $.get("front/motd", {object: $("#object").val()}, function(data) {
                    $("#message").val(data);
                });

                $('#add-item').click(function(e) {
                    $.post("front/motd", {object: $("#object").val(), message: $("#message").val()}, function(data) {
                        $('#messages').removeClass('hide').addClass('alert alert-success alert-dismissible').slideDown().show();
                        $('#messages_content').html('<h4>Message updated: ' + data + '<h4>');

                        $('#modal').modal('show');
                        e.preventDefault();
                    });
                });
            });
        </script>
    </body>
</html>
Time for a first test. If we run Tasks→boot→bootRun or ./gradlew bootRun, we’ll be able to open the browser, go to http://localhost:8080 and verify that we have everything in place:
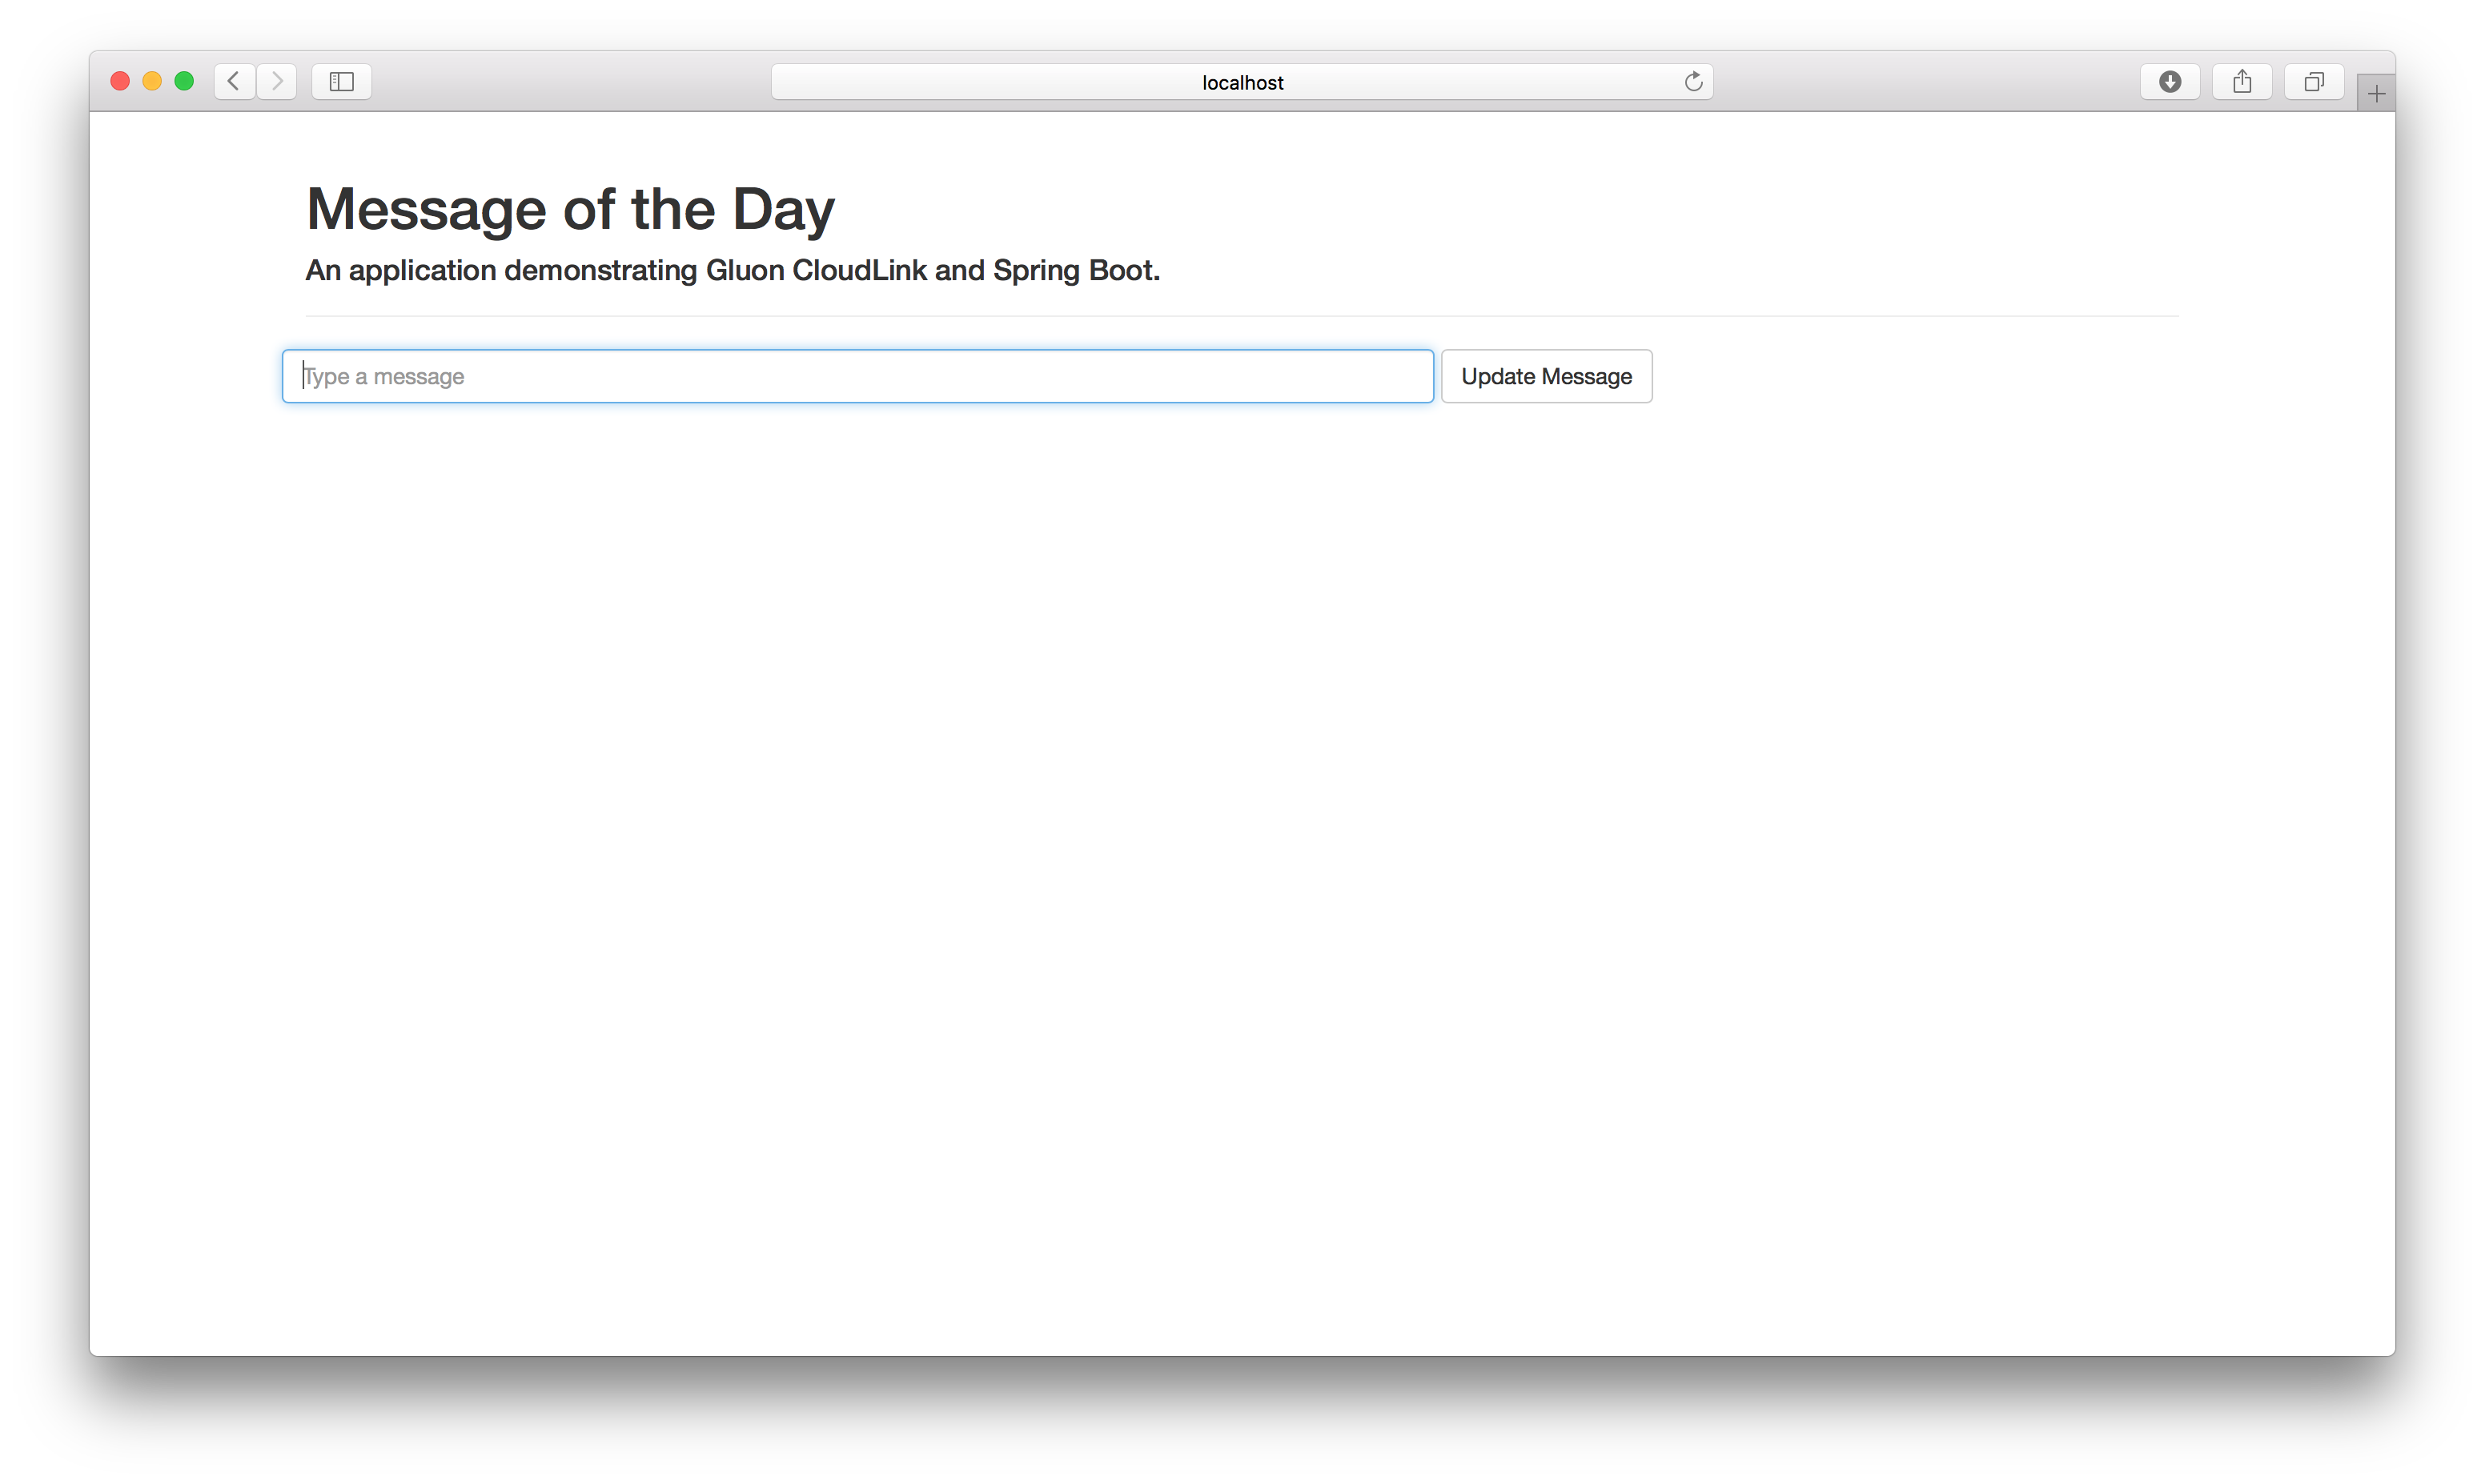
The first time the text field will be empty, so we can send an initial value by providing a
message in the text field and clicking the Update Message button.

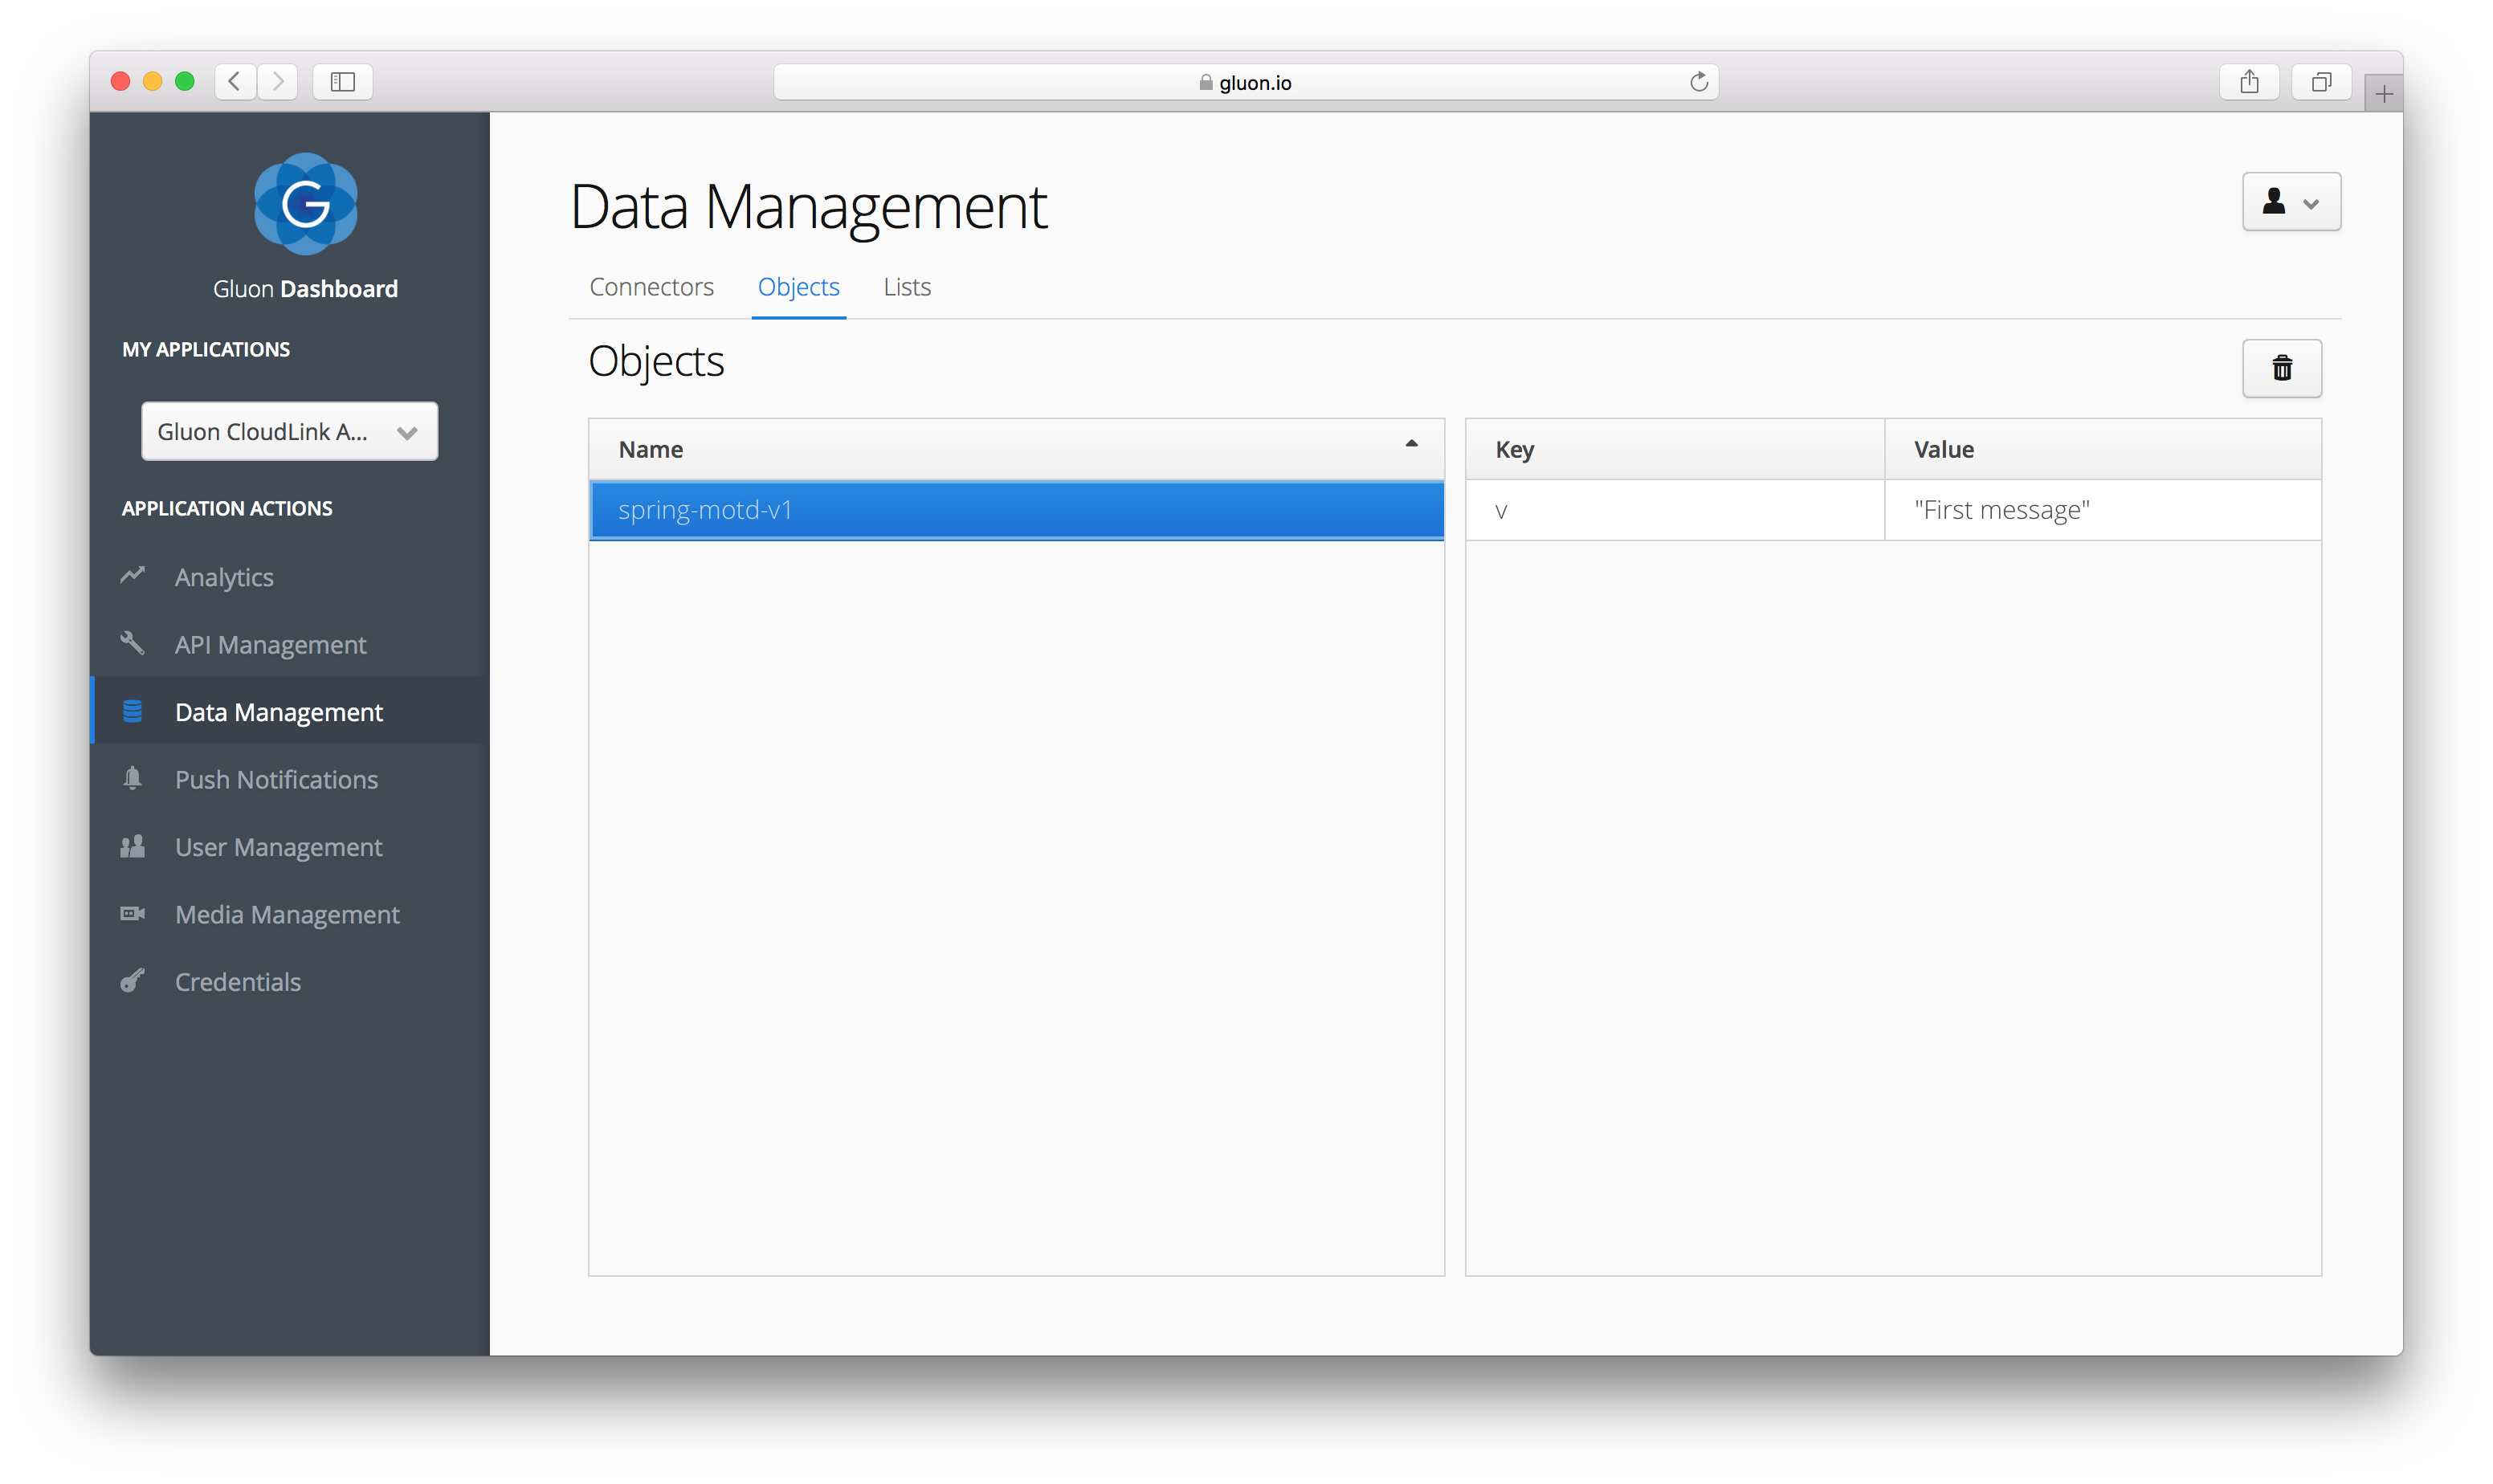
We can verify that the value has been stored correctly by using the Object browser in the Gluon
Dashboard. Navigate to the Objects tab in the Data Management page to see the latest value
that has been assigned to the spring-motd-v1 object.
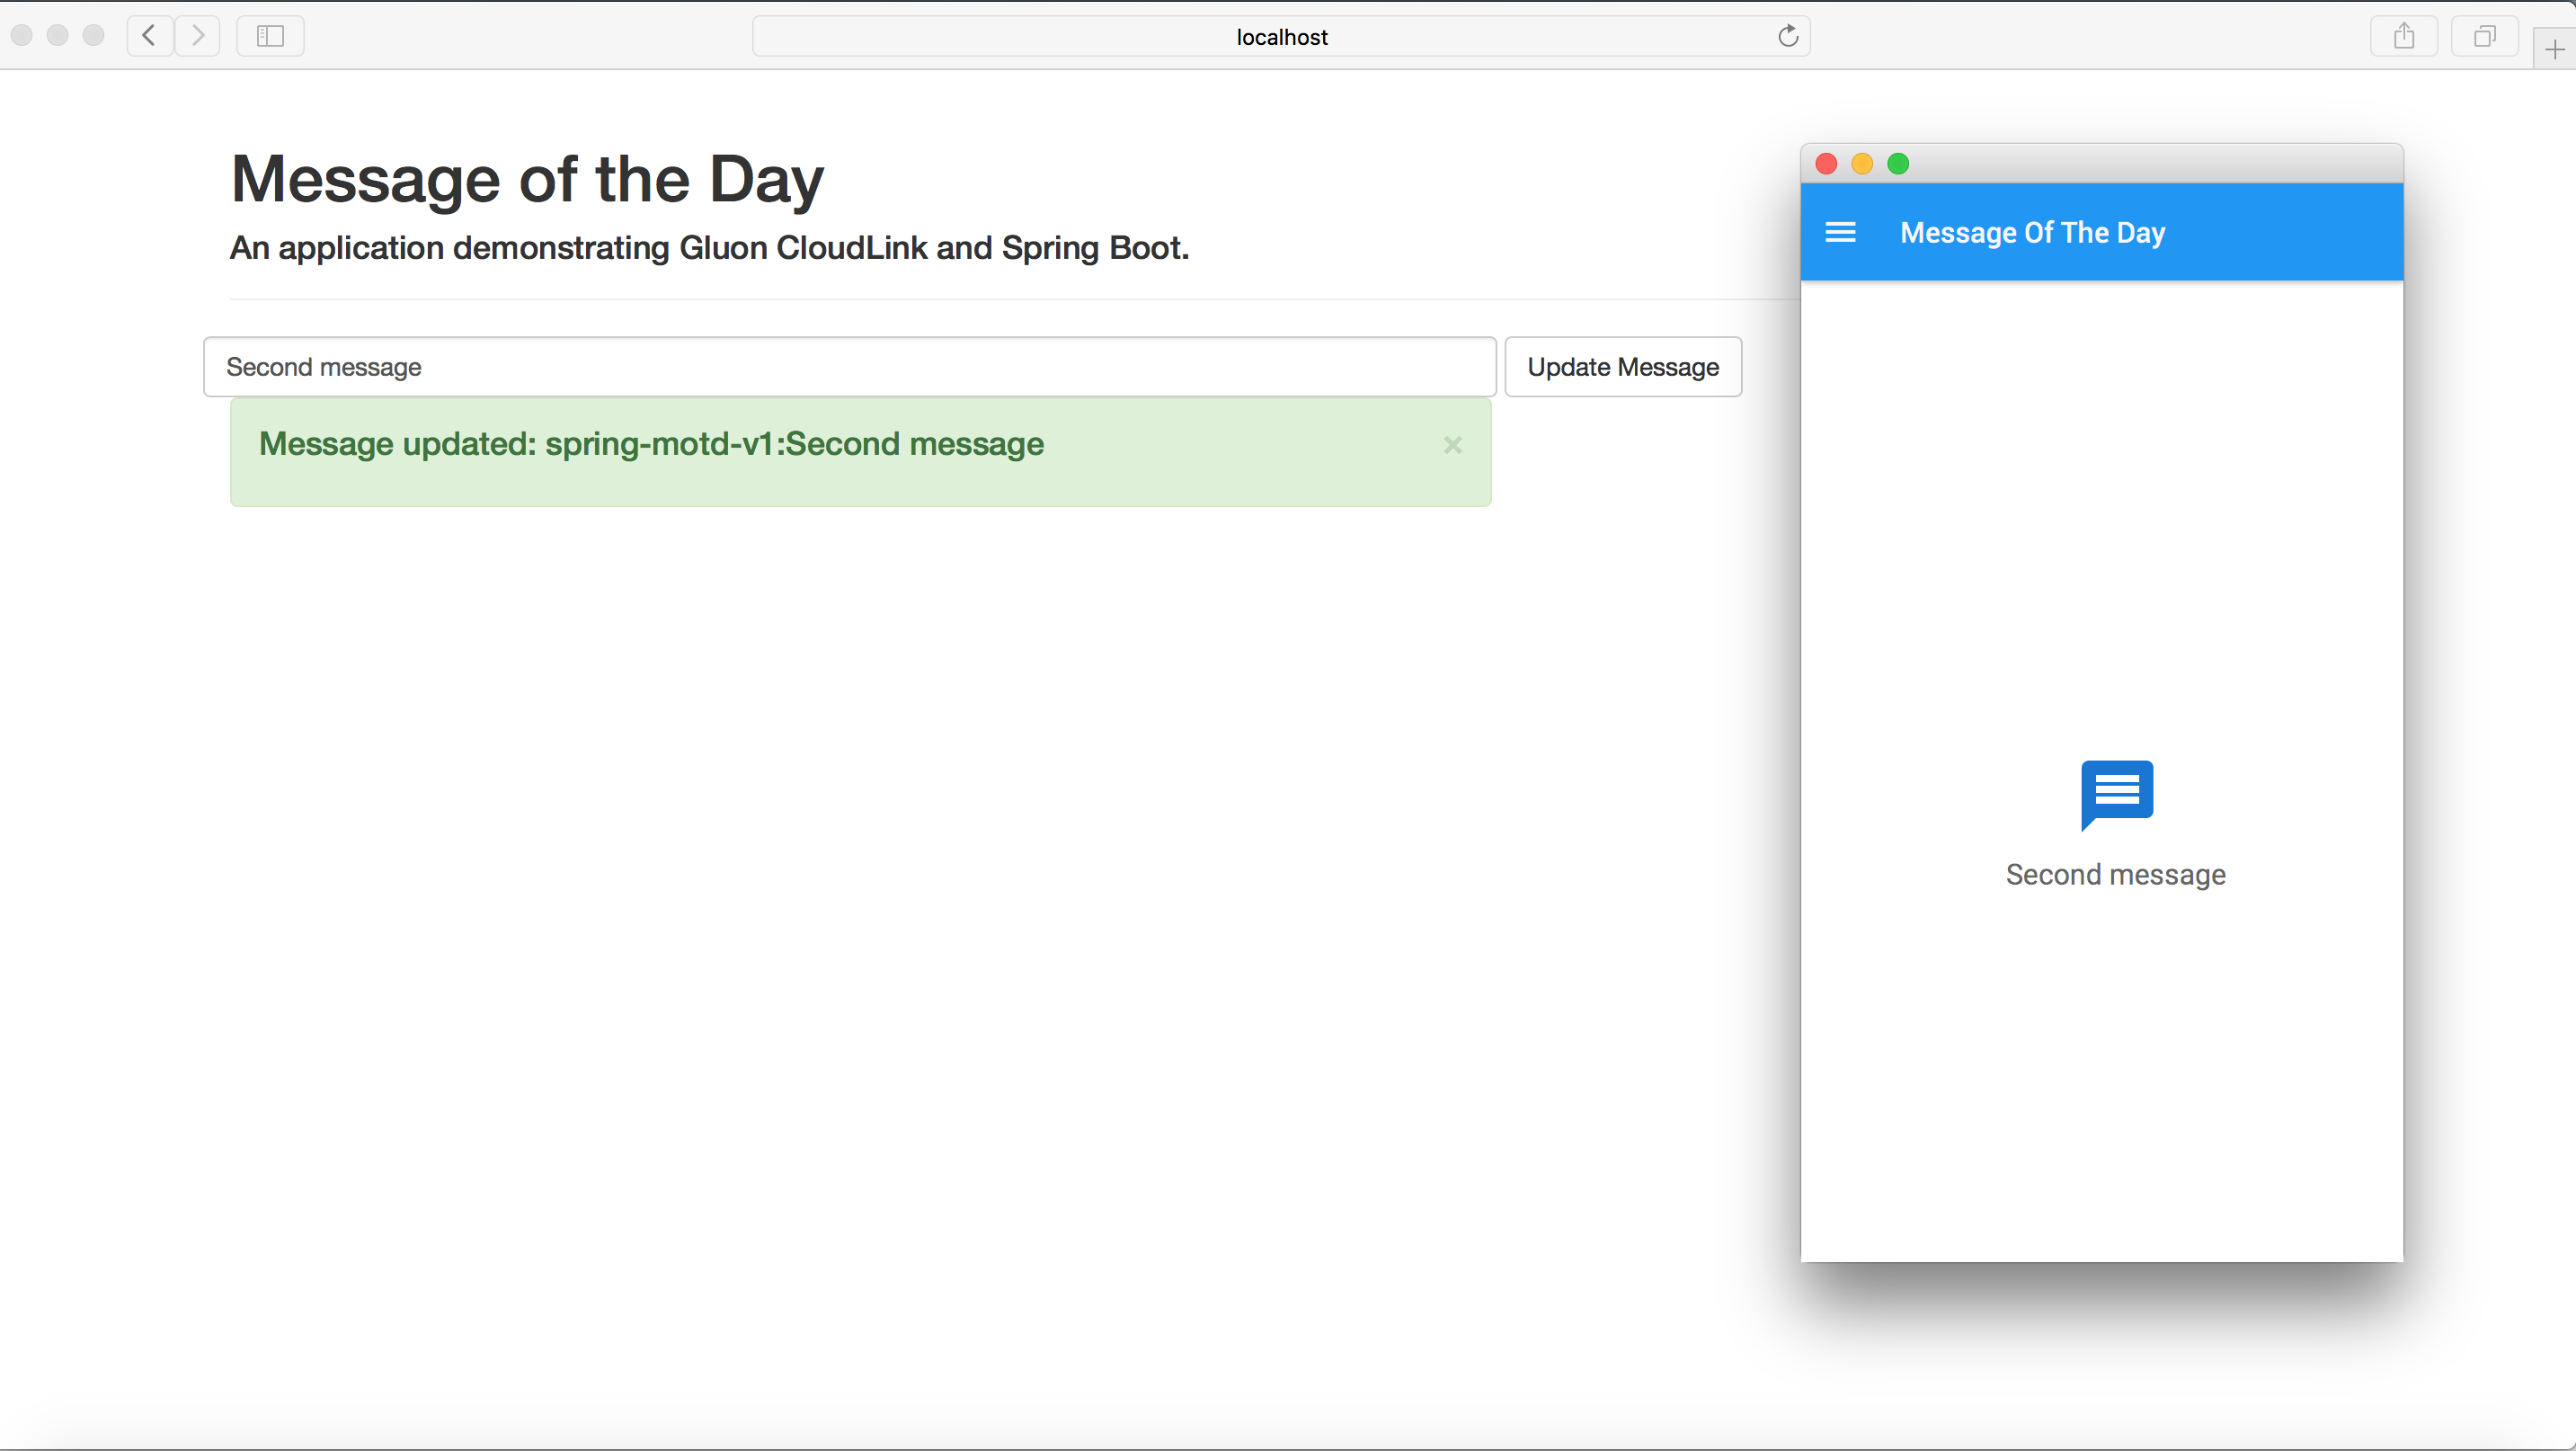
If we run the client application, the exact same message should appear there as well:
If we set a new message in the web form, it will be immediately updated in the client
application, all because of the JavaFX binding to the GluonObservableObject.
Conclusion
During this tutorial we have accomplished several tasks:
-
We have created a client project that can be deployed on Desktop, Android and iOS, with a
DataClientto retrieve the value of a single observable object from Gluon CloudLink. -
We have created a web application using Spring Boot that, by using the Gluon CloudLink Enterprise SDK, can retrieve that same value and update it as well.
-
When the value is updated from the web application, the active client applications are updated instantly.
If you have made it this far, congratulations, we hope this sample and the documentation was helpful to you! In case you have any questions, your first stop should be the Gluon support page, where you can access the CloudLink latest documentation. Gluon also recommends the community to support each other over at the Gluon StackOverflow page. Finally, Gluon offers commercial support as well, to kick start your projects.