1. Overview
The Gluon Client plugin leverages GraalVM, OpenJDK and JavaFX by compiling the Java Client application and all its required dependencies into native code, so that it can be directly executed as a native application on the target platform.
One of the advantages is a much faster startup time, since the JVM no longer needs to be started. The resulting application will be entirely integrated into the native operating system.
2. Requirements
At this moment the plugin supports the following target platforms:
-
Linux
-
Mac OS X
-
Windows
-
iOS
-
Android
2.1. GraalVM
Download and unpack GraalVM from https://github.com/graalvm/graalvm-ce-builds/releases/tag/vm-20.2.0, choosing from the list of assets:
-
Linux/Android:
graalvm-ce-java11-linux-amd64-20.2.0.tar.gz -
macOS/iOS:
graalvm-ce-java11-darwin-amd64-20.2.0.tar.gz -
Windows:
graalvm-ce-java11-windows-amd64-20.2.0.zip
Set the GRAALVM_HOME environment variable to point to the GraalVM directory:
-
For Linux:
export GRAALVM_HOME=/path/to/graalvm-ce-java11-{graalvm-version} -
For macOS:
export GRAALVM_HOME=/path/to/graalvm-ce-java11-{graalvm-version}/Contents/Home -
For Windows:
set GRAALVM_HOME=C:\path\to\graalvm-ce-java11-{graalvm-version}
2.2. Java
Set JAVA_HOME to point to the GraalVM installation directory:
-
For Linux/macOS:
export JAVA_HOME=$GRAALVM_HOME
-
For Windows:
set JAVA_HOME=%GRAALVM_HOME%
Alternatively, set the JAVA_HOME environment variable to point to the a JDK 11+ installation directory.
2.3. Linux
-
gcc version 6 or higher
-
ld version 2.26 or higher
2.3.1. CentOS
Required packages
Execute the following command to install the required yum packages:
sudo yum install pkgconfig gtk3-devel libXtst-devel
CentOS 6/7: Developer Toolset
By default, CentOS 6 and 7 bundle gcc version 4.4.x and 4.8.x respectively. The easiest way to install a more recent version is to install Developer Toolset 6 or higher using Software Collections. The installation process is described in detail at https://www.softwarecollections.org/en/scls/rhscl/devtoolset-8/
2.4. Mac OS X
-
macOS 10.14.4 or higher
2.5. Windows
On Windows, you will need to install Microsoft Visual Studio 2019. The Community Edition is sufficient and can be downloaded from https://visualstudio.microsoft.com/downloads/.
|
Note
|
Please make sure that you only choose the English Language Pack. GraalVM might not be able to detect the installed compiler version in other languages. |
During the installation process, make sure that you select at least the following individual components:
-
Choose the English Language Pack
-
C++/CLI support for v142 build tools (14.25 or later)
-
MSVC v142 - VS 2019 C++ x64/x86 build tools (v14.25 or later)
-
Windows Universal CRT SDK
-
Windows 10 SDK (10.0.19041.0 or later)
|
Note
|
All build commands, be it with maven or gradle, must be executed in a Visual Studio 2019 Command Prompt called
Alternatively, you can run |
2.6. iOS
Currently, iOS can be built only on Mac OS X.
Xcode version 11 or higher is required. Xcode can be installed from the Mac App Store. Once installed, open it and accept the license terms.
Use Homebrew to install the following packages:
-
brew install --HEAD libusbmuxd
-
brew install --HEAD libimobiledevice
2.7. Android
Currently, Android can be built only on Linux OS (or from Windows WSL2).
The Android SDK is required to build applications for the android platform. The Android SDK will be downloaded automatically by the client plugin and configured with the required packages.
If you already have a local installation of the Android SDK, you can override this behaviour
by defining environment variables named ANDROID_SDK, that points to the Android SDK folder
on your system, and ANDROID_NDK pointing to the ndk-bundle folder. Please make sure that you have installed the following required packages:
-
platform-tools
-
platforms;android-29
-
build-tools;29.0.3
-
ndk-bundle
-
extras;android;m2repository
-
extras;google;m2repository
3. The Gluon Client plugin for Maven
If you have a Java or JavaFX project and you are using Maven as a build tool, you can easily include the plugin to start creating native applications.
The plugin can be found here: https://github.com/gluonhq/client-maven-plugin
3.1. Apply the plugin
Edit your pom file and add the plugin:
<plugin>
    <groupId>com.gluonhq</groupId>
    <artifactId>client-maven-plugin</artifactId>
    <version>0.1.33</version>
    <configuration>
        <mainClass>your.mainClass</mainClass>
    </configuration>
</plugin>
The plugin allows some options that can be set in <configuration> to override the default settings.
3.2. Goals
The client plugin introduces the following goals:
-
client:compile
-
client:link
-
client:build
-
client:package
-
client:install
-
client:run
3.2.1. client:compile
This goal performs AOT compilation by executing the native-image command and builds the shared object file.
It is a very intensive and lengthy task (several minutes, depending on your project and CPU), so it should be called
only when the project is ready and runs fine on a VM.
The results will be available at target/client/$arch-$os/gvm.
3.2.2. client:link
Links the object file to create a native executable file or shared library.
The results will be available at target/client/$arch-$os/$AppName.
3.2.3. client:build
This goal simply combines client:compile and client:link.
3.2.4. client:package
Packages the executable or shared library into a target specific package that includes all the necessary dependencies.
The list of platform specific packages are as follows:
-
Linux - deb, rpm
-
macOS - app, pkg, deb
-
Windows - exe, msi
-
iOS - app, ipa
-
Android - apk
|
Note
|
At the moment, this goal is only supported for iOS and Android. |
3.2.5. client:install
Installs the package on the host system or attached device.
|
Note
|
At the moment, this goal is only intended for Android. |
3.2.6. client:run
Runs either the executable generated by client:link on the host system
or runs the application that was installed on the device (iOS or Android).
3.3. Run the samples
There are many different samples available in the Gluon-samples project on GitHub that make use of the Gluon Client plugin for Maven.
This docs only mention the getting started HelloWorld samples.
For the rest of the samples, see Gluon documentation website.
|
Note
|
Before proceeding, make sure to set the |
3.3.1. HelloWorld
Let’s run HelloWorld with the Gluon Client plugin for Maven.
package hello;

public class HelloWorld {

    public static void main(String[] args) {
        System.out.println("Hello World!!");
        System.exit(0);
    }
}<?xml version="1.0" encoding="UTF-8"?>
<project xmlns="http://maven.apache.org/POM/4.0.0" xmlns:xsi="http://www.w3.org/2001/XMLSchema-instance" xsi:schemaLocation="http://maven.apache.org/POM/4.0.0 http://maven.apache.org/xsd/maven-4.0.0.xsd">
<modelVersion>4.0.0</modelVersion>
<groupId>com.gluonhq.samples</groupId>
<artifactId>helloworld</artifactId>
<version>1.0.0-SNAPSHOT</version>
<packaging>jar</packaging>
<name>helloworld</name>
<properties>
<project.build.sourceEncoding>UTF-8</project.build.sourceEncoding>s
<maven.compiler.release>11</maven.compiler.release>
<client.maven.plugin.version>3.8.1</client.maven.plugin.version>
<main.class>hello.HelloWorld</main.class>
</properties>
<build>
<plugins>
<plugin>
<groupId>org.apache.maven.plugins</groupId>
<artifactId>maven-compiler-plugin</artifactId>
<version>3.8.1</version>
</plugin>
<plugin>
<groupId>com.gluonhq</groupId>
<artifactId>client-maven-plugin</artifactId>
<version>0.1.33</version>
<configuration>
<target>${client.target}</target>
<mainClass>${main.class}</mainClass>
</configuration>
</plugin>
</plugins>
</build>
<profiles>
<profile>
<id>desktop</id>
<activation>
<activeByDefault>true</activeByDefault>
</activation>
<properties>
<client.target>host</client.target>
</properties>
</profile>
<profile>
<id>ios</id>
<properties>
<client.target>ios</client.target>
</properties>
</profile>
<profile>
<id>android</id>
<properties>
<client.target>android</client.target>
</properties>
</profile>
</profiles>
</project>Target: Linux
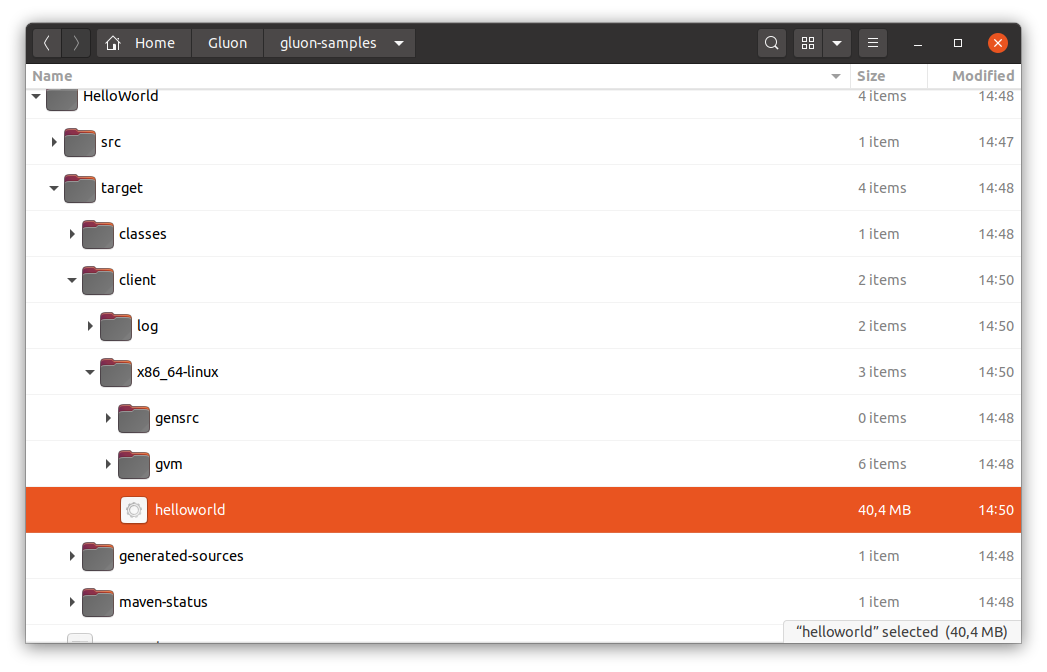
On a Linux machine, run the client:compile goal. It produces the following output:
[INFO] --- client-maven-plugin:0.1.33:compile (default-cli) @ helloworld ---
[INFO] ==================== COMPILE TASK ====================
[INFO] We will now compile your code for x86_64-linux-linux. This may take some time.
[INFO] [SUB] [hello.helloworld:4902]    classlist:   2,318.99 ms,  0.96 GB
[INFO] [SUB] [hello.helloworld:4902]        (cap):   1,459.76 ms,  0.96 GB
[INFO] [SUB] [hello.helloworld:4902]        setup:   3,223.67 ms,  0.96 GB
[INFO] [SUB] [hello.helloworld:4902]     (clinit):     368.34 ms,  3.21 GB
[INFO] [SUB] [hello.helloworld:4902]   (typeflow):  11,305.59 ms,  3.21 GB
[INFO] [SUB] [hello.helloworld:4902]    (objects):  12,607.81 ms,  3.21 GB
[INFO] [SUB] [hello.helloworld:4902]   (features):   1,637.68 ms,  3.21 GB
[INFO] [SUB] [hello.helloworld:4902]     analysis:  26,435.19 ms,  3.21 GB
[INFO] [SUB] [hello.helloworld:4902]     universe:     604.95 ms,  3.21 GB
[INFO] [SUB] [hello.helloworld:4902]      (parse):   1,945.81 ms,  3.21 GB
[INFO] [SUB] [hello.helloworld:4902]     (inline):   3,643.57 ms,  4.15 GB
[INFO] [SUB] [hello.helloworld:4902]    (compile):  14,496.02 ms,  4.90 GB
[INFO] [SUB] [hello.helloworld:4902]      compile:  21,376.96 ms,  4.90 GB
[INFO] [SUB] [hello.helloworld:4902]        image:   2,728.50 ms,  4.90 GB
[INFO] [SUB] [hello.helloworld:4902]        write:     669.48 ms,  4.90 GB
[INFO] [SUB] [hello.helloworld:4902]      [total]:  57,617.30 ms,  4.90 GB
[INFO] ------------------------------------------------------------------------
[INFO] BUILD SUCCESS
[INFO] ------------------------------------------------------------------------
And as a result, hello.helloworld.o is created and can be found under target/client/x86_64-linux/gvm/tmp/SVM-*/hello.helloworld.o.
Run the client:link goal to produce the native image.
As a result, target/client/x86_64-linux/helloWorld is created. It can be executed directly from a terminal or with mvn client:run.
Target: macOS
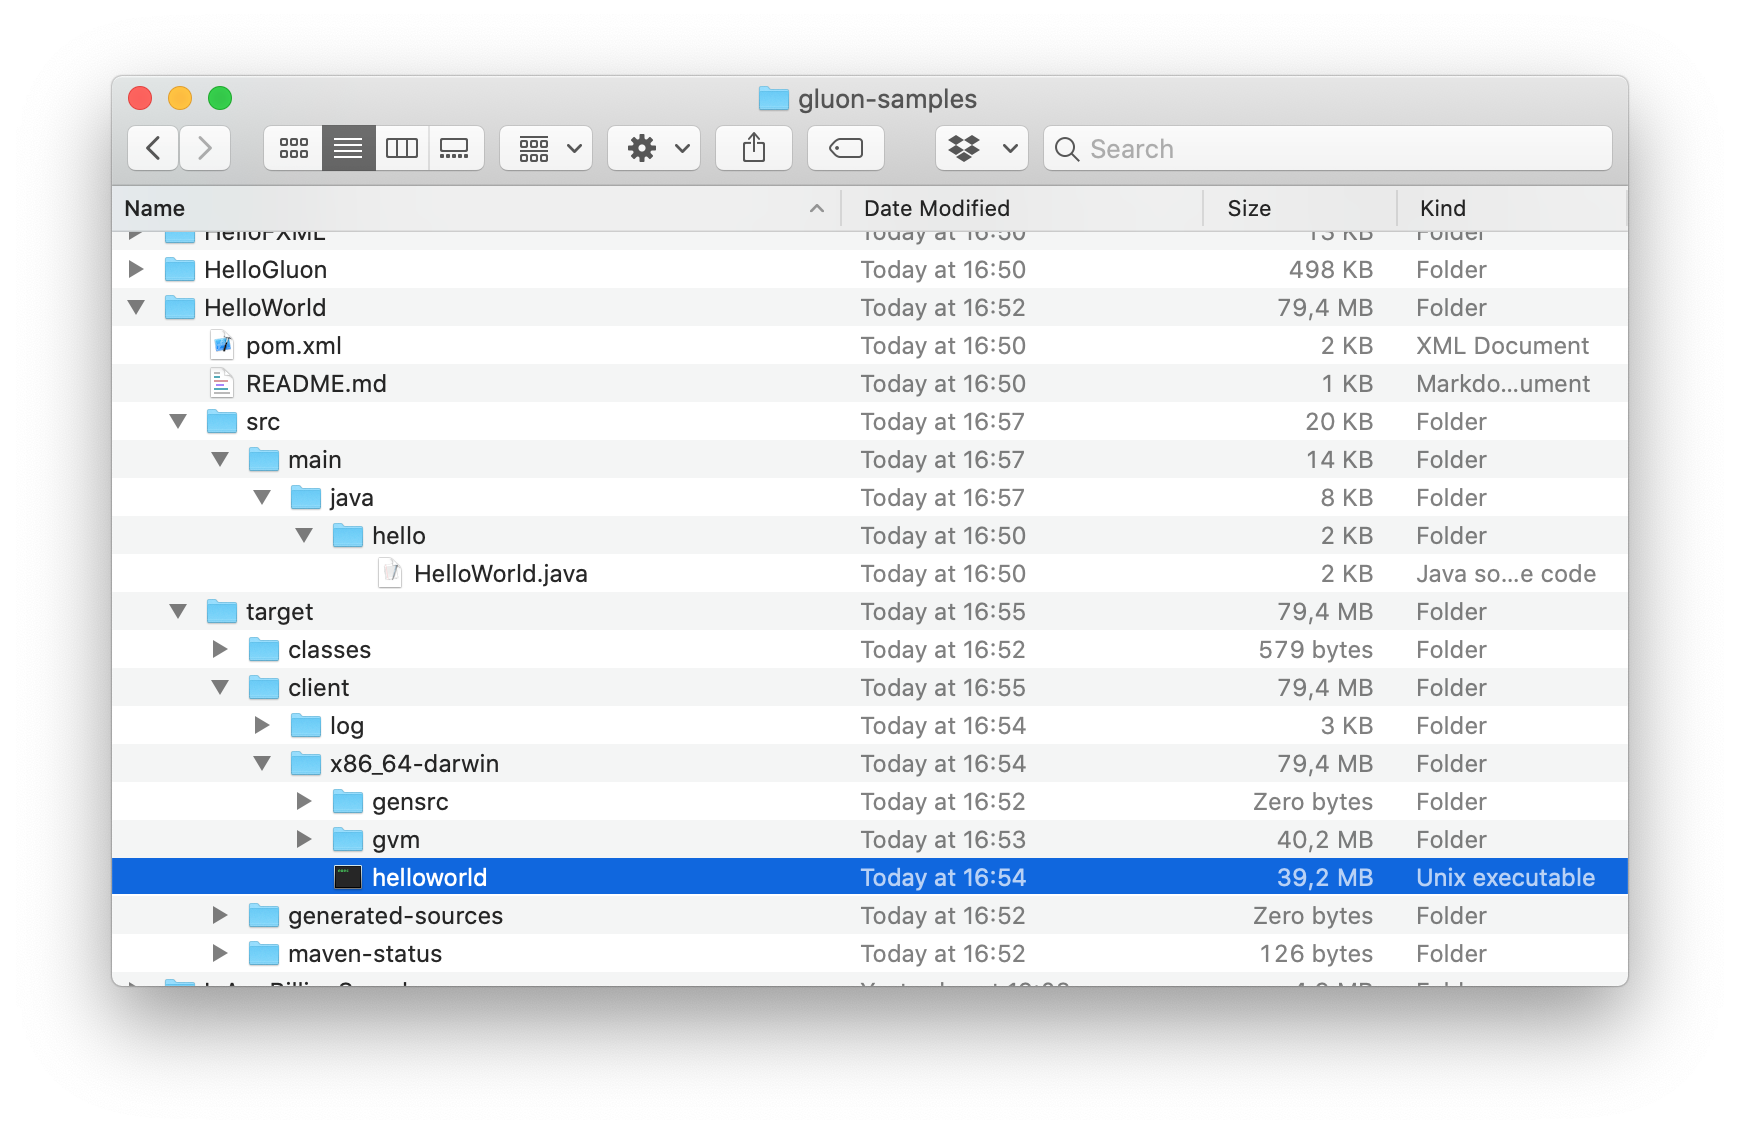
On Mac OS X, Run the client:compile goal. It produces the following output:
[INFO] --- client-maven-plugin:0.1.33:compile (default-cli) @ helloworld ---
[INFO] ==================== COMPILE TASK ====================
[INFO] We will now compile your code for x86_64-apple-darwin. This may take some time.
[INFO] [SUB] [hello.helloworld:1829]    classlist:   1,741.21 ms,  0.96 GB
[INFO] [SUB] [hello.helloworld:1829]        (cap):   1,604.12 ms,  0.96 GB
[INFO] [SUB] [hello.helloworld:1829]        setup:   3,875.26 ms,  0.96 GB
[INFO] [SUB] [hello.helloworld:1829]     (clinit):     512.37 ms,  3.21 GB
[INFO] [SUB] [hello.helloworld:1829]   (typeflow):  13,551.23 ms,  3.21 GB
[INFO] [SUB] [hello.helloworld:1829]    (objects):  14,683.72 ms,  3.21 GB
[INFO] [SUB] [hello.helloworld:1829]   (features):   1,897.64 ms,  3.21 GB
[INFO] [SUB] [hello.helloworld:1829]     analysis:  31,396.24 ms,  3.21 GB
[INFO] [SUB] [hello.helloworld:1829]     universe:     927.88 ms,  3.21 GB
[INFO] [SUB] [hello.helloworld:1829]      (parse):   3,290.32 ms,  3.21 GB
[INFO] [SUB] [hello.helloworld:1829]     (inline):   4,121.45 ms,  4.11 GB
[INFO] [SUB] [hello.helloworld:1829]    (compile):  24,163.64 ms,  5.02 GB
[INFO] [SUB] [hello.helloworld:1829]      compile:  33,199.90 ms,  5.02 GB
[INFO] [SUB] [hello.helloworld:1829]        image:   4,121.24 ms,  5.02 GB
[INFO] [SUB] [hello.helloworld:1829]        write:     697.29 ms,  5.02 GB
[INFO] [SUB] [hello.helloworld:1829]      [total]:  76,352.27 ms,  5.02 GB
[INFO] ------------------------------------------------------------------------
[INFO] BUILD SUCCESS
[INFO] ------------------------------------------------------------------------
And as a result, hello.helloworld.o is created and can be found under target/client/x86_64-darwin/gvm/tmp/SVM-*/hello.helloworld.o.
Run the client:link goal to produce the native image. As a result, target/client/x86_64-darwin/helloWorld is created.
It can be executed directly from a terminal or with mvn client:run.
Target: Windows
On a Windows machine, run the client:compile goal. It produces the following output:
[INFO] --- client-maven-plugin:0.1.33:compile (default-cli) @ helloworld ---
[INFO] ==================== COMPILE TASK ====================
[INFO] We will now compile your code for x86_64-microsoft-windows. This may take some time.
[INFO] [SUB] Warning: Ignoring server-mode native-image argument --no-server.
[INFO] [SUB] [hello.helloworld:7112]    classlist:   4,153.91 ms,  0.96 GB
[INFO] [SUB] [hello.helloworld:7112]        (cap):   5,358.45 ms,  0.96 GB
[INFO] [SUB] [hello.helloworld:7112]        setup:   8,726.61 ms,  0.96 GB
[INFO] [SUB] WARNING GR-10238: VarHandle for static field is currently not fully supported. Static field private static volatile java.lang.System$Logger jdk.internal.event.EventHelper.securityLogger is not properly marked for Unsafe access!
[INFO] [SUB] [hello.helloworld:7112]     (clinit):     418.10 ms,  1.92 GB
[INFO] [SUB] [hello.helloworld:7112]   (typeflow):  24,301.38 ms,  1.92 GB
[INFO] [SUB] [hello.helloworld:7112]    (objects):  22,462.70 ms,  1.92 GB
[INFO] [SUB] [hello.helloworld:7112]   (features):   1,743.55 ms,  1.92 GB
[INFO] [SUB] [hello.helloworld:7112]     analysis:  49,567.10 ms,  1.92 GB
[INFO] [SUB] [hello.helloworld:7112]     universe:     790.38 ms,  1.92 GB
[INFO] [SUB] [hello.helloworld:7112]      (parse):   6,963.45 ms,  1.82 GB
[INFO] [SUB] [hello.helloworld:7112]     (inline):   6,342.01 ms,  2.09 GB
[INFO] [SUB] [hello.helloworld:7112]    (compile):  32,776.16 ms,  2.09 GB
[INFO] [SUB] [hello.helloworld:7112]      compile:  47,301.62 ms,  2.09 GB
[INFO] [SUB] [hello.helloworld:7112]        image:   2,534.79 ms,  2.09 GB
[INFO] [SUB] [hello.helloworld:7112]        write:     227.90 ms,  2.09 GB
[INFO] [SUB] [hello.helloworld:7112]      [total]: 113,730.60 ms,  2.09 GB
[INFO] ------------------------------------------------------------------------
[INFO] BUILD SUCCESS
[INFO] ------------------------------------------------------------------------
And as a result, hello.helloworld.obj is created and can be found under target\client\x86_64-windows\gvm\tmp\SVM-*\hello.helloworld.obj.
Run the client:link goal to produce the native image. As a result, target\client\x86_64-windows\helloWorld.exe
is created. It can be executed directly or with mvn client:run.

Target: iOS
|
Note
|
This requires an iOS device that has to be plugged in at the run phase. A valid provisioning profile is required as well, either by enrolling to the Apple Developer program or by using free provisioning. See iOS Deployment. |
Use the ios profile to run mvn -Pios client:compile on Mac OS X:
[INFO] --- client-maven-plugin:0.1.33:compile (default-cli) @ helloworld ---
[INFO] ==================== COMPILE TASK ====================
[INFO] We will now compile your code for arm64-apple-ios. This may take some time.
[INFO] [SUB] [hello.helloworld:2619]    classlist:   1,796.27 ms,  0.96 GB
[INFO] [SUB] [hello.helloworld:2619]        (cap):     394.97 ms,  0.96 GB
[INFO] [SUB] [hello.helloworld:2619]        setup:   2,588.74 ms,  0.96 GB
[INFO] [SUB] [hello.helloworld:2619]     (clinit):     501.74 ms,  3.18 GB
[INFO] [SUB] [hello.helloworld:2619]   (typeflow):  12,836.03 ms,  3.18 GB
[INFO] [SUB] [hello.helloworld:2619]    (objects):  14,296.39 ms,  3.18 GB
[INFO] [SUB] [hello.helloworld:2619]   (features):   1,699.59 ms,  3.18 GB
[INFO] [SUB] [hello.helloworld:2619]     analysis:  30,090.48 ms,  3.18 GB
[INFO] [SUB] [hello.helloworld:2619]     universe:     956.49 ms,  3.18 GB
[INFO] [SUB] [hello.helloworld:2619]      (parse):   3,090.59 ms,  3.18 GB
[INFO] [SUB] [hello.helloworld:2619]     (inline):   3,993.41 ms,  4.11 GB
[INFO] [SUB] [hello.helloworld:2619]    (compile):  28,280.20 ms,  4.95 GB
[INFO] [SUB] [hello.helloworld:2619]    (bitcode):   1,210.45 ms,  4.95 GB
[INFO] [SUB] [hello.helloworld:2619]    (prelink):   4,441.72 ms,  4.95 GB
[INFO] [SUB] [hello.helloworld:2619]       (llvm):  52,067.97 ms,  4.95 GB
[INFO] [SUB] [hello.helloworld:2619]   (postlink):   3,286.67 ms,  4.95 GB
[INFO] [SUB] [hello.helloworld:2619]      compile:  96,697.84 ms,  4.95 GB
[INFO] [SUB] [hello.helloworld:2619]        image:   4,741.68 ms,  4.95 GB
[INFO] [SUB] [hello.helloworld:2619]        write:   1,412.67 ms,  4.95 GB
[INFO] [SUB] [hello.helloworld:2619]      [total]: 138,660.24 ms,  4.95 GB
[INFO] ------------------------------------------------------------------------
[INFO] BUILD SUCCESS
[INFO] ------------------------------------------------------------------------
And as a result, hello.helloworld.o is created and can be found under target/client/arm64-ios/gvm/tmp/SVM-*/hello.helloworld.o.
Note that the process takes some time. There will be performance improvements, but either way, it is convenient to test first on desktop (and with HotSpot) as much as possible (i.e. with mvn javafx:run), so client:compile doesn’t have to be repeated due to avoidable errors.
Run the mvn -Pios client:link to produce the native image. As a result, target/client/arm64-ios/helloWorld.app is created.
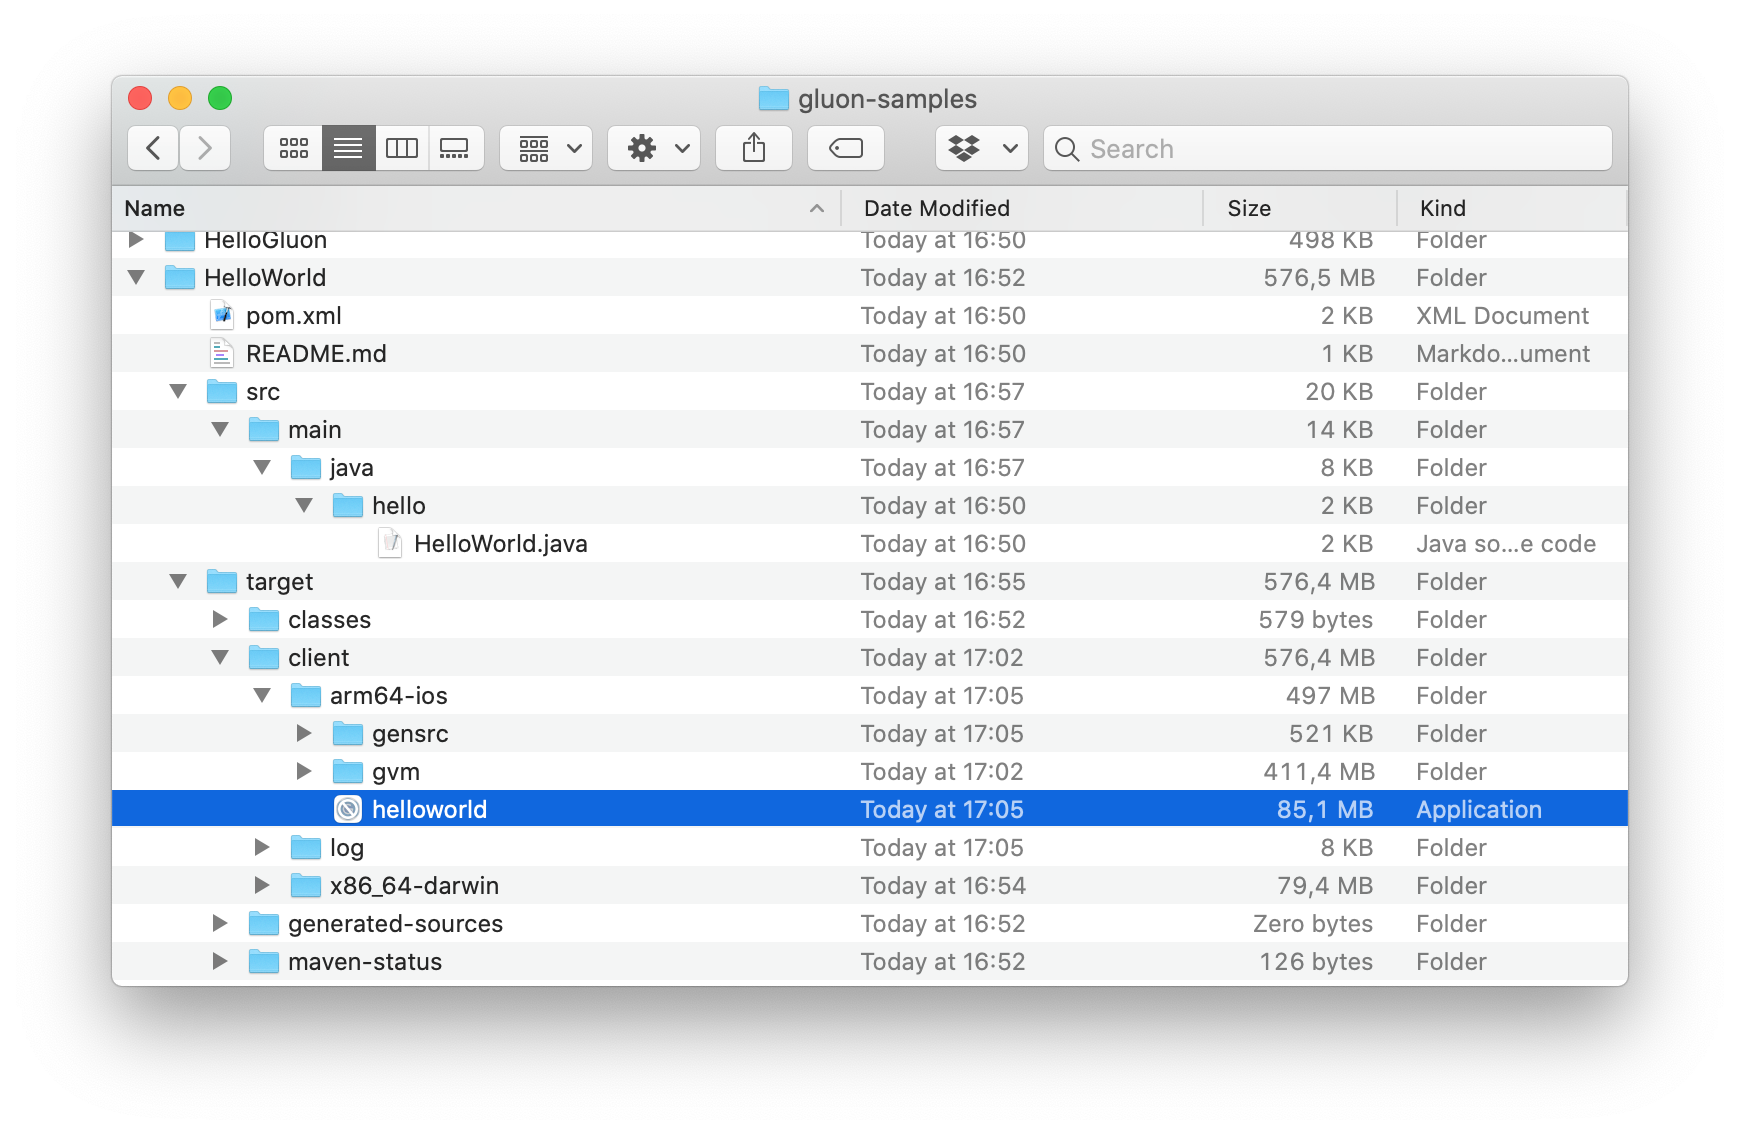
Now it can be deployed to a plugged iOS device with mvn -Pios client:run.
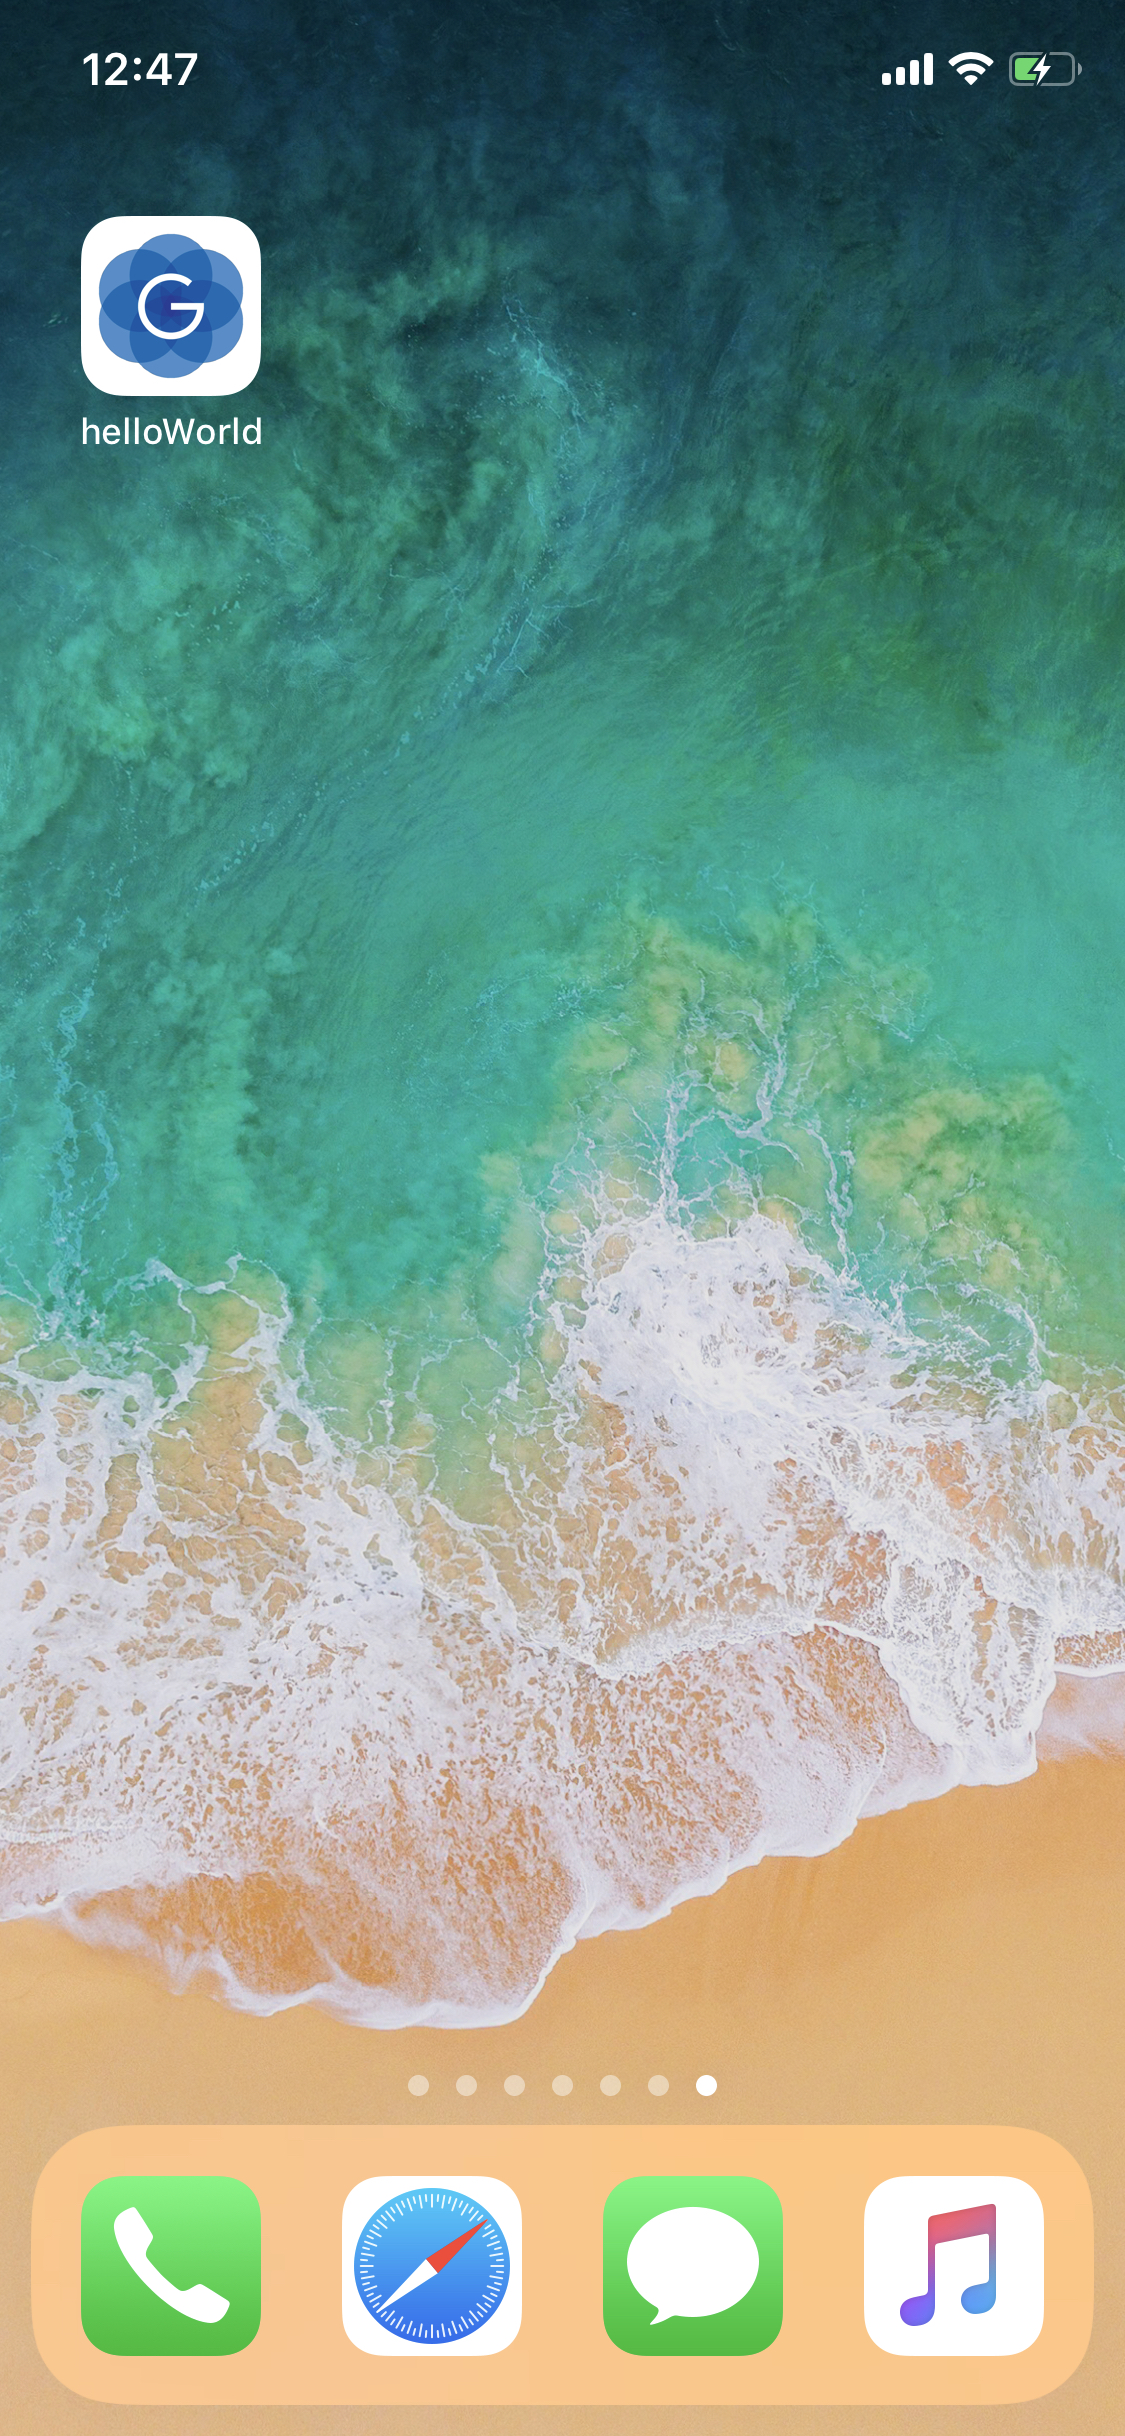
[INFO] --- client-maven-plugin:0.1.33:run (default-cli) @ helloworld ---
[INFO] ==================== RUN TASK ====================
[INFO] [SUB] [....] Waiting for iOS device to be connected
[INFO] [SUB] [....] Using abcdef01234567890abcdef01234567890abcdef (D221AP, iPhone X, iphoneos, arm64) a.k.a. 'iPhone'.
[INFO] [SUB] ------ Install phase ------
[INFO] [SUB] [  0%] Found abcdef01234567890abcdef01234567890abcdef (D221AP, iPhone X, iphoneos, arm64) a.k.a. 'iPhone' connected through USB, beginning install
[INFO] [SUB] [  5%] Copying ~/development/client-samples/Maven/HelloWorld/target/client/arm64-ios/helloWorld.app/META-INF/ to device
...
[INFO] [SUB] [ 90%] SandboxingApplication
[INFO] [SUB] [ 95%] GeneratingApplicationMap
[INFO] [SUB] [100%] Installed package ~/development/client-samples/Maven/HelloWorld/target/client/arm64-ios/helloWorld.app
...
[INFO] [SUB] ------ Debug phase ------
[INFO] [SUB] Starting debug of abcdef01234567890abcdef01234567890abcdef (D221AP, iPhone X, iphoneos, arm64) a.k.a. 'iPhone' connected through USB...
[INFO] [SUB] [  0%] Looking up developer disk image
[INFO] [SUB] [ 95%] Developer disk image mounted successfully
[INFO] [SUB] [100%] Connecting to remote debug server
[INFO] [SUB] -------------------------
...
[INFO] [SUB] determineCpuFeaures
[INFO] [SUB] Hello World!!
[INFO] [SUB] Process 23642 exited with status = 0 (0x00000000)
[INFO] result = true
[INFO] ------------------------------------------------------------------------
[INFO] BUILD SUCCESS
[INFO] ------------------------------------------------------------------------
Even though there is no UI for this application, we can still see the message being printed to the console.
Target: Android
|
Note
|
This requires an Android device that has to be plugged in at the run phase. |
On a Linux machine, use the android profile and run mvn -Pandroid client:compile:
[INFO] --- client-maven-plugin:0.1.33:compile (default-cli) @ helloworld ---
[INFO] ==================== COMPILE TASK ====================
[INFO] We will now compile your code for aarch64-linux-android. This may take some time.
[INFO] [SUB] [hello.helloworld:8258]    classlist:   1,474.74 ms,  0.96 GB
[INFO] [SUB] [hello.helloworld:8258]        (cap):     306.46 ms,  0.96 GB
[INFO] [SUB] [hello.helloworld:8258]        setup:   2,078.26 ms,  0.96 GB
[INFO] [SUB] WARNING GR-10238: VarHandle for static field is currently not fully supported. Static field private static volatile java.lang.System$Logger jdk.internal.event.EventHelper.securityLogger is not properly marked for Unsafe access!
[INFO] [SUB] [hello.helloworld:8258]     (clinit):     493.75 ms,  2.29 GB
[INFO] [SUB] [hello.helloworld:8258]   (typeflow):  11,436.20 ms,  2.29 GB
[INFO] [SUB] [hello.helloworld:8258]    (objects):  12,928.51 ms,  2.29 GB
[INFO] [SUB] [hello.helloworld:8258]   (features):   1,578.28 ms,  2.29 GB
[INFO] [SUB] [hello.helloworld:8258]     analysis:  27,065.74 ms,  2.29 GB
[INFO] [SUB] [hello.helloworld:8258]     universe:     909.78 ms,  2.30 GB
[INFO] [SUB] [hello.helloworld:8258]      (parse):   2,156.71 ms,  2.30 GB
[INFO] [SUB] [hello.helloworld:8258]     (inline):   3,780.53 ms,  3.68 GB
[INFO] [SUB] [hello.helloworld:8258]    (compile):  19,433.23 ms,  4.72 GB
[INFO] [SUB] [hello.helloworld:8258]      compile:  26,877.82 ms,  4.72 GB
[INFO] [SUB] [hello.helloworld:8258]        image:   4,022.56 ms,  4.72 GB
[INFO] [SUB] [hello.helloworld:8258]        write:     409.92 ms,  4.72 GB
[INFO] [SUB] [hello.helloworld:8258]      [total]:  63,290.80 ms,  4.72 GB
[INFO] ------------------------------------------------------------------------
[INFO] BUILD SUCCESS
[INFO] ------------------------------------------------------------------------
And as a result, hello.helloworld.o is created and can be found under target/client/aarch64-android/gvm/tmp/SVM-*/hello.helloworld.o.
Note that the process takes some time. There will be performance improvements, but either way, it is convenient to test first on desktop (and with HotSpot) as much as possible (i.e. with mvn javafx:run), so client:compile doesn’t have to be repeated due to avoidable errors.
Run mvn -Pandroid client:link to produce the native image. As a result, target/client/aarch64-android/libhelloWorld.so is created.
Finally, run mvn -Pandroid client:package to bundle the application into an Android APK that can be installed on a device.
It produces the following output:
[INFO] --- client-maven-plugin:{client-maven-plugin-version}:package (default-cli) @ helloworld ---
[INFO] ==================== PACKAGE TASK ====================
[INFO] Default Android manifest generated in ~/Gluon/gluon-samples/HelloWorld/target/client/aarch64-android/gensrc/android/AndroidManifest.xml.
Consider copying it to ~/Gluon/gluon-samples/HelloWorld/src/android/AndroidManifest.xml before performing any modification
[INFO] Default Android resources generated in ~/Gluon/gluon-samples/HelloWorld/target/client/aarch64-android/gensrc/android/res.
Consider copying them to ~/Gluon/gluon-samples/HelloWorld/src/android/res before performing any modification
[INFO] ------------------------------------------------------------------------
[INFO] BUILD SUCCESS
[INFO] ------------------------------------------------------------------------
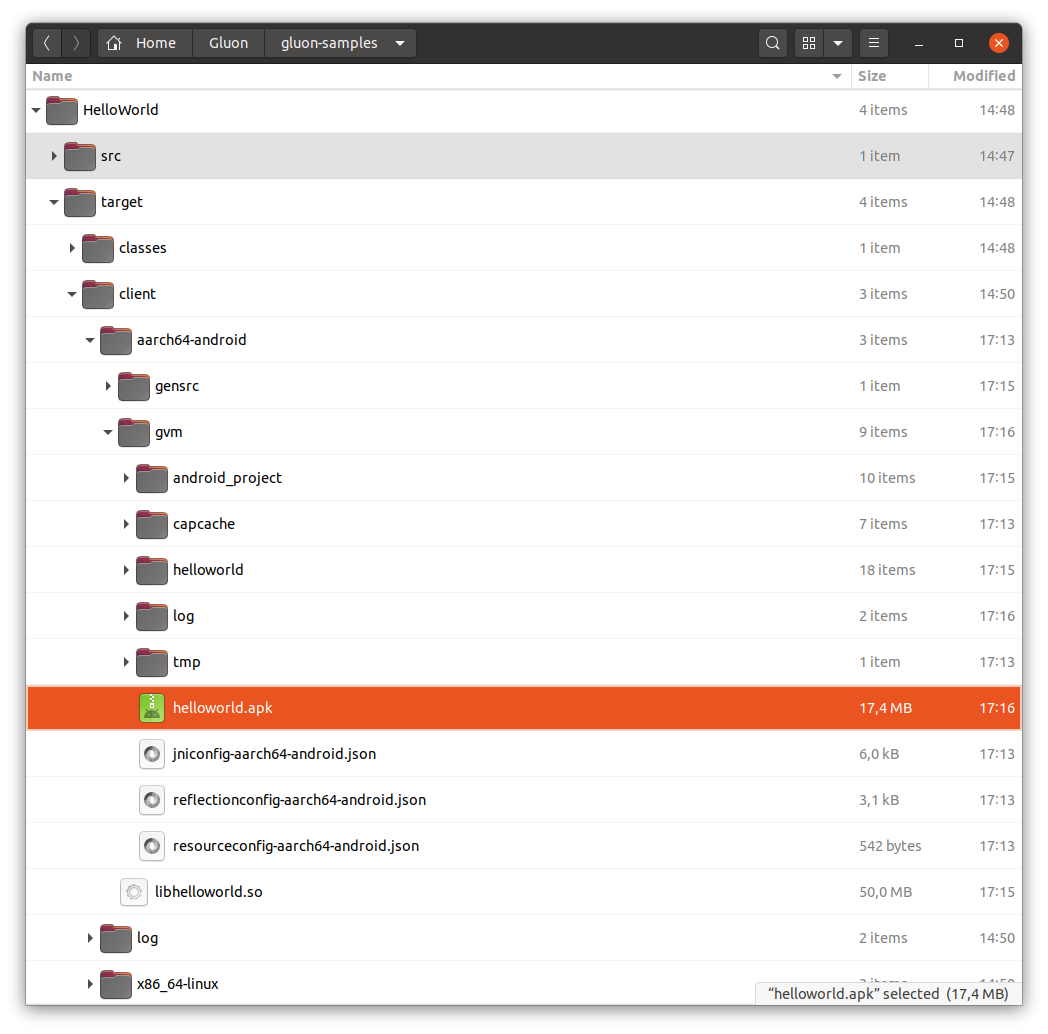
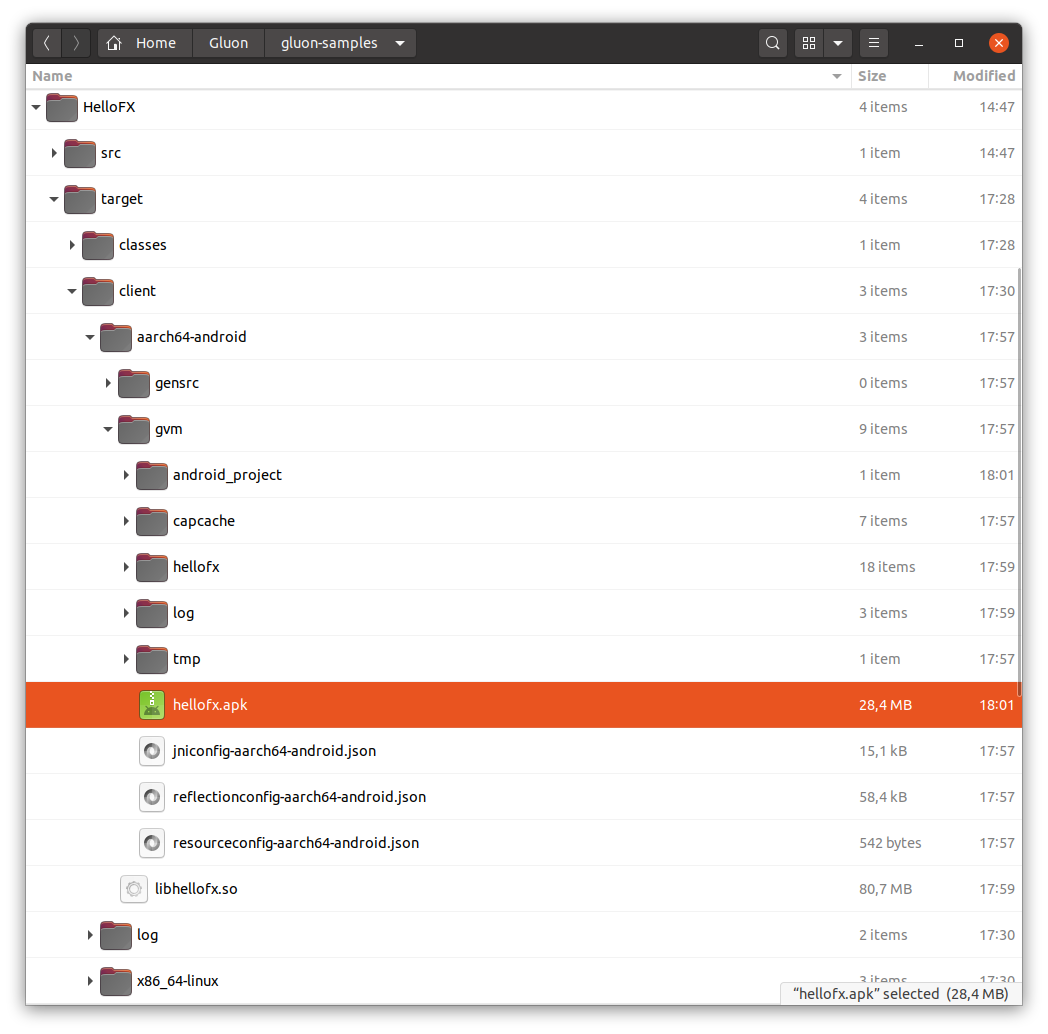
This creates the apk package which is available at target/client/aarch64-android/gvm/helloworld.apk.
Now we are ready to install and run the application on a plugged-in Android device. Run mvn -Pandroid client:install client:run to
install and launch the application on the device.
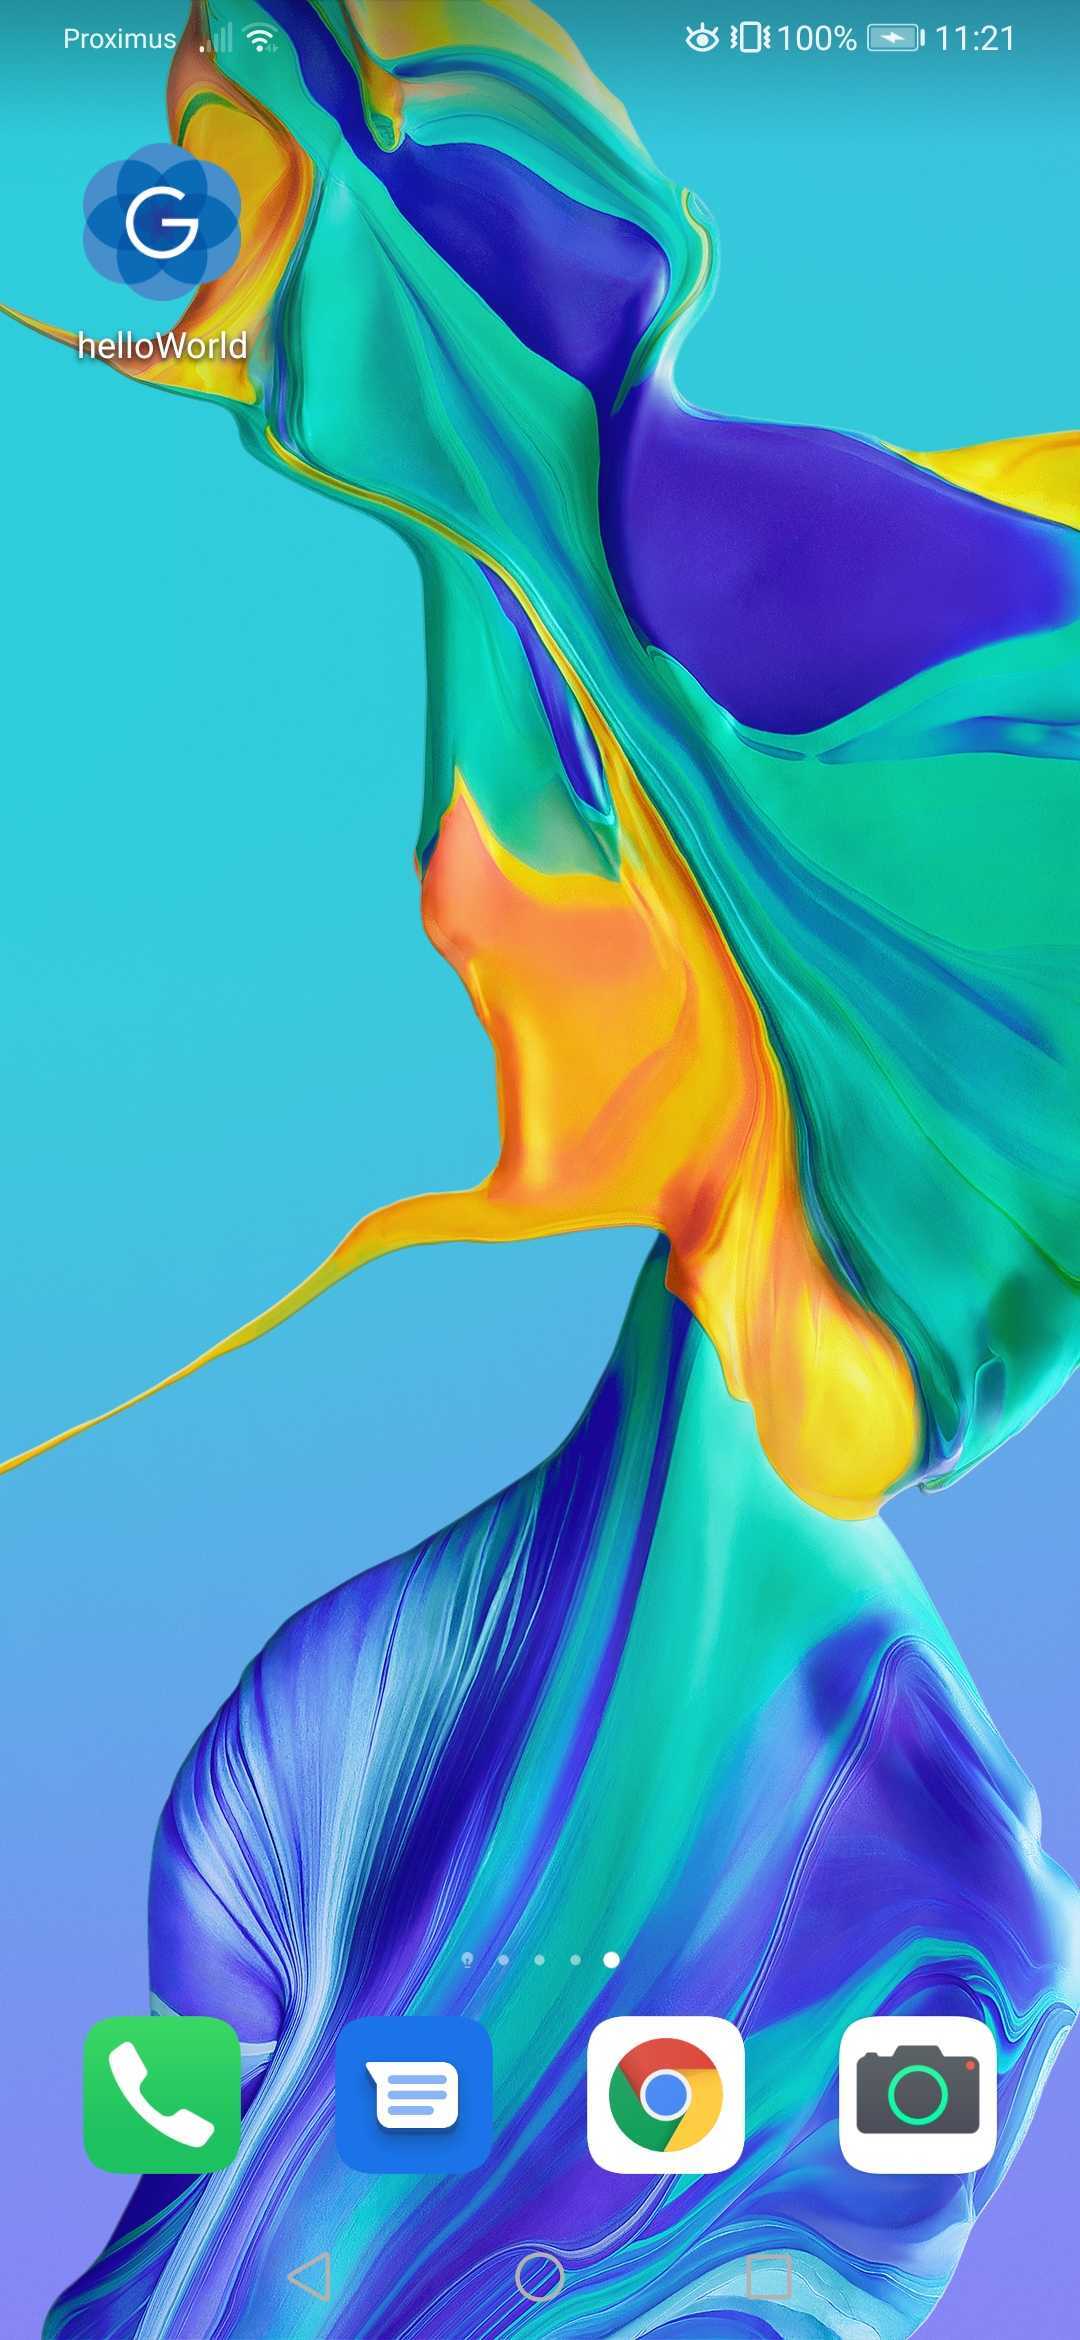
[INFO] --- client-maven-plugin:0.1.33:install (default-cli) @ helloworld ---
[INFO] ==================== INSTALL TASK ====================
[INFO]
[INFO] --- client-maven-plugin:0.1.33:run (default-cli) @ helloworld ---
[INFO] ==================== RUN TASK ====================
...
[INFO] [SUB] E/GraalGluon(11146):
[INFO] [SUB] E/GraalGluon(11146):
[INFO] [SUB] E/GraalGluon(11146): determineCpuFeaures
[INFO] [SUB] D/GraalCompiled(11146): Hello World!!
...
[INFO] ------------------------------------------------------------------------
[INFO] BUILD SUCCESS
[INFO] ------------------------------------------------------------------------
Even though there is no UI for this application, we can still see the message being printed to the console.
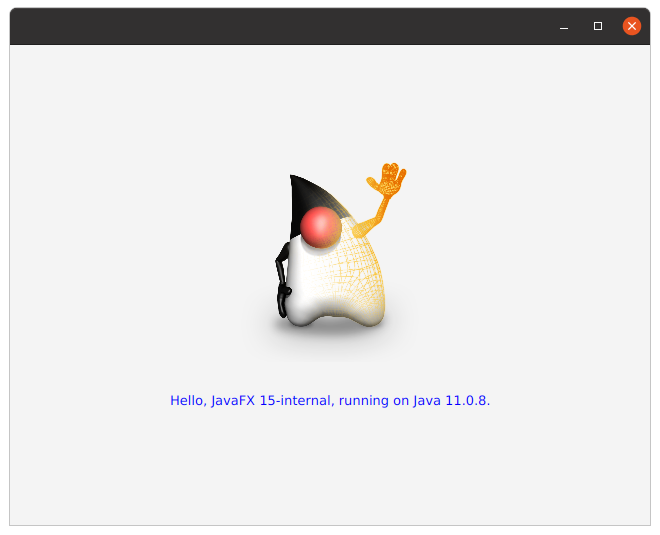
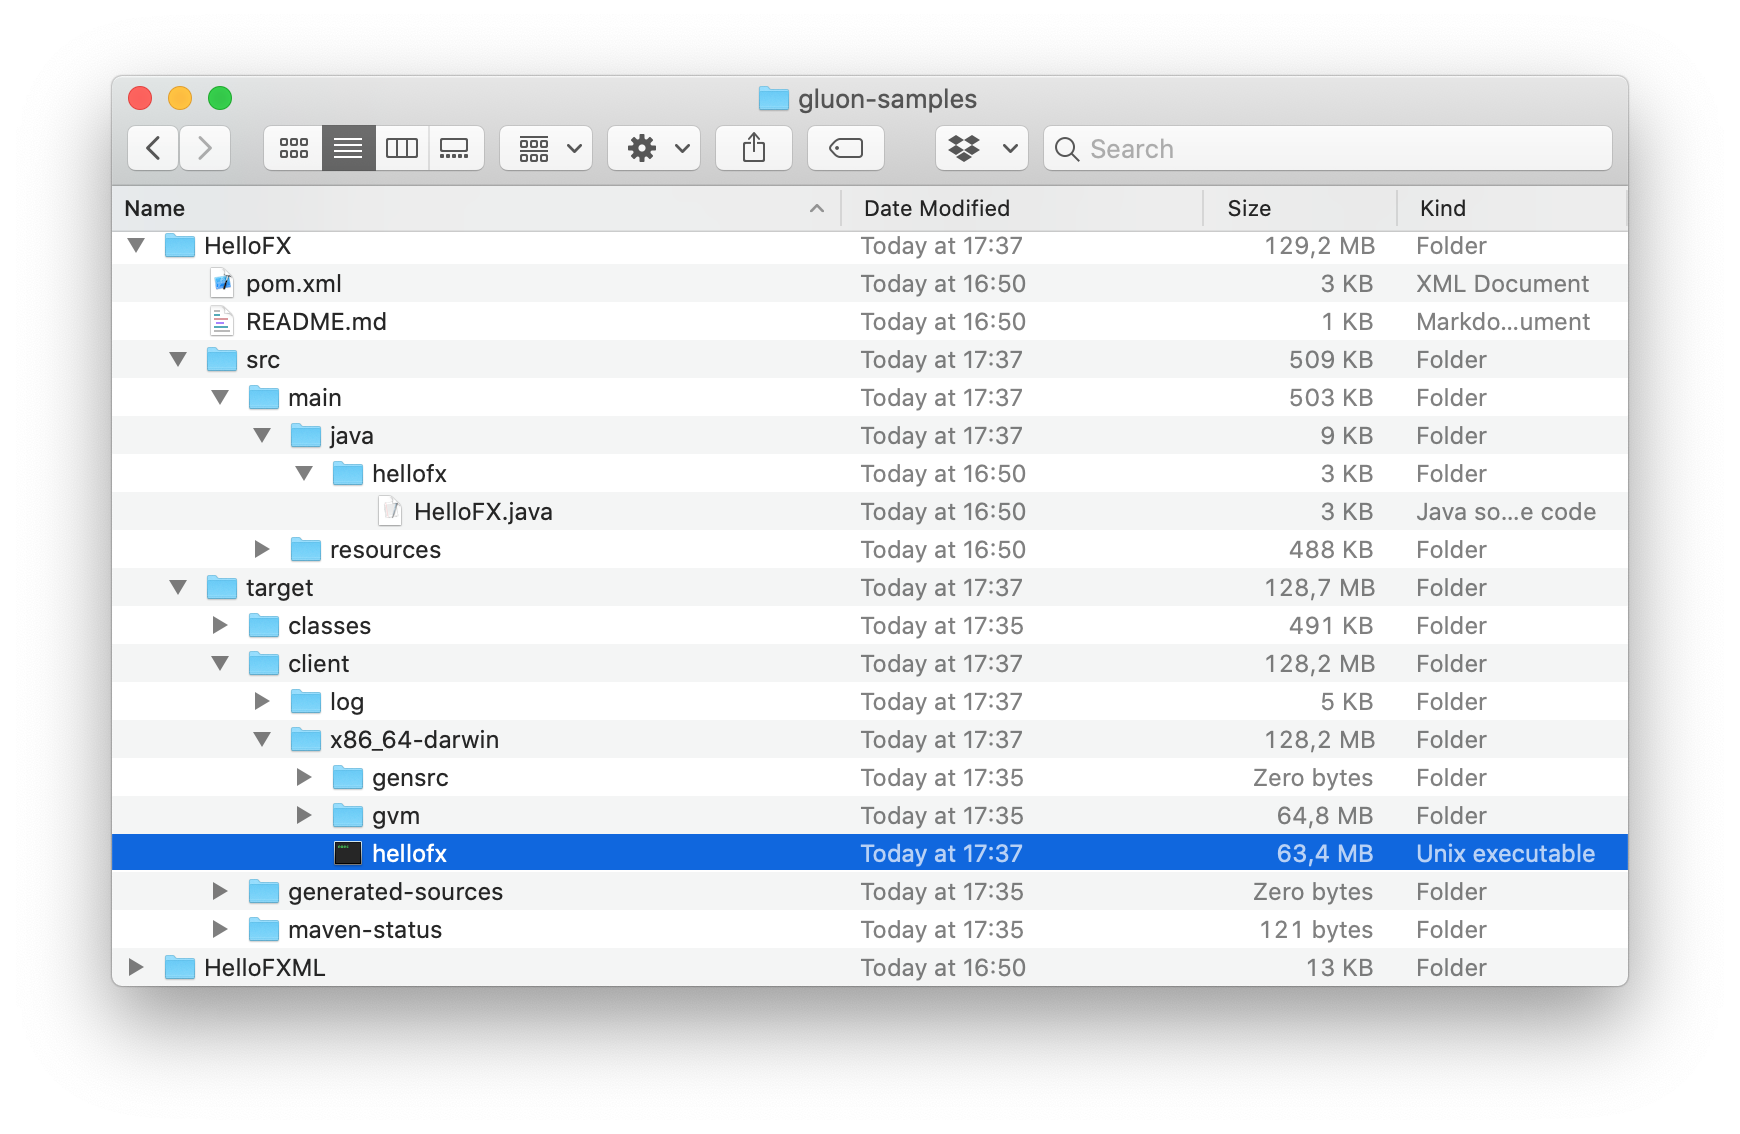
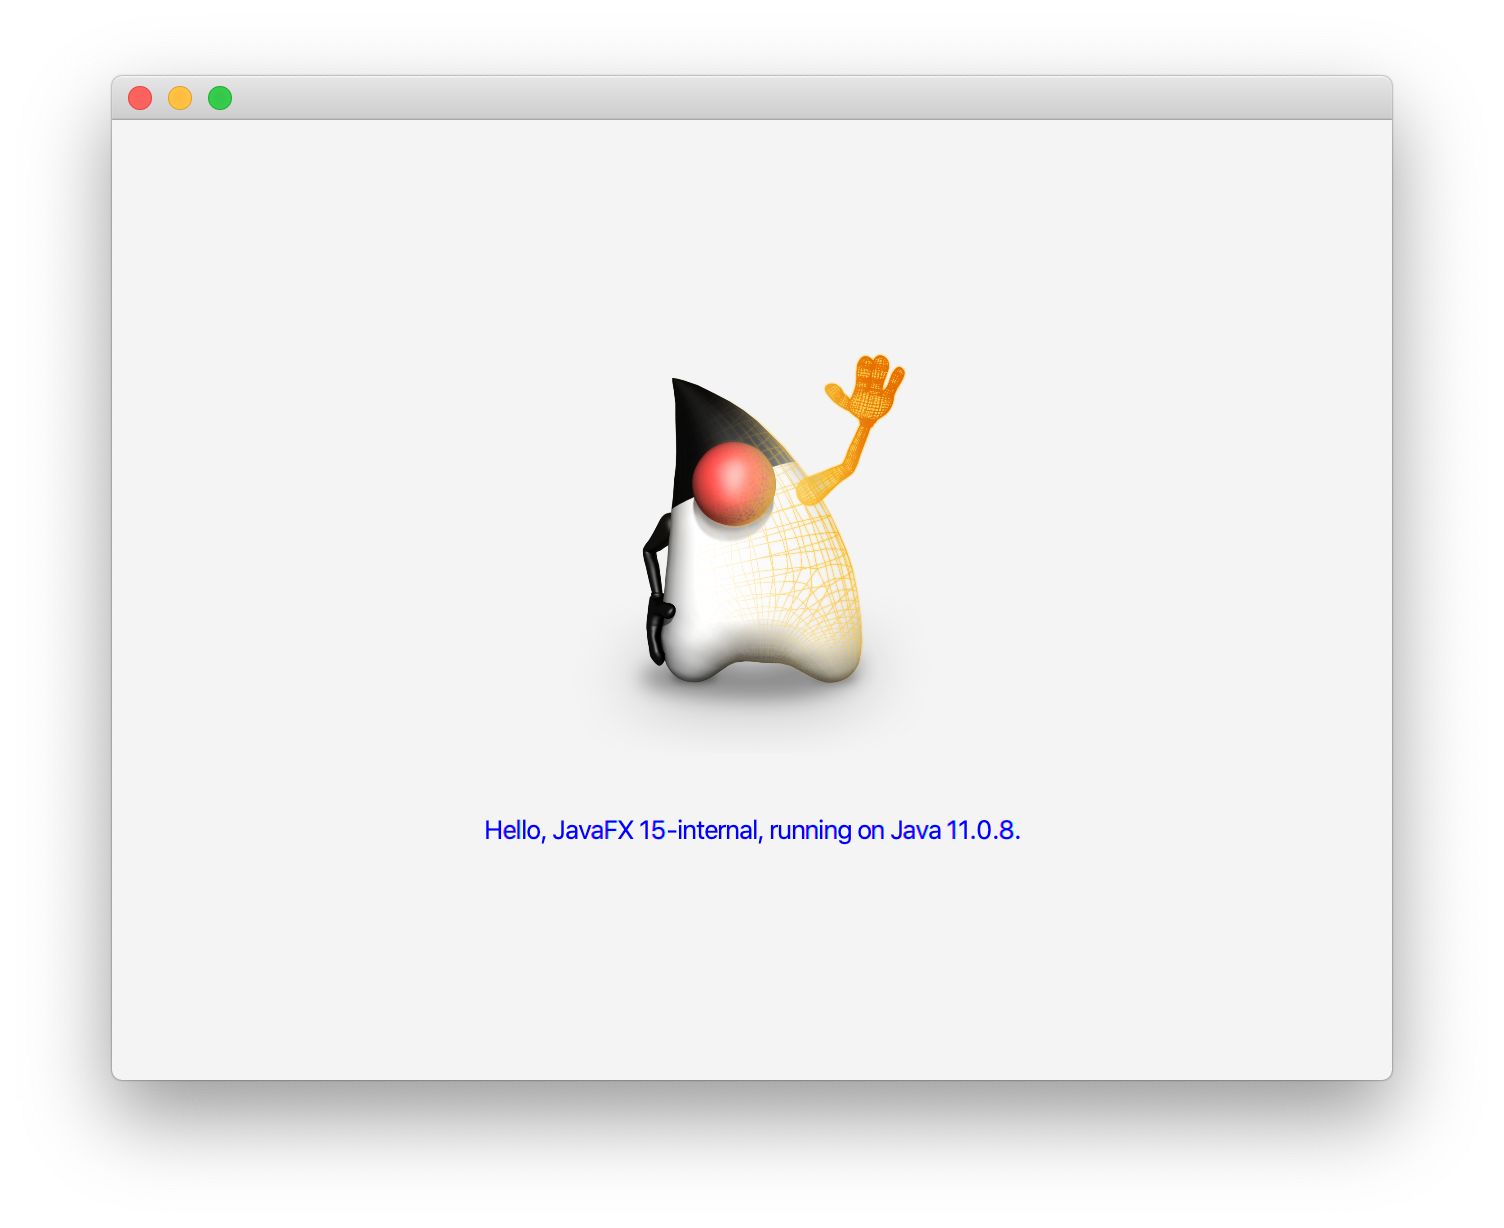
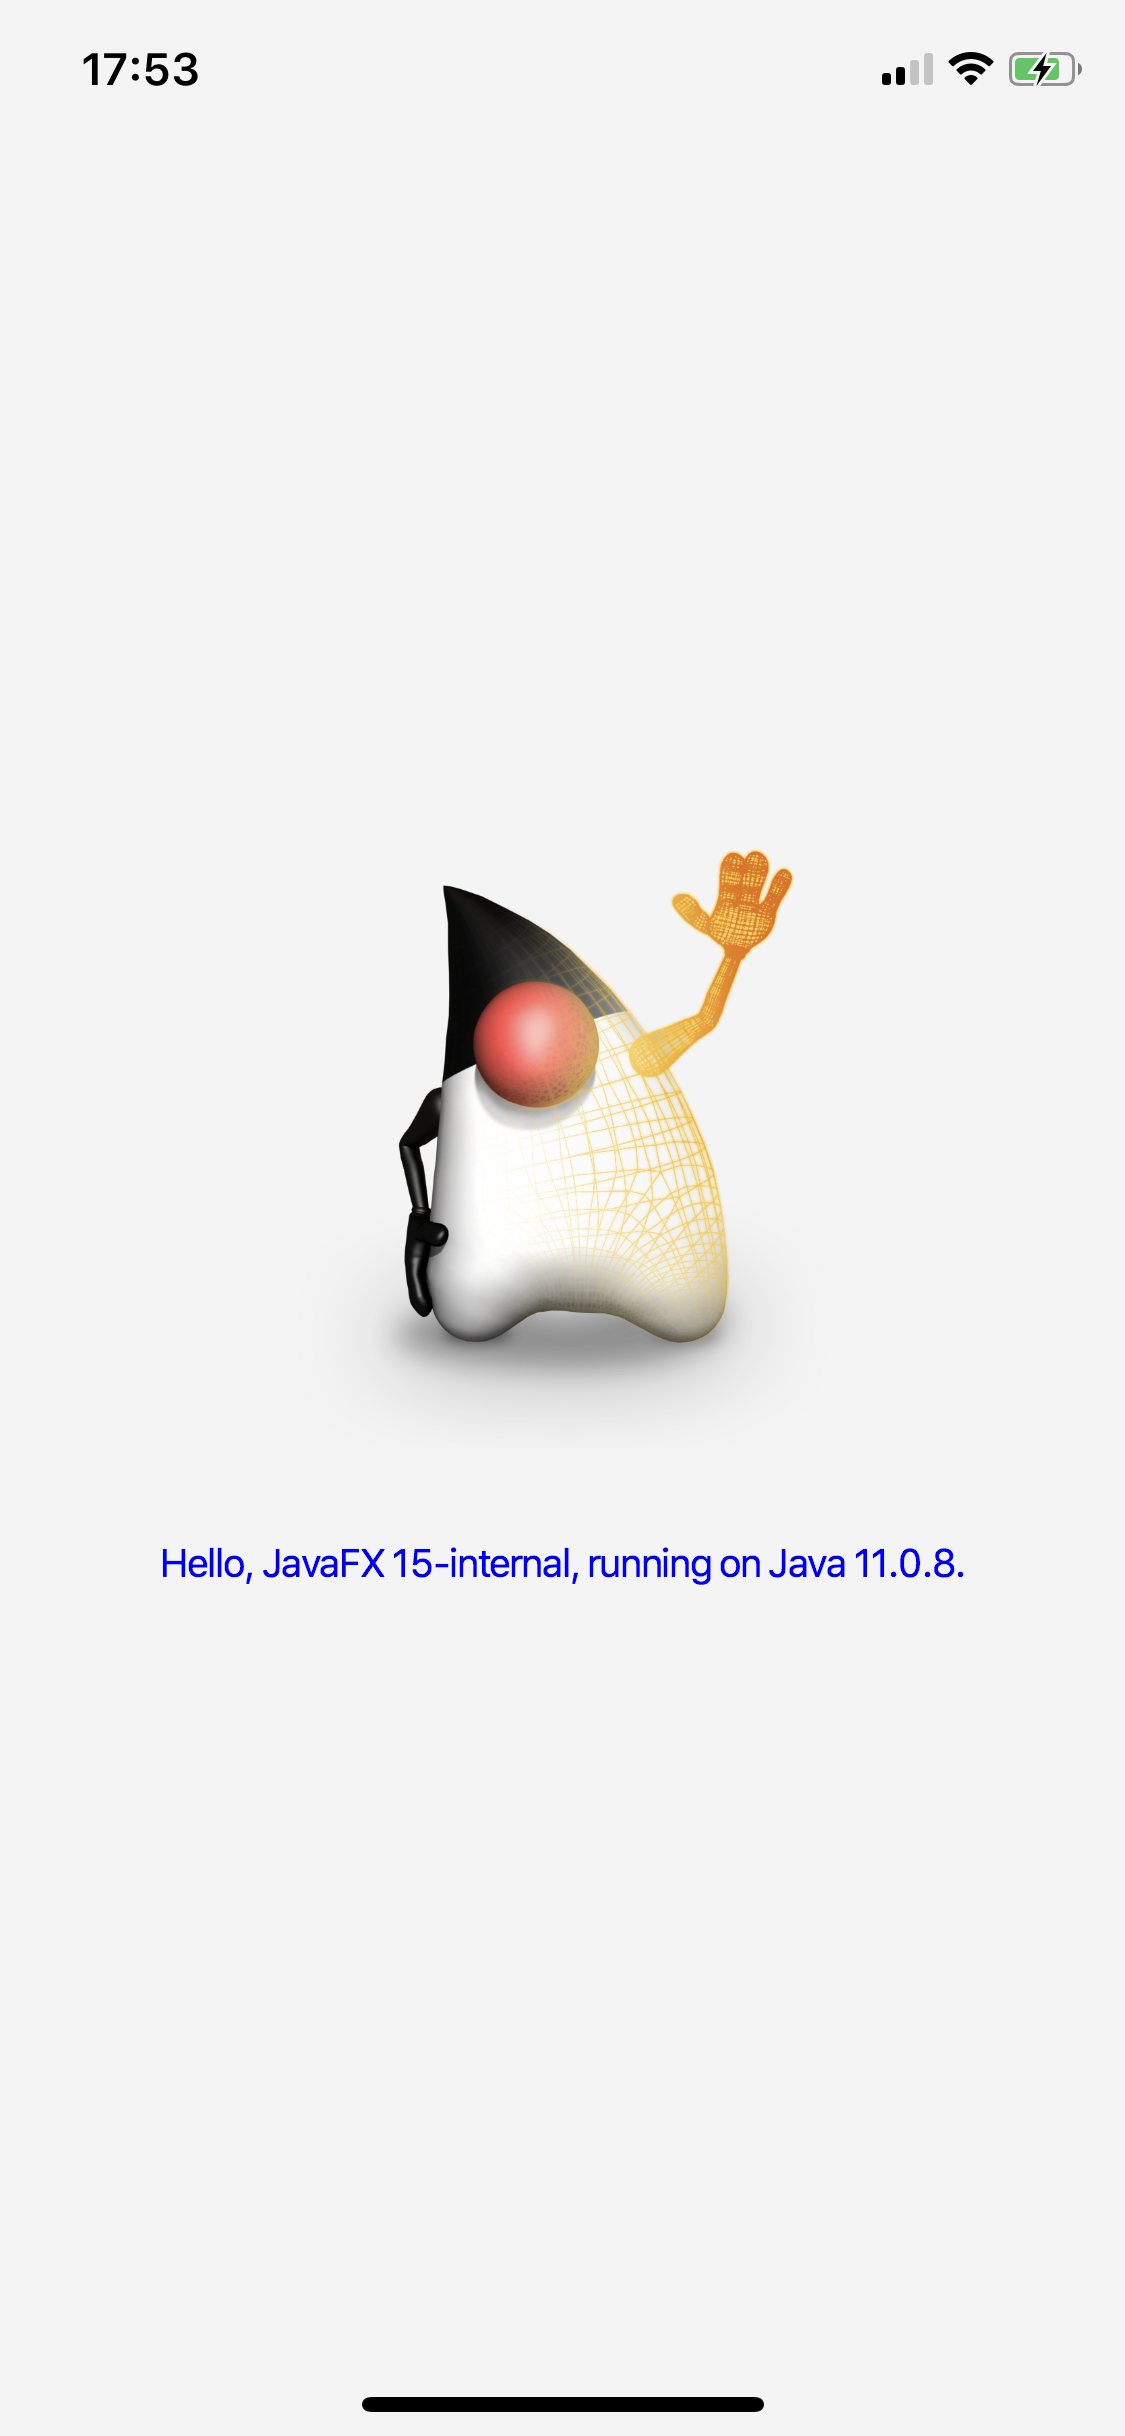
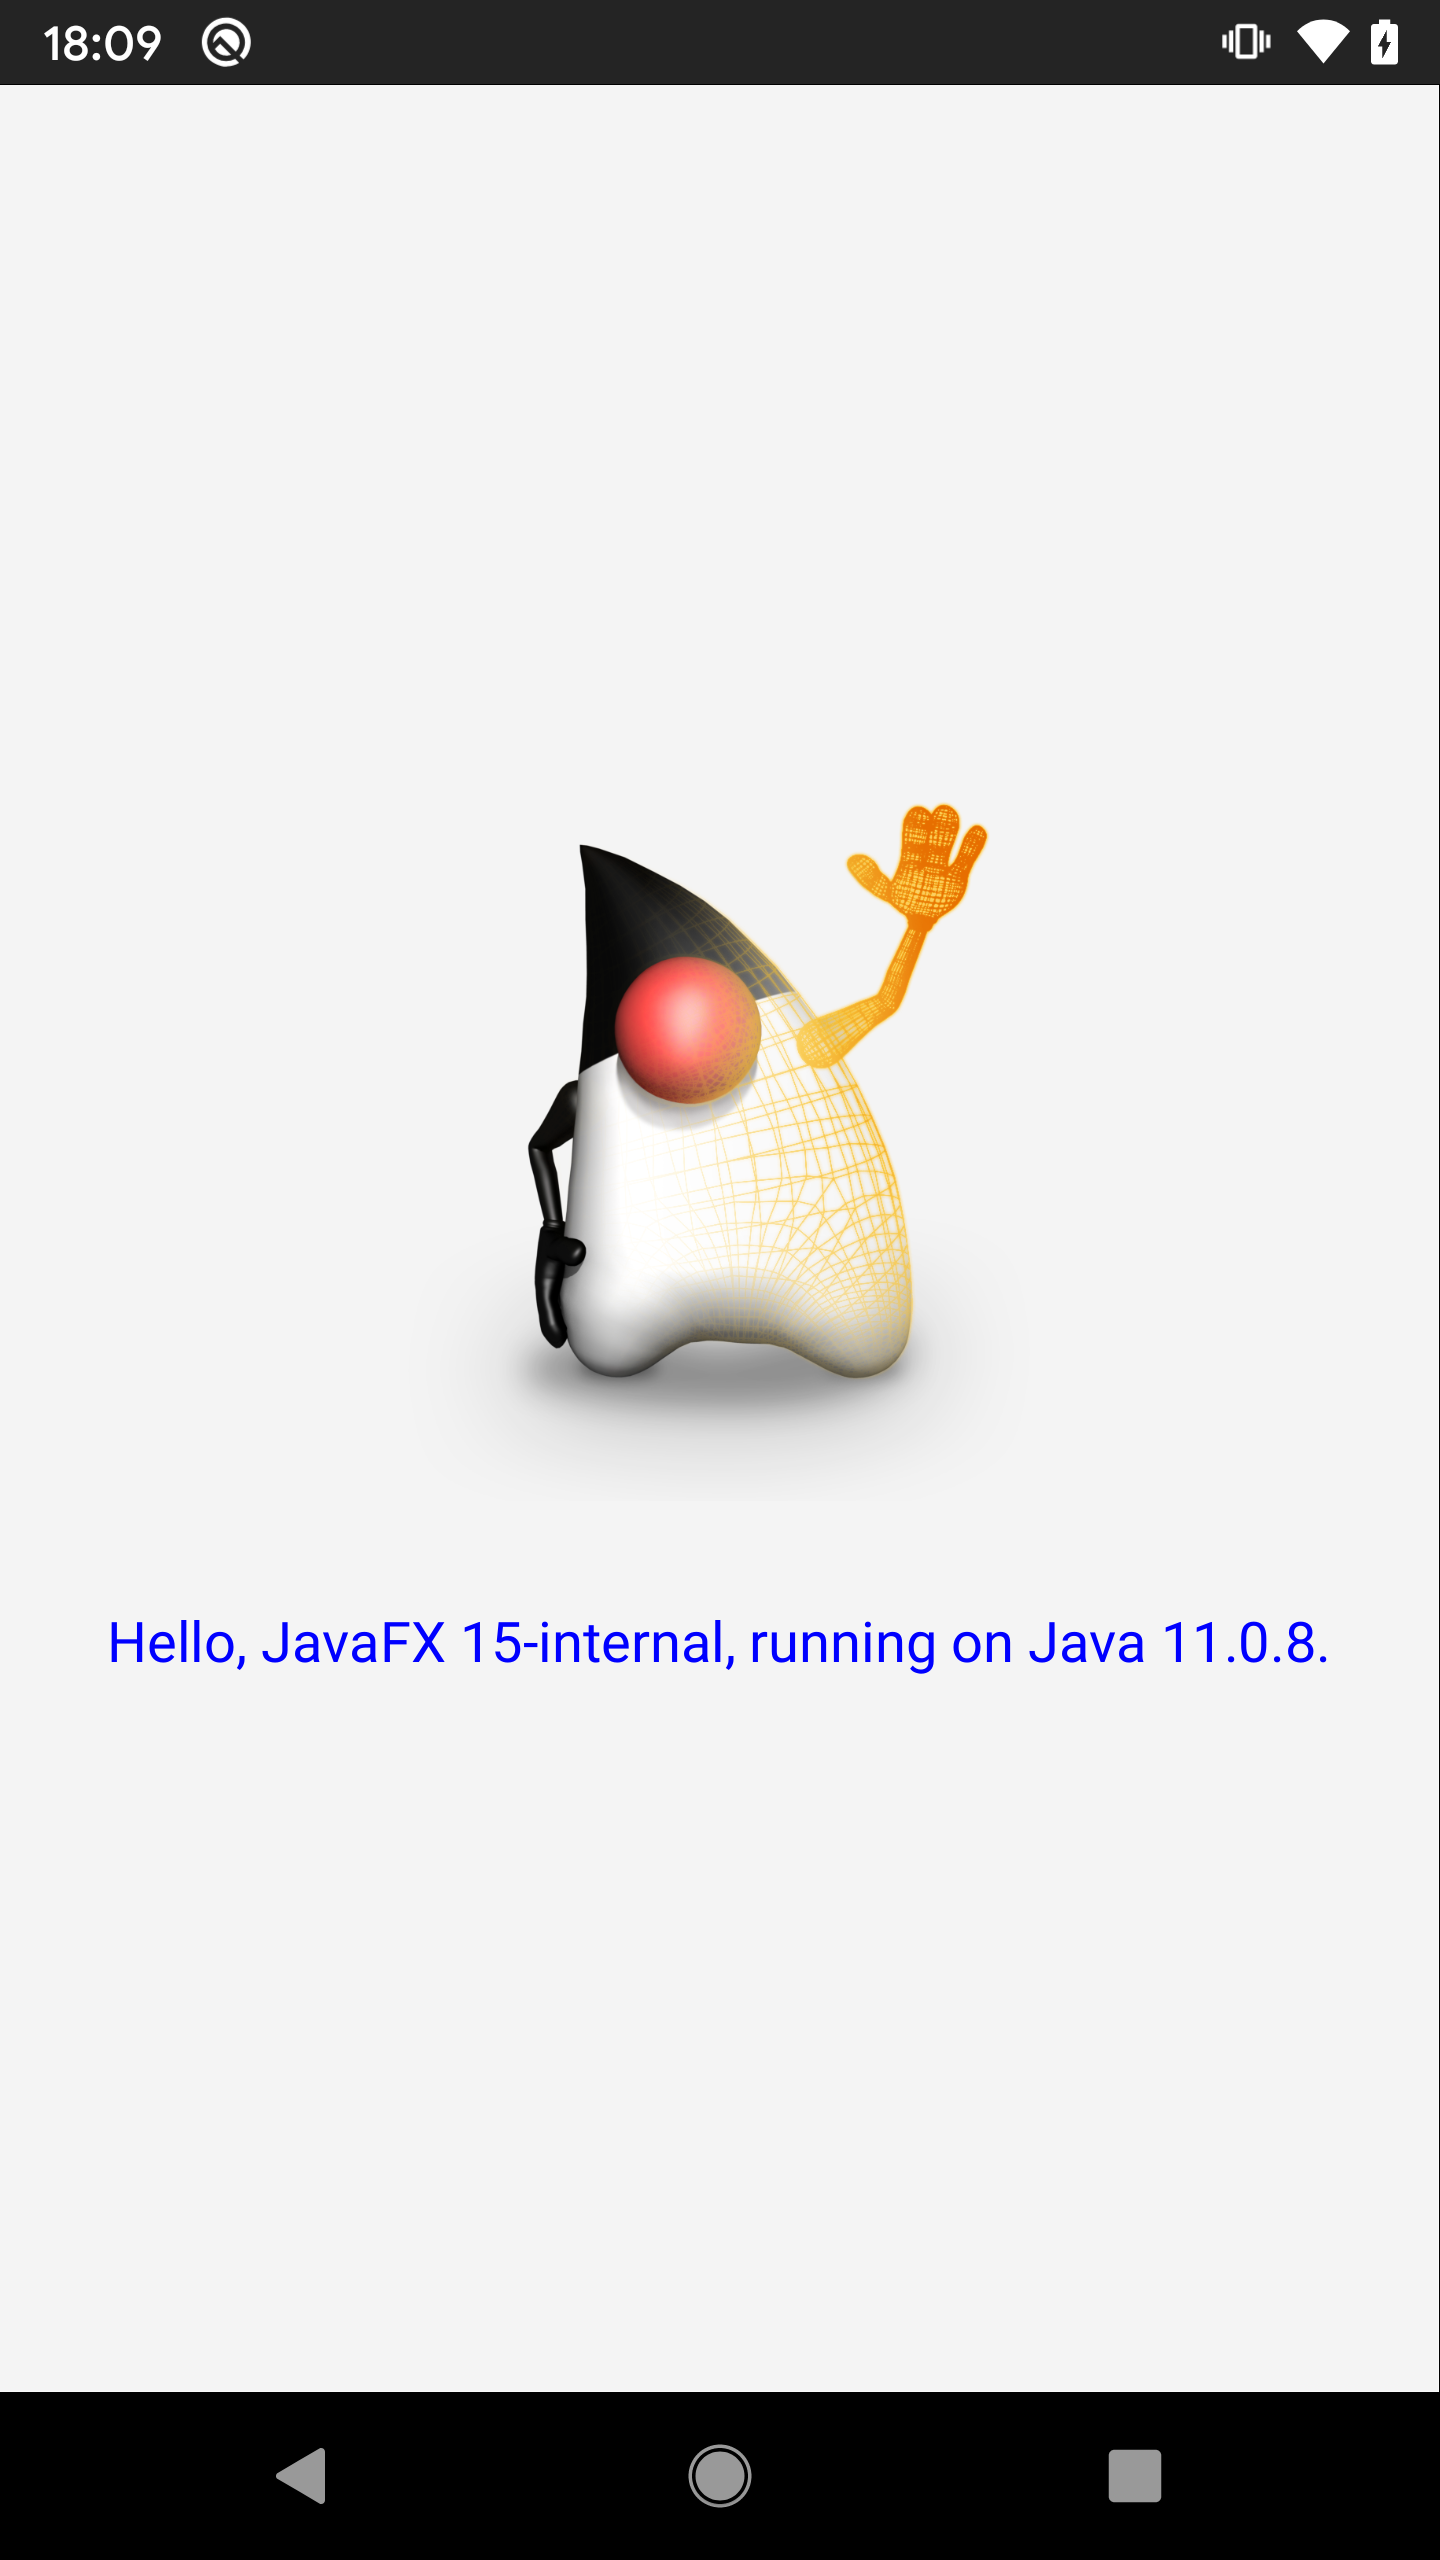
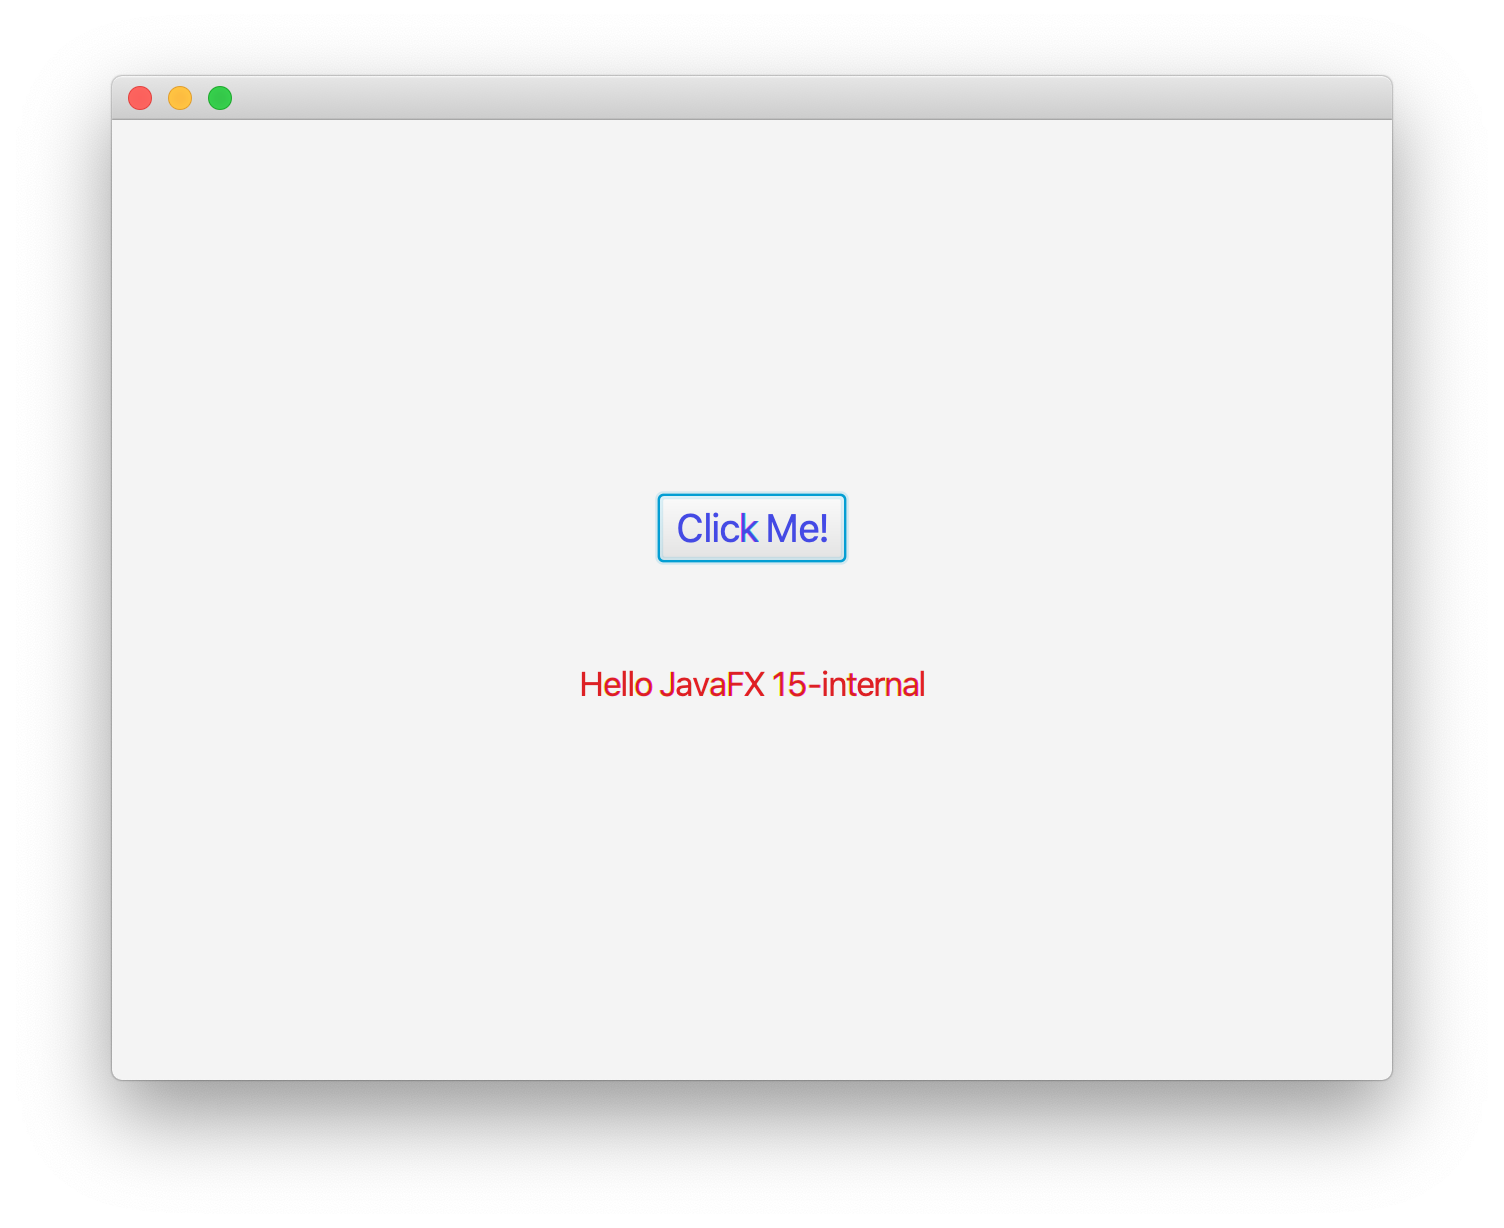
3.3.2. HelloFX
Now let’s run HelloFX, a simple JavaFX application.
public class HelloFX extends Application {

    public void start(Stage stage) {
        String javaVersion = System.getProperty("java.version");
        String javafxVersion = System.getProperty("javafx.version");
        Label label = new Label("Hello, JavaFX " + javafxVersion + ", running on Java " + javaVersion + ".");

        ImageView imageView = new ImageView(new Image(HelloFX.class.getResourceAsStream("/hellofx/openduke.png")));
        imageView.setFitHeight(200);
        imageView.setPreserveRatio(true);

        VBox root = new VBox(30, imageView, label);
        root.setAlignment(Pos.CENTER);

        Scene scene = new Scene(root, 640, 480);
        scene.getStylesheets().add(HelloFX.class.getResource("styles.css").toExternalForm());
        stage.setScene(scene);
        stage.show();
    }

    public static void main(String[] args) {
        launch(args);
    }
}<?xml version="1.0" encoding="UTF-8"?>
<project xmlns="http://maven.apache.org/POM/4.0.0" xmlns:xsi="http://www.w3.org/2001/XMLSchema-instance" xsi:schemaLocation="http://maven.apache.org/POM/4.0.0 http://maven.apache.org/xsd/maven-4.0.0.xsd">
<modelVersion>4.0.0</modelVersion>
<groupId>com.gluonhq.samples</groupId>
<artifactId>hellofx</artifactId>
<version>1.0.0-SNAPSHOT</version>
<packaging>jar</packaging>
<name>hellofx</name>
<properties>
<project.build.sourceEncoding>UTF-8</project.build.sourceEncoding>
<maven.compiler.release>11</maven.compiler.release>
<javafx.version>15</javafx.version>
<client.maven.plugin.version>3.8.1</client.maven.plugin.version>
<main.class>hellofx.HelloFX</main.class>
</properties>
<dependencies>
<dependency>
<groupId>org.openjfx</groupId>
<artifactId>javafx-controls</artifactId>
<version>${javafx.version}</version>
</dependency>
</dependencies>
<build>
<plugins>
<plugin>
<groupId>org.apache.maven.plugins</groupId>
<artifactId>maven-compiler-plugin</artifactId>
<version>3.8.1</version>
</plugin>
<plugin>
<groupId>org.openjfx</groupId>
<artifactId>javafx-maven-plugin</artifactId>
<version>0.0.5</version>
<configuration>
<mainClass>${main.class}</mainClass>
</configuration>
</plugin>
<plugin>
<groupId>com.gluonhq</groupId>
<artifactId>client-maven-plugin</artifactId>
<version>${client.maven.plugin.version}</version>
<configuration>
<target>${client.target}</target>
<mainClass>${main.class}</mainClass>
</configuration>
</plugin>
</plugins>
</build>
<profiles>
<profile>
<id>desktop</id>
<activation>
<activeByDefault>true</activeByDefault>
</activation>
<properties>
<client.target>host</client.target>
</properties>
</profile>
<profile>
<id>ios</id>
<properties>
<client.target>ios</client.target>
</properties>
</profile>
<profile>
<id>android</id>
<properties>
<client.target>android</client.target>
</properties>
</profile>
</profiles>
</project>Run the application to make sure everything works with Java 11:
mvn clean javafx:run
Target: Linux
On a Linux machine, run the client:compile goal. It produces the following output:
[INFO] --- client-maven-plugin:0.1.33:compile (default-cli) @ hellofx ---
[INFO] ==================== COMPILE TASK ====================
[INFO] [SUB] [hellofx.hellofx:4286]    classlist:   4,465.09 ms,  0.96 GB
[INFO] [SUB] [hellofx.hellofx:4286]        (cap):   1,578.18 ms,  0.96 GB
[INFO] [SUB] [hellofx.hellofx:4286]        setup:   3,635.99 ms,  0.96 GB
[INFO] [SUB] [hellofx.hellofx:4286]     (clinit):   1,148.59 ms,  4.02 GB
[INFO] [SUB] [hellofx.hellofx:4286]   (typeflow):  20,732.40 ms,  4.02 GB
[INFO] [SUB] [hellofx.hellofx:4286]    (objects):  22,106.29 ms,  4.02 GB
[INFO] [SUB] [hellofx.hellofx:4286]   (features):   3,153.63 ms,  4.02 GB
[INFO] [SUB] [hellofx.hellofx:4286]     analysis:  49,730.80 ms,  4.02 GB
[INFO] [SUB] [hellofx.hellofx:4286]     universe:   4,497.82 ms,  5.10 GB
[INFO] [SUB] [hellofx.hellofx:4286]      (parse):   4,921.35 ms,  5.10 GB
[INFO] [SUB] [hellofx.hellofx:4286]     (inline):   7,389.24 ms,  5.48 GB
[INFO] [SUB] [hellofx.hellofx:4286]    (compile):  26,684.64 ms,  5.79 GB
[INFO] [SUB] [hellofx.hellofx:4286]      compile:  41,273.83 ms,  5.78 GB
[INFO] [SUB] [hellofx.hellofx:4286]        image:   4,323.81 ms,  5.78 GB
[INFO] [SUB] [hellofx.hellofx:4286]        write:     761.30 ms,  5.78 GB
[INFO] [SUB] [hellofx.hellofx:4286]      [total]: 109,023.72 ms,  5.78 GB
[INFO] ------------------------------------------------------------------------
[INFO] BUILD SUCCESS
[INFO] ------------------------------------------------------------------------
And as a result, hellofx.hellofx.o is created and can be found under target/client/x86_64-linux/gvm/tmp/SVM-*/hellofx.hellofx.o.
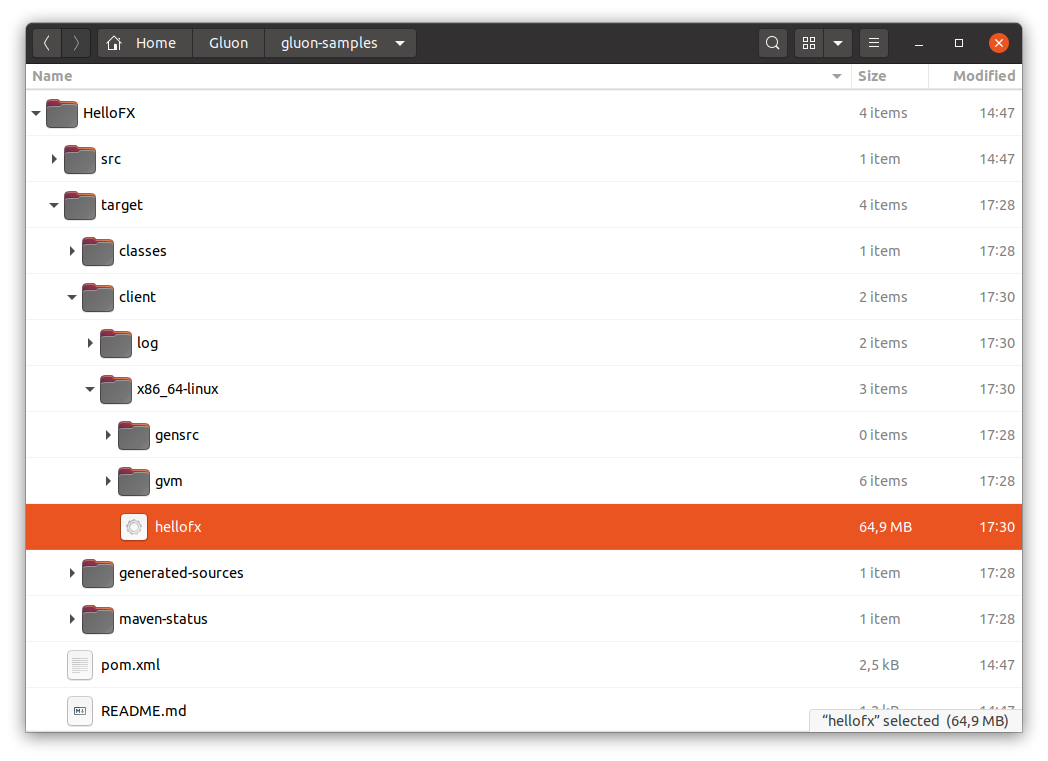
Run the client:link goal to produce the native image. As a result, target/client/x86_64-linux/hellofx is created.
It can be executed directly or with mvn client:run.
Target: macOS
On Mac OS X, run the client:compile goal. It produces the following output:
[INFO] --- client-maven-plugin:0.1.33:compile (default-cli) @ hellofx ---
[INFO] ==================== COMPILE TASK ====================
[INFO] We will now compile your code for x86_64-apple-darwin. This may take some time.
[INFO] [SUB] [hellofx.hellofx:2309]    classlist:   3,410.78 ms,  0.96 GB
[INFO] [SUB] [hellofx.hellofx:2309]        (cap):   1,509.86 ms,  0.96 GB
[INFO] [SUB] [hellofx.hellofx:2309]        setup:   3,863.89 ms,  0.96 GB
[INFO] [SUB] [hellofx.hellofx:2309]     (clinit):   1,257.74 ms,  4.75 GB
[INFO] [SUB] [hellofx.hellofx:2309]   (typeflow):  24,813.75 ms,  4.75 GB
[INFO] [SUB] [hellofx.hellofx:2309]    (objects):  25,161.07 ms,  4.75 GB
[INFO] [SUB] [hellofx.hellofx:2309]   (features):   3,090.12 ms,  4.75 GB
[INFO] [SUB] [hellofx.hellofx:2309]     analysis:  56,425.44 ms,  4.75 GB
[INFO] [SUB] [hellofx.hellofx:2309]     universe:   2,060.83 ms,  5.06 GB
[INFO] [SUB] [hellofx.hellofx:2309]      (parse):   6,364.53 ms,  5.06 GB
[INFO] [SUB] [hellofx.hellofx:2309]     (inline):   7,150.96 ms,  5.84 GB
[INFO] [SUB] [hellofx.hellofx:2309]    (compile):  43,871.39 ms,  5.93 GB
[INFO] [SUB] [hellofx.hellofx:2309]      compile:  61,332.73 ms,  5.93 GB
[INFO] [SUB] [hellofx.hellofx:2309]        image:   8,034.36 ms,  5.89 GB
[INFO] [SUB] [hellofx.hellofx:2309]        write:   1,337.65 ms,  5.89 GB
[INFO] [SUB] [hellofx.hellofx:2309]      [total]: 136,878.31 ms,  5.89 GB
[INFO] ------------------------------------------------------------------------
[INFO] BUILD SUCCESS
[INFO] ------------------------------------------------------------------------
And as a result, hellofx.hellofx.o is created and can be found under target/client/x86_64-darwin/gvm/tmp/SVM-*/hellofx.hellofx.o.
Run the client:link goal to produce the native image. As a result, target/client/x86_64-darwin/hellofx is created.
It can be executed directly or with mvn client:run.
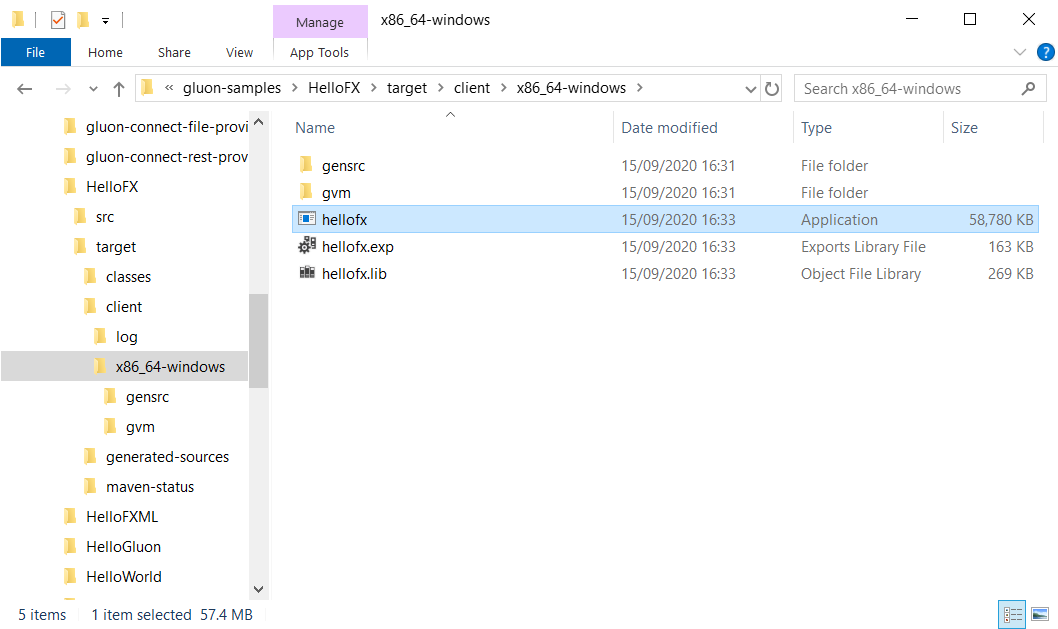
Target: Windows
On a Windows machine, run the client:compile goal. It produces the following output:
[INFO] --- client-maven-plugin:0.1.33:compile (default-cli) @ hellofx ---
[INFO] ==================== COMPILE TASK ====================
[INFO] We will now compile your code for x86_64-microsoft-windows. This may take some time.
[INFO] [SUB] Warning: Ignoring server-mode native-image argument --no-server.
[INFO] [SUB] [hellofx.hellofx:1872]    classlist:   4,129.20 ms,  0.96 GB
[INFO] [SUB] [hellofx.hellofx:1872]        (cap):   2,432.83 ms,  0.96 GB
[INFO] [SUB] [hellofx.hellofx:1872]        setup:   4,741.30 ms,  0.96 GB
[INFO] [SUB] WARNING GR-10238: VarHandle for static field is currently not fully supported. Static field private static volatile java.lang.System$Logger jdk.internal.event.EventHelper.securityLogger is not properly marked for Unsafe access!
[INFO] [SUB] [hellofx.hellofx:1872]     (clinit):     913.99 ms,  2.33 GB
[INFO] [SUB] [hellofx.hellofx:1872]   (typeflow):  47,466.16 ms,  2.33 GB
[INFO] [SUB] [hellofx.hellofx:1872]    (objects):  30,559.65 ms,  2.33 GB
[INFO] [SUB] [hellofx.hellofx:1872]   (features):   2,596.89 ms,  2.33 GB
[INFO] [SUB] [hellofx.hellofx:1872]     analysis:  83,244.37 ms,  2.33 GB
[INFO] [SUB] [hellofx.hellofx:1872]     universe:   2,483.86 ms,  2.31 GB
[INFO] [SUB] [hellofx.hellofx:1872]      (parse):  12,910.54 ms,  2.07 GB
[INFO] [SUB] [hellofx.hellofx:1872]     (inline):  21,259.04 ms,  2.61 GB
[INFO] [SUB] [hellofx.hellofx:1872]    (compile):  51,522.36 ms,  2.83 GB
[INFO] [SUB] [hellofx.hellofx:1872]      compile:  88,166.40 ms,  2.83 GB
[INFO] [SUB] [hellofx.hellofx:1872]        image:   5,539.33 ms,  2.78 GB
[INFO] [SUB] [hellofx.hellofx:1872]        write:     461.00 ms,  2.78 GB
[INFO] [SUB] [hellofx.hellofx:1872]      [total]: 189,148.96 ms,  2.78 GB
[INFO] ------------------------------------------------------------------------
[INFO] BUILD SUCCESS
[INFO] ------------------------------------------------------------------------
And as a result, hellofx.hellofx.obj is created and can be found under target\client\x86_64-windows\gvm\tmp\SVM-*\hellofx.hellofx.obj.
Run the client:link goal to produce the native image. As a result, target\client\x86_64-windows\hellofx.exe
is created. It can be executed directly or with mvn client:run.

Target: iOS
|
Note
|
This requires an iOS device that has to be plugged in at the run phase. A valid provisioning profile is required as well, either by enrolling to the Apple Developer program or by using free provisioning. See iOS Deployment. |
On Mac OS X, use the ios profile and run mvn -Pios client:compile, that produces the following output:
[INFO] --- client-maven-plugin:0.1.33:compile (default-cli) @ hellofx ---
[INFO] ==================== COMPILE TASK ====================
[INFO] We will now compile your code for arm64-apple-ios. This may take some time.
[INFO] [SUB] [hellofx.hellofx:3374]    classlist:   3,413.81 ms,  0.96 GB
[INFO] [SUB] [hellofx.hellofx:3374]        (cap):     415.26 ms,  0.96 GB
[INFO] [SUB] [hellofx.hellofx:3374]        setup:   2,741.93 ms,  0.96 GB
[INFO] [SUB] [hellofx.hellofx:3374]     (clinit):   1,281.87 ms,  4.75 GB
[INFO] [SUB] [hellofx.hellofx:3374]   (typeflow):  23,706.05 ms,  4.75 GB
[INFO] [SUB] [hellofx.hellofx:3374]    (objects):  23,952.72 ms,  4.75 GB
[INFO] [SUB] [hellofx.hellofx:3374]   (features):   2,950.68 ms,  4.75 GB
[INFO] [SUB] [hellofx.hellofx:3374]     analysis:  54,112.42 ms,  4.75 GB
[INFO] [SUB] [hellofx.hellofx:3374]     universe:   1,903.63 ms,  4.75 GB
[INFO] [SUB] [hellofx.hellofx:3374]      (parse):   6,064.08 ms,  5.06 GB
[INFO] [SUB] [hellofx.hellofx:3374]     (inline):  13,531.61 ms,  5.78 GB
[INFO] [SUB] [hellofx.hellofx:3374]    (compile):  52,150.30 ms,  5.71 GB
[INFO] [SUB] [hellofx.hellofx:3374]    (bitcode):   3,122.43 ms,  5.71 GB
[INFO] [SUB] [hellofx.hellofx:3374]    (prelink):  14,080.96 ms,  5.71 GB
[INFO] [SUB] [hellofx.hellofx:3374]       (llvm): 112,011.52 ms,  5.65 GB
[INFO] [SUB] [hellofx.hellofx:3374]   (postlink):   7,265.98 ms,  5.65 GB
[INFO] [SUB] [hellofx.hellofx:3374]      compile: 208,869.95 ms,  5.65 GB
[INFO] [SUB] [hellofx.hellofx:3374]        image:  12,751.53 ms,  5.56 GB
[INFO] [SUB] [hellofx.hellofx:3374]        write:   2,411.88 ms,  5.56 GB
[INFO] [SUB] [hellofx.hellofx:3374]      [total]: 286,614.27 ms,  5.56 GB
[INFO] ------------------------------------------------------------------------
[INFO] BUILD SUCCESS
[INFO] ------------------------------------------------------------------------
And as a result, hellofx.hellofx.o is created and can be found under target/client/arm64-ios/gvm/tmp/SVM-*/hellofx.hellofx.o.
Run mvn -Pios client:link to produce the native image. As a result, target/client/arm64-ios/hellofx.app is created.
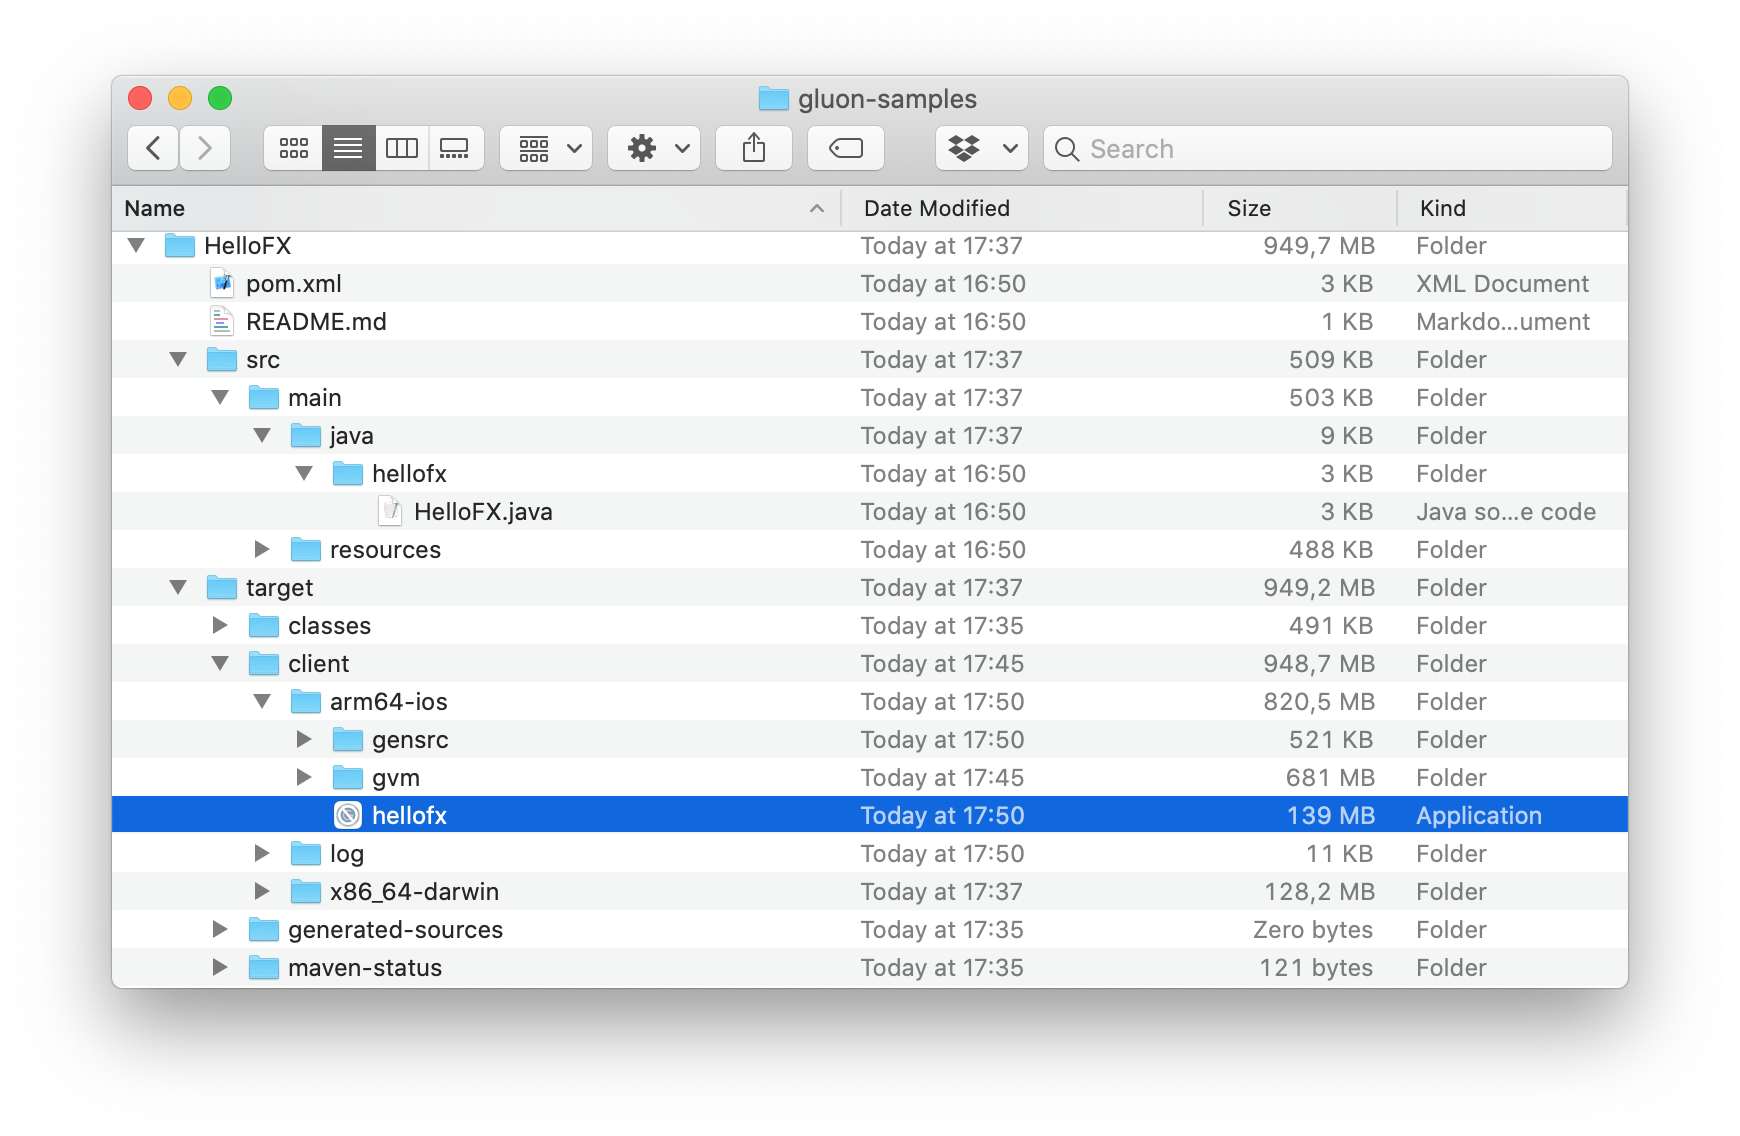
Now it can be deployed to a plugged iOS device with mvn -Pios client:run.
Target: Android
|
Note
|
This requires an Android device that has to be plugged in at the run phase. |
On a Linux machine, use the android profile, and run mvn -Pandroid client:compile, that produces the following output:
[INFO] --- client-maven-plugin:0.1.33:compile (default-cli) @ hellofx ---
[INFO] ==================== COMPILE TASK ====================
[INFO] We will now compile your code for aarch64-linux-android. This may take some time.
[INFO] [SUB] [hellofx.hellofx:9119]    classlist:   3,089.42 ms,  0.96 GB
[INFO] [SUB] [hellofx.hellofx:9119]        (cap):     328.79 ms,  0.96 GB
[INFO] [SUB] [hellofx.hellofx:9119]        setup:   2,140.79 ms,  0.96 GB
[INFO] [SUB] WARNING GR-10238: VarHandle for static field is currently not fully supported. Static field private static volatile java.lang.System$Logger jdk.internal.event.EventHelper.securityLogger is not properly marked for Unsafe access!
[INFO] [SUB] [hellofx.hellofx:9119]     (clinit):     991.74 ms,  4.62 GB
[INFO] [SUB] [hellofx.hellofx:9119]   (typeflow):  16,071.52 ms,  4.62 GB
[INFO] [SUB] [hellofx.hellofx:9119]    (objects):  17,823.50 ms,  4.62 GB
[INFO] [SUB] [hellofx.hellofx:9119]   (features):   2,687.95 ms,  4.62 GB
[INFO] [SUB] [hellofx.hellofx:9119]     analysis:  38,896.58 ms,  4.62 GB
[INFO] [SUB] [hellofx.hellofx:9119]     universe:   1,839.74 ms,  4.62 GB
[INFO] [SUB] [hellofx.hellofx:9119]      (parse):   6,003.11 ms,  4.96 GB
[INFO] [SUB] [hellofx.hellofx:9119]     (inline):   8,276.27 ms,  5.90 GB
[INFO] [SUB] [hellofx.hellofx:9119]    (compile):  43,421.83 ms,  5.86 GB
[INFO] [SUB] [hellofx.hellofx:9119]      compile:  60,386.00 ms,  5.86 GB
[INFO] [SUB] [hellofx.hellofx:9119]        image:   7,353.86 ms,  5.90 GB
[INFO] [SUB] [hellofx.hellofx:9119]        write:     593.95 ms,  5.90 GB
[INFO] [SUB] [hellofx.hellofx:9119]      [total]: 114,908.43 ms,  5.90 GB
[INFO] ------------------------------------------------------------------------
[INFO] BUILD SUCCESS
[INFO] ------------------------------------------------------------------------
And as a result, hellofx.hellofx.o is created and can be found under target/client/aarch64-android/gvm/tmp/SVM-*/hellofx.hellofx.o.
Note that the process takes some time. There will be performance improvements, but either way, it is convenient to test first on desktop (and with HotSpot) as much as possible (i.e. with mvn javafx:run), so client:compile doesn’t have to be repeated due to avoidable errors.
Run mvn -Pandroid client:link to produce the native image. As a result, target/client/aarch64-android/libhellofx.so is created.
Finally, run mvn -Pandroid client:package to bundle the application into an Android APK that can be installed on a device.
It produces the following output:
[INFO] --- client-maven-plugin:{client-maven-plugin-version}:package (default-cli) @ hellofx ---
[INFO] ==================== PACKAGE TASK ====================
[INFO] Default Android manifest generated in ~/Gluon/gluon-samples/HelloFX/target/client/aarch64-android/gensrc/android/AndroidManifest.xml.
Consider copying it to ~/Gluon/gluon-samples/HelloFX/src/android/AndroidManifest.xml before performing any modification
[INFO] Default Android resources generated in ~/Gluon/gluon-samples/HelloFX/target/client/aarch64-android/gensrc/android/res.
Consider copying them to ~/Gluon/gluon-samples/HelloFX/src/android/res before performing any modification
[INFO] ------------------------------------------------------------------------
[INFO] BUILD SUCCESS
[INFO] ------------------------------------------------------------------------
This creates the apk package which is available at target/client/aarch64-android/gvm/hellofx.apk.
Now we are ready to install and run the application on a plugged-in Android device. Run mvn -Pandroid client:install client:run to
install and launch the application on the device.
3.4. Configuration
|
Note
|
This is for advanced users. |
The plugin allows some customization to modify the default settings, which are:
<plugin>
    <groupId>com.gluonhq</groupId>
    <artifactId>client-maven-plugin</artifactId>
    <version>0.1.33</version>
    <configuration>
        <target>host</target>
        <mainClass>your.mainClass</mainClass>
        <bundlesList></bundlesList>
        <resourcesList></resourcesList>
        <reflectionList></reflectionList>
        <jniList></jniList>
        <attachList></attachList>
        <nativeImageArgs></nativeImageArgs>
        <verbose>false</verbose>
        <graalvmHome></graalvmHome>
        <javaStaticSdkVersion>11_ea+1</javaStaticSdkVersion>
        <javafxStaticSdkVersion>11_ea+1</javafxStaticSdkVersion>
        <enableSWRendering>false</enableSWRendering>
        <releaseConfiguration>
            <!-- Android -->
            <appLabel></appLabel>
            <versionCode>1</versionCode>
            <versionName>1.0</versionName>
            <providedKeyStorePath>${android-keystore-path}</providedKeyStorePath>
            <providedKeyStorePassword>${android-keystore-password}</providedKeyStorePassword>
            <providedKeyAlias>${android-key-alias}</providedKeyAlias>
            <providedKeyAliasPassword>${android-key-password}</providedKeyAliasPassword>
            <!-- iOS -->
            <bundleName></bundleName>
            <bundleVersion>1.0</bundleVersion>
            <bundleShortVersion>1.0</bundleShortVersion>
            <providedSigningIdentity></providedSigningIdentity>
            <providedProvisioningProfile></providedProvisioningProfile>
            <skipSigning>false</skipSigning>
        </releaseConfiguration>
    </configuration>
</plugin>
3.4.1. target
A string that defines the target platform. The default is host, which refers to the platform that currently hosts the process.
It can be set also to ios to create native images for iOS devices (Aarch64), or android to create native images for Android devices (Aarch64).
Default: host
3.4.2. bundlesList
List of fully qualified resource bundles that will be added to the default list of resource bundles. By default, the list already includes the JavaFX bundles, like:
-
com/sun/javafx/scene/control/skin/resources/controls -
com/sun/javafx/scene/control/skin/resources/controls-nt -
com.sun.javafx.tk.quantum.QuantumMessagesBundle
For more advanced usage, read the Resource bundles section.
3.4.3. resourcesList
List of additional resource patterns or extensions that will be added to the default resource list that already includes:
-
png,jpg,jpeg,gif,bmp,ttf,raw -
xml,fxml,css,gls,json,dat, -
license,frag,vert,obj
We keep adding extensions to this list. Please check the source code for the latest list.
For more advanced usage, read the Resources section.
3.4.4. reflectionList
List of additional full qualified classes that will be added to the default reflection list, that already includes most of the JavaFX classes.
Note: The current list is added to a file that can be found under target/client/$arch-$os/gvm/reflectionconfig-$arch-$os.json.
For more advanced usage, read the JNI and Reflection section.
3.4.5. jniList
List of additional full qualified classes that will be added to the default jni list, that already includes most of the JavaFX classes.
Note: The current list is added to a file that can be found under target/client/$arch-$os/gvm/jniconfig-$arch-$os.json.
For more advanced usage, read the JNI and Reflection section.
3.4.6. attachList
If you want to include Gluon Attach services to your project, you can use attachList to including the name of the services, like:
<!-- dependencies -->
<dependency>
    <groupId>com.gluonhq.attach</groupId>
    <artifactId>display</artifactId>
    <version>4.0.9</version>
</dependency>

<!-- plugin -->
<configuration>
    <attachList>
        <list>display</list>
    </attachList>
</configuration>
By default the attachVersion is 4.0.9.
After saving the changes, the dependencies for the defined services will be resolved to include those for defined target, and when the native compile goal is executed, the native services implementations will be added to the reflection and JNI lists.
Note: Attach platform implementations will be added only to the goals of the Client plugin, but not to the JavaFX plugin. It is convenient to use Maven profiles to overcome this issue.
3.4.7. nativeImageArgs
List of additional arguments that will be added to the native image creation.
3.4.8. verbose
Set to true will generate a more verbose output to the console, useful when having errors, to identify possible issues.
Also, you can get a more verbose output for these goals running with -X:
mvn -X client:compile
Default: false
Note: Regardless the verbose value, the full logs can be found under target/client/$arch-$os/gmv/log.
3.4.9. graalvmHome
Path to GraalVM installation directory. This is only required when GRAALVM_HOME is not set.
Since: 0.1.3
3.4.10. javaStaticSdkVersion
The version of the Java static libraries. These will be located under: ~/.gluon/substrate/javaStaticSdk/$javaStaticSdkVersion/$target-$arch/labs-staticjdk/lib.
Default: 11_ea+1
3.4.11. javafxStaticSdkVersion
The version of the JavaFX SDK and its static libraries. These will be located under: ~/.gluon/substrate/javafxStaticSdk/$javaStaticSdkVersion/$target-$arch/sdk/lib.
Default: 15_ea+gvm23
3.4.12. Software Rendering
JavaFX applications can use software rendering when the graphics hardware on a system is insufficient to support hardware accelerated rendering.
To enable software rendering set the enableSWRendering parameter to true in plugin configuration.
Note: Enabling software rendering will result in a longer compile time and larger native image.
Default: false
Since: 0.1.14
3.5. Config files
Some configuration options can alternatively be defined in configuration files instead of the configuration section of the plugin.
All the configuration files detailed below must be placed in the same folder named src/main/resources/META-INF/substrate/config.
When building the application, the plugin will also inspect every jar dependency for the existence of these configuration files. The
files in the jar should be placed in the same folder: META-INF/substrate/config.
3.5.1. JNI and Reflection
For every class that is defined in jniList or reflectionList, it is included in the configuration files
target/client/$arch-$os/gvm/jniconfig-$arch-$os.json and target/client/$arch-$os/gvm/reflectionconfig-$arch-$os.json respectively,
with a definition like the following:
[
  {
    "name" : "package.name.ClassName",
    "allDeclaredConstructors" : true,
    "allPublicConstructors" : true,
    "allDeclaredFields" : true,
    "allPublicFields" : true,
    "allDeclaredMethods" : true,
    "allPublicMethods" : true
  }
]
This has an impact on both compilation time and memory footprint, because all methods and fields are opened. Ideally, it is better to open only the minimal list of fields and methods that are required for your application to run.
You can create the following files:
-
jniconfig.jsonand/orreflectionconfig.json: these are applied to all targets -
jniconfig-$arch-$os.jsonand/orreflectionconfig-$arch-$os.json: these are only applied to targets that match both the architecture and operating system. For example, specifying reflection configuration for linux 64bit can be achieved by creating a file calledreflectionconfig-x86_64-linux.json.
The files must contain the fully qualified name of classes, together with some attributes (like allDeclaredFields), methods and/or fields that will be invoked via reflection and that are not already part of the list.
For instance, the configuration below only adds the method named
valueOf of the MaterialDesignIcon class to the final reflection configuration:
[
  {
    "name":"com.gluonhq.charm.glisten.visual.MaterialDesignIcon",
    "methods":[
      {"name":"valueOf","parameterTypes":["java.lang.String"] }
    ]
  }
]
For more information, see Reflection use in Native Images.
3.5.2. Resources
The resourcesList configuration option can also be defined in a configuration file:
-
resourceconfig.json: applied to all targets -
resourceconfig-$arch-$os.json: only applied to targets that match the given architecture and operating system
For more information, see Accessing resources in Native Images.
For instance, the configuration below includes a pattern to load all *.txt files found:
[
  {
  "resources": [
    {"pattern": ".*\\.txt$"}
  ]
  }
]
3.5.3. Resource bundles
The bundlesList configuration option can also be defined in a configuration file:
-
resourcebundles.json: applied to all targets -
resourcebundles-$arch-$os.json: only applied to targets that match the given architecture and operating system
For instance, below are the fully qualified name of two given resource bundles that will be included:
com.mycompany.myproject.mybundle1
com.mycompany.myproject.mybundle2
3.5.4. Build time initialization
If you need to set a class or list of classed to be initialized at build time, you can add their fully qualified name to the following configuration files:
-
initbuildtime: applied to all targets -
initbuildtime-$arch-$os: only applied to targets that match the given architecture and operating system
This can be especially convenient for enums that have a large list of values.
For more information, see Class initialization in Native Image.
3.6. Release Configuration
These options allow setting release parameters for Android and iOS.
3.6.1. Android
appLabel
A user-visible short name for the app, if not set, the Maven project’s name will be used.
versionCode
A positive integer used as an internal version number, by default is set to 1.
versionName
A string used as the version number shown to users, like <major>.<minor>.<point>. By default is 1.0.
Signing for release:
If these 4 parameters are not set, the app will be signed for debug only.
-
providedKeyStorePath: A string with the path to a keystore file that can be used to sign the Android apk -
providedKeyStorePassword: A string with the password of the provide keystore file -
providedKeyAlias: A string with an identifying name for the key -
providedKeyAliasPassword: A string with a password for the key
Note that it can be convenient to define the values for these options in the ~/.m2/settings.xml file, using Maven profiles.
3.6.2. iOS
bundleName
A user-visible short name for the bundle. If not set, the Maven project’s name will be used.
bundleVersion
The version of the build that identifies an iteration of the bundle. A string composed of one to three period-separated integers, containing numeric characters (0-9) and periods only. Default 1.0.
bundleShortVersion
A user-visible string for the release or version number of the bundle. A string composed of one to three period-separated integers, containing numeric characters (0-9) and periods only. Default 1.0.
Signing for development or distribution
-
providedSigningIdentity: String that identifies a valid certificate that will be used for iOS development or iOS distribution. -
providedProvisioningProfile: String with the name of the provisioning profile created for iOS. When not provided, the plugin will be selected from all the valid identities found installed on the machine from any of these types:iPhone Developer|Apple Development|iOS Development|iPhone Distribution
and that were used by the provisioning profile development or distribution of the given app. When not provided, the plugin will try to find a valid installed provisioning profile that can be used to sign the app, including wildcards.
skipSigning
Boolean that can be used to skip signing iOS apps. This will prevent any deployment, but can be useful to run tests without an actual device.
3.7. HelloFXML Sample
Let’s run now HelloFXML, a JavaFX application with FXML to illustrate how to use the extended options and customize the plugin configuration.
In this case, we need to add the resource bundle of the project. we need to add the controller from this file to the reflection list.
public class HelloFXML extends Application {

    @Override
    public void start(Stage stage) throws IOException {
        AnchorPane root = FXMLLoader.load(HelloFXML.class.getResource("hello.fxml"),
                ResourceBundle.getBundle("hellofx.hello"));
        Scene scene = new Scene(root, 640, 480);
        stage.setScene(scene);
        stage.show();
    }

    public static void main(String[] args) {
        launch(args);
    }
}<?xml version="1.0" encoding="UTF-8"?>
<project xmlns="http://maven.apache.org/POM/4.0.0" xmlns:xsi="http://www.w3.org/2001/XMLSchema-instance" xsi:schemaLocation="http://maven.apache.org/POM/4.0.0 http://maven.apache.org/xsd/maven-4.0.0.xsd">
<modelVersion>4.0.0</modelVersion>
<groupId>com.gluonhq.samples</groupId>
<artifactId>hellofxml</artifactId>
<version>1.0.0-SNAPSHOT</version>
<packaging>jar</packaging>
<name>hellofxml</name>
<properties>
<project.build.sourceEncoding>UTF-8</project.build.sourceEncoding>
<maven.compiler.release>11</maven.compiler.release>
<javafx.version>15</javafx.version>
<client.maven.plugin.version>3.8.1</client.maven.plugin.version>
<main.class>hellofx.HelloFXML</main.class>
</properties>
<dependencies>
<dependency>
<groupId>org.openjfx</groupId>
<artifactId>javafx-controls</artifactId>
<version>${javafx.version}</version>
</dependency>
<dependency>
<groupId>org.openjfx</groupId>
<artifactId>javafx-fxml</artifactId>
<version>${javafx.version}</version>
</dependency>
</dependencies>
<build>
<plugins>
<plugin>
<groupId>org.apache.maven.plugins</groupId>
<artifactId>maven-compiler-plugin</artifactId>
<version>3.8.1</version>
</plugin>
<plugin>
<groupId>org.openjfx</groupId>
<artifactId>javafx-maven-plugin</artifactId>
<version>0.0.5</version>
<configuration>
<mainClass>${main.class}</mainClass>
</configuration>
</plugin>
<plugin>
<groupId>com.gluonhq</groupId>
<artifactId>client-maven-plugin</artifactId>
<version>${client.maven.plugin.version}</version>
<configuration>
<target>${client.target}</target>
<mainClass>${main.class}</mainClass>
<bundlesList>
<list>hellofx.hello</list>
</bundlesList>
<reflectionList>
<list>hellofx.HelloController</list>
</reflectionList>
</configuration>
</plugin>
</plugins>
</build>
</project>Run the application first to make sure everything works on Java 11:
mvn clean javafx:run
Then compile and link the application by using the client:build goal. The commands below are run on a Linux host,
but the procedures for the other targets are exactly the same as explained in the HelloWorld and HelloFX samples above.
This is the output of running mvn client:build:
[INFO] --- client-maven-plugin:0.1.33:compile (default-cli) @ hellofxml ---
[INFO] ==================== COMPILE TASK ====================
[INFO] We will now compile your code for x86_64-linux-linux. This may take some time.
[INFO] [SUB] [hellofx.hellofxml:9232]    classlist:   5,354.99 ms,  0.96 GB
[INFO] [SUB] [hellofx.hellofxml:9232]        (cap):   1,612.39 ms,  0.96 GB
[INFO] [SUB] [hellofx.hellofxml:9232]        setup:   3,768.22 ms,  0.96 GB
[INFO] [SUB] [hellofx.hellofxml:9232]     (clinit):     860.00 ms,  4.98 GB
[INFO] [SUB] [hellofx.hellofxml:9232]   (typeflow):  17,555.56 ms,  4.98 GB
[INFO] [SUB] [hellofx.hellofxml:9232]    (objects):  23,901.17 ms,  4.98 GB
[INFO] [SUB] [hellofx.hellofxml:9232]   (features):   2,382.18 ms,  4.98 GB
[INFO] [SUB] [hellofx.hellofxml:9232]     analysis:  46,139.81 ms,  4.98 GB
[INFO] [SUB] [hellofx.hellofxml:9232]     universe:   1,358.51 ms,  4.98 GB
[INFO] [SUB] [hellofx.hellofxml:9232]      (parse):   4,111.39 ms,  4.79 GB
[INFO] [SUB] [hellofx.hellofxml:9232]     (inline):   5,644.07 ms,  5.34 GB
[INFO] [SUB] [hellofx.hellofxml:9232]    (compile):  28,107.47 ms,  5.70 GB
[INFO] [SUB] [hellofx.hellofxml:9232]      compile:  40,347.10 ms,  5.70 GB
[INFO] [SUB] [hellofx.hellofxml:9232]        image:   4,340.70 ms,  5.64 GB
[INFO] [SUB] [hellofx.hellofxml:9232]        write:     386.82 ms,  5.64 GB
[INFO] [SUB] [hellofx.hellofxml:9232]      [total]: 102,193.22 ms,  5.64 GB
[INFO]
[INFO] --- client-maven-plugin:0.1.33:link (default-cli) @ hellofxml ---
[INFO] ==================== LINK TASK ====================
[INFO] ------------------------------------------------------------------------
[INFO] BUILD SUCCESS
[INFO] ------------------------------------------------------------------------
The executable has been created at target/client/${arch}-${os}. For desktop targets, the application
can be executed directly or through maven by running mvn client:run.
For mobile targets, you can
run mvn -Pandroid client:build client:package client:install client:run for Android and mvn -Pios client:build client:run for iOS.
3.8. HelloGluon Sample
Time now to run HelloGluon, a Gluon Mobile application to illustrate how to use the extended options and customize the plugin extension gluonClient.
In this case, we need to add some Gluon Attach services like Storage or Display, and for that we’ll use attachList.
public class HelloGluon extends MobileApplication {

    @Override
    public void init() {
        addViewFactory(HOME_VIEW, () -> {
            FloatingActionButton fab = new FloatingActionButton(MaterialDesignIcon.SEARCH.text,
                    e -> System.out.println("Search"));

            ImageView imageView = new ImageView(new Image(HelloGluon.class.getResourceAsStream("openduke.png")));
            imageView.setFitHeight(200);
            imageView.setPreserveRatio(true);

            Label label = new Label("Hello, Gluon Mobile!");
            VBox root = new VBox(20, imageView, label);
            root.setAlignment(Pos.CENTER);

            View view = new View(root) {
                @Override
                protected void updateAppBar(AppBar appBar) {
                    appBar.setTitleText("Gluon Mobile");
                }
            };

            fab.showOn(view);
            return view;
        });
    }

    @Override
    public void postInit(Scene scene) {
        Swatch.LIGHT_GREEN.assignTo(scene);
        scene.getStylesheets().add(HelloGluon.class.getResource("styles.css").toExternalForm());

        if (Platform.isDesktop()) {
            Dimension2D dimension2D = DisplayService.create()
                    .map(DisplayService::getDefaultDimensions)
                    .orElse(new Dimension2D(640, 480));
            scene.getWindow().setWidth(dimension2D.getWidth());
            scene.getWindow().setHeight(dimension2D.getHeight());
        }
    }

    public static void main(String[] args) {
        launch();
    }
}<?xml version="1.0" encoding="UTF-8"?>
<project xmlns="http://maven.apache.org/POM/4.0.0" xmlns:xsi="http://www.w3.org/2001/XMLSchema-instance" xsi:schemaLocation="http://maven.apache.org/POM/4.0.0 http://maven.apache.org/xsd/maven-4.0.0.xsd">
<modelVersion>4.0.0</modelVersion>
<groupId>com.gluonhq.samples</groupId>
<artifactId>hellogluon</artifactId>
<version>1.0.0-SNAPSHOT</version>
<packaging>jar</packaging>
<name>hellogluon</name>
<properties>
<project.build.sourceEncoding>UTF-8</project.build.sourceEncoding>
<maven.compiler.release>11</maven.compiler.release>
<javafx.version>15</javafx.version>
<charm.version>6.0.5</charm.version>
<attach.version>4.0.9</attach.version>
<client.maven.plugin.version>3.8.1</client.maven.plugin.version>
<main.class>om.gluonhq.hello.HelloGluon</main.class>
</properties>
<dependencies>
<dependency>
<groupId>org.openjfx</groupId>
<artifactId>javafx-controls</artifactId>
<version>${javafx.version}</version>
</dependency>
<dependency>
<groupId>com.gluonhq</groupId>
<artifactId>charm-glisten</artifactId>
<version>${charm.version}</version>
</dependency>
<dependency>
<groupId>com.gluonhq.attach</groupId>
<artifactId>display</artifactId>
<version>${attach.version}</version>
</dependency>
<dependency>
<groupId>com.gluonhq.attach</groupId>
<artifactId>lifecycle</artifactId>
<version>${attach.version}</version>
</dependency>
<dependency>
<groupId>com.gluonhq.attach</groupId>
<artifactId>statusbar</artifactId>
<version>${attach.version}</version>
</dependency>
<dependency>
<groupId>com.gluonhq.attach</groupId>
<artifactId>storage</artifactId>
<version>${attach.version}</version>
</dependency>
<dependency>
<groupId>com.gluonhq.attach</groupId>
<artifactId>util</artifactId>
<version>${attach.version}</version>
</dependency>
</dependencies>
<repositories>
<repository>
<id>Gluon</id>
<url>https://nexus.gluonhq.com/nexus/content/repositories/releases</url>
</repository>
</repositories>
<build>
<plugins>
<plugin>
<groupId>org.apache.maven.plugins</groupId>
<artifactId>maven-compiler-plugin</artifactId>
<version>3.8.1</version>
</plugin>
<plugin>
<groupId>org.openjfx</groupId>
<artifactId>javafx-maven-plugin</artifactId>
<version>0.0.5</version>
<configuration>
<mainClass>${main.class}</mainClass>
</configuration>
</plugin>
<plugin>
<groupId>com.gluonhq</groupId>
<artifactId>client-maven-plugin</artifactId>
<version>0.1.33</version>
<configuration>
<target>${client.target}</target>
<attachList>
<list>display</list>
<list>lifecycle</list>
<list>statusbar</list>
<list>storage</list>
</attachList>
<mainClass>${main.class}</mainClass>
</configuration>
</plugin>
</plugins>
</build>
<profiles>
<profile>
<id>desktop</id>
<activation>
<activeByDefault>true</activeByDefault>
</activation>
<properties>
<client.target>host</client.target>
</properties>
<dependencies>
<dependency>
<groupId>com.gluonhq.attach</groupId>
<artifactId>display</artifactId>
<version>${attach.version}</version>
<classifier>desktop</classifier>
<scope>runtime</scope>
</dependency>
<dependency>
<groupId>com.gluonhq.attach</groupId>
<artifactId>lifecycle</artifactId>
<version>${attach.version}</version>
<classifier>desktop</classifier>
<scope>runtime</scope>
</dependency>
<dependency>
<groupId>com.gluonhq.attach</groupId>
<artifactId>storage</artifactId>
<version>${attach.version}</version>
<classifier>desktop</classifier>
<scope>runtime</scope>
</dependency>
</dependencies>
</profile>
<profile>
<id>ios</id>
<properties>
<client.target>ios</client.target>
</properties>
</profile>
<profile>
<id>android</id>
<properties>
<client.target>android</client.target>
</properties>
</profile>
</profiles>
</project>Run the application first to make sure everything works on Java 11:
mvn clean javafx:run
Note that by running the default profile, the Attach services implementation for desktop are included.
Now compile and link the application by using the client:build goal. The commands below are run on a Linux host,
but the procedures for the other targets are exactly the same as explained in the HelloWorld and HelloFX samples above.
This is the output of running mvn client:build:
[INFO] --- client-maven-plugin:0.1.33:compile (default-cli) @ hellogluon ---
[INFO] ==================== COMPILE TASK ====================
[INFO] We will now compile your code for x86_64-linux-linux. This may take some time.
[INFO] [SUB] [com.gluonhq.hello.hellogluon:15285]    classlist:   3,830.36 ms,  0.96 GB
[INFO] [SUB] [com.gluonhq.hello.hellogluon:15285]        (cap):   1,279.80 ms,  0.96 GB
[INFO] [SUB] [com.gluonhq.hello.hellogluon:15285]        setup:   3,149.33 ms,  0.96 GB
[INFO] [SUB] [com.gluonhq.hello.hellogluon:15285]     (clinit):     996.75 ms,  4.94 GB
[INFO] [SUB] [com.gluonhq.hello.hellogluon:15285]   (typeflow):  19,774.61 ms,  4.94 GB
[INFO] [SUB] [com.gluonhq.hello.hellogluon:15285]    (objects):  21,692.14 ms,  4.94 GB
[INFO] [SUB] [com.gluonhq.hello.hellogluon:15285]   (features):   2,434.42 ms,  4.94 GB
[INFO] [SUB] [com.gluonhq.hello.hellogluon:15285]     analysis:  46,901.64 ms,  4.94 GB
[INFO] [SUB] [com.gluonhq.hello.hellogluon:15285]     universe:   1,277.06 ms,  4.94 GB
[INFO] [SUB] [com.gluonhq.hello.hellogluon:15285]      (parse):   5,606.66 ms,  5.38 GB
[INFO] [SUB] [com.gluonhq.hello.hellogluon:15285]     (inline):   3,775.36 ms,  5.01 GB
[INFO] [SUB] [com.gluonhq.hello.hellogluon:15285]    (compile):  34,395.42 ms,  5.07 GB
[INFO] [SUB] [com.gluonhq.hello.hellogluon:15285]      compile:  46,357.77 ms,  5.07 GB
[INFO] [SUB] [com.gluonhq.hello.hellogluon:15285]        image:   4,758.09 ms,  5.75 GB
[INFO] [SUB] [com.gluonhq.hello.hellogluon:15285]        write:     396.24 ms,  5.75 GB
[INFO] [SUB] [com.gluonhq.hello.hellogluon:15285]      [total]: 106,989.55 ms,  5.75 GB
[INFO]
[INFO] --- client-maven-plugin:0.1.33:link (default-cli) @ hellogluon ---
[INFO] ==================== LINK TASK ====================
[INFO] ------------------------------------------------------------------------
[INFO] BUILD SUCCESS
[INFO] ------------------------------------------------------------------------
The executable has been created at target/client/${arch}-${os}. For desktop targets, the application
can be executed directly or through maven by running mvn client:run.

For mobile targets, you can
run mvn -Pandroid client:build client:package client:install client:run for Android and mvn -Pios client:build client:run for iOS.
4. iOS Deployment
If you want to test and distribute your app via the App Store, you’ll need to enroll in the Apple Developer Program. However, if you only want to test on your iOS device, you can use free provisioning.
Either way, first of all you will need a unique Apple ID.
4.1. Creating an Apple ID
In case you don’t have it yet, create an Apple ID.
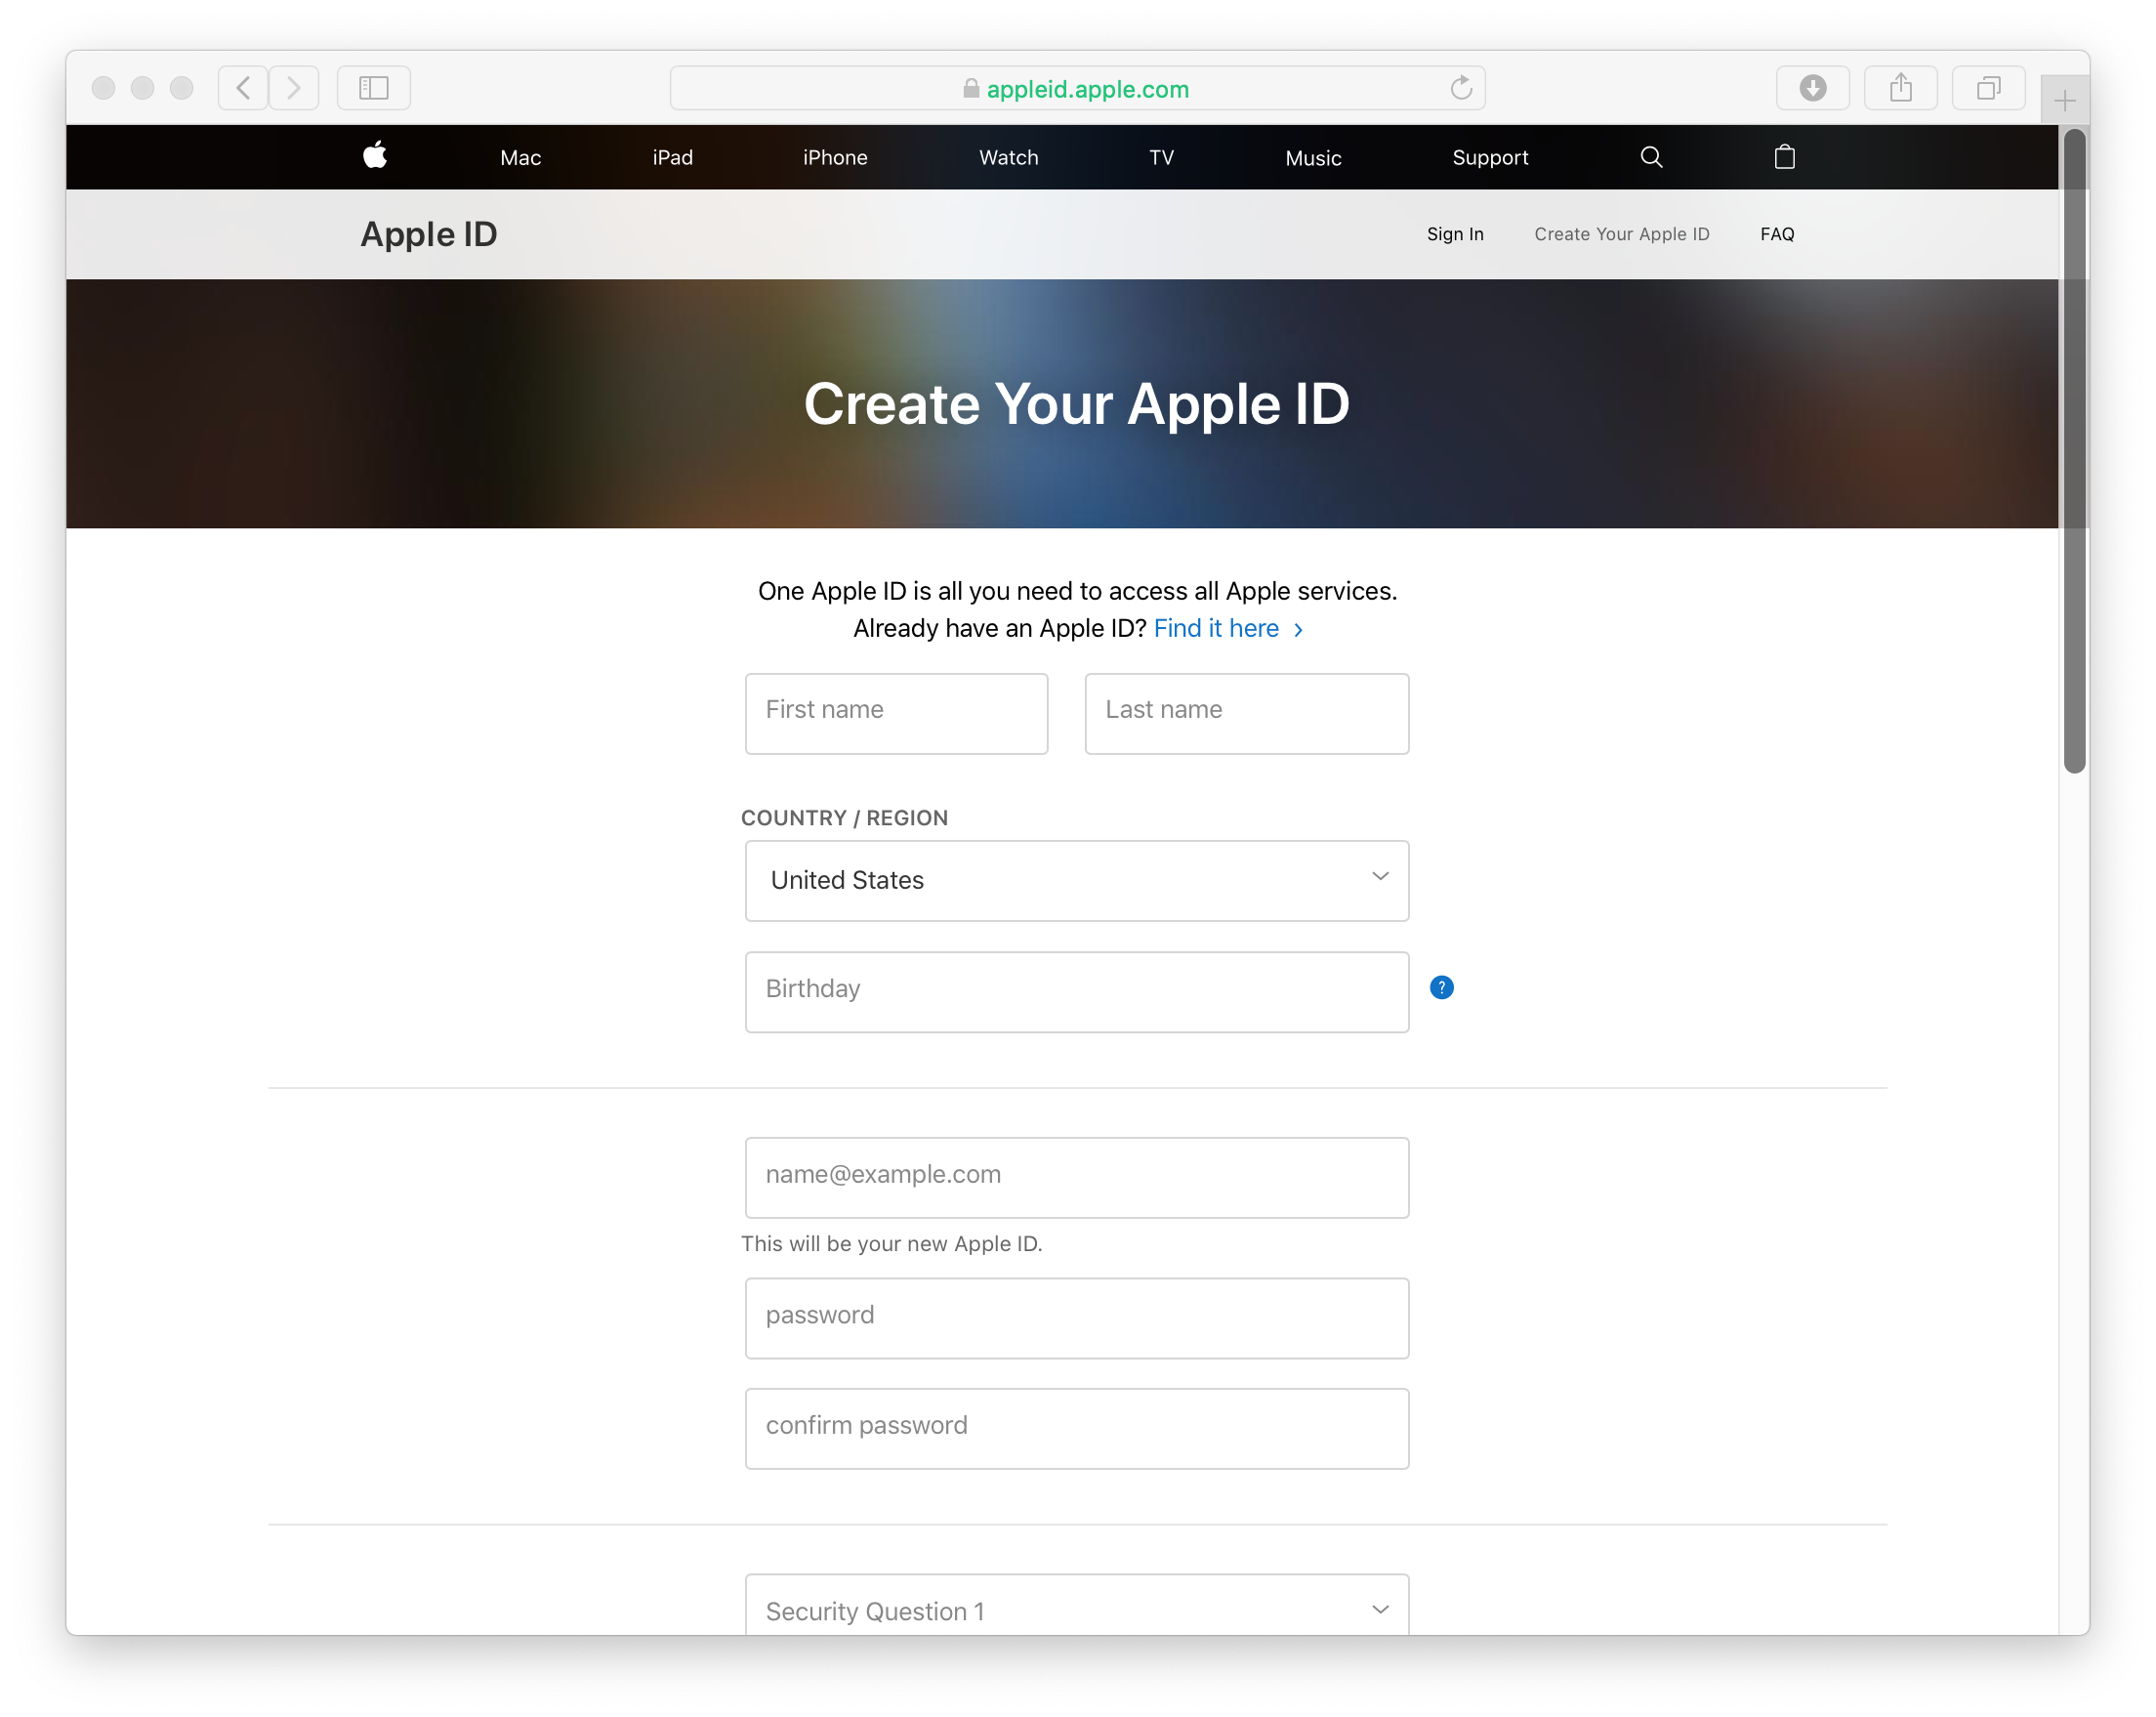
You will need a valid email account, and you will receive and email to validate and activate the Apple ID.
In case you are going to use free provisioning, this Apple ID must not be connected to the Apple Developer Program.
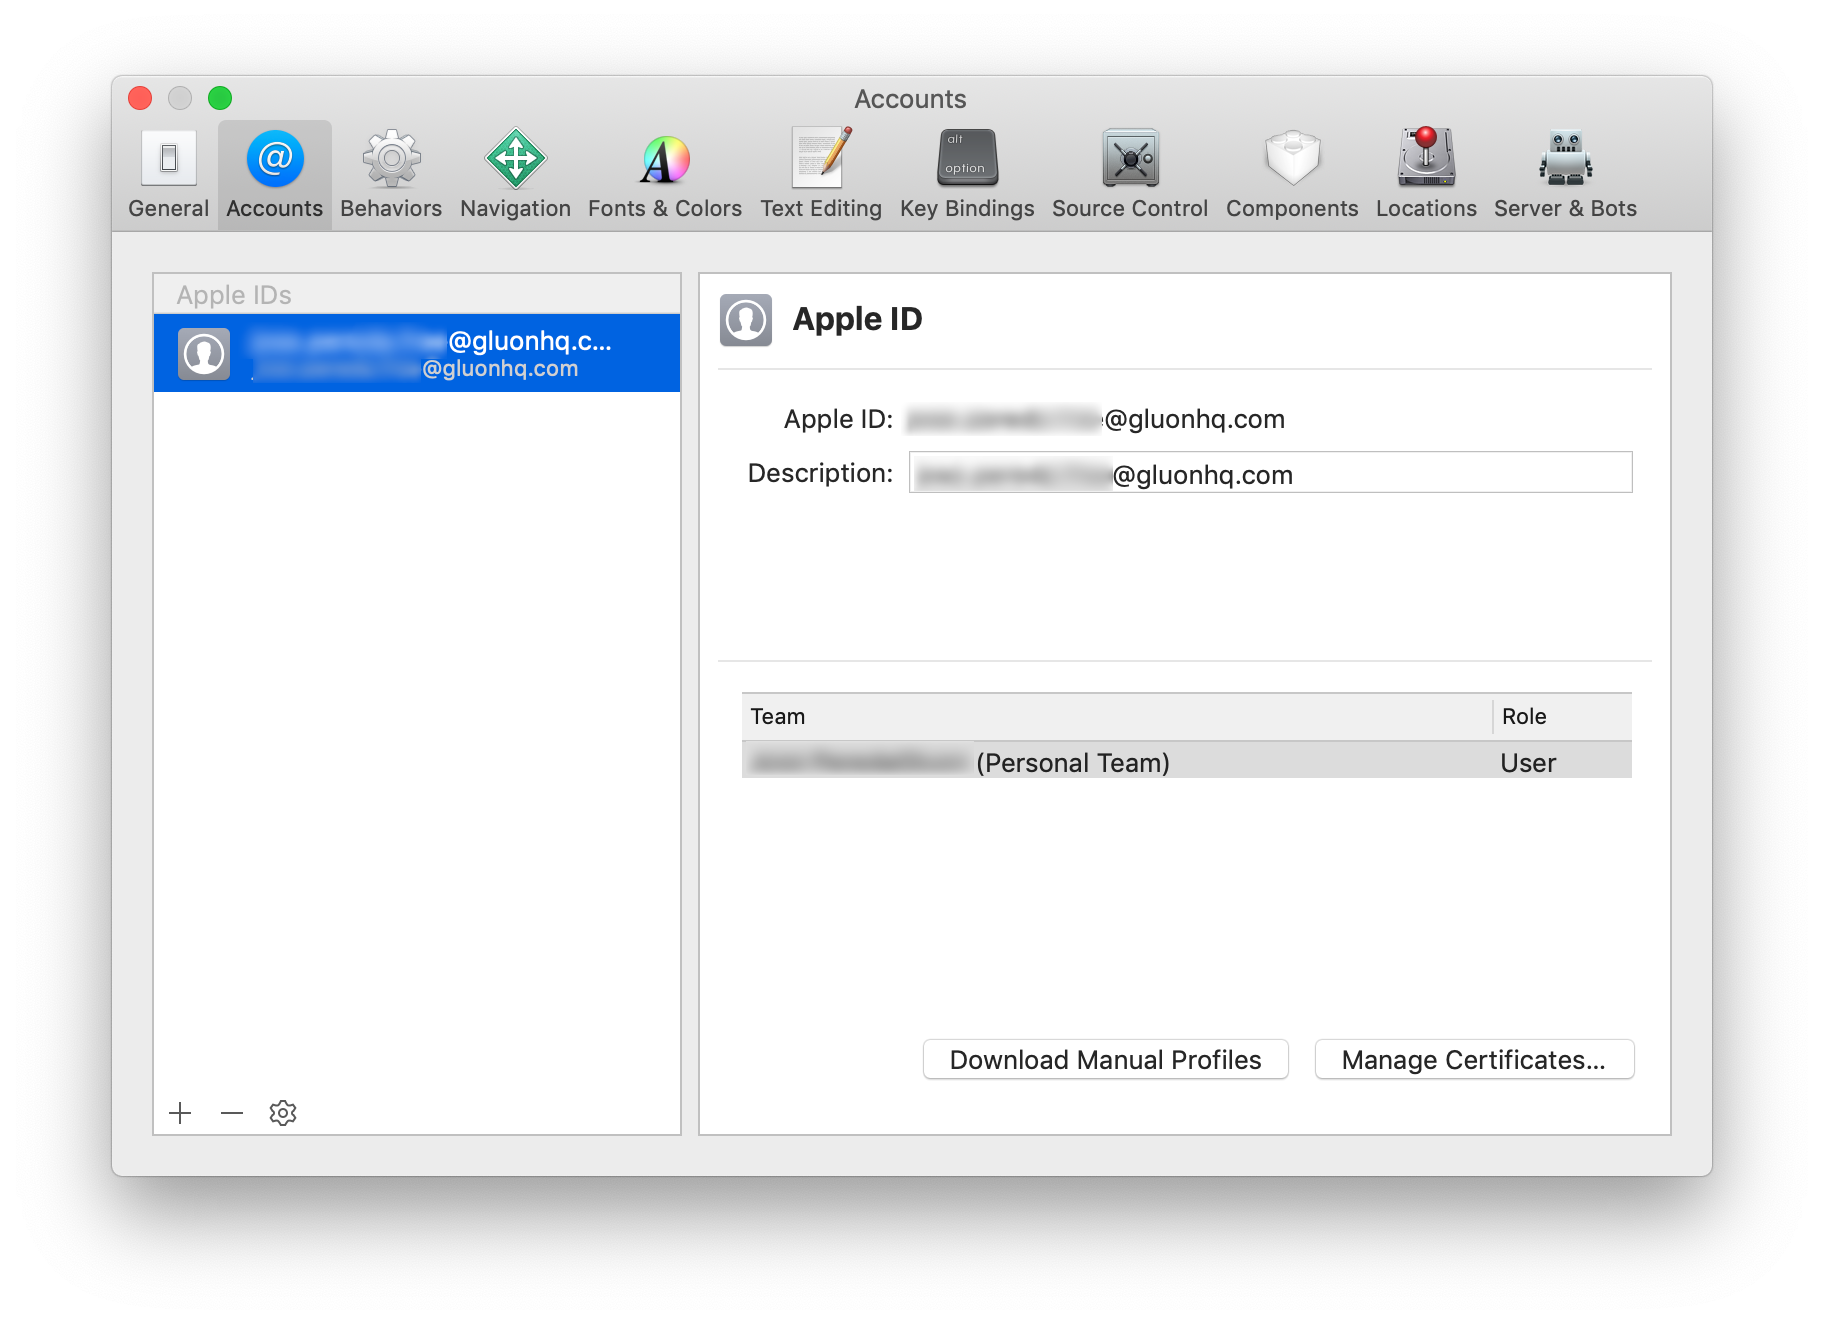
Once you have your Apple ID verified and activated, open Xcode, go to Preferences → Accounts. Press the + button at the bottom left to add an account, select `Apple ID, and include the email address used to create the Apple ID.
4.2. Xcode project
The first time you start deploying to an iOS device, you need to follow these steps, so Xcode configures properly your device for future iOS deployment.
Note: If you are using free provisioning, you will have to follow this procedure every time you create a new project.
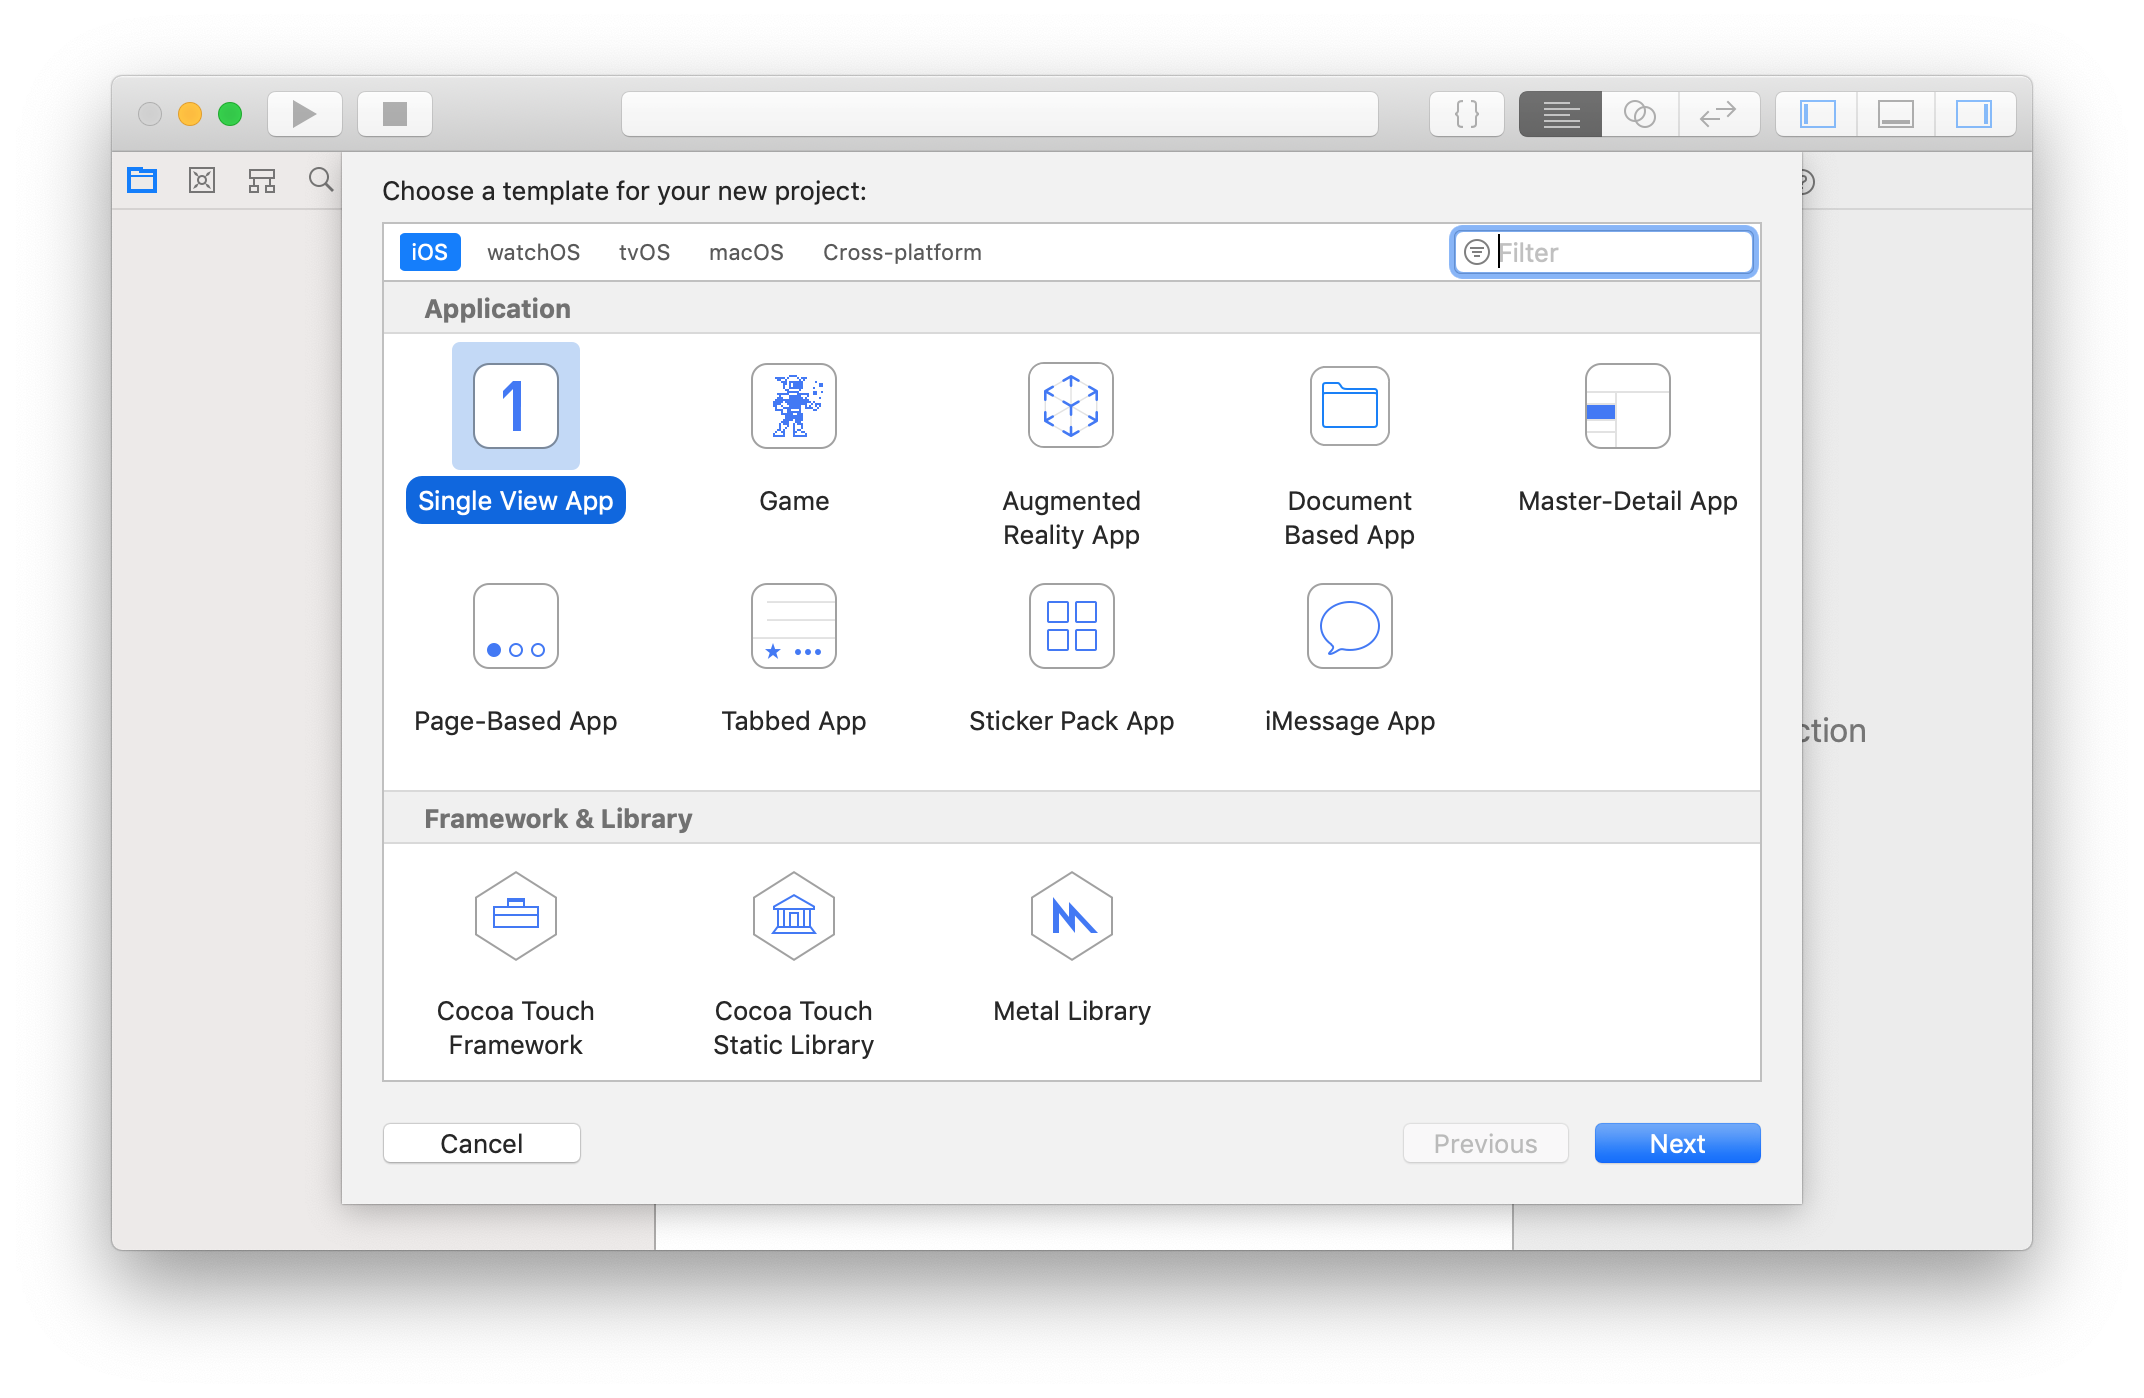
4.2.1. Create an empty Xcode project
Open Xcode and go to File → New → Project…, and select a simple template for iOS, like Single View App.
Name and bundle
Provide a name and a bundle ID to the project.
Note: if you are using free provisioning, the bundle ID must match the one defined in your Java project (or the other way around).
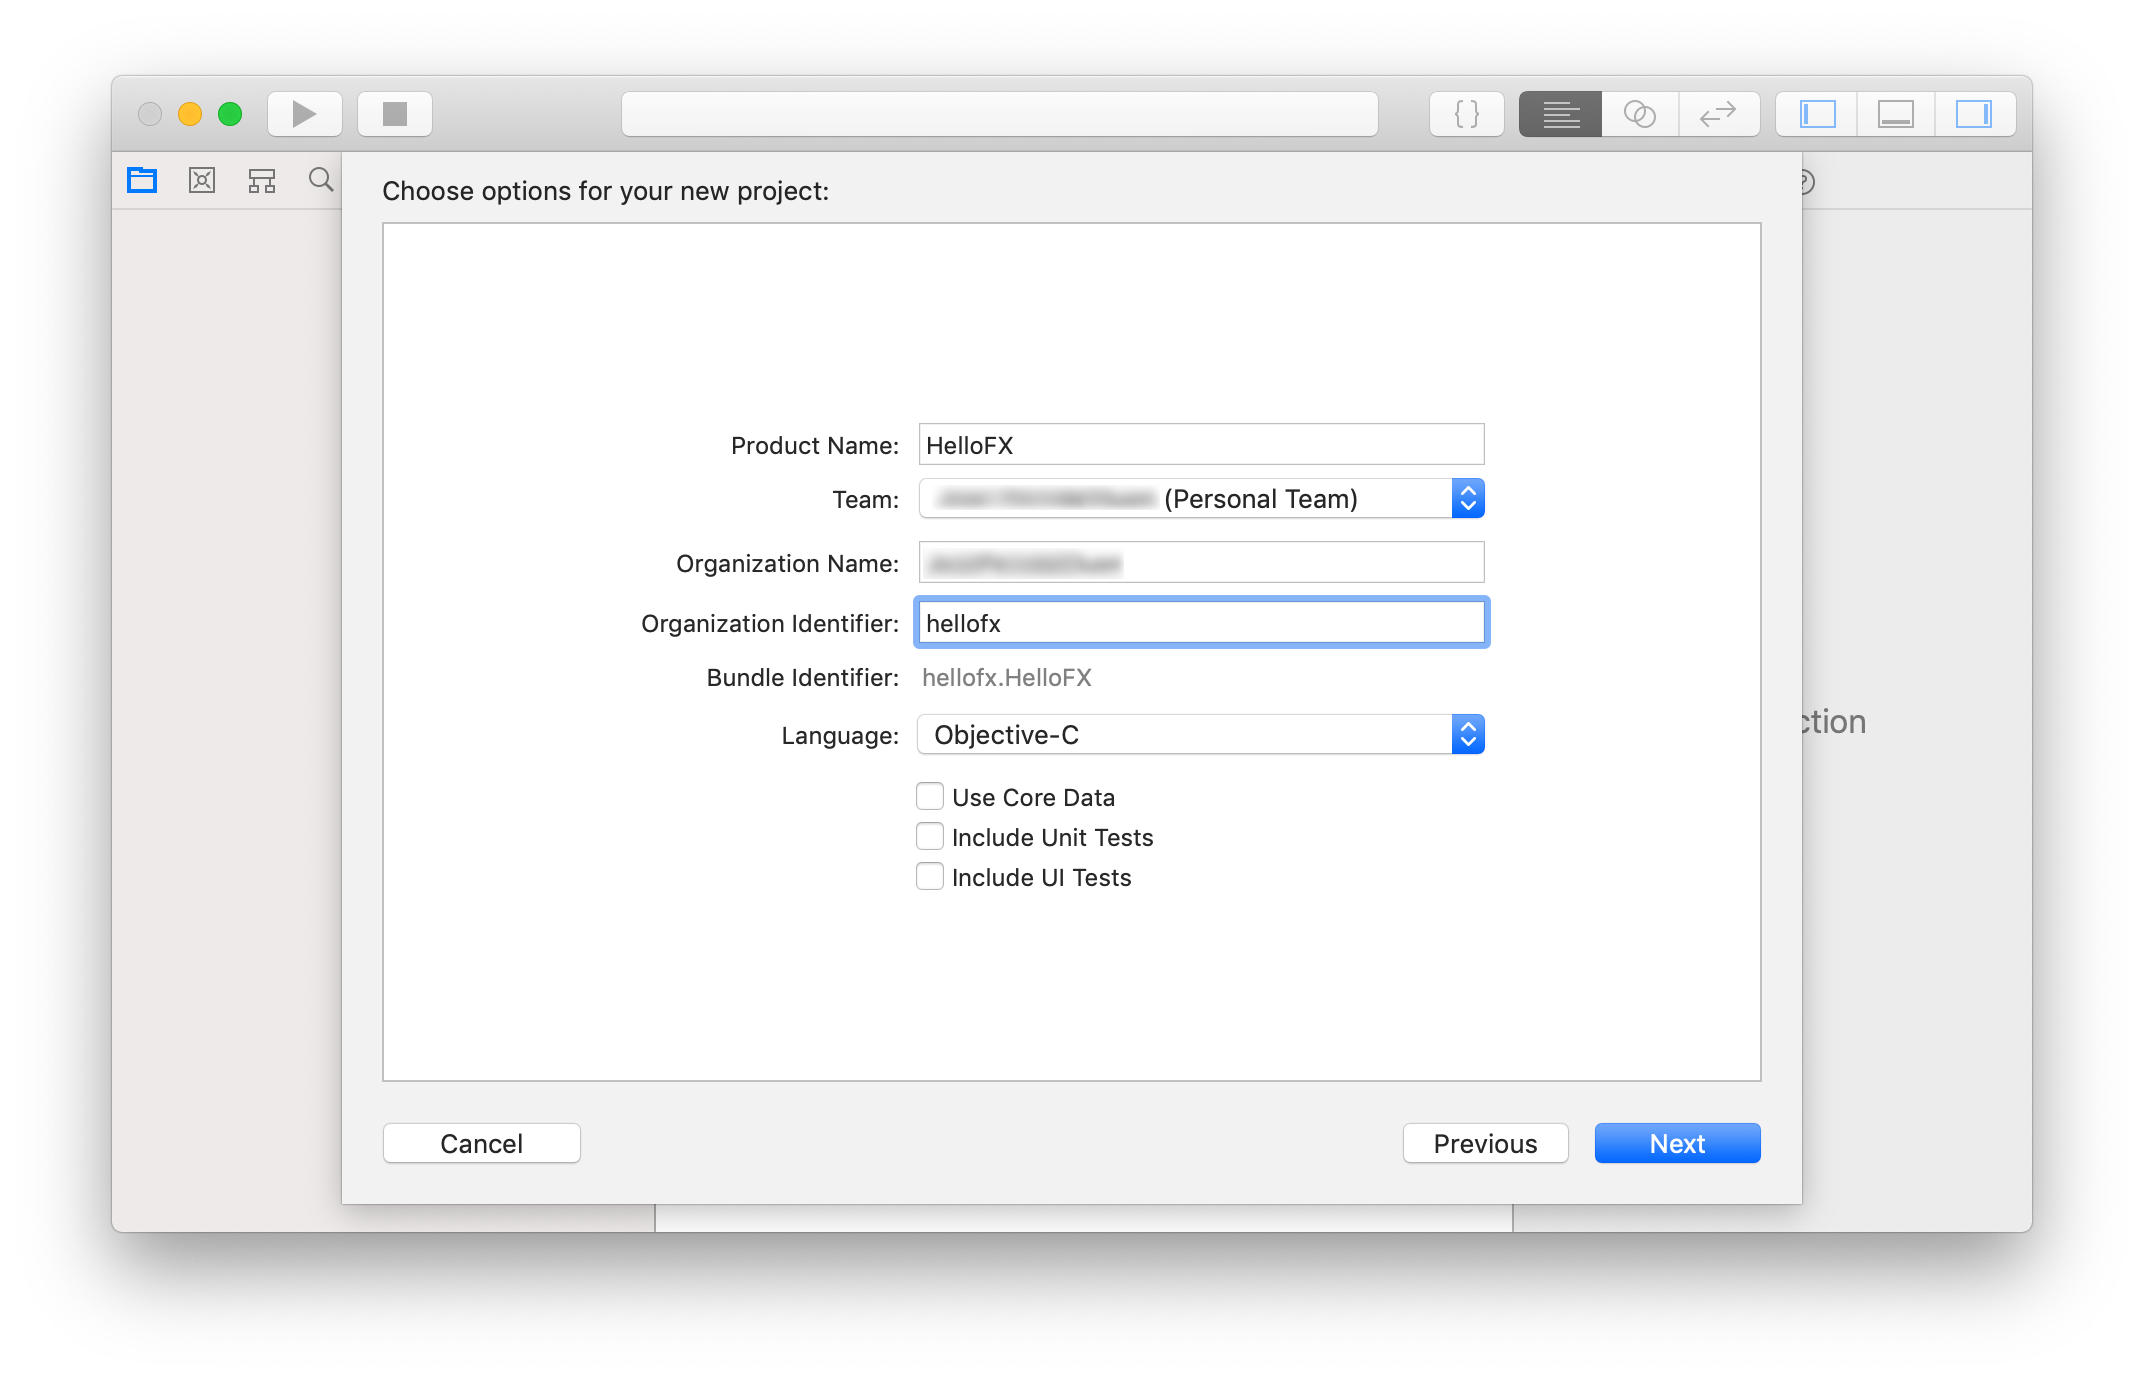
Press next, provide a location and create the project.
Signing the project
Once the project is created, it will be opened and you will have access to the General tab with the identity and signing information.
At this point you should plug your iOS device, and select it from the top drop-down list of build schemes that list your iOS device and iOS simulators.
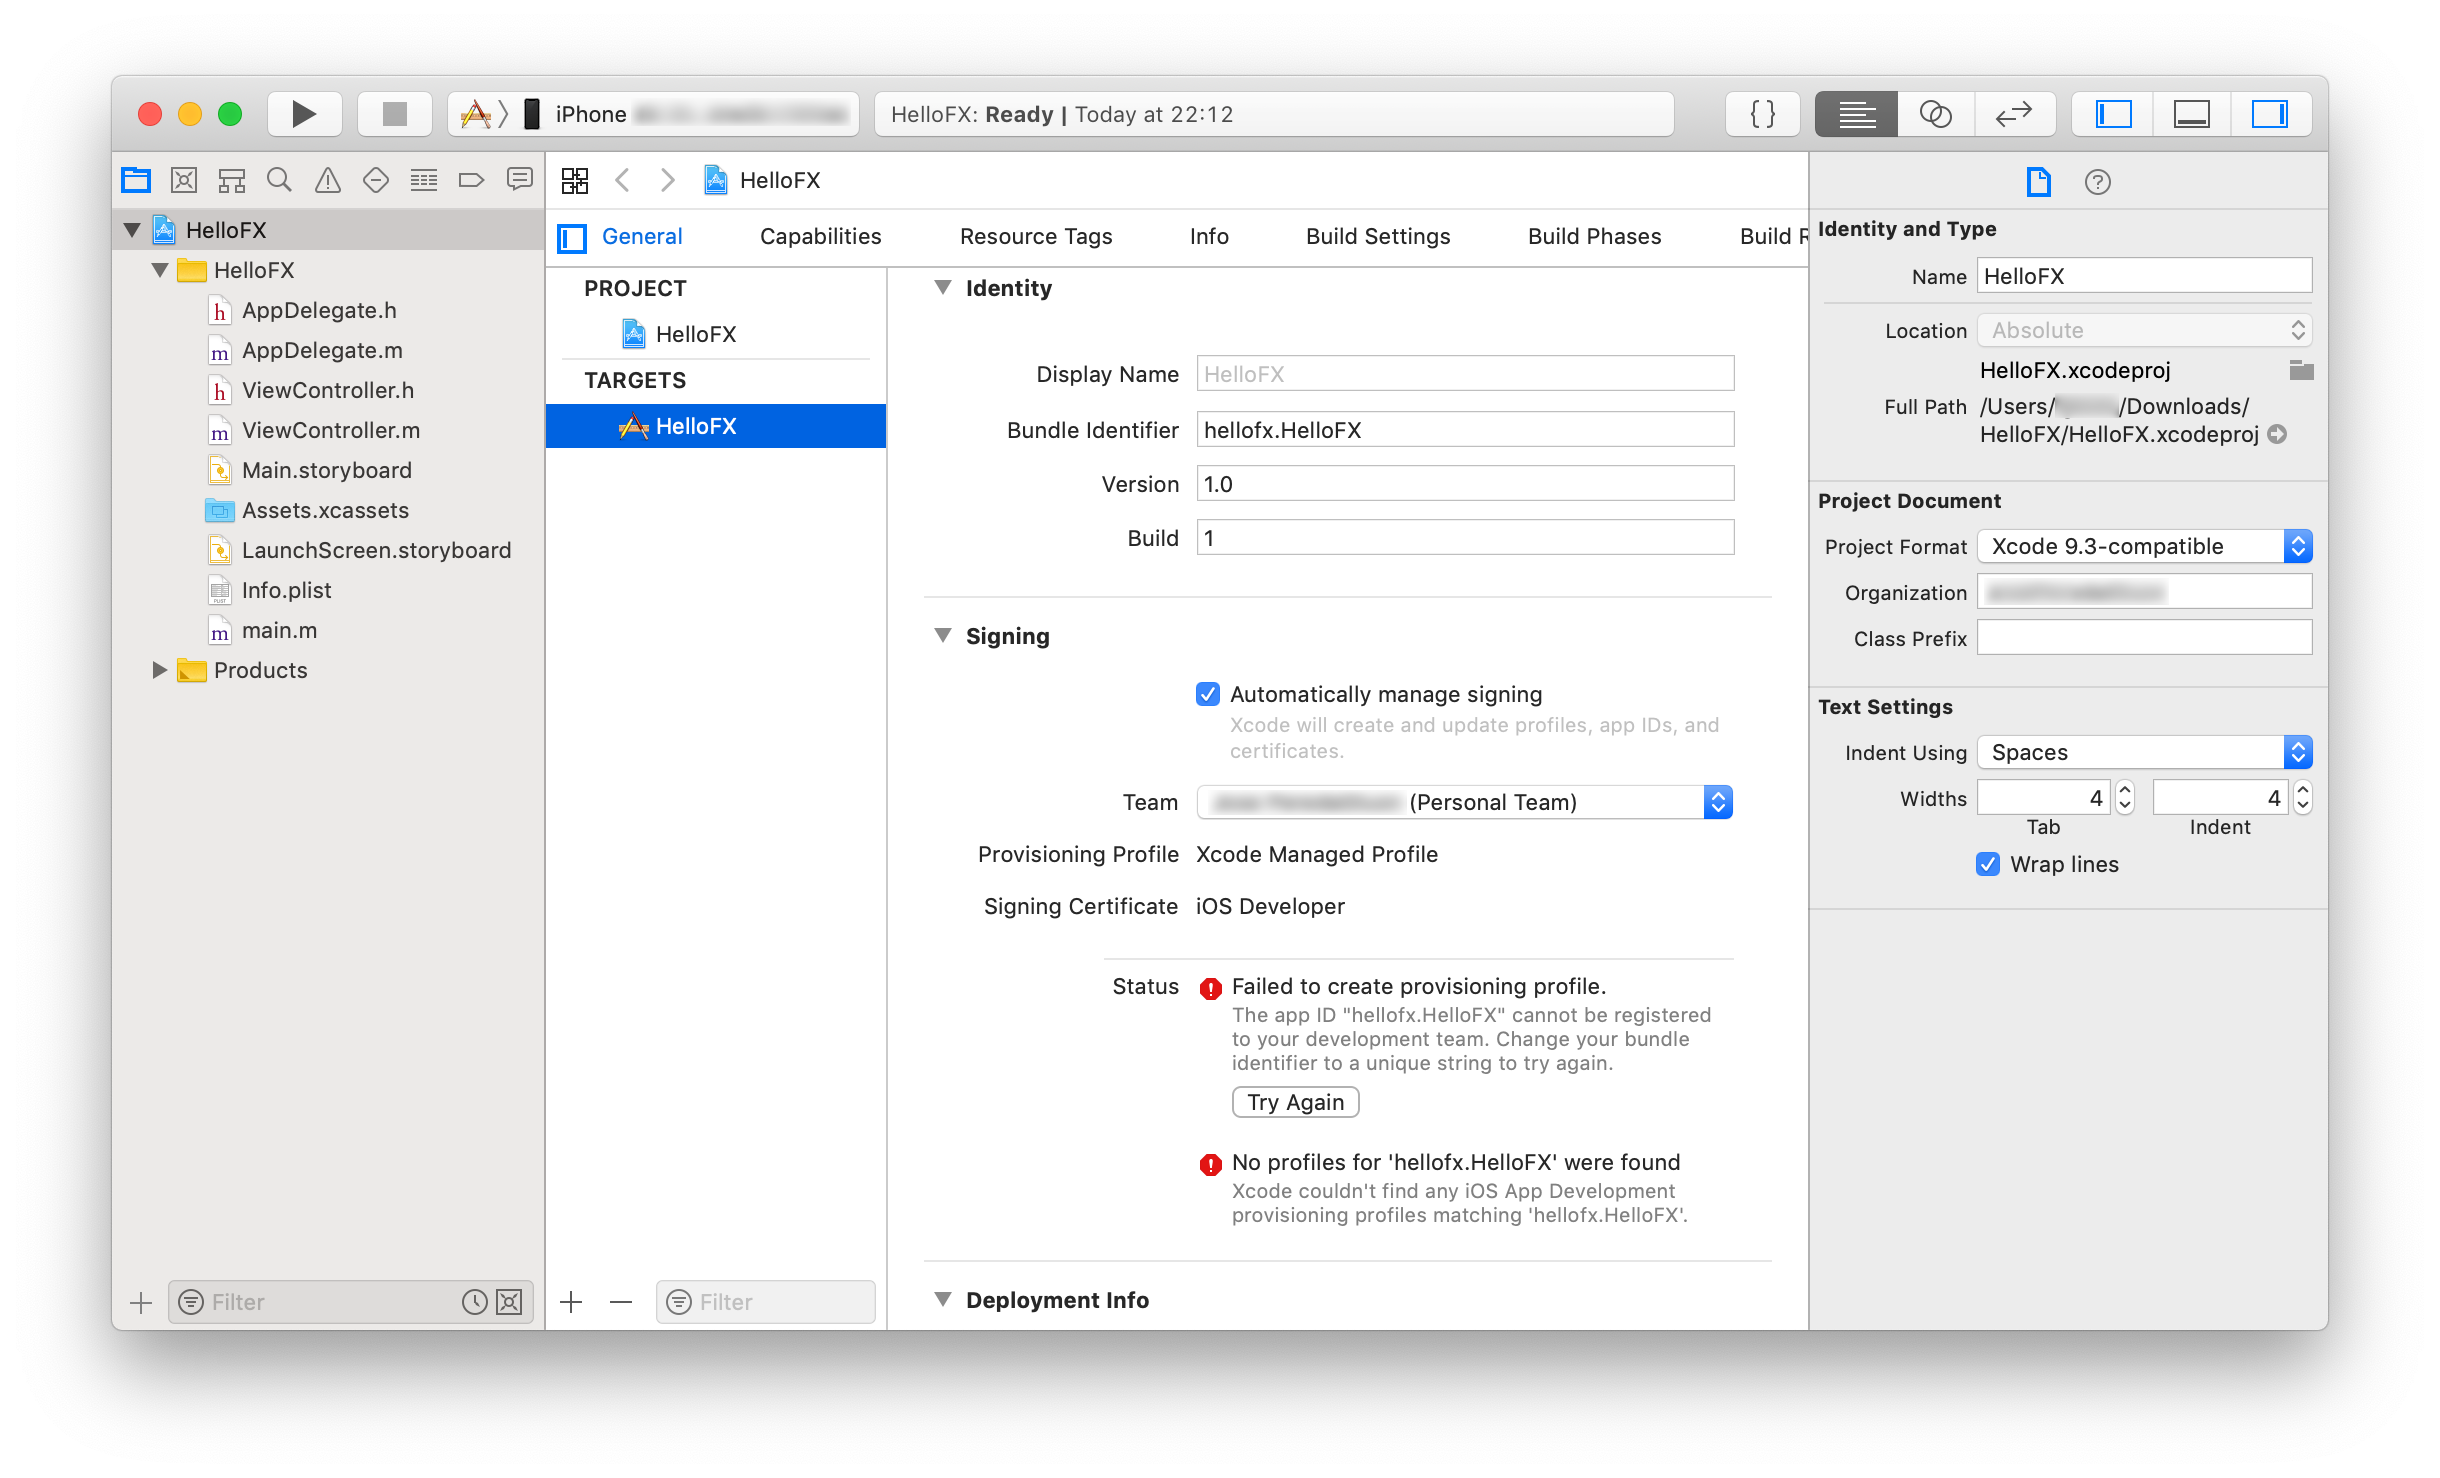
Make sure you have selected Automatically manage signing, and select a valid Team from the drop-down list.
If you get the error like: The app ID "hellofx.HelloFX" cannot be registered to your develoment team, this means that the proposed app ID is already in use or has already been registered by the Apple servers, and cannot longer be used. The only solution is to change the app ID until you get a valid one:
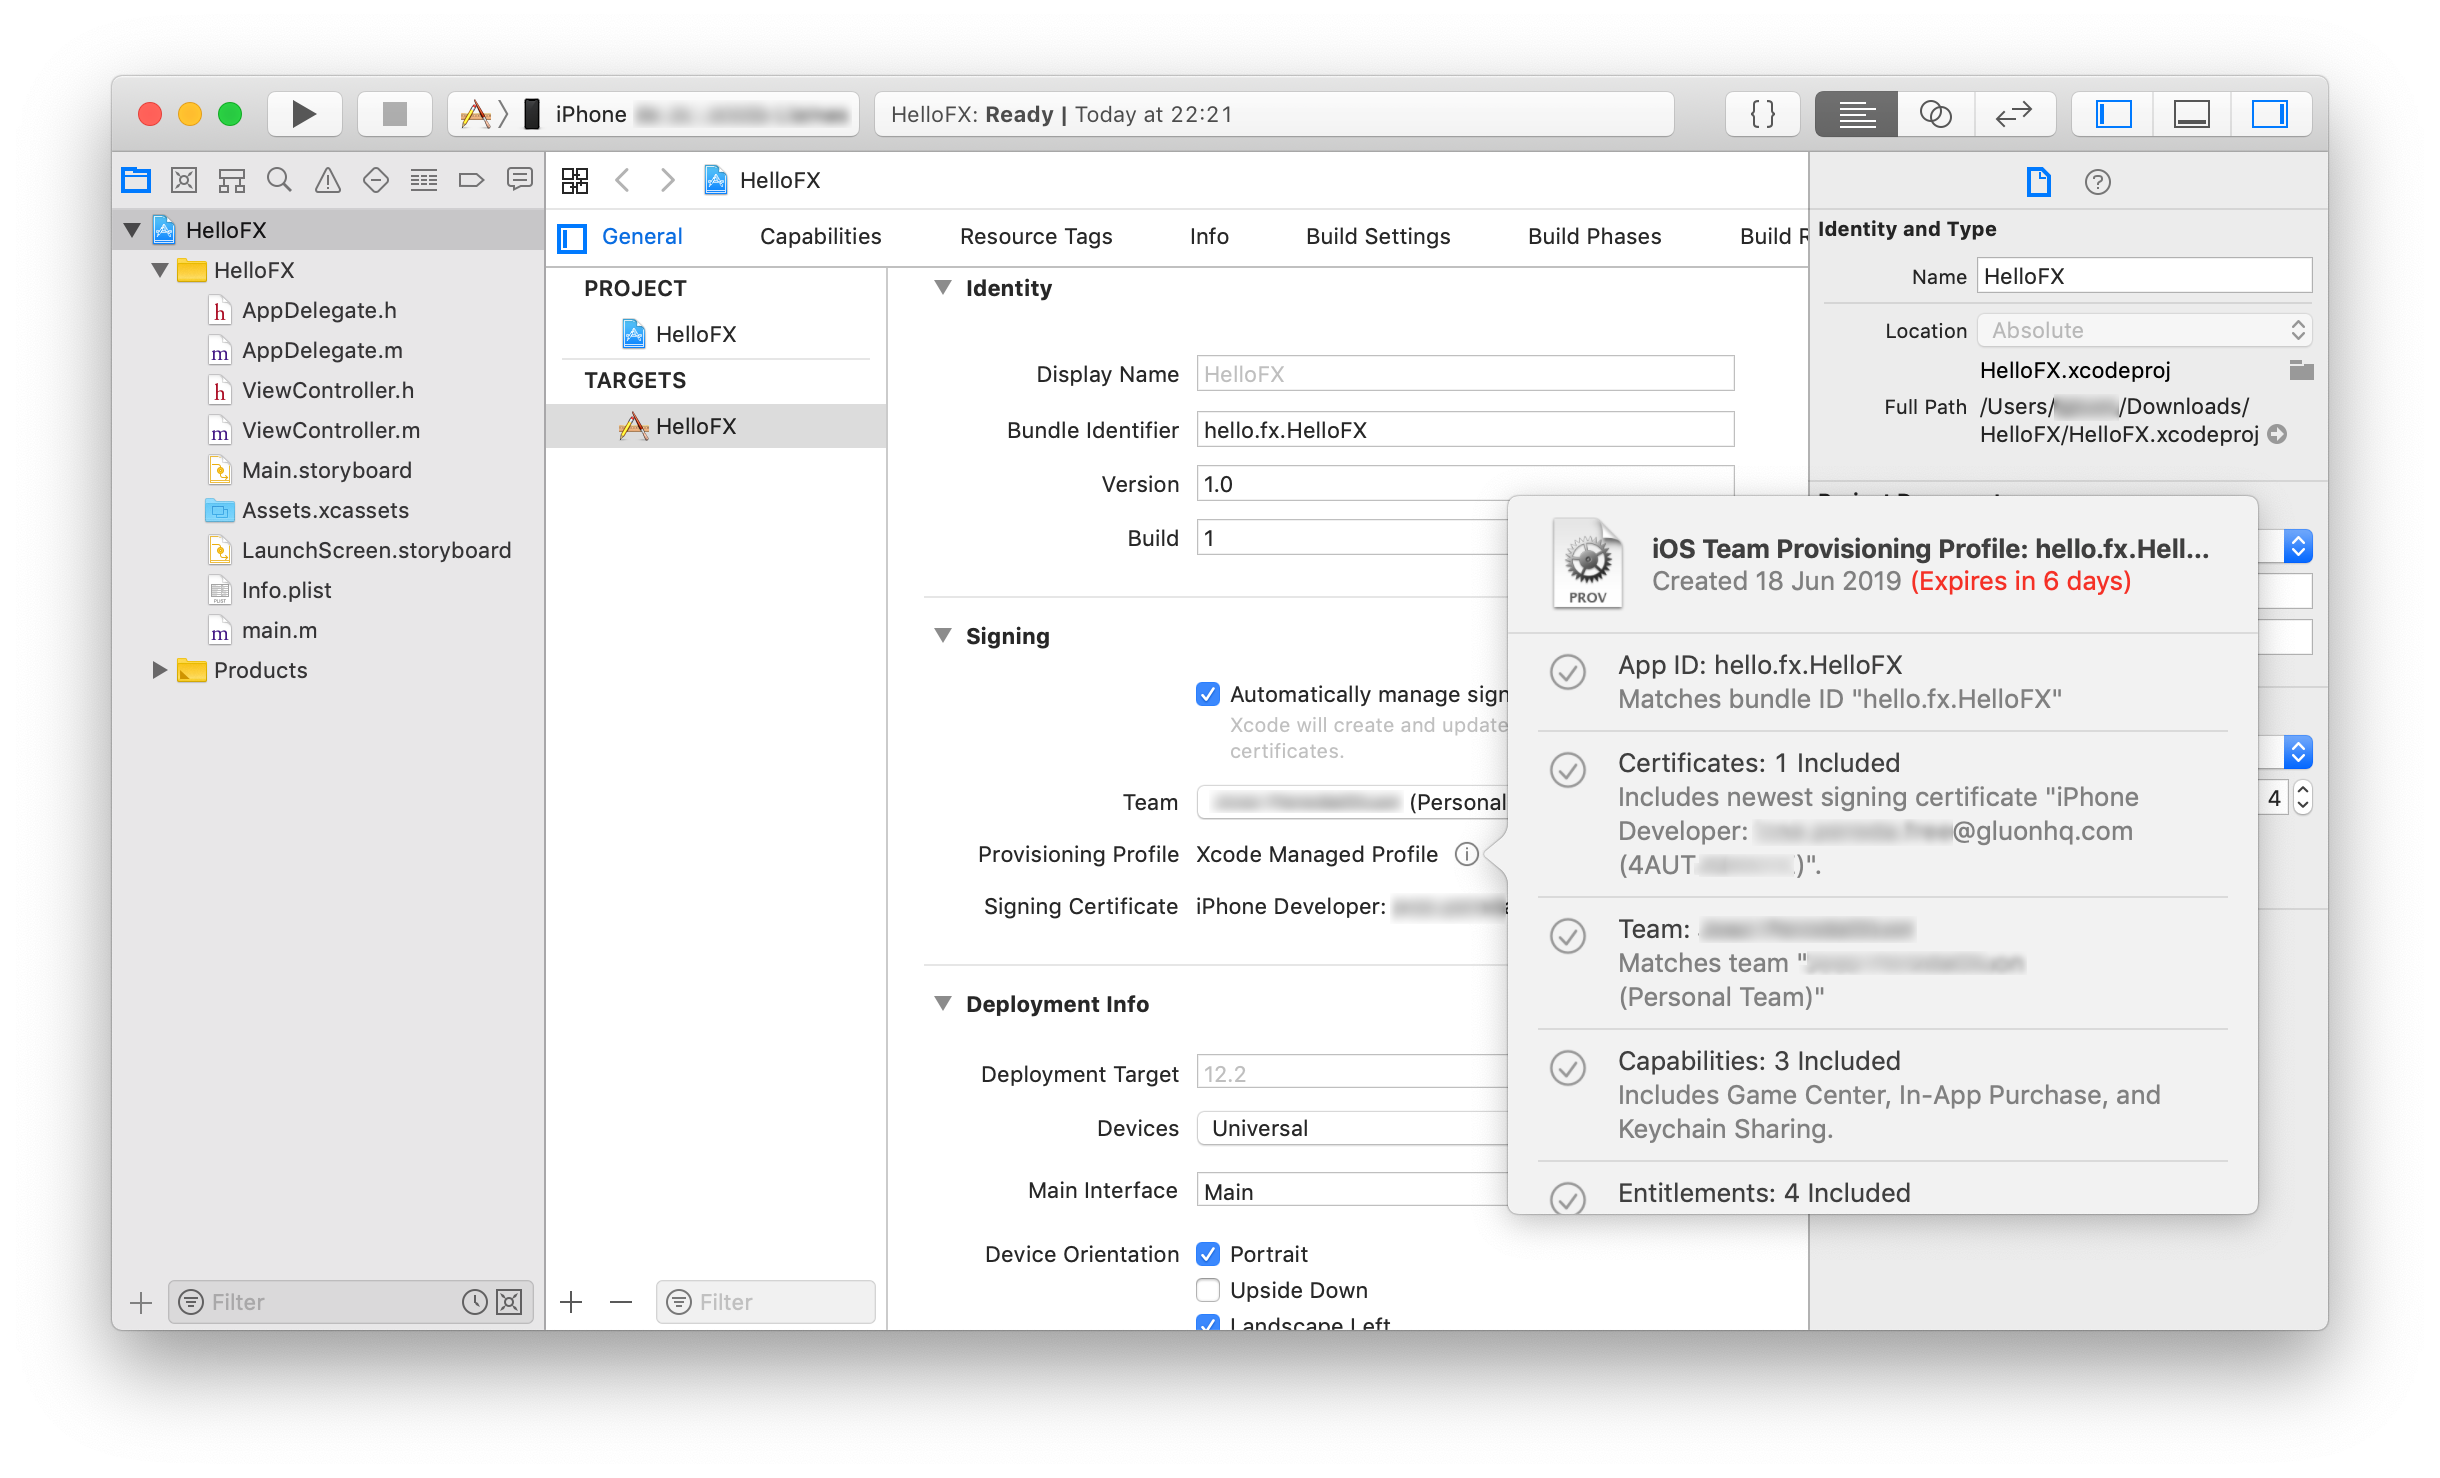
Note that the provisioning profile generated by Xcode for that app ID can be found in your ~/Library/MobileDevice/Provisioning Profiles folder.
For free provisioning, this profile will expire after one week.
Deploying the project
Once everything is in place (there are no visible errors in the General screen), press the Play button that will build and run the current scheme.
Note: Using free provisioning it is possible that the run fails with a message like: Could not launch "HelloFX", that prompts you to verify the Developer App certificate is trusted on your device, as by default the certificate is untrusted. Go to your iPhone, Settings → General → Device Management, and select the certificate to trust it. Then go back to Xcode and run again. This time, the app will launch and you will get a white screen.
Press stop to finish and quit Xcode.
4.3. Developer Program
If you (as individual or as a company) have enrolled to the Apple Developer Program, to deploy to iOS you need to generate:
-
A valid signing identity
-
A valid provisioning profile
The following steps describe how these can be generated.
4.3.1. iOS Development Certificate
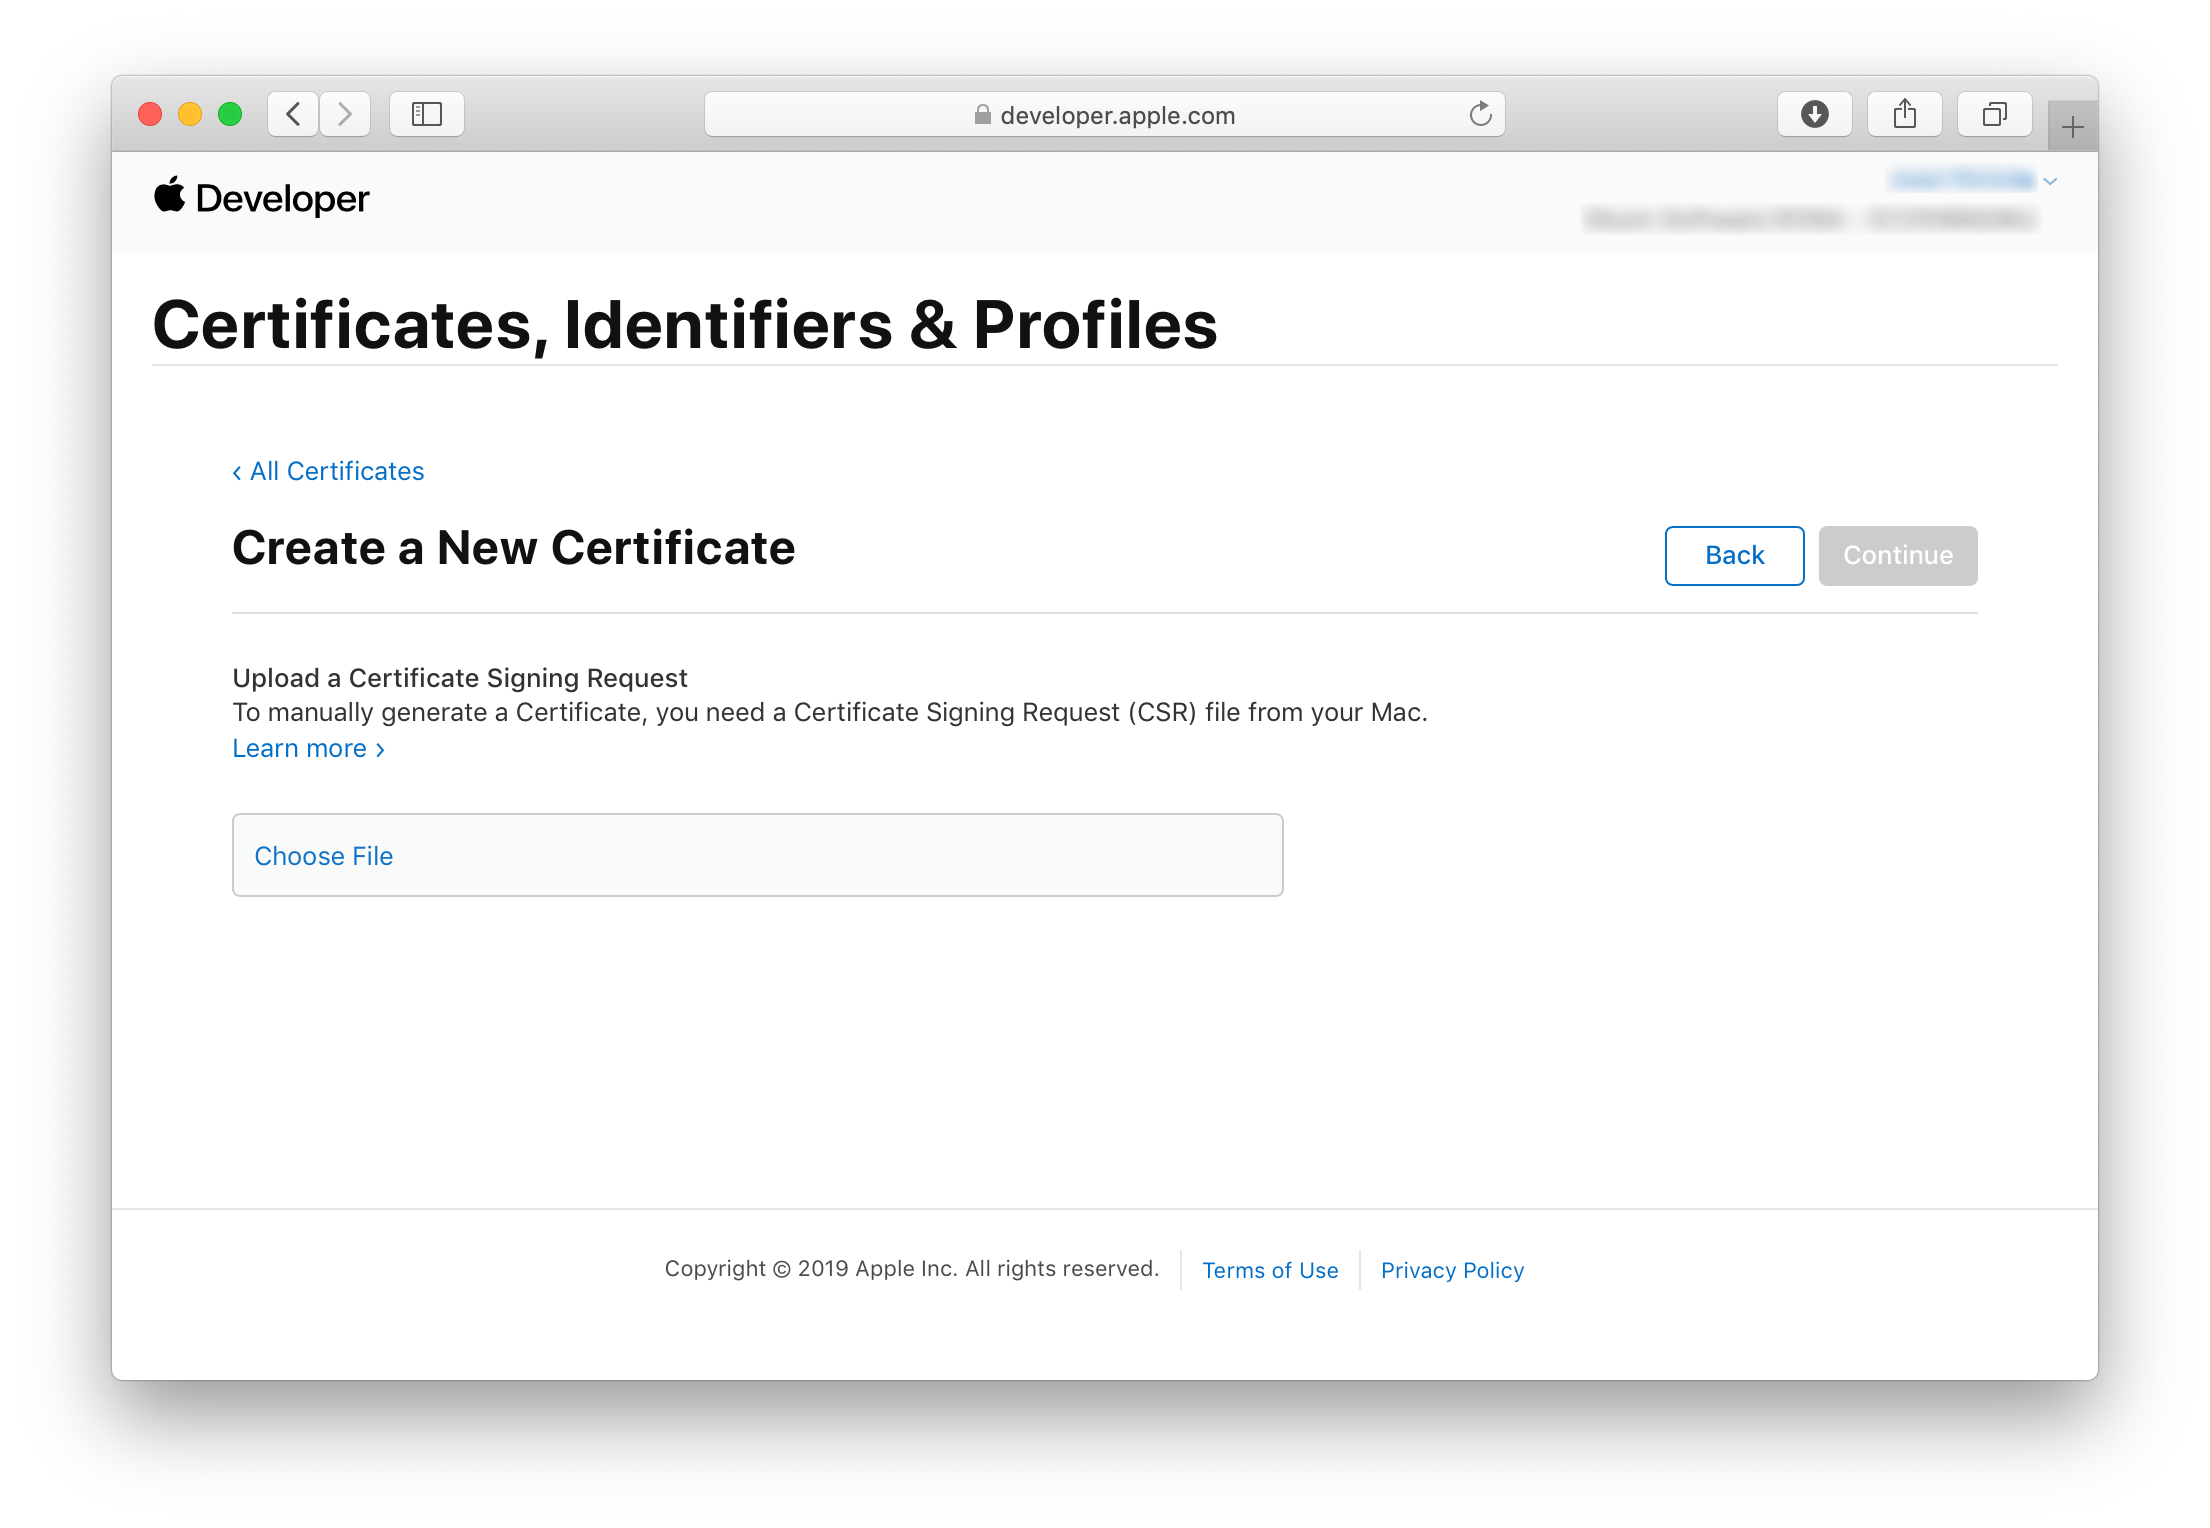
Go to the Developer portal, and access Certificates, Identifiers & Profiles. Select Certificates from the left, and press +, to create a Development certificate (for testing). Later on you will need a Distribution certificate for distribution through the App Store.

To generate a certificate, you need a Certificate Signing Request (CSR) file from your Mac.
Certificate Signing Request
According to Apple Help, these are the steps to generate the CSR:
-
Launch the
Keychain Accessapplication, located in /Applications/Utilities. -
Choose
Keychain Access → Certificate Assistant → Request a Certificate from a Certificate Authority. -
Enter an email address in the
User Email Addressfield. -
Enter a name for the key.
-
Leave the
CA Email Addressfield empty. -
Choose
Saved to disk, and click Continue. -
Save the CSR file.
Upload CSR
Return to the Developer portal and upload the CSR:
Download and install the certificate
Once the CSR is uploaded, a certificate is generated. Download this certificate to your Mac.
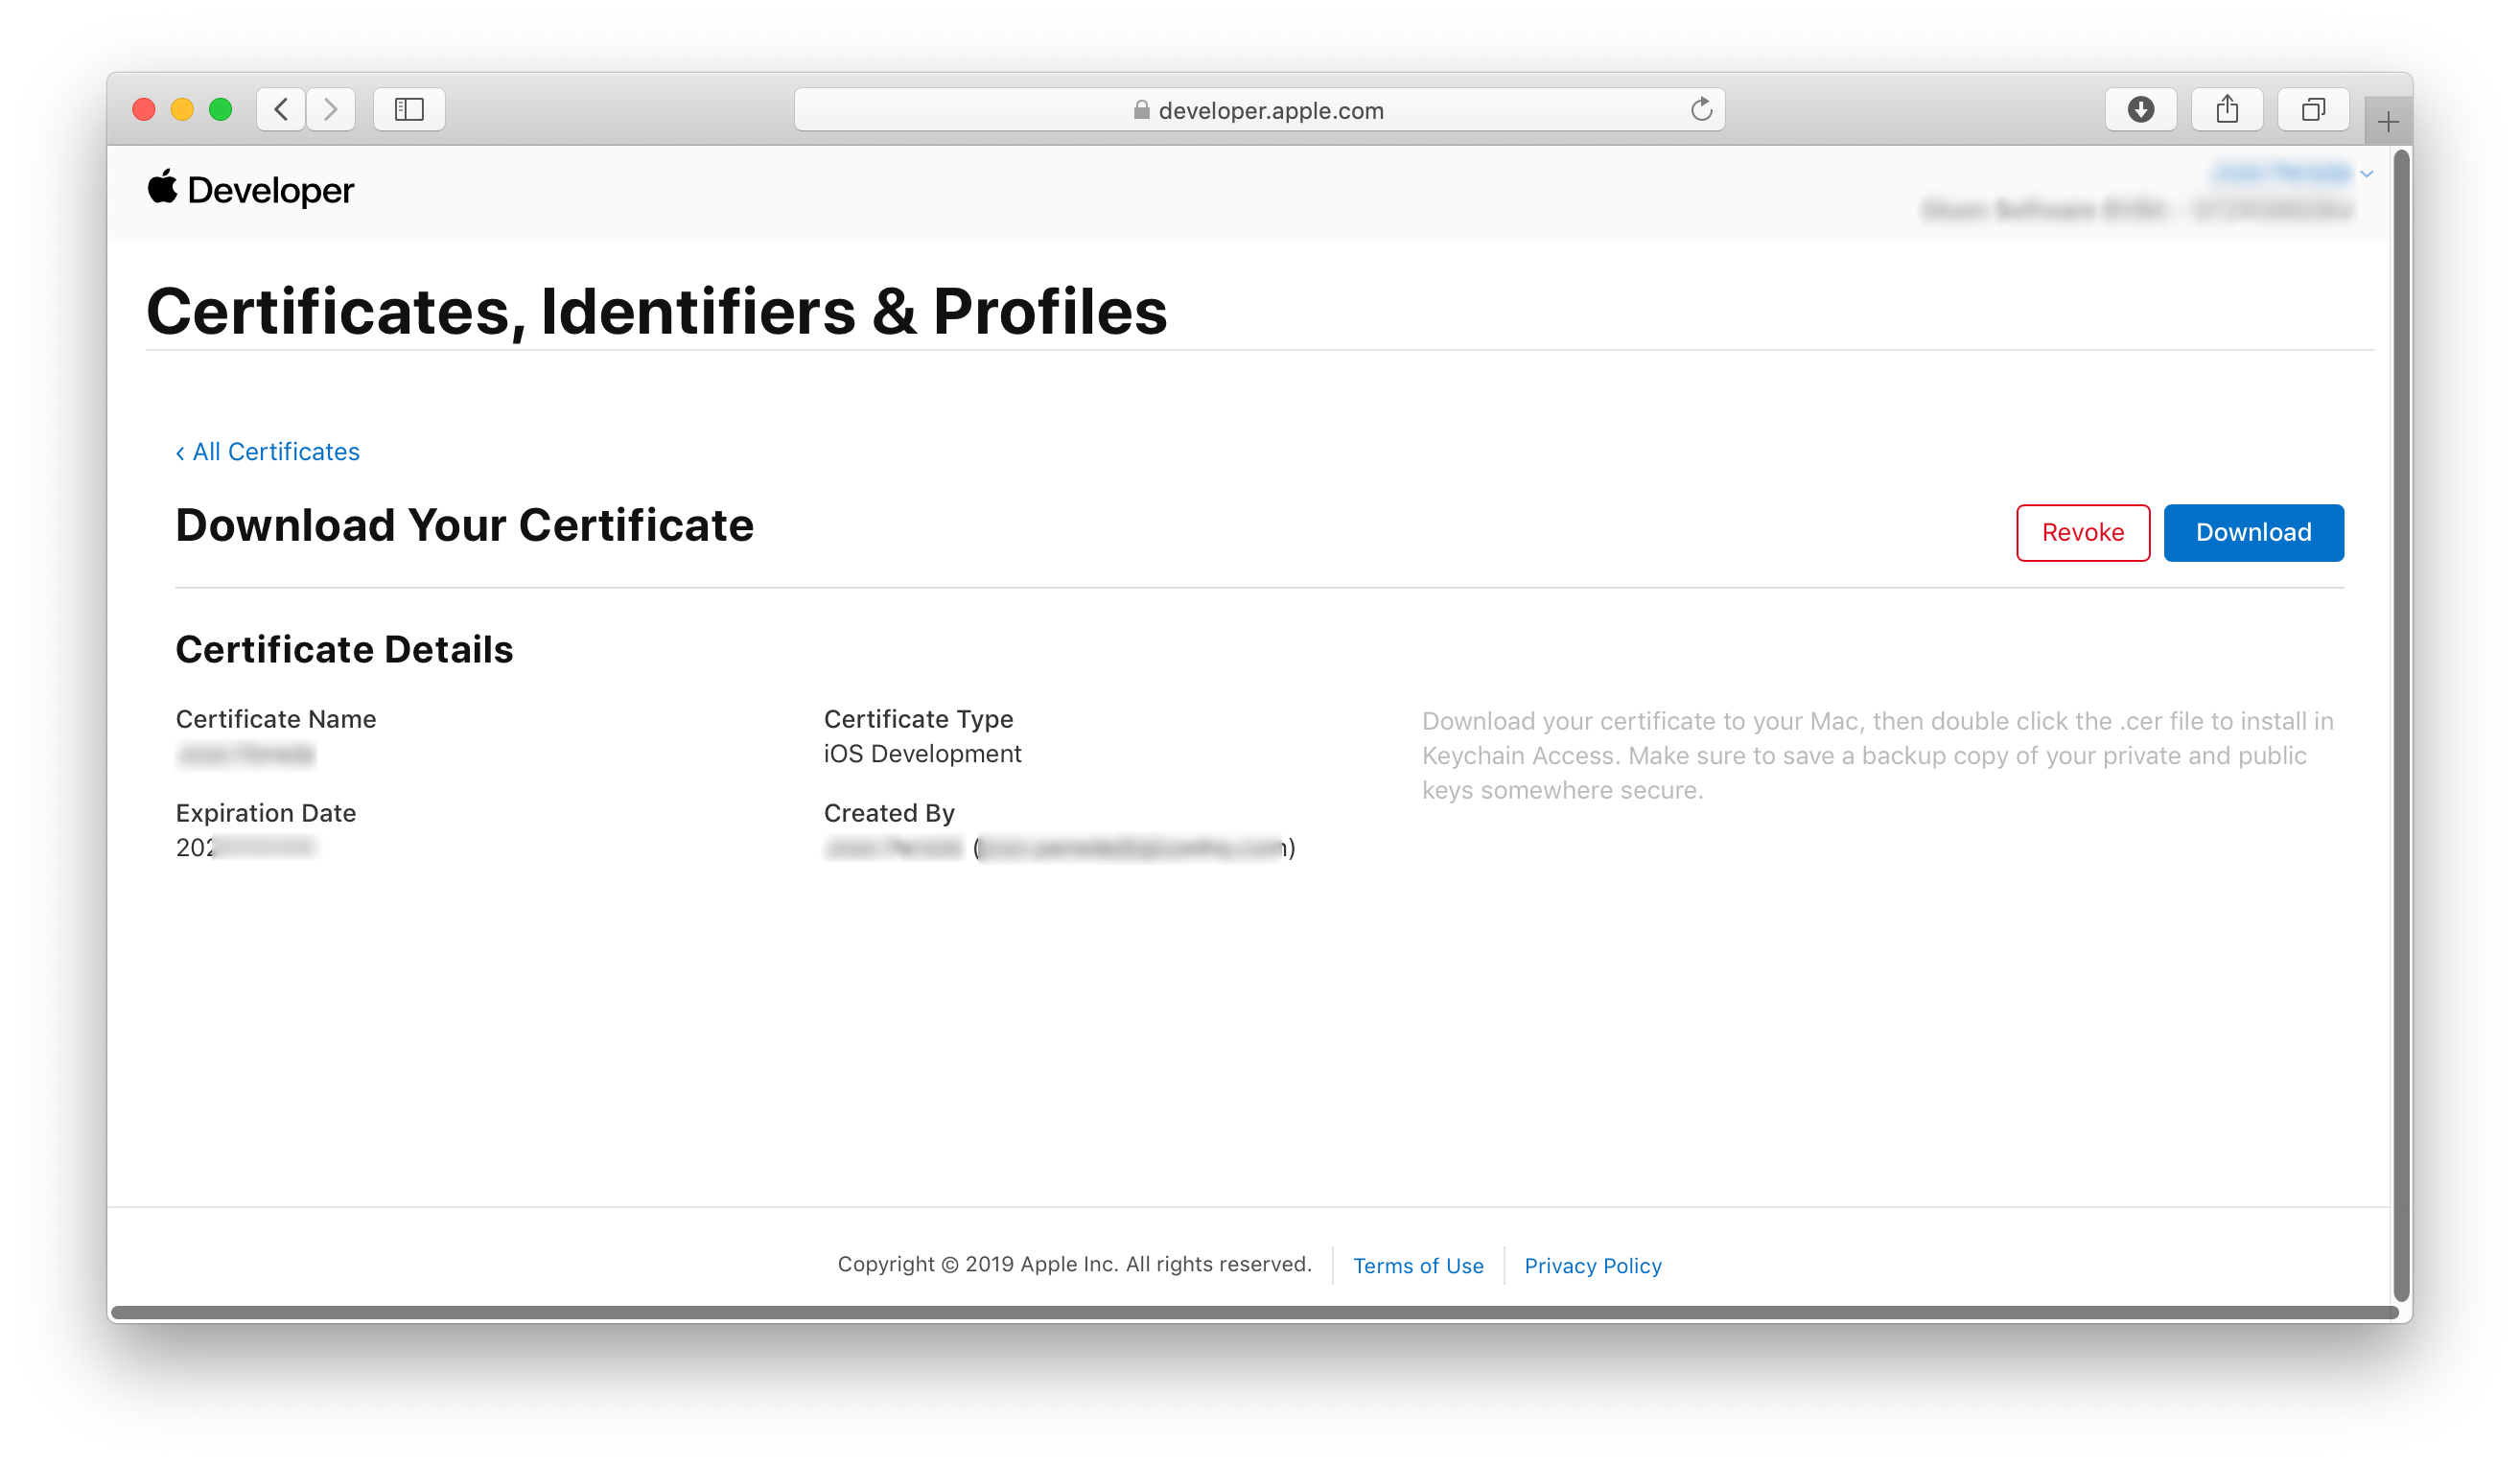
Then double click the .cer file to install in Keychain Access.
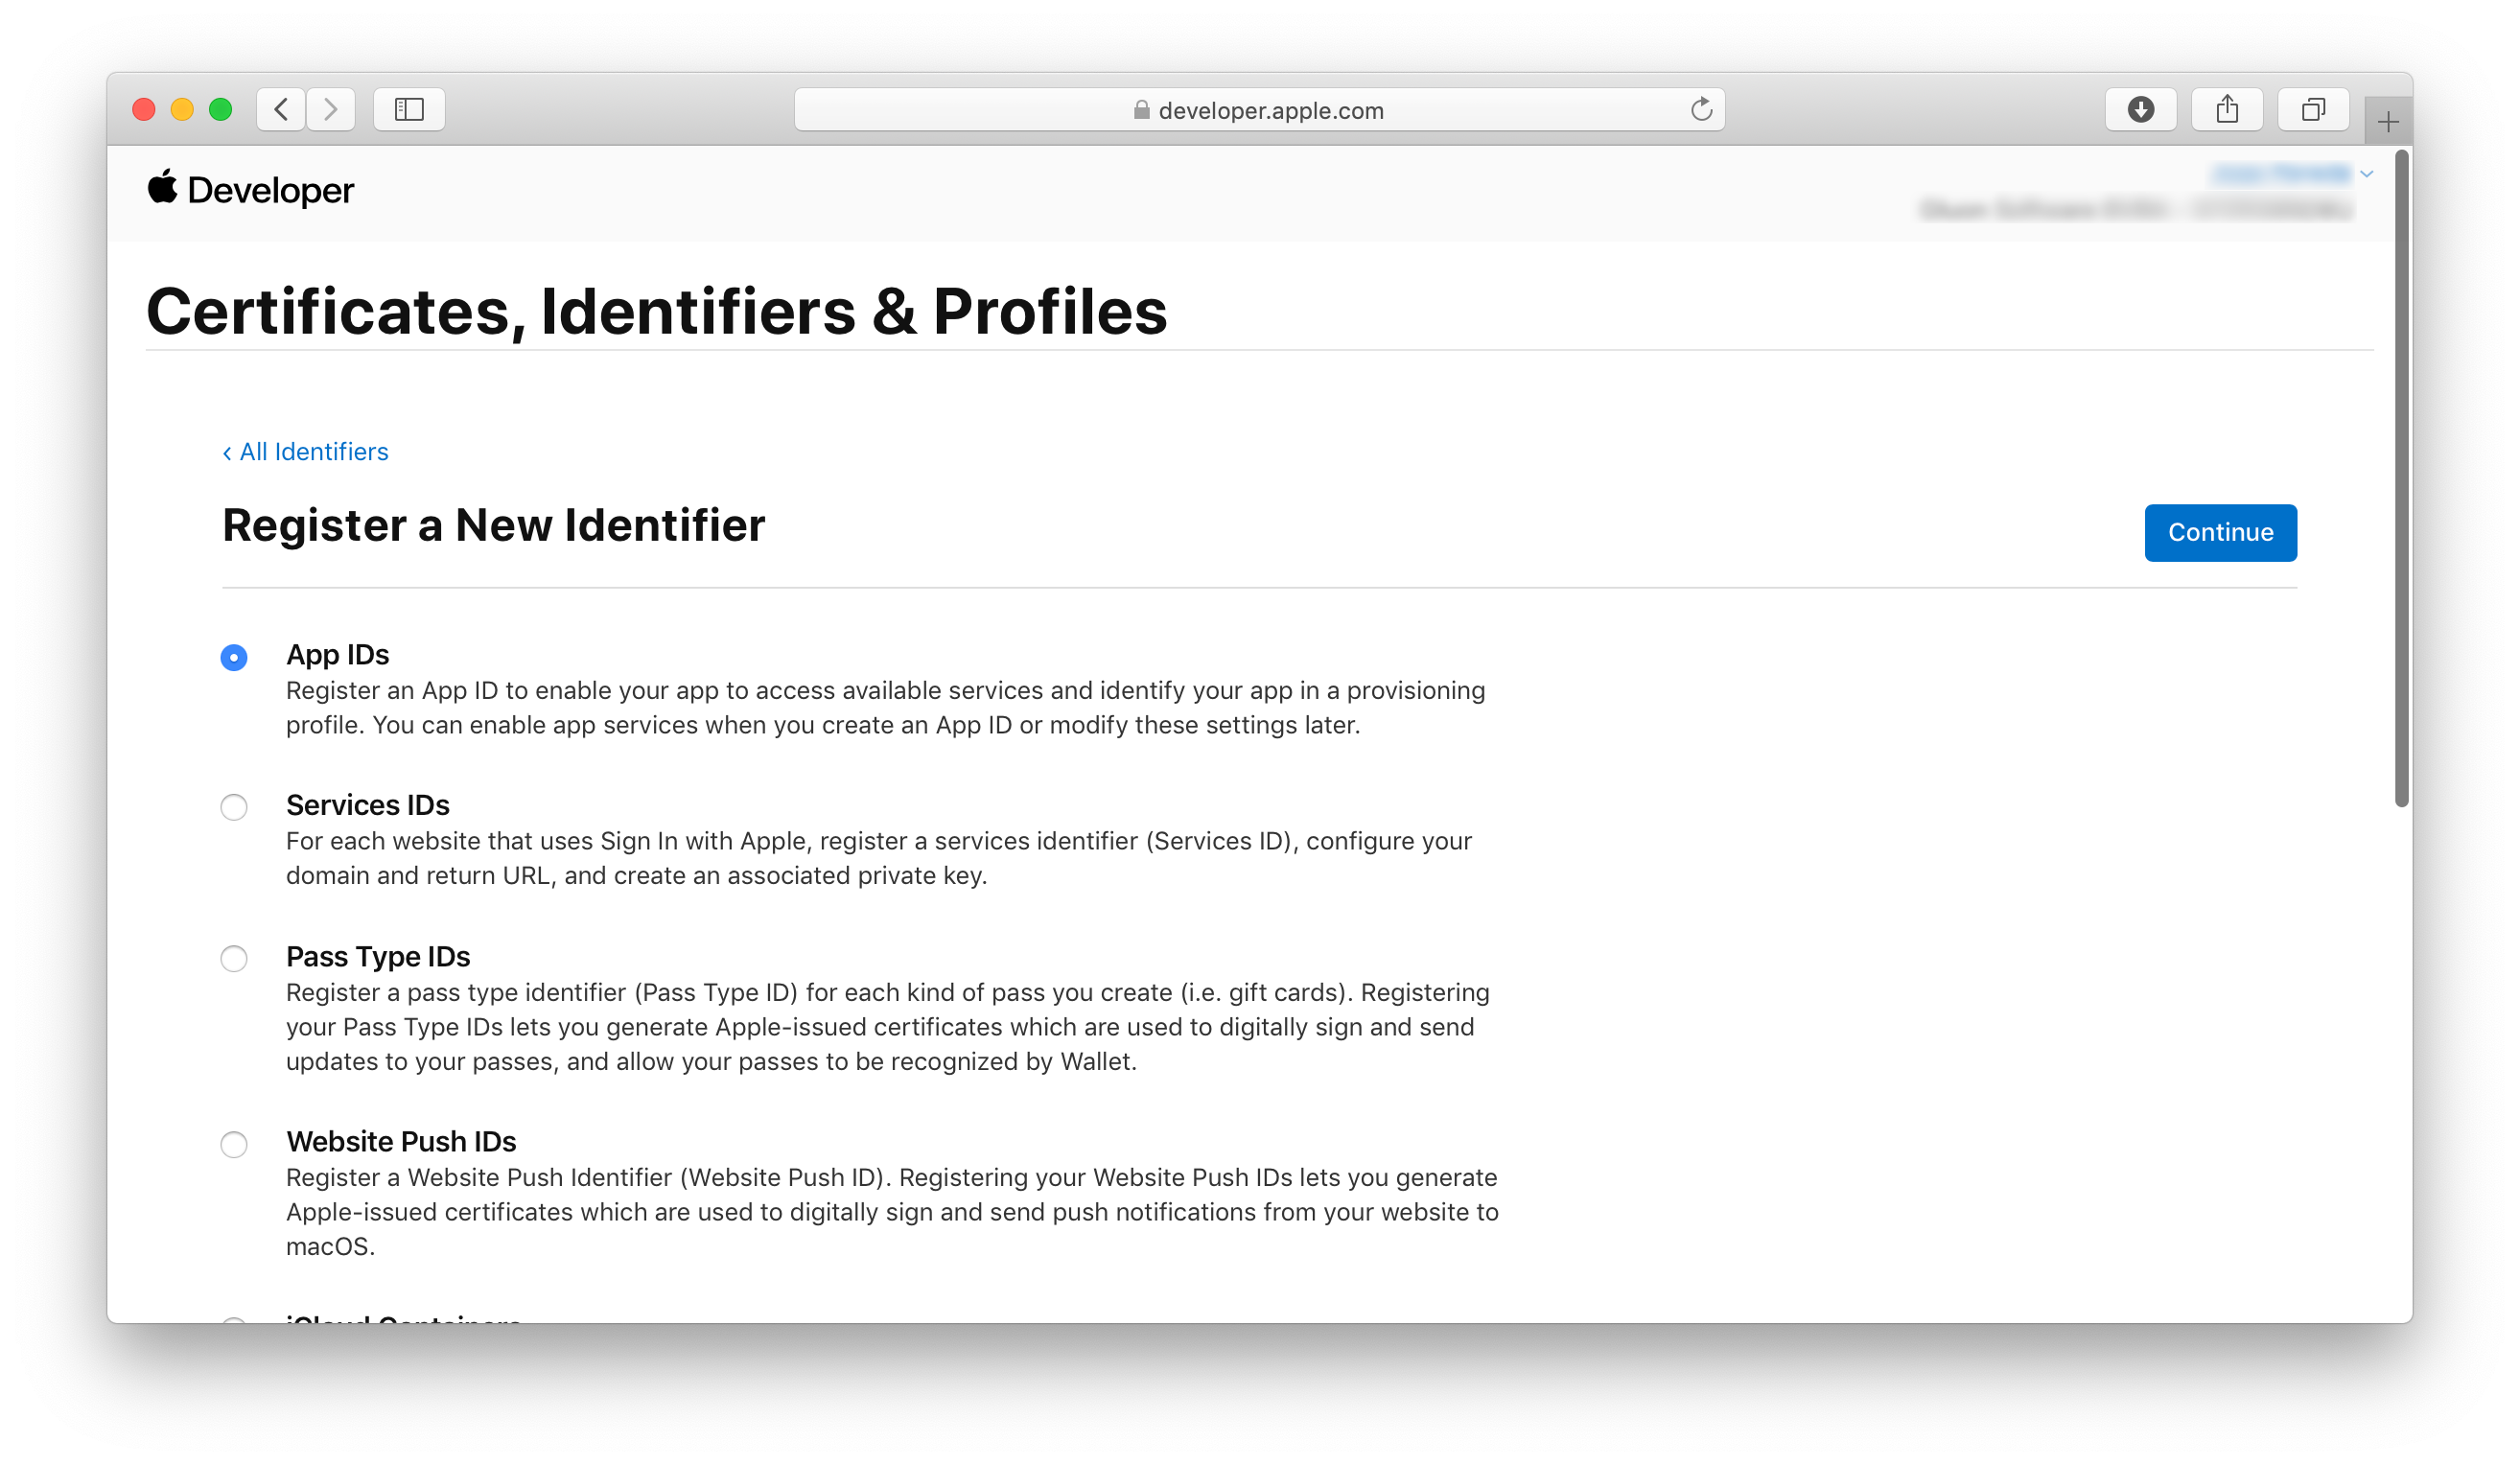
4.3.2. Identifiers
Go to the Developer portal, and access Certificates, Identifiers & Profiles. Select Identifiers from the left, and press +, to create a new app identifier.
You can enable app services when you create the App ID or modify these settings later on.
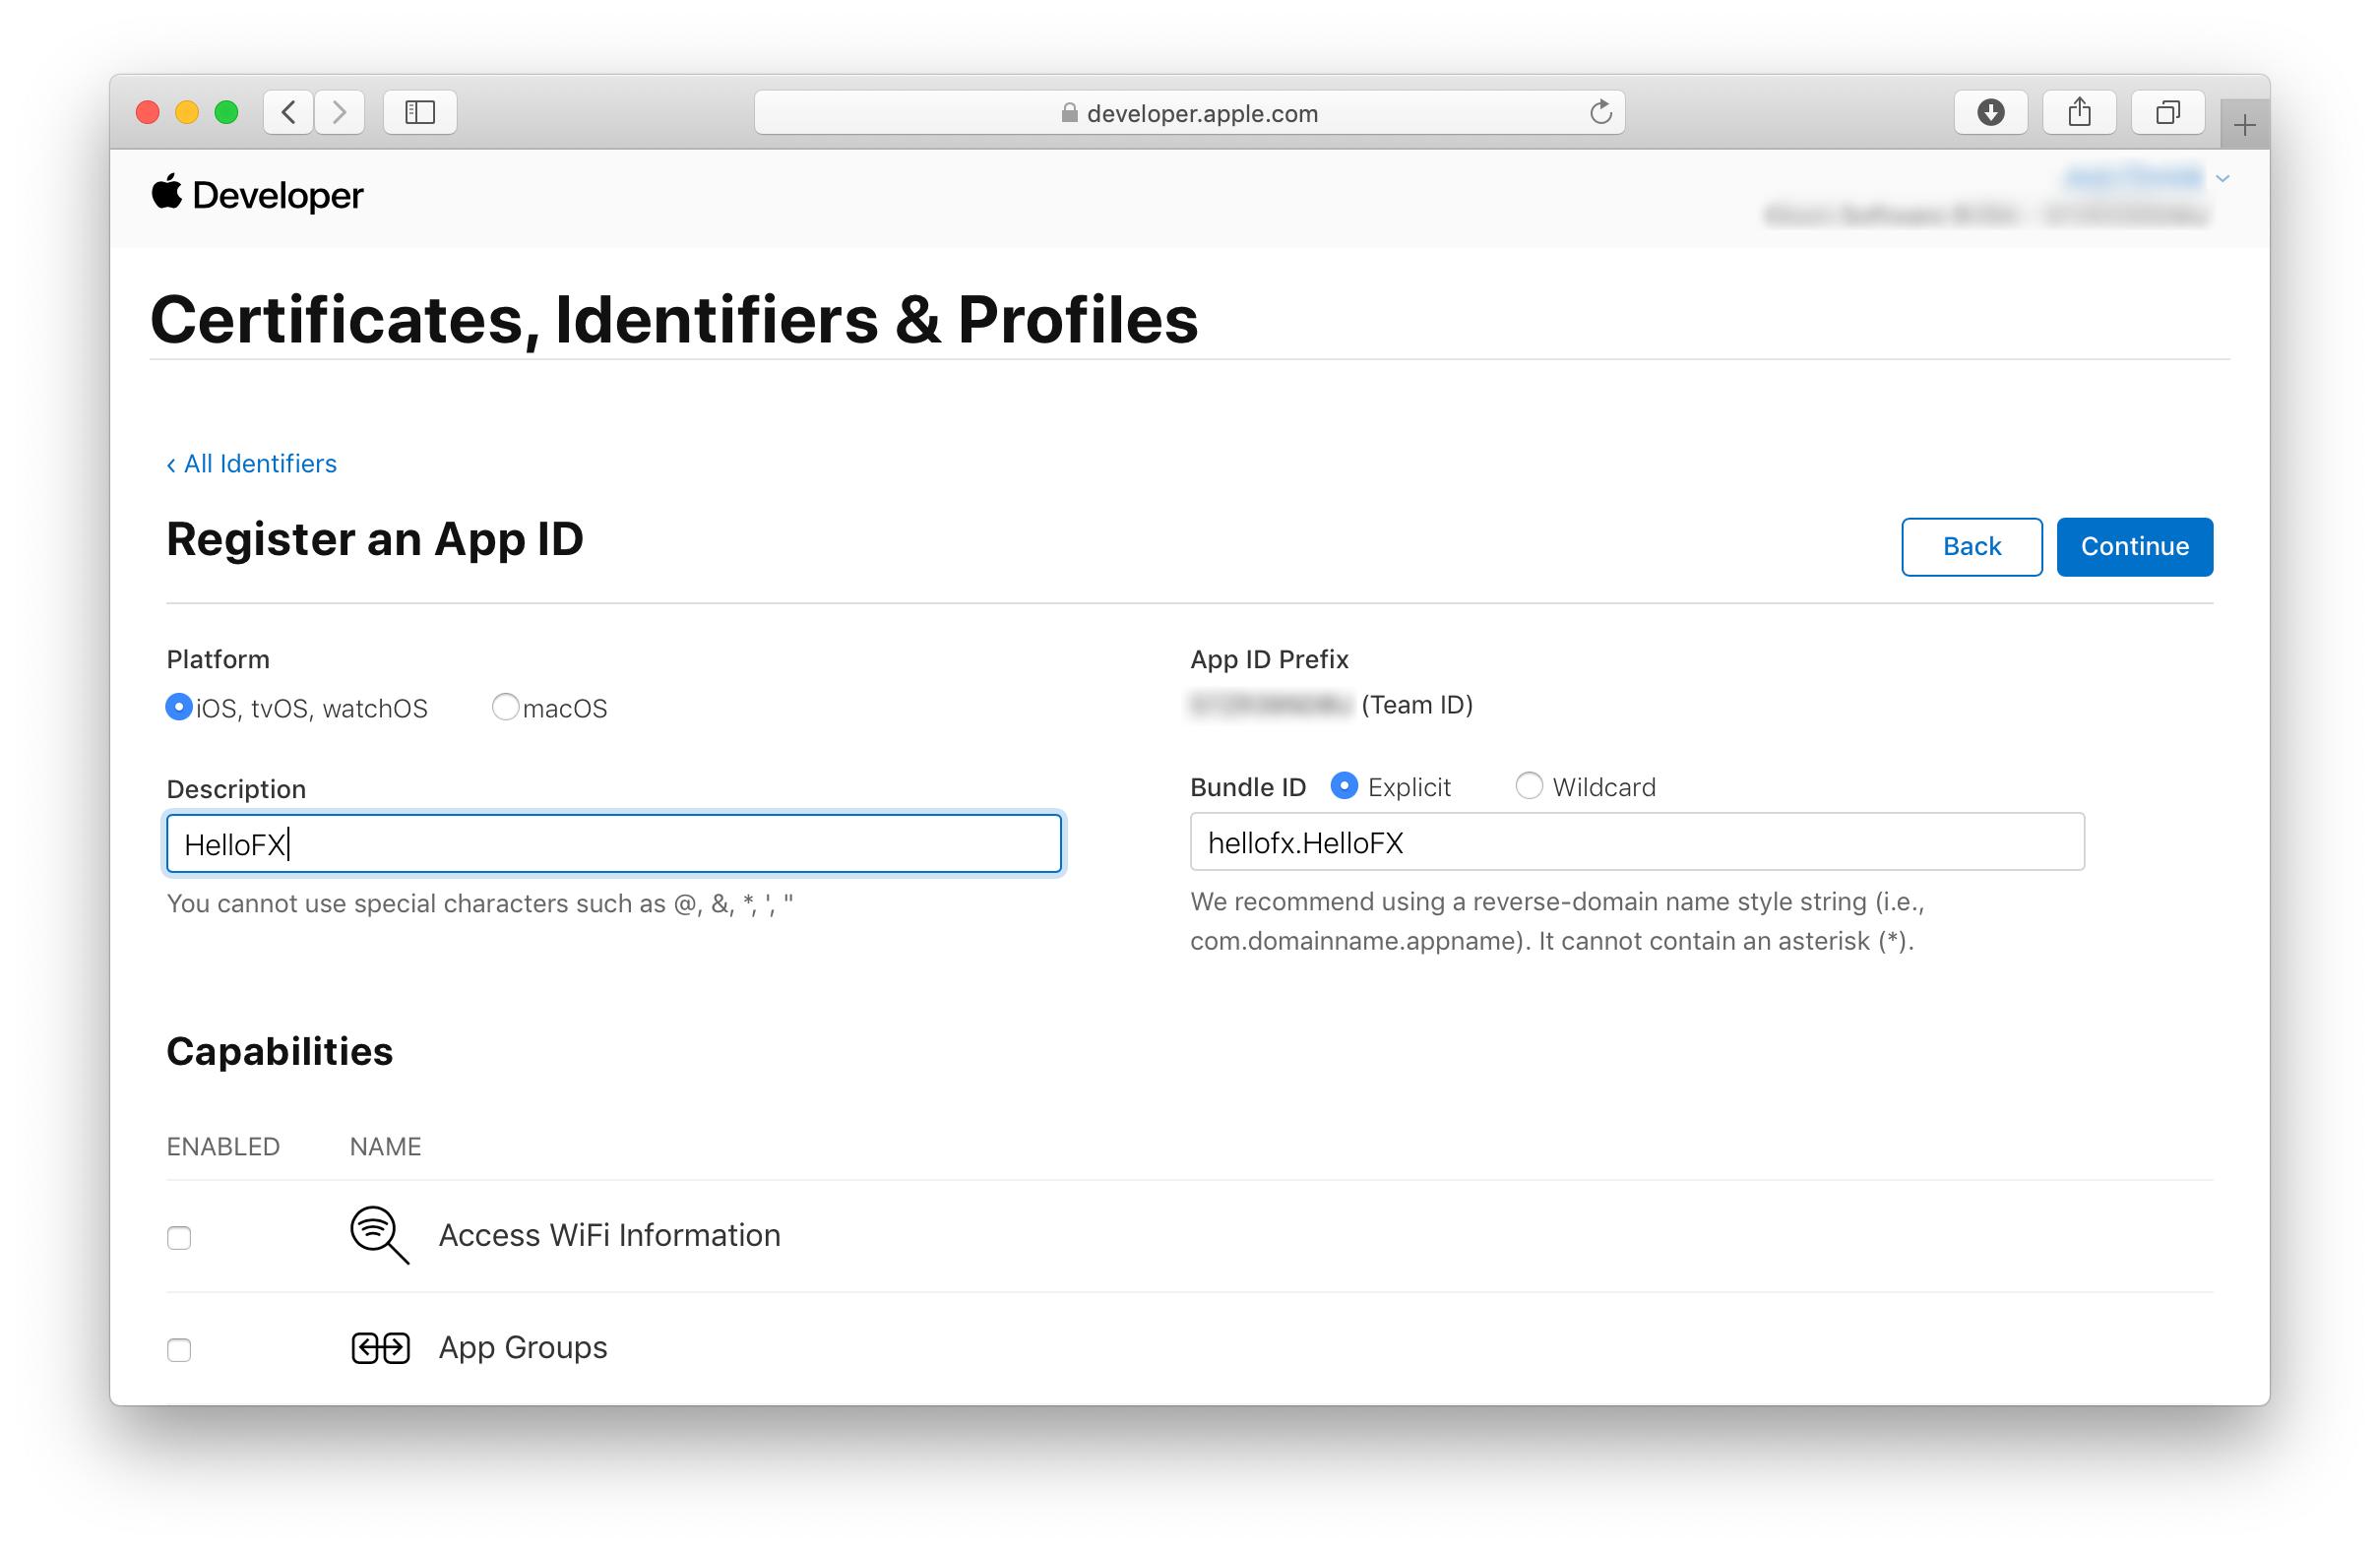
Provide a name and make sure you use the exact Bundle ID from your app, the one listed in your Default-Info.plist file under the CFBundleIdentifier key.
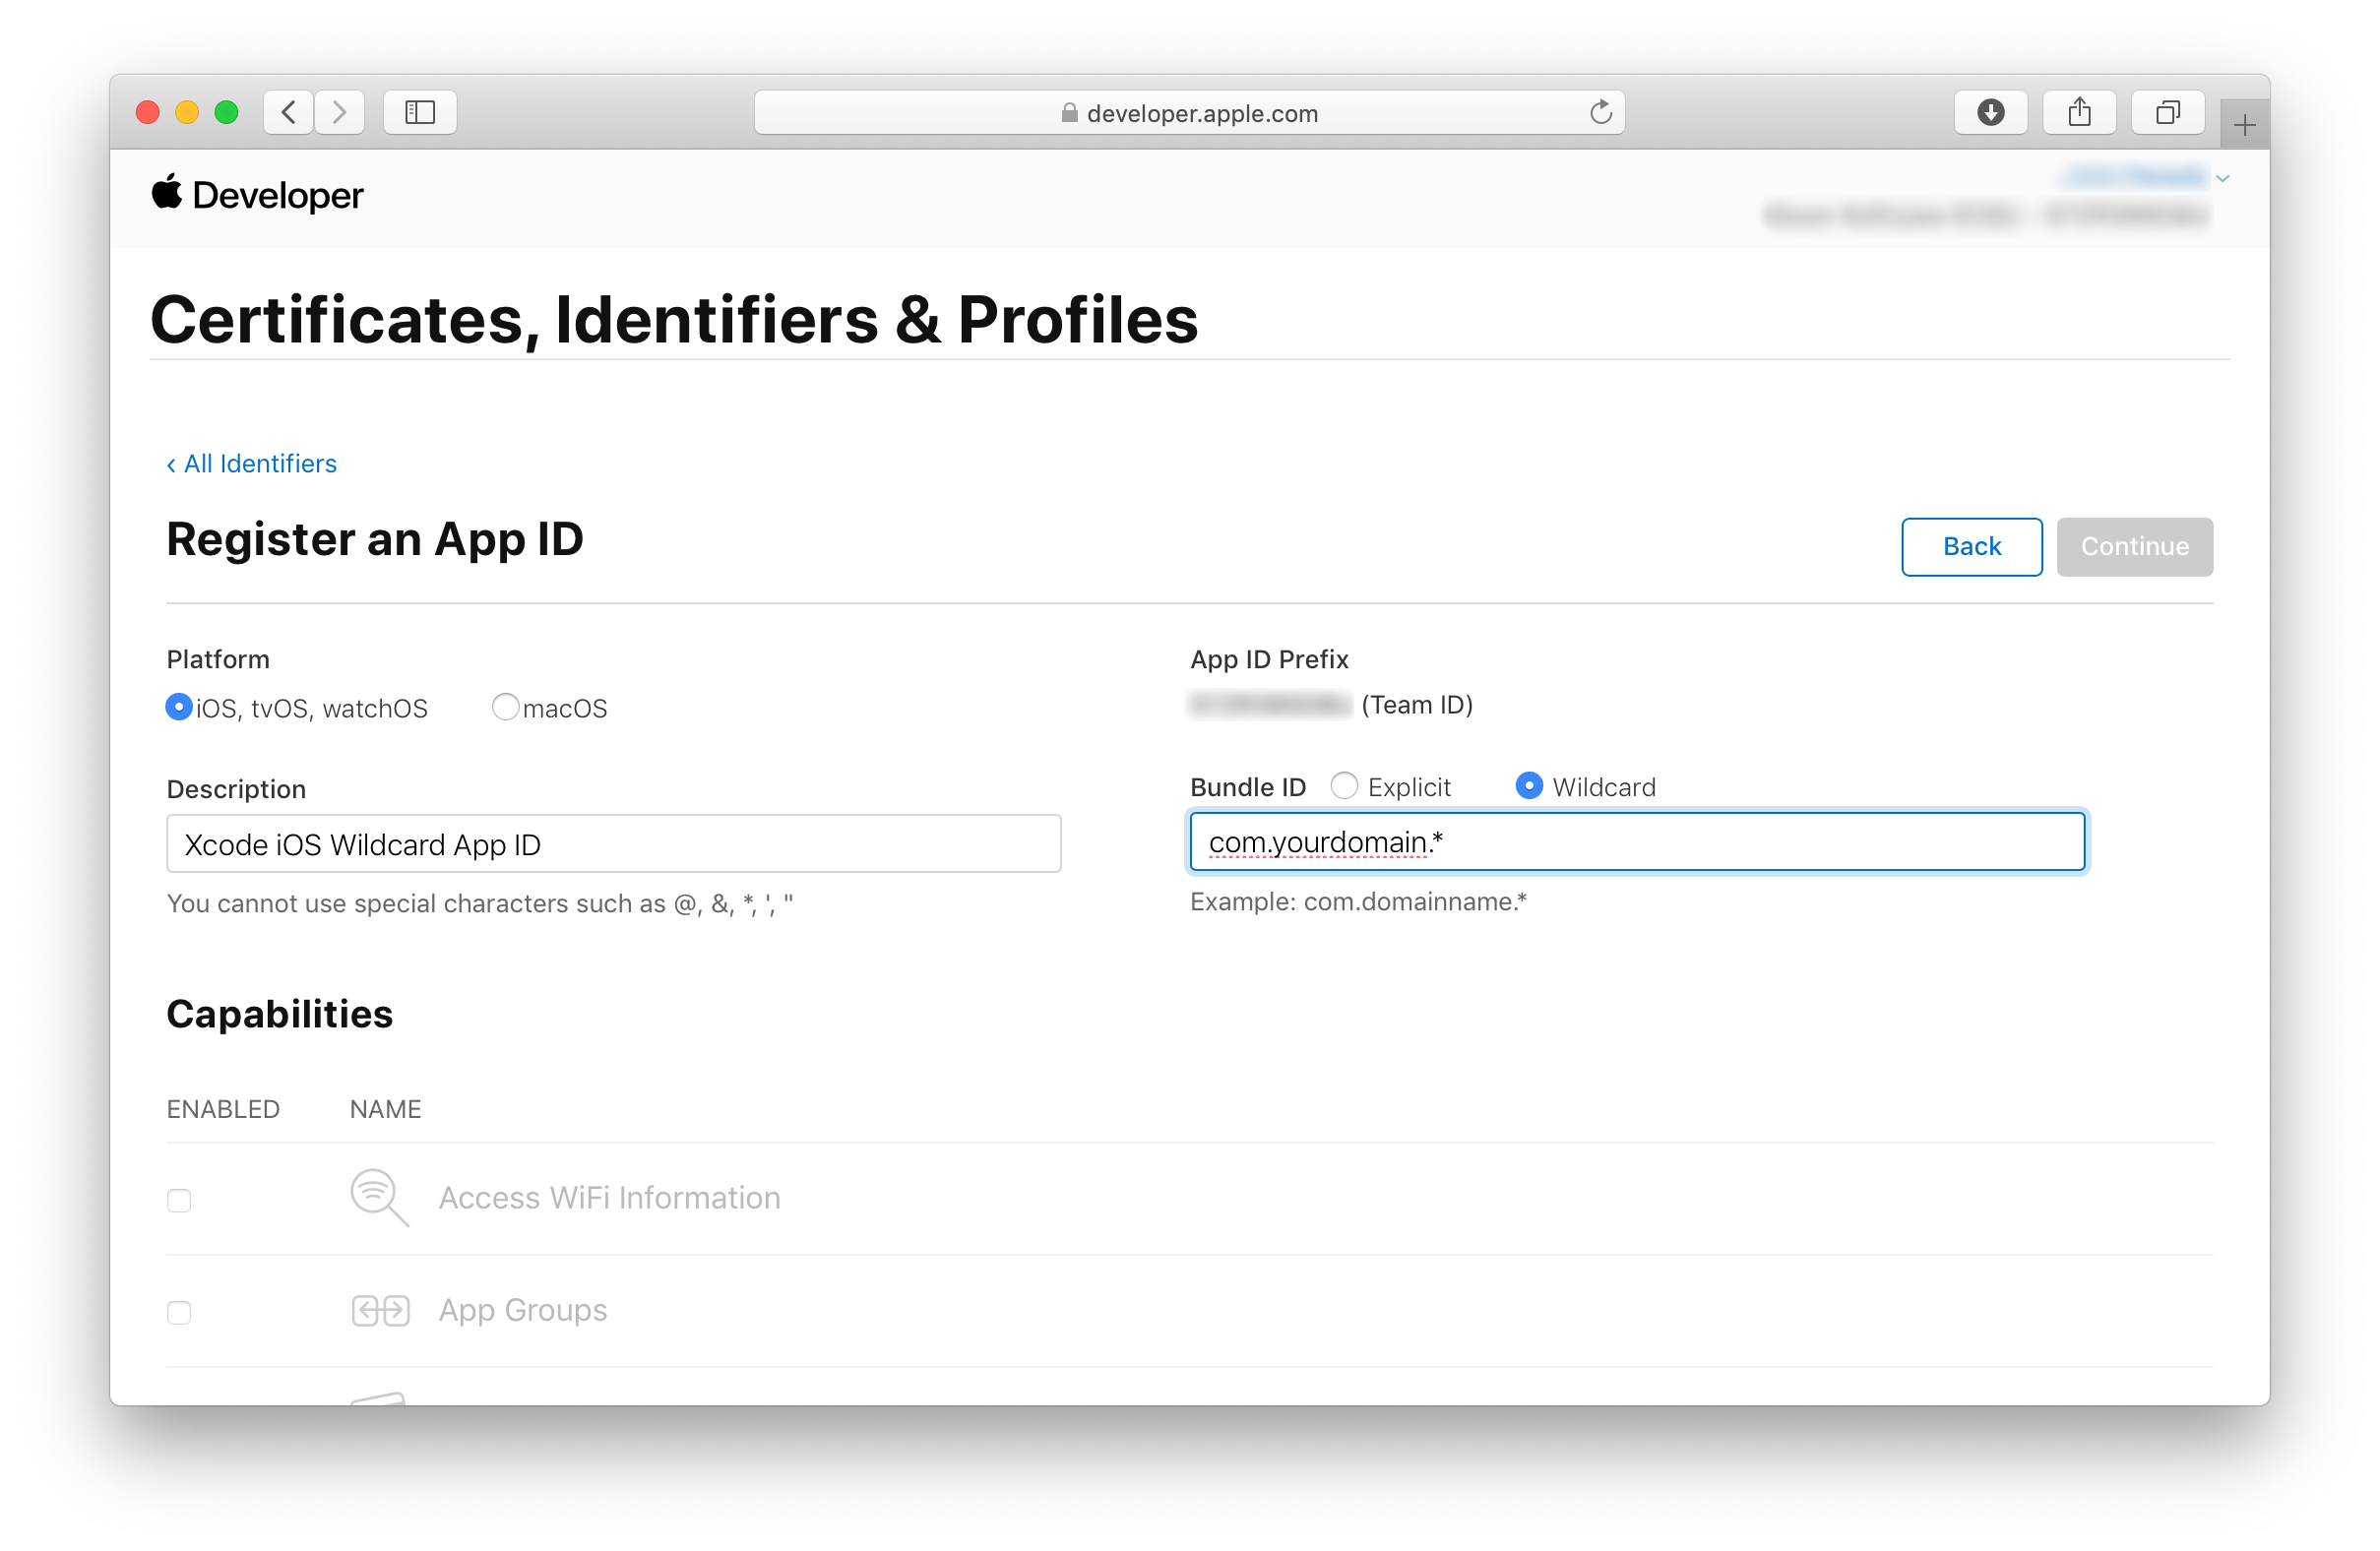
Alternatively, you can use a wildcard that will let you use a single App ID to match multiple apps. It is recommended to use your domain name, to filter out other apps.
Select any of the required services (if you are using an explicit Bundle ID), and click continue to create the App ID.
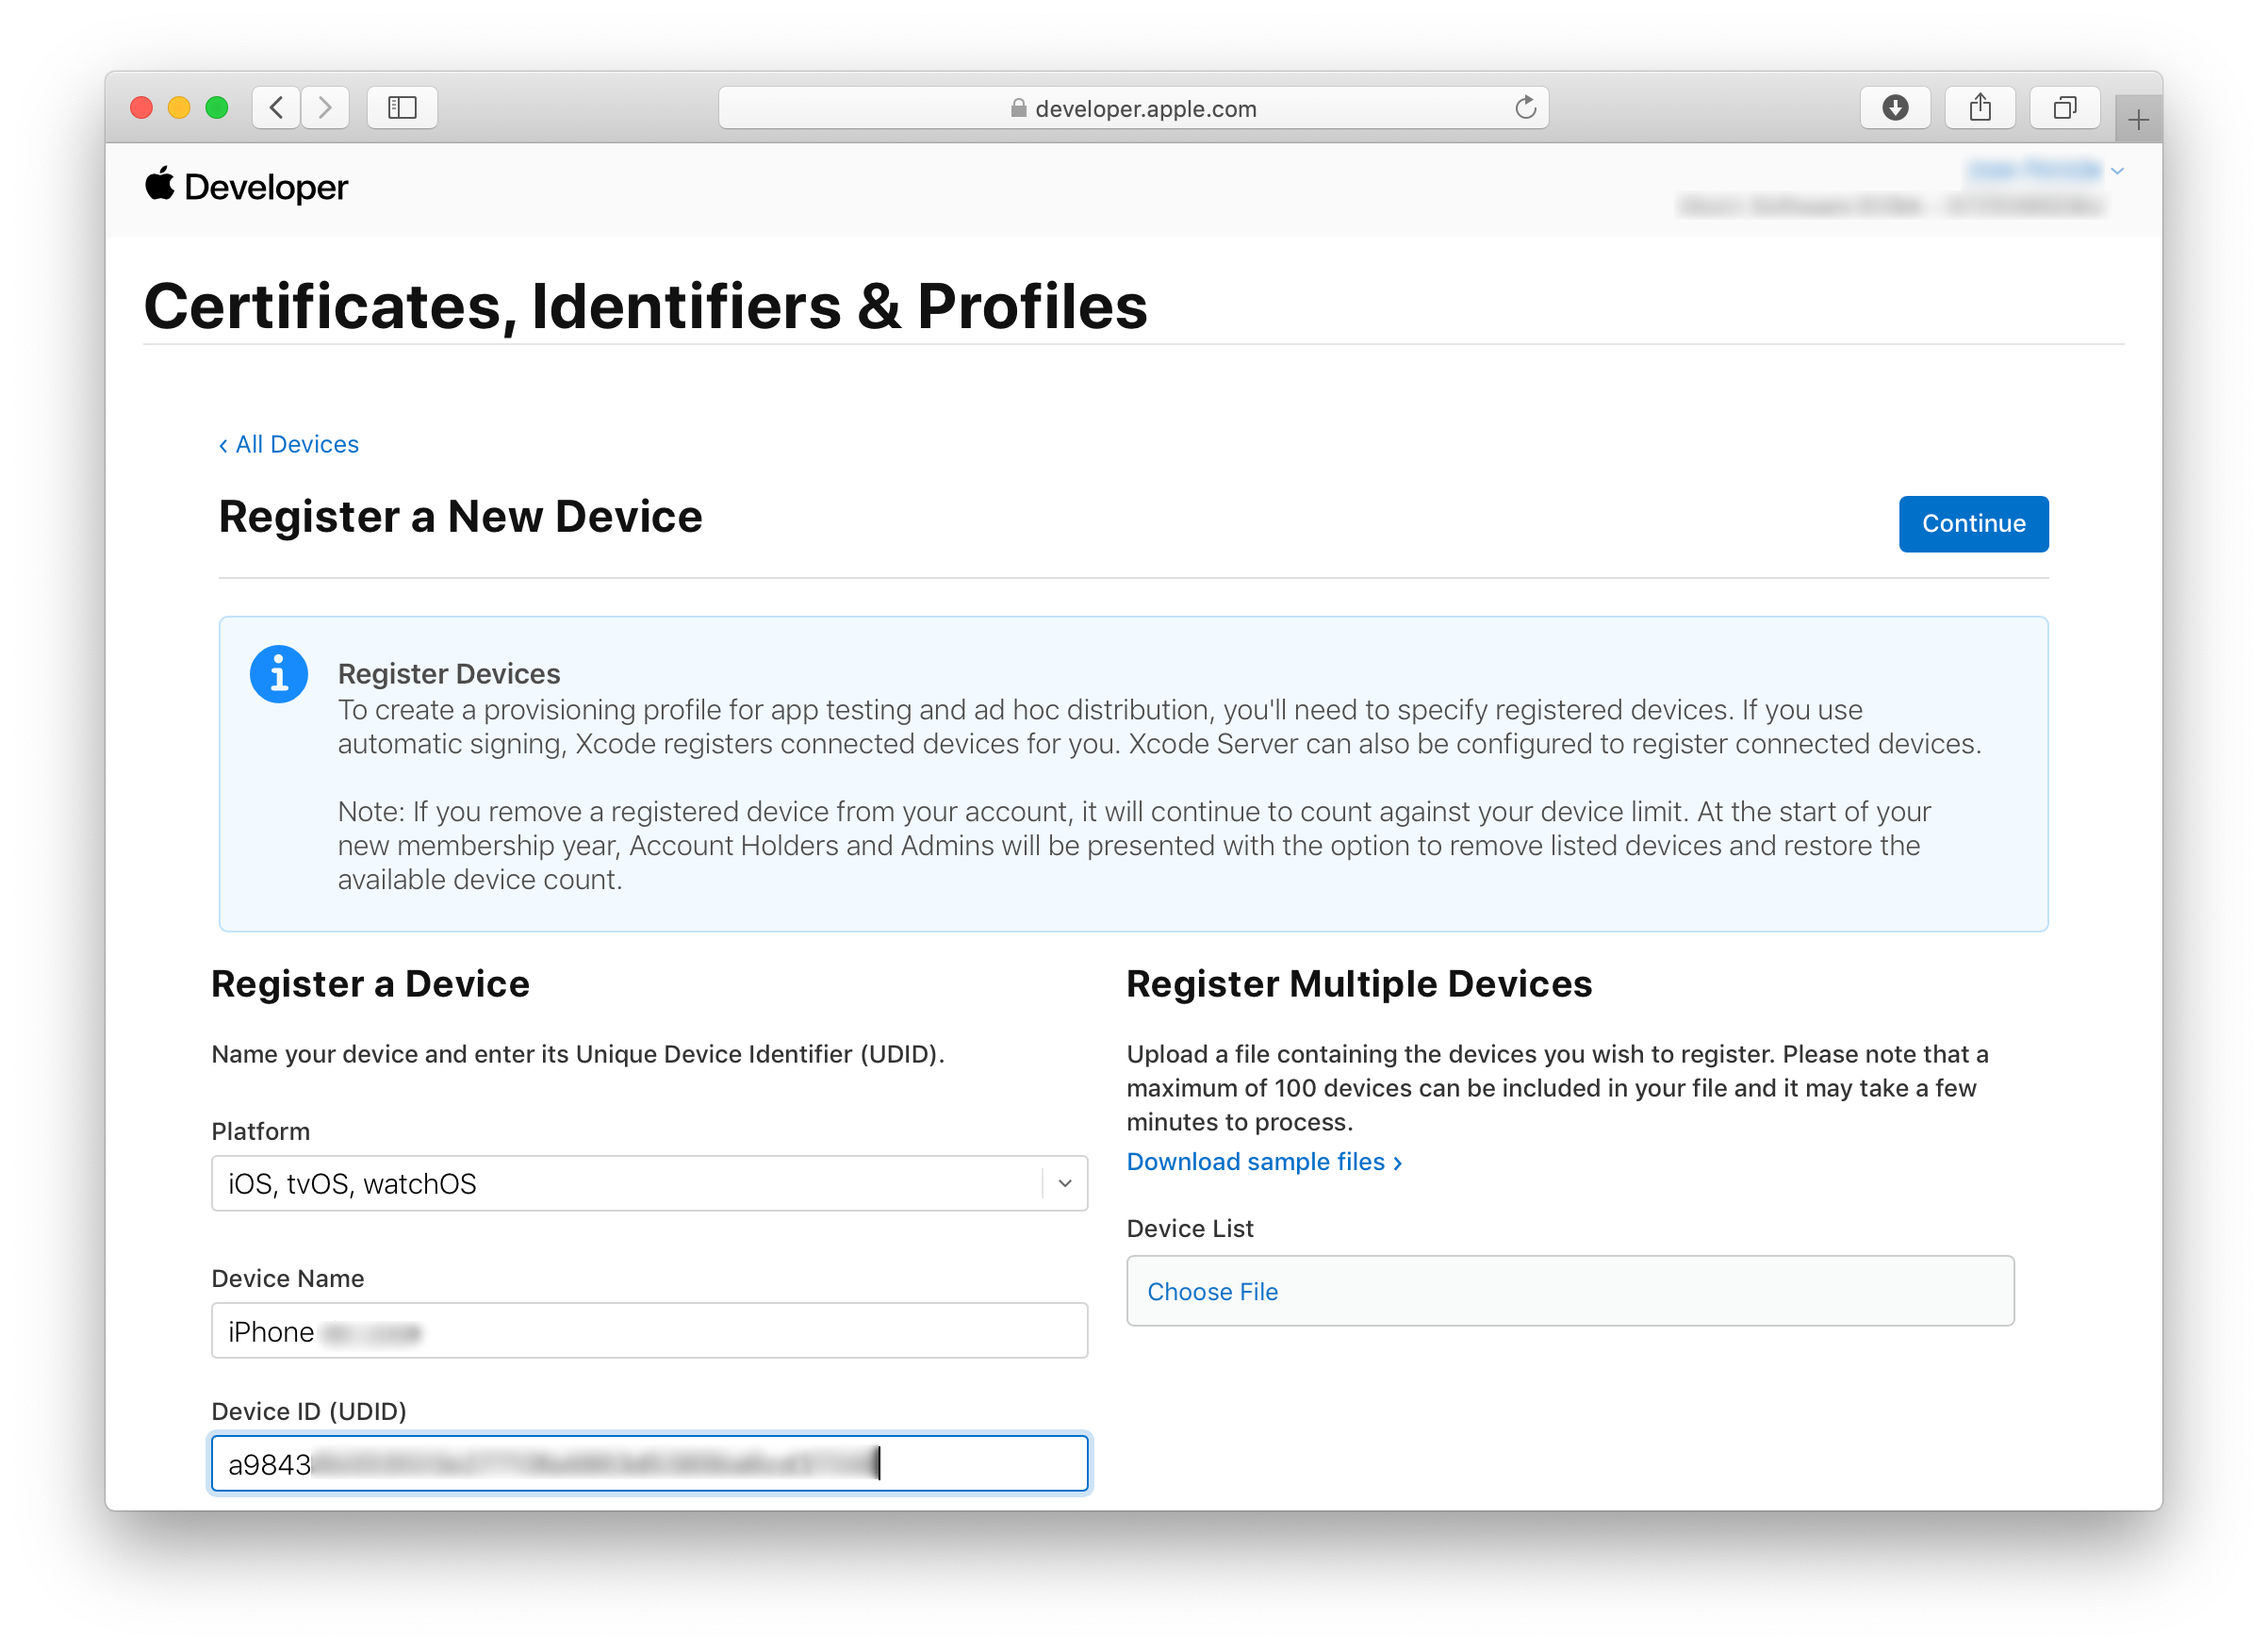
4.3.3. Devices
To create a provisioning profile for development, the devices that are allowed to run the application have to be identified.
To add your testing devices, you need to provide their UDID.It can be found from Xcode → Window → Devices and Simulators. Plug your device, select it from Connected devices, and then select its identifier and copy it.
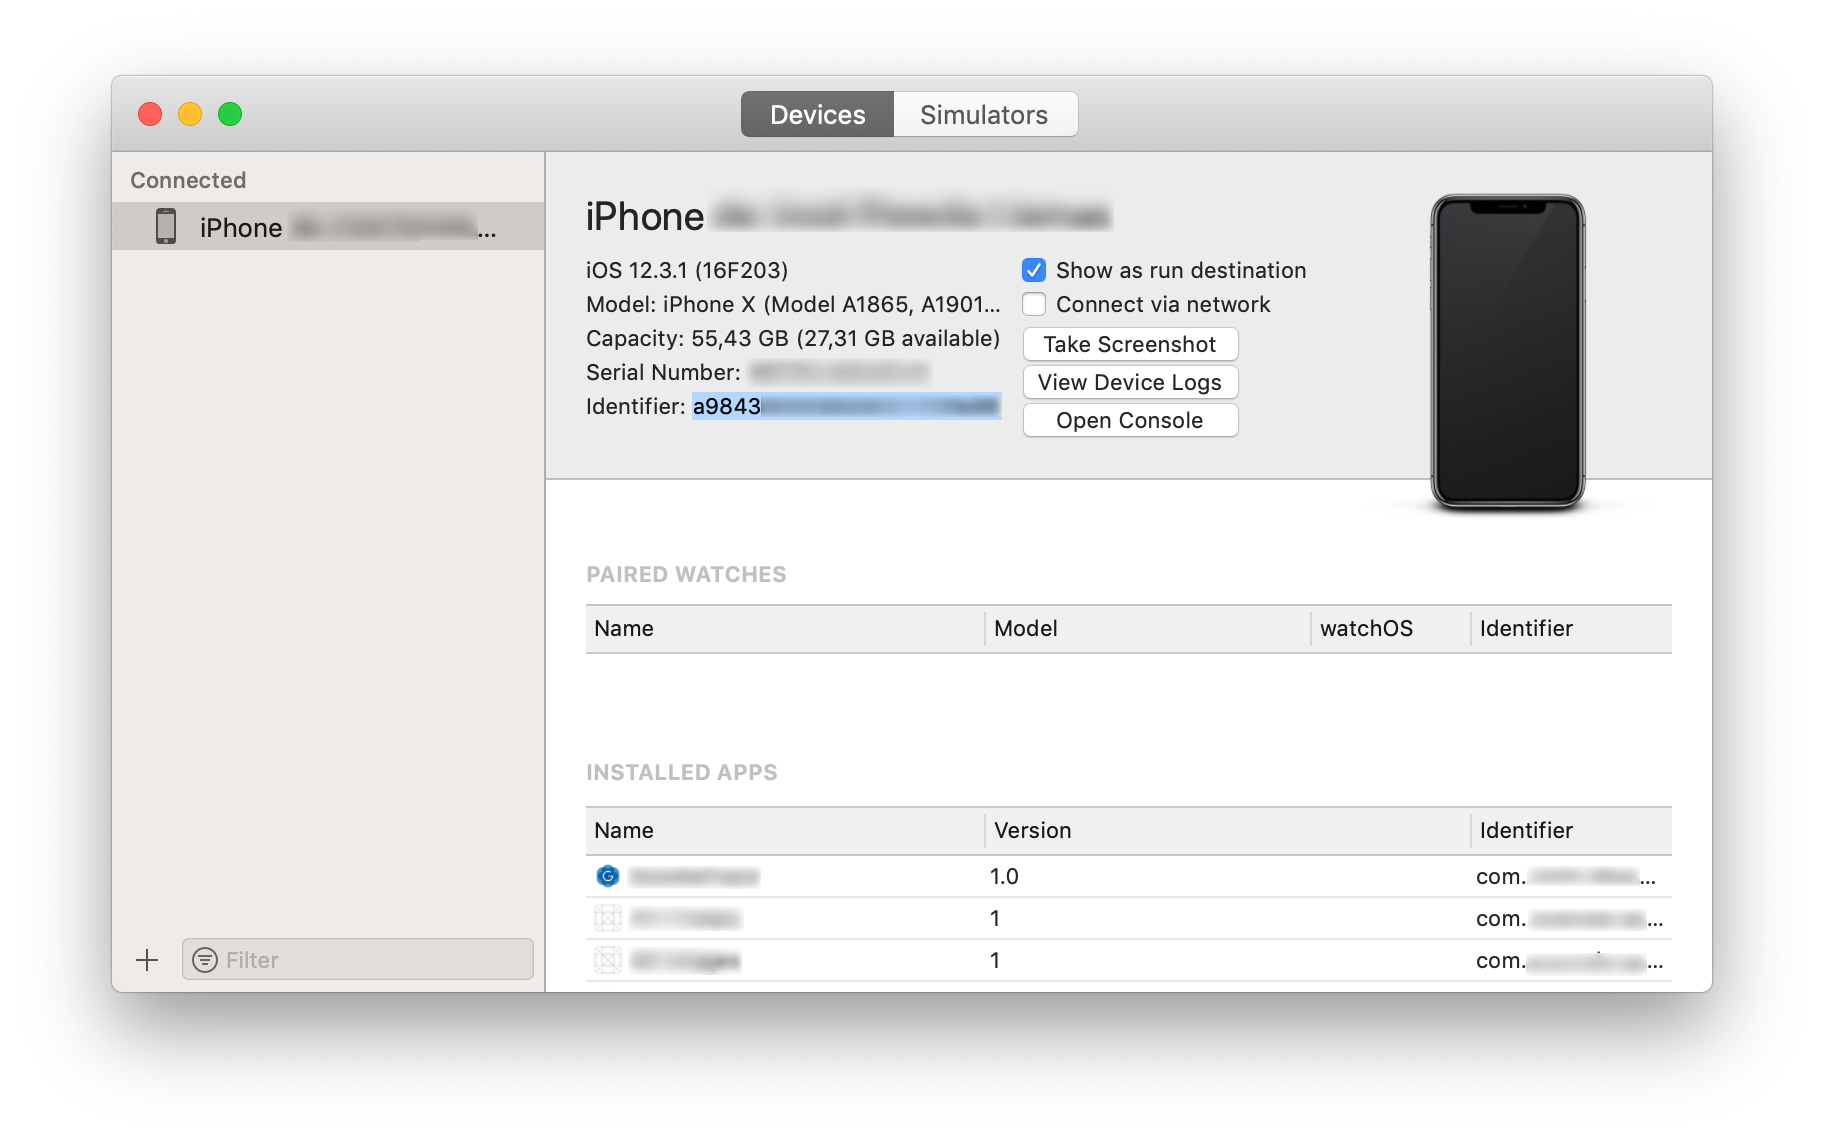
Go to the Developer portal, and access Certificates, Identifiers & Profiles. Select Devices from the left, and press +, to add a new device.
Add a name and paste the devices’s identifier.
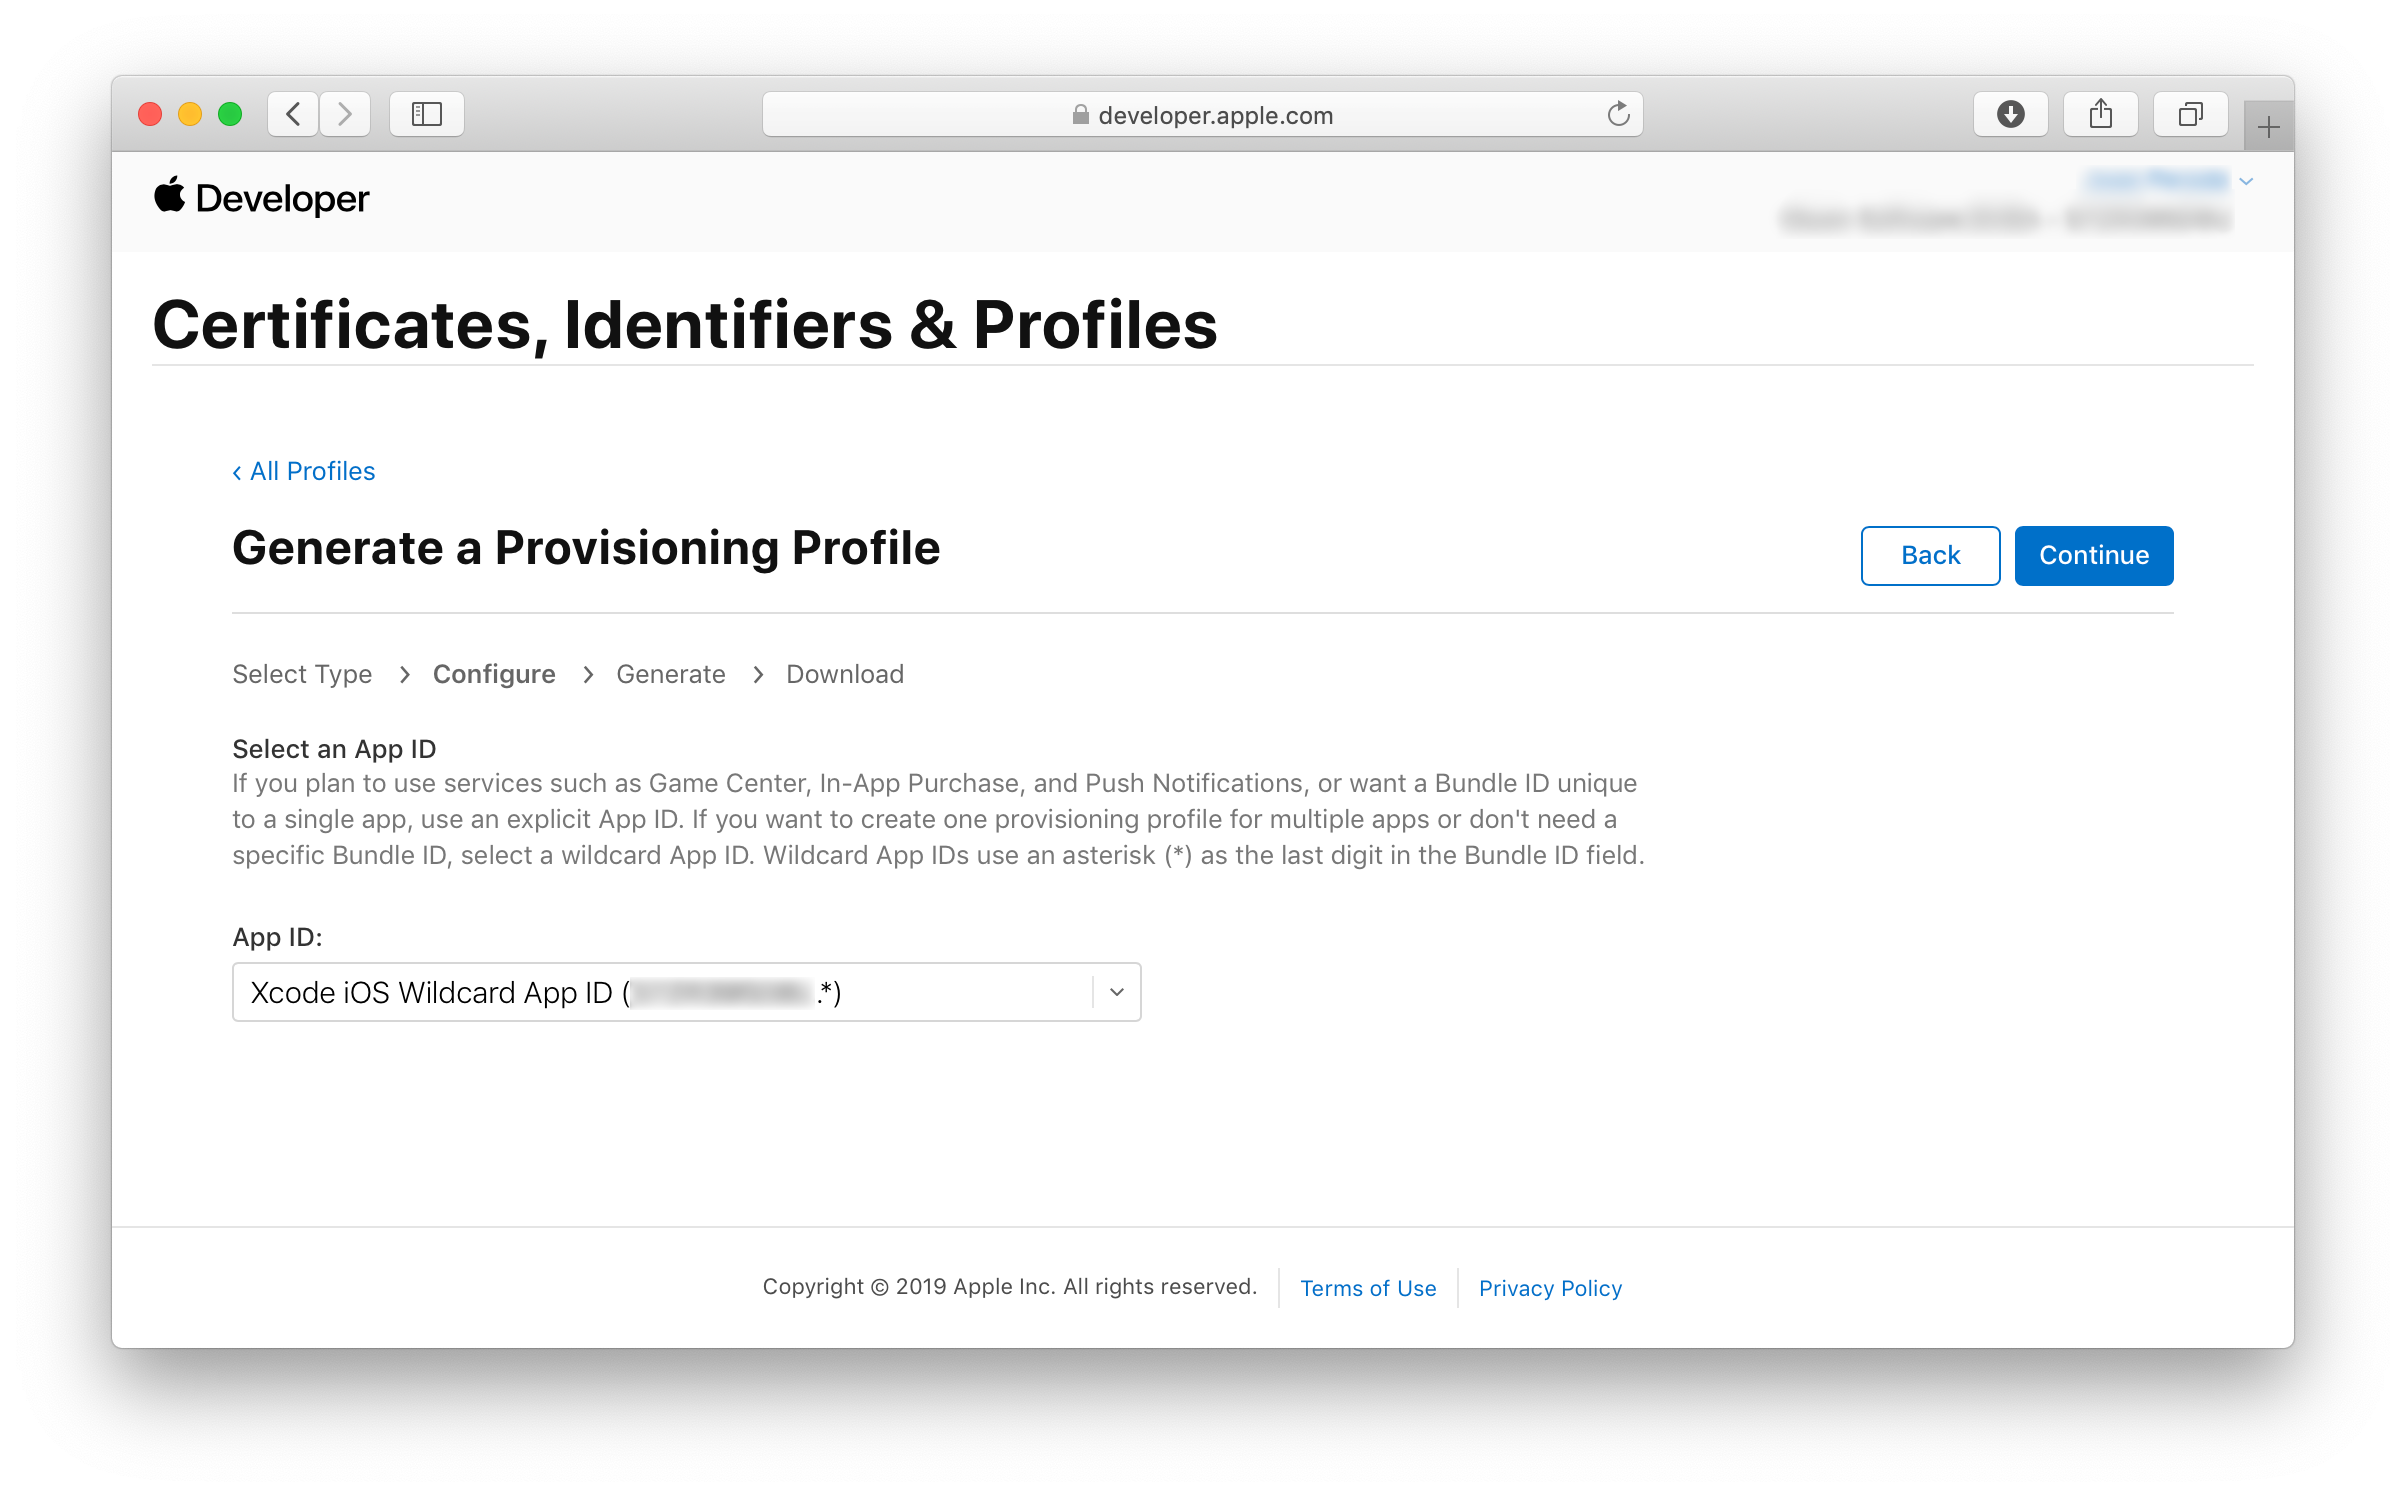
4.3.4. Profiles
Go to the Developer portal, and access Certificates, Identifiers & Profiles. Select Profiles from the left, and press +, to add a new provisioning profile.
To add a Development profile (later on you will need a Distribution one), select iOS App Development, and press continue.

From the drop down list, select a valid App ID:
-
If you plan to use services such as Game Center, In-App Purchase, and Push Notifications, or want a Bundle ID unique to a single app, use an explicit App ID.
-
If you want to create one provisioning profile for multiple apps or don’t need a specific Bundle ID, select a wildcard App ID.
Press continue and select one or more certificates that should be included in this provisioning profile.
Press continue and select one or more devices that should be include in this provisioning profile.
Press continue and finally, give a name to the provisioning profile, it will be used to identify the profile in the portal. Then press Generate.
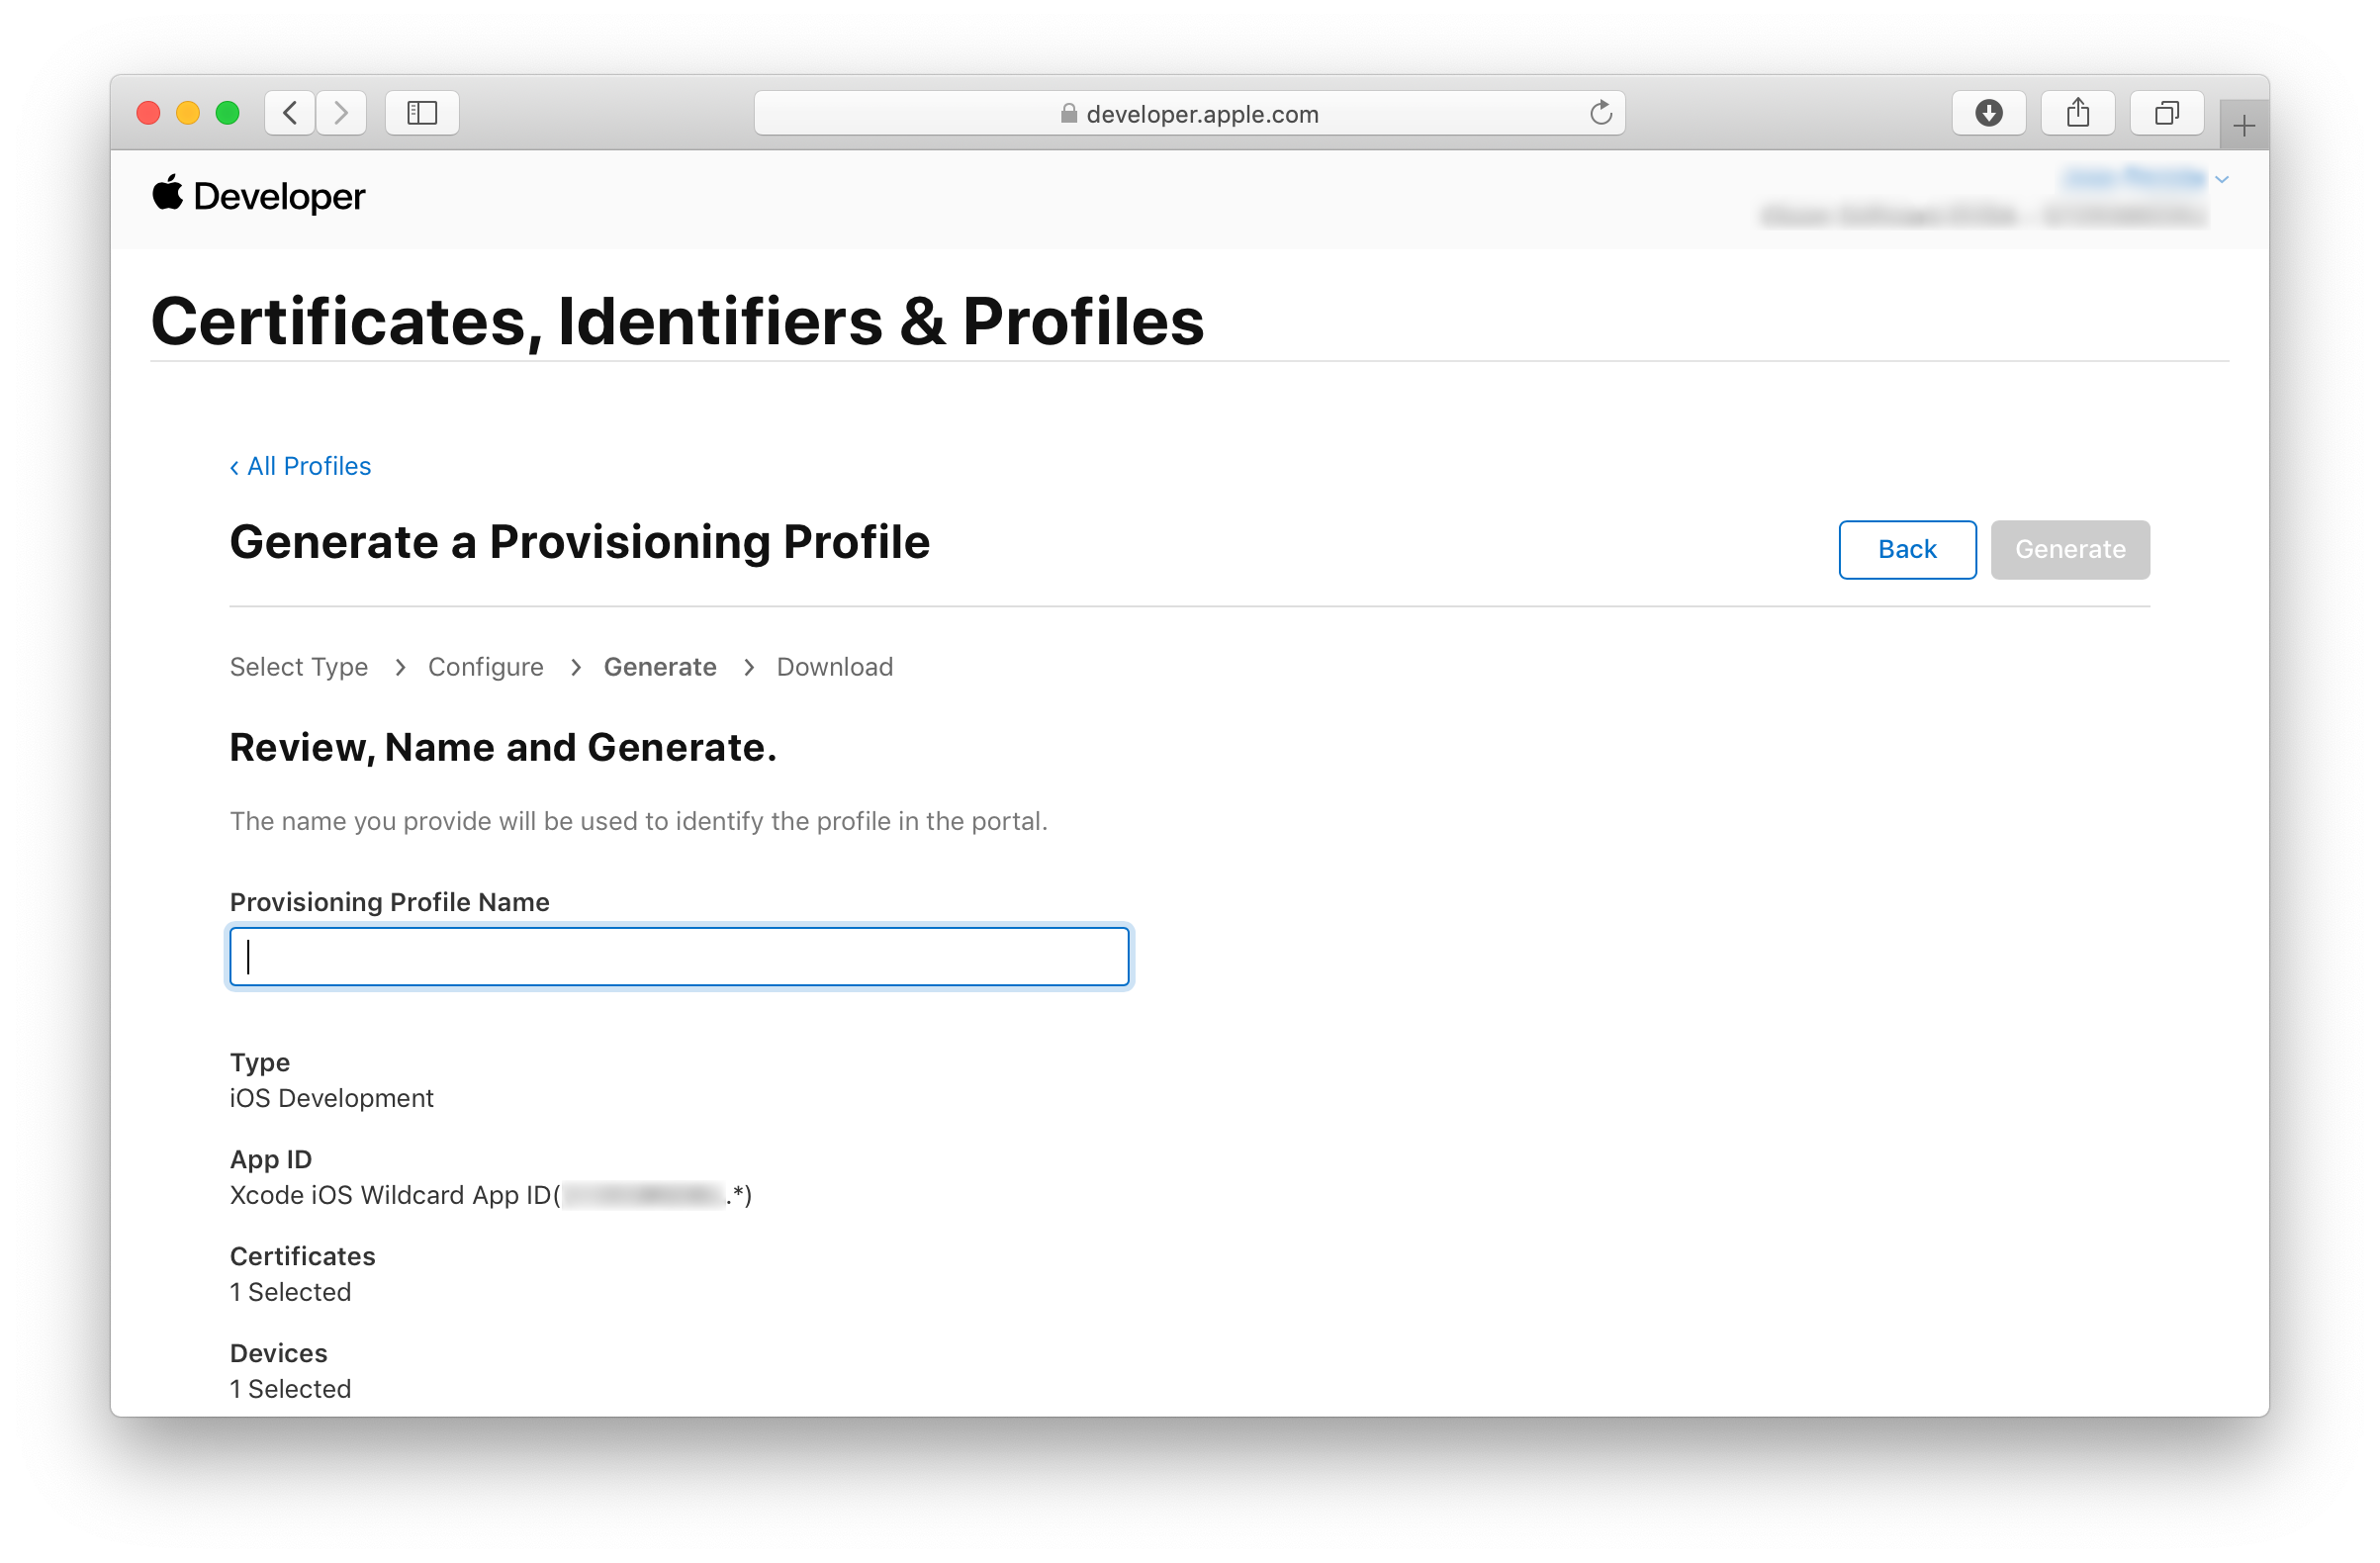
When finished, download it and install it by double clicking on the file.
4.4. Java Project
Back to your Java project, and assuming you have already done the AOT compilation phase, you need to run ./gradlew nativeLink (Gradle plugin) or mvn client:link (Maven plugin). This will generate the src/ios/Default-Info.plist file and the src/ios/assets folder with a default iconset.
You can modify the default values and iconset.
If you are using free provisioning or an explicit provisioning profile, edit the src/ios/Default-Info.plist file and set the exact same bundle ID as the one in the profile (note it is case sensitive):
<dict>
    <key>CFBundleIdentifier</key>
    <string>hello.fx.HelloFX</string>
    <key>CFBundleVersion</key>
    <string>1.0</string>
...
If you are using a wildcard, make sure the domain (if any) matches.
Note: the bundle identifier key doesn’t need to match your main class.
If you have modified the plist file, save it, and run again ./gradlew nativeLink (Gradle plugin) or mvn client:link (Maven plugin).
Using verbose = true (Gradle) or <verbose>true</verbose> (Maven) in the client plugin can be of help to trace which provisioning profile is used, and to check that a valid one was found:
CONSIDER provprofile ProvisioningProfile [type=Development, file=/Users/<user>/Library/MobileDevice/Provisioning Profiles/caae4d7d-b5d2-4************.mobileprovision, uuid=caae4d7d-b5d2-4************, name=iOS Team Provisioning Profile: hello.fx.HelloFX, appIdName=XC hello fx HelloFX, appIdPrefix=D6QST****, appId=D6QST****.hello.fx.HelloFX, creationDate=2019-06-18, expirationDate=2019-06-25, certFingerprints=[DA3D9B8C7640*******]]

YES, we have a MATCH!!
If the link task finishes successfully, you can deploy. With your iOS device plugged in, run: ./gradlew nativeRun (Gradle plugin) or mvn client:run (Maven plugin).
Note: If you are using free provisioning, this will deploy your Java app replacing the Xcode app.
At the end of the process you should get your app running on your iOS device.
5. Android Development
|
Note
|
At the moment, native images for Android can only be built on Linux. |
To target android devices, <target>android</target> needs to be added to the Gluon client plugin configuration:
<plugin>
    <groupId>com.gluonhq</groupId>
    <artifactId>client-maven-plugin</artifactId>
    <version>${client.plugin.version}</version>
    <configuration>
        <target>android</target>
        <mainClass>${mainClassName}</mainClass>
    </configuration>
</plugin>
Or alternatively, a Maven profile can be used:
<plugin>
    <groupId>com.gluonhq</groupId>
    <artifactId>client-maven-plugin</artifactId>
    <version>${client.plugin.version}</version>
    <configuration>
        <target>${client.target}</target>
        <mainClass>${mainClassName}</mainClass>
    </configuration>
</plugin>
<profiles>
    <profile>
        <id>android</id>
        <properties>
            <client.target>android</client.target>
        </properties>
    </profile>
</profiles>
The project can be built using mvn -Pandroid client:build. This will run the compilation phase and
link the compiled objects into an android executable.
Run mvn -Pandroid client:package to generate an android application package (an APK) that can be
installed on any android device.
To install the application to a connected android device, run mvn -Pandroid client:install.
Finally, you can call mvn -Pandroid client:run to launch the application on the device. The client plugin
will also start adb logcat to print out debugging information from the device to the console.
6. IDE Plugins
Gluon releases IDE plugins for all major Java IDEs. These plugins can be used to create a basic project with all the required dependencies to natively build the project and ultimately run the native image. These plugins can be used to create either a Maven or Gradle project. We will briefly discuss on how to install these plugins, create a new project and build a native image using Gluon Client in the following section.
6.1. The Gluon Plugin for IntelliJ IDEA
In this section, we’ll explain briefly how to install the plugin on IntelliJ IDEA and how to use it to create a sample application that can be deployed on desktop, Android and iOS devices. Before we start, make sure to check the list of prerequisites.
6.1.1. Plugin Installation
You can get it from here,
or you can directly install it from IntelliJ IDEA: click File→Settings… (or IntelliJ IDEA→Preferences…) and select Plugins on the left. You will see the installed plugins on your system.
Now click Marketplace, type Gluon, select the result and click Install.
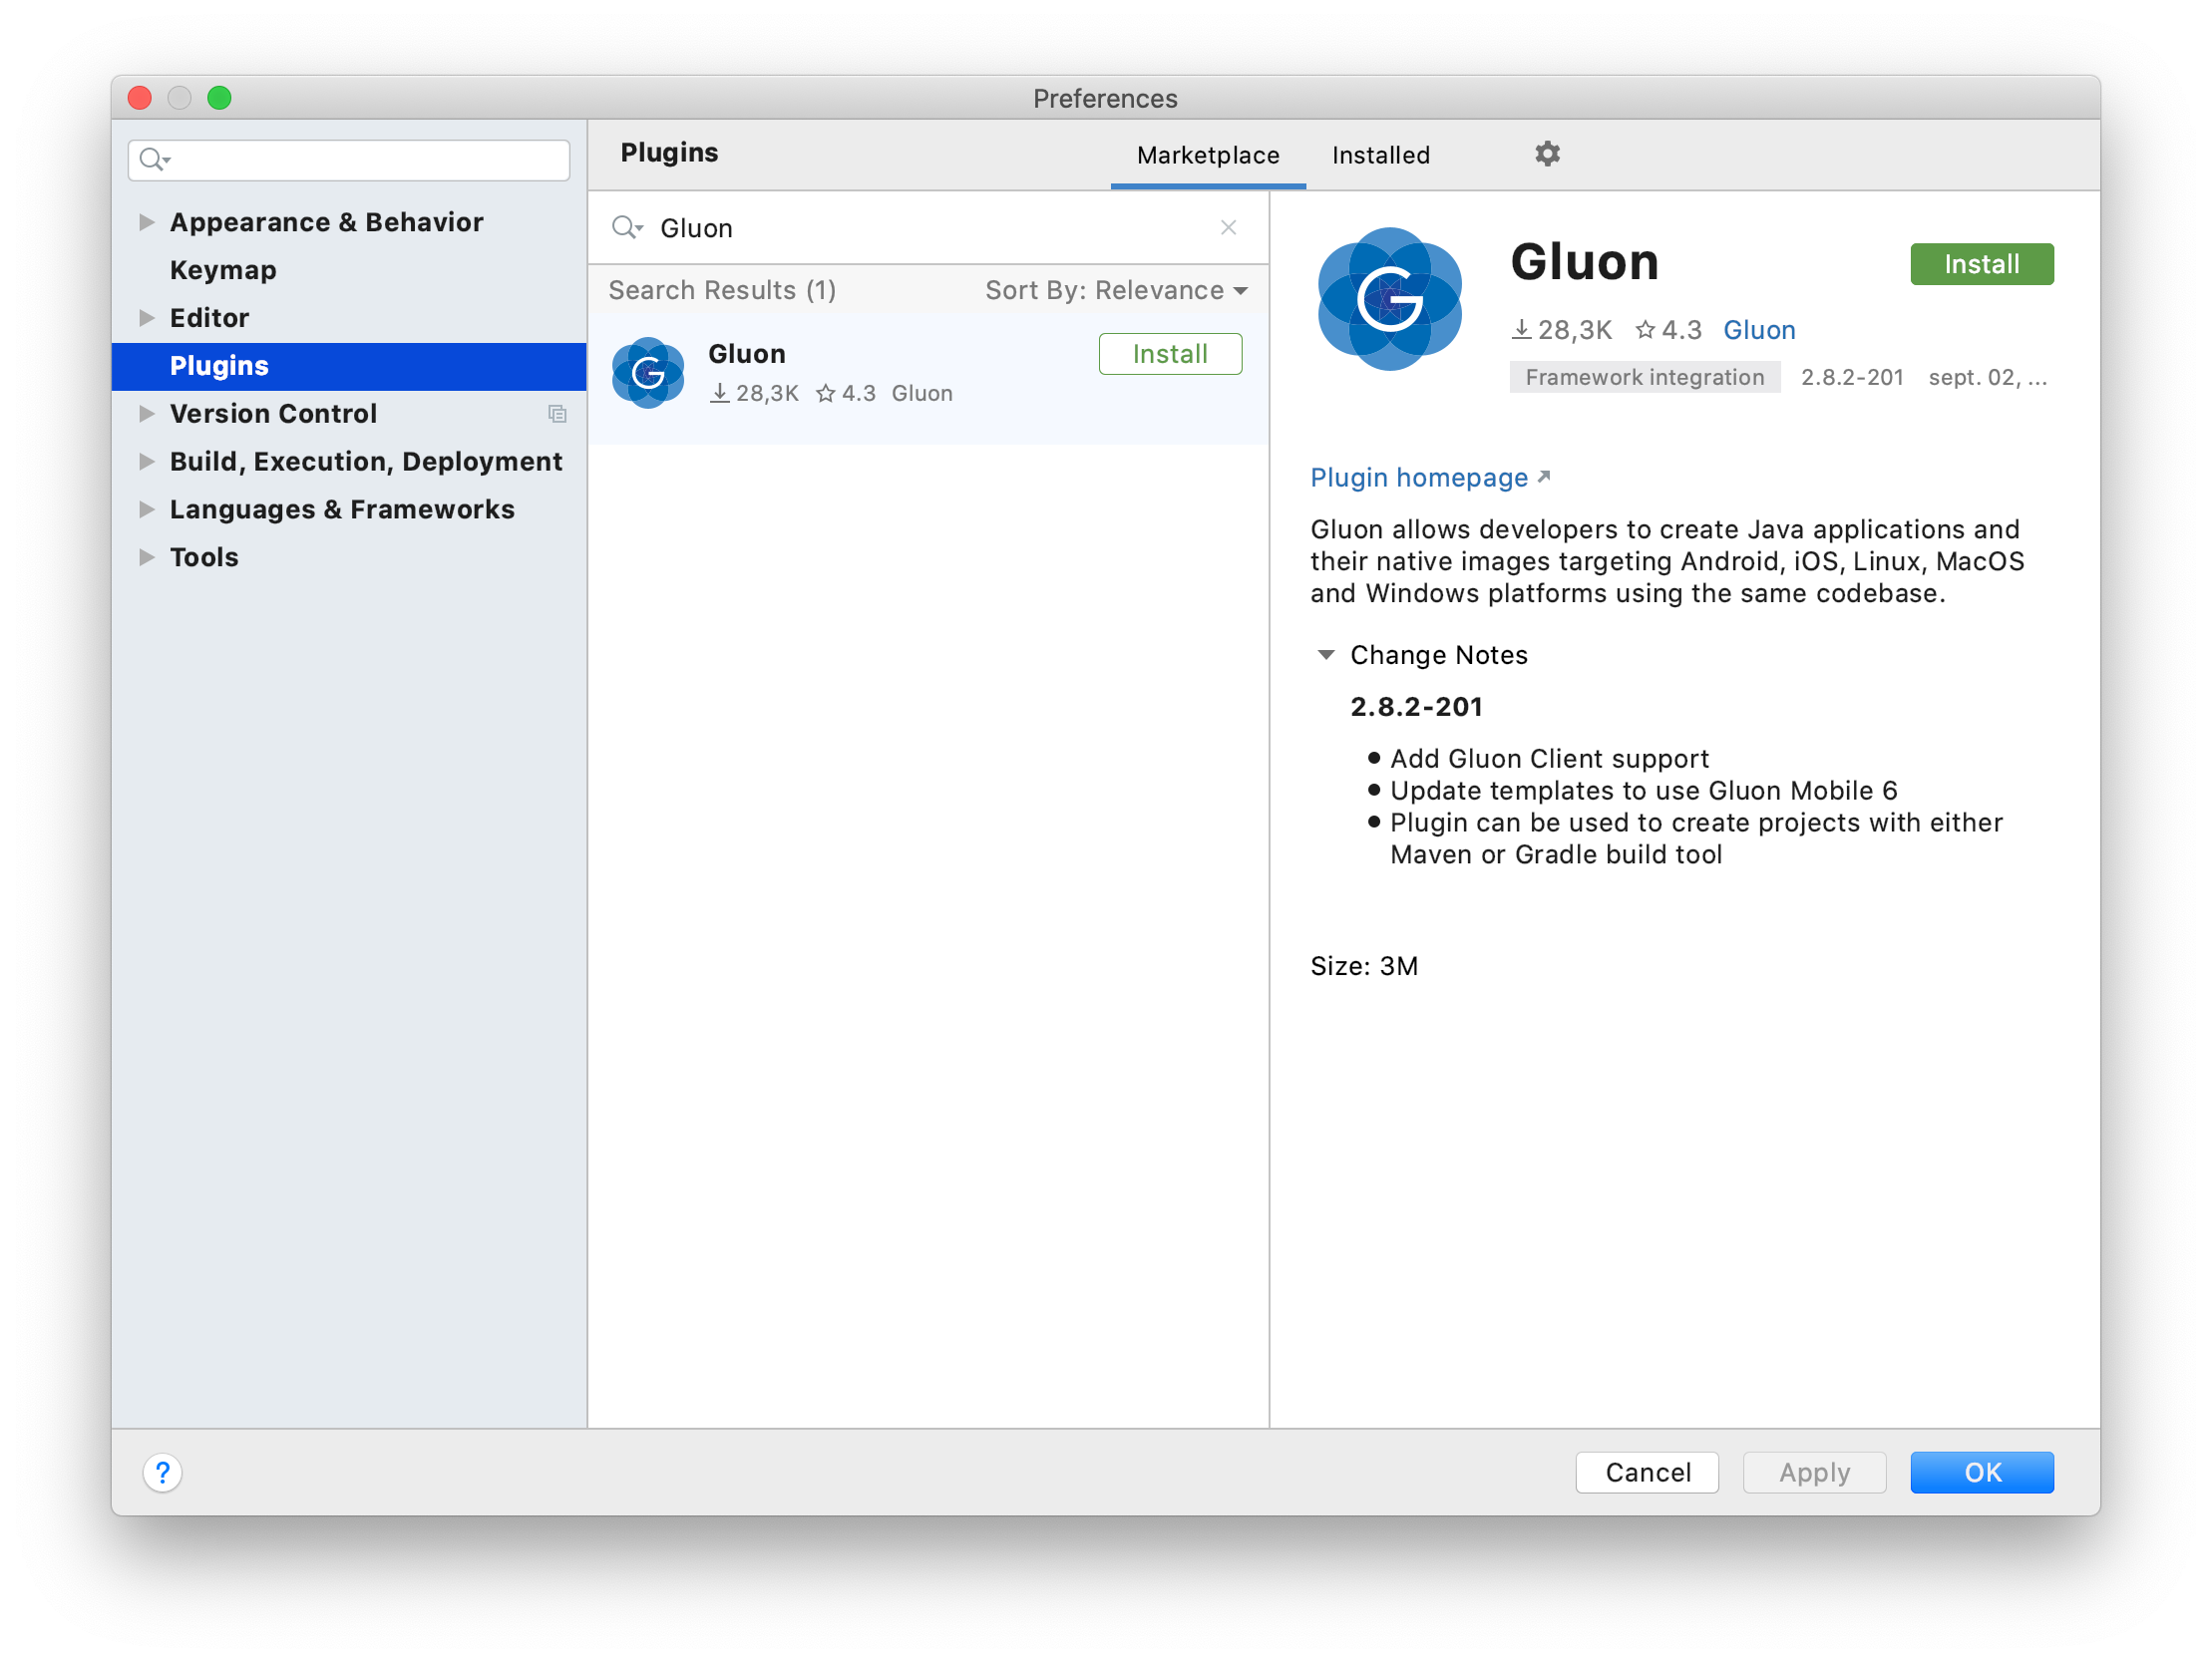
The Gluon Plugin will be downloaded and installed. Then press Restart IDE or simply press OK to close the plugins dialog, and restart the IDE when asked.
6.1.2. Create a new Gluon project
Once the plugin is installed, we can use it to create a sample application.
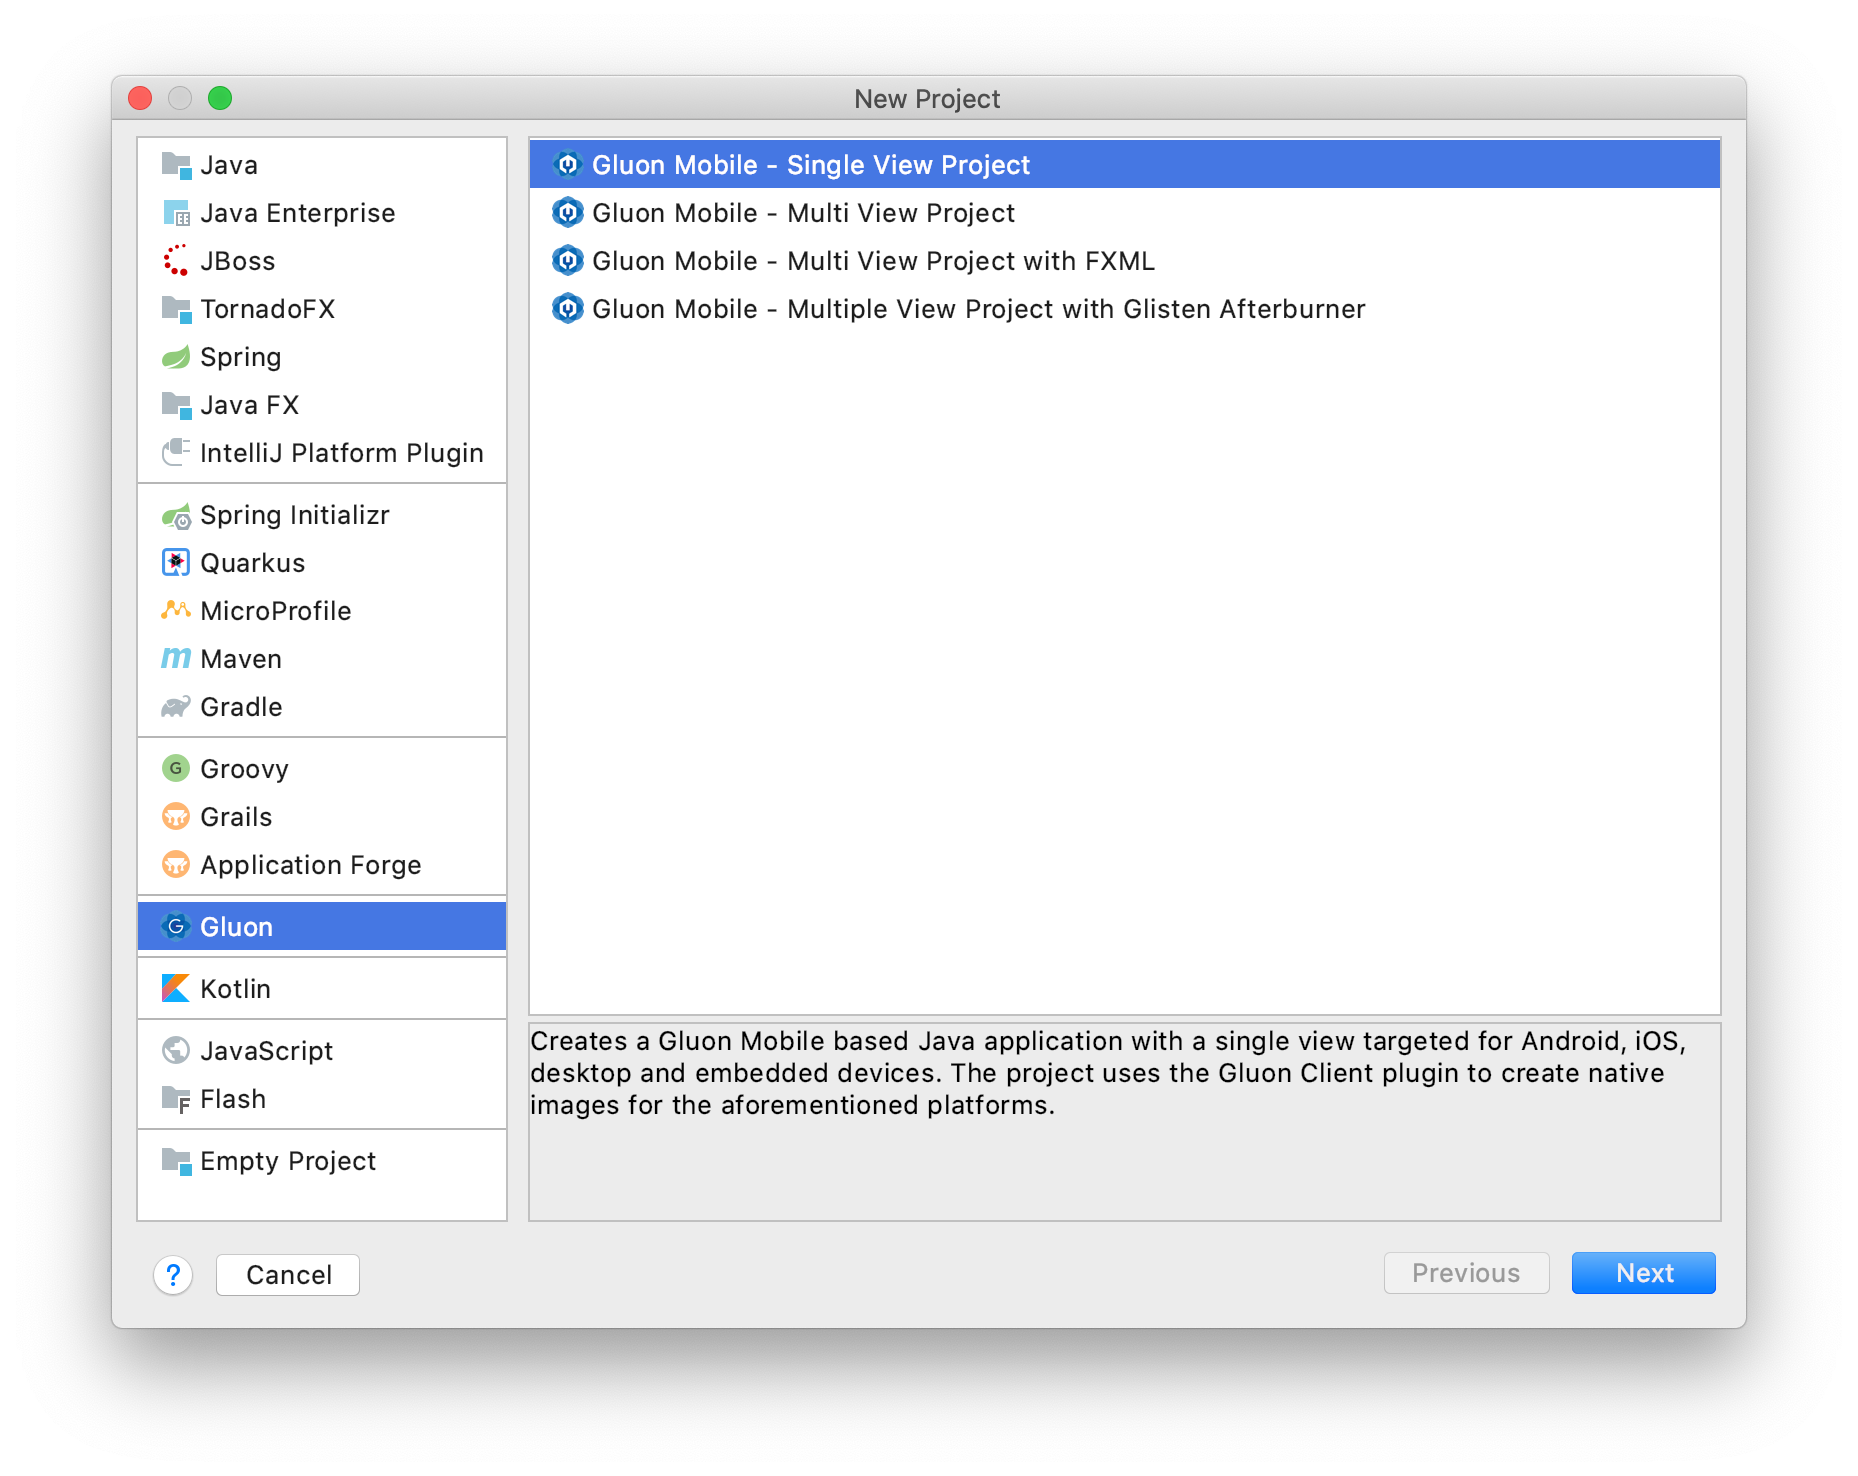
In IntelliJ IDEA, click File → New → Project… and select Gluon on the left, and one of the available projects on the right.
For instance, Gluon Mobile - Single View Project. Press Next.
The first time you use the plugin, you will be asked to enter your email address.
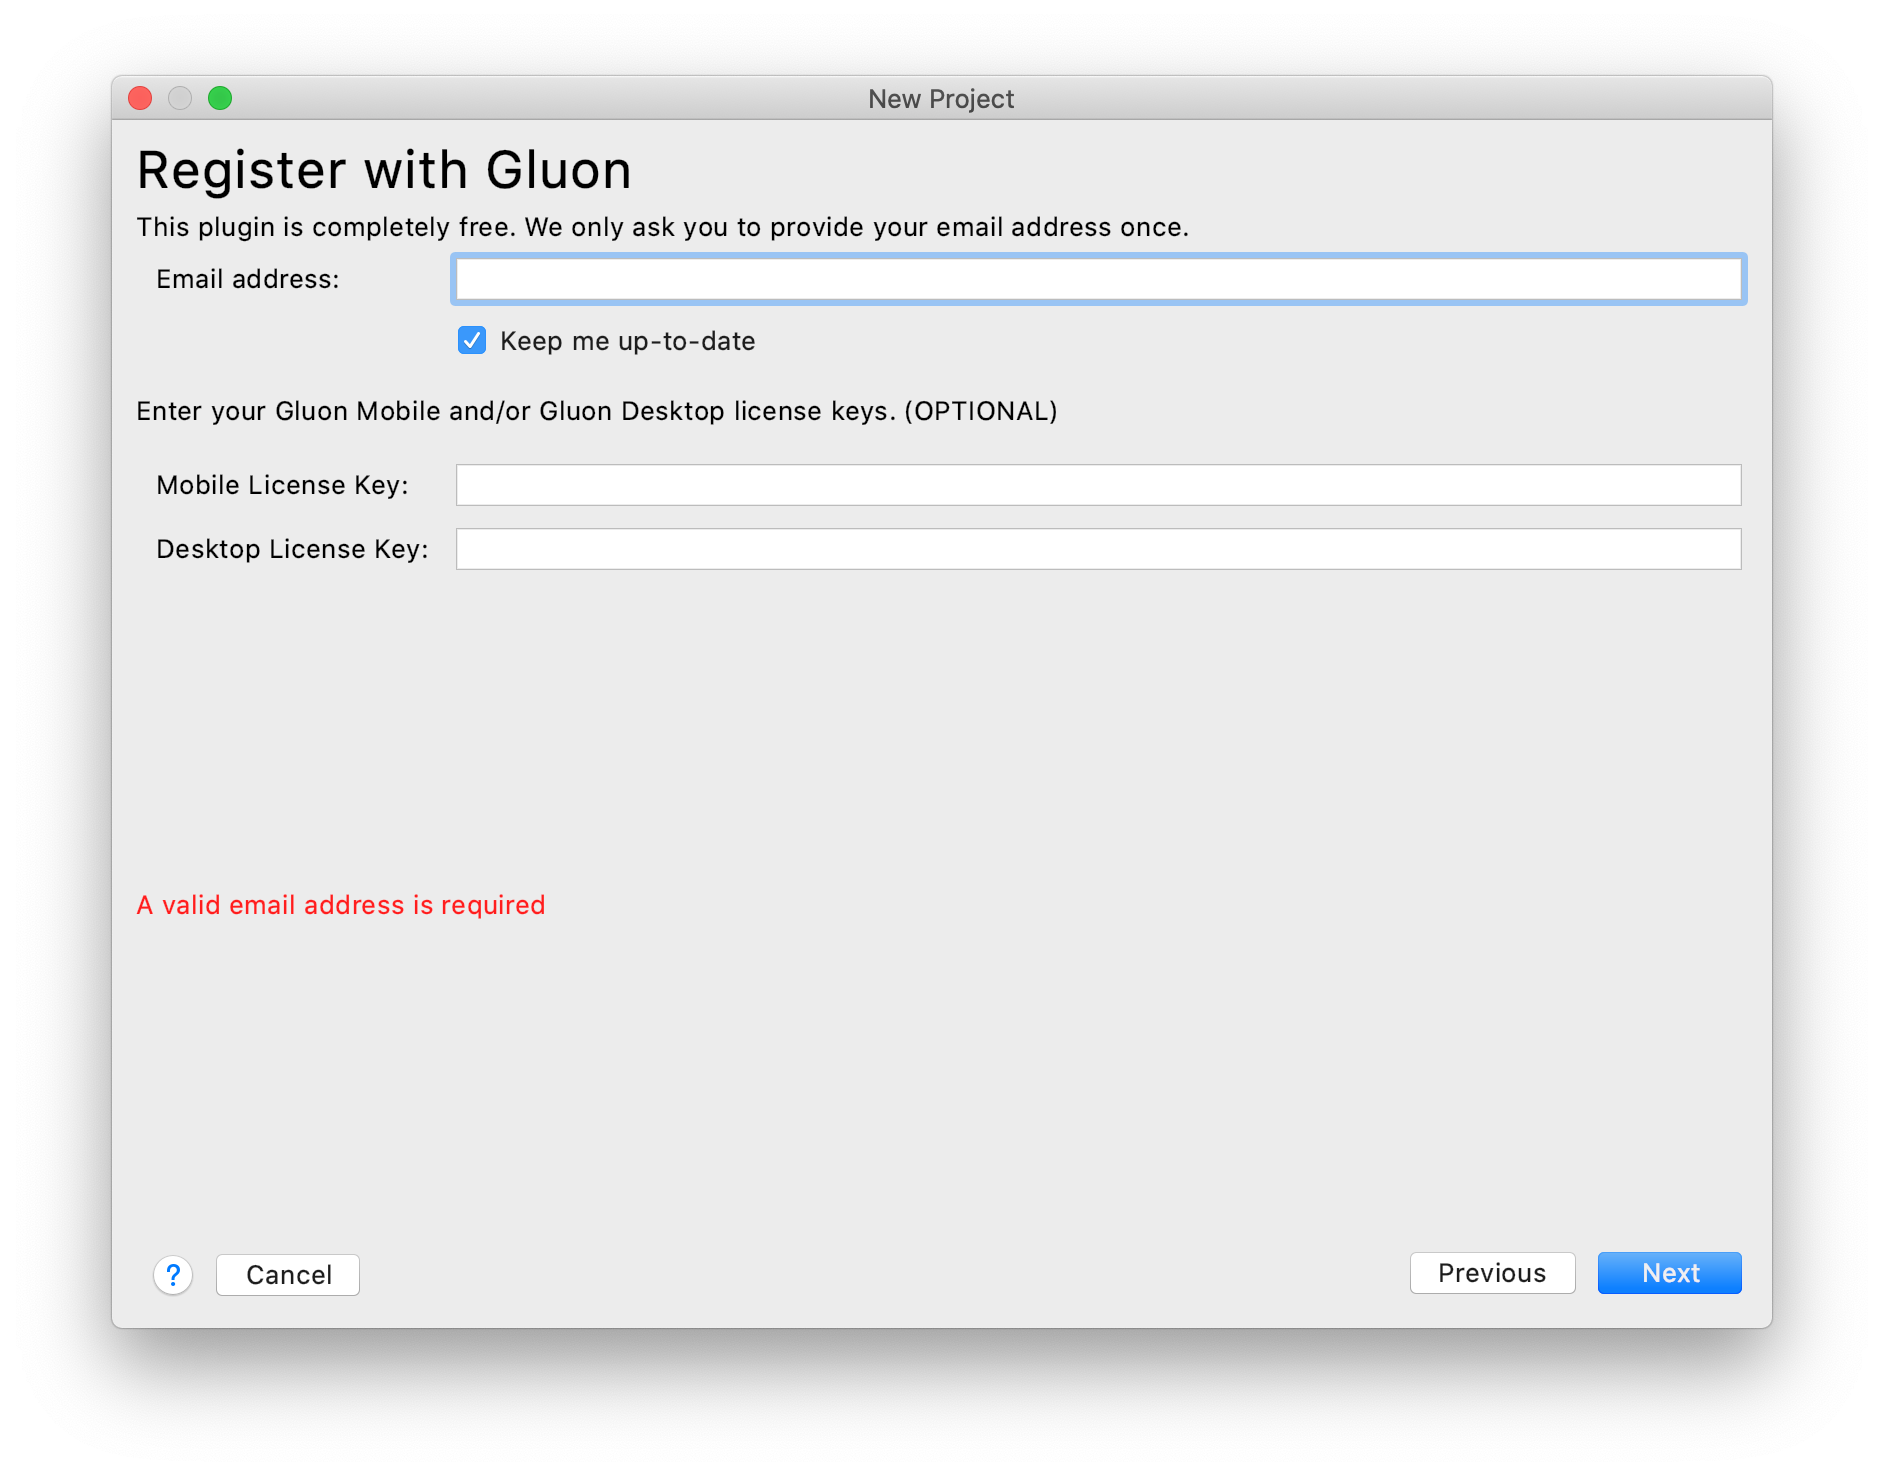
If you already have a Gluon Mobile key for your projects, you can insert it here as well, so it will be added by default to your new projects. If you don’t, you will be using the free (trial) version. Please find more about Gluon Mobile licenses.
You can access these settings later on from File→Settings→Gluon (or IntelliJ IDEA→Preferences…→Gluon):
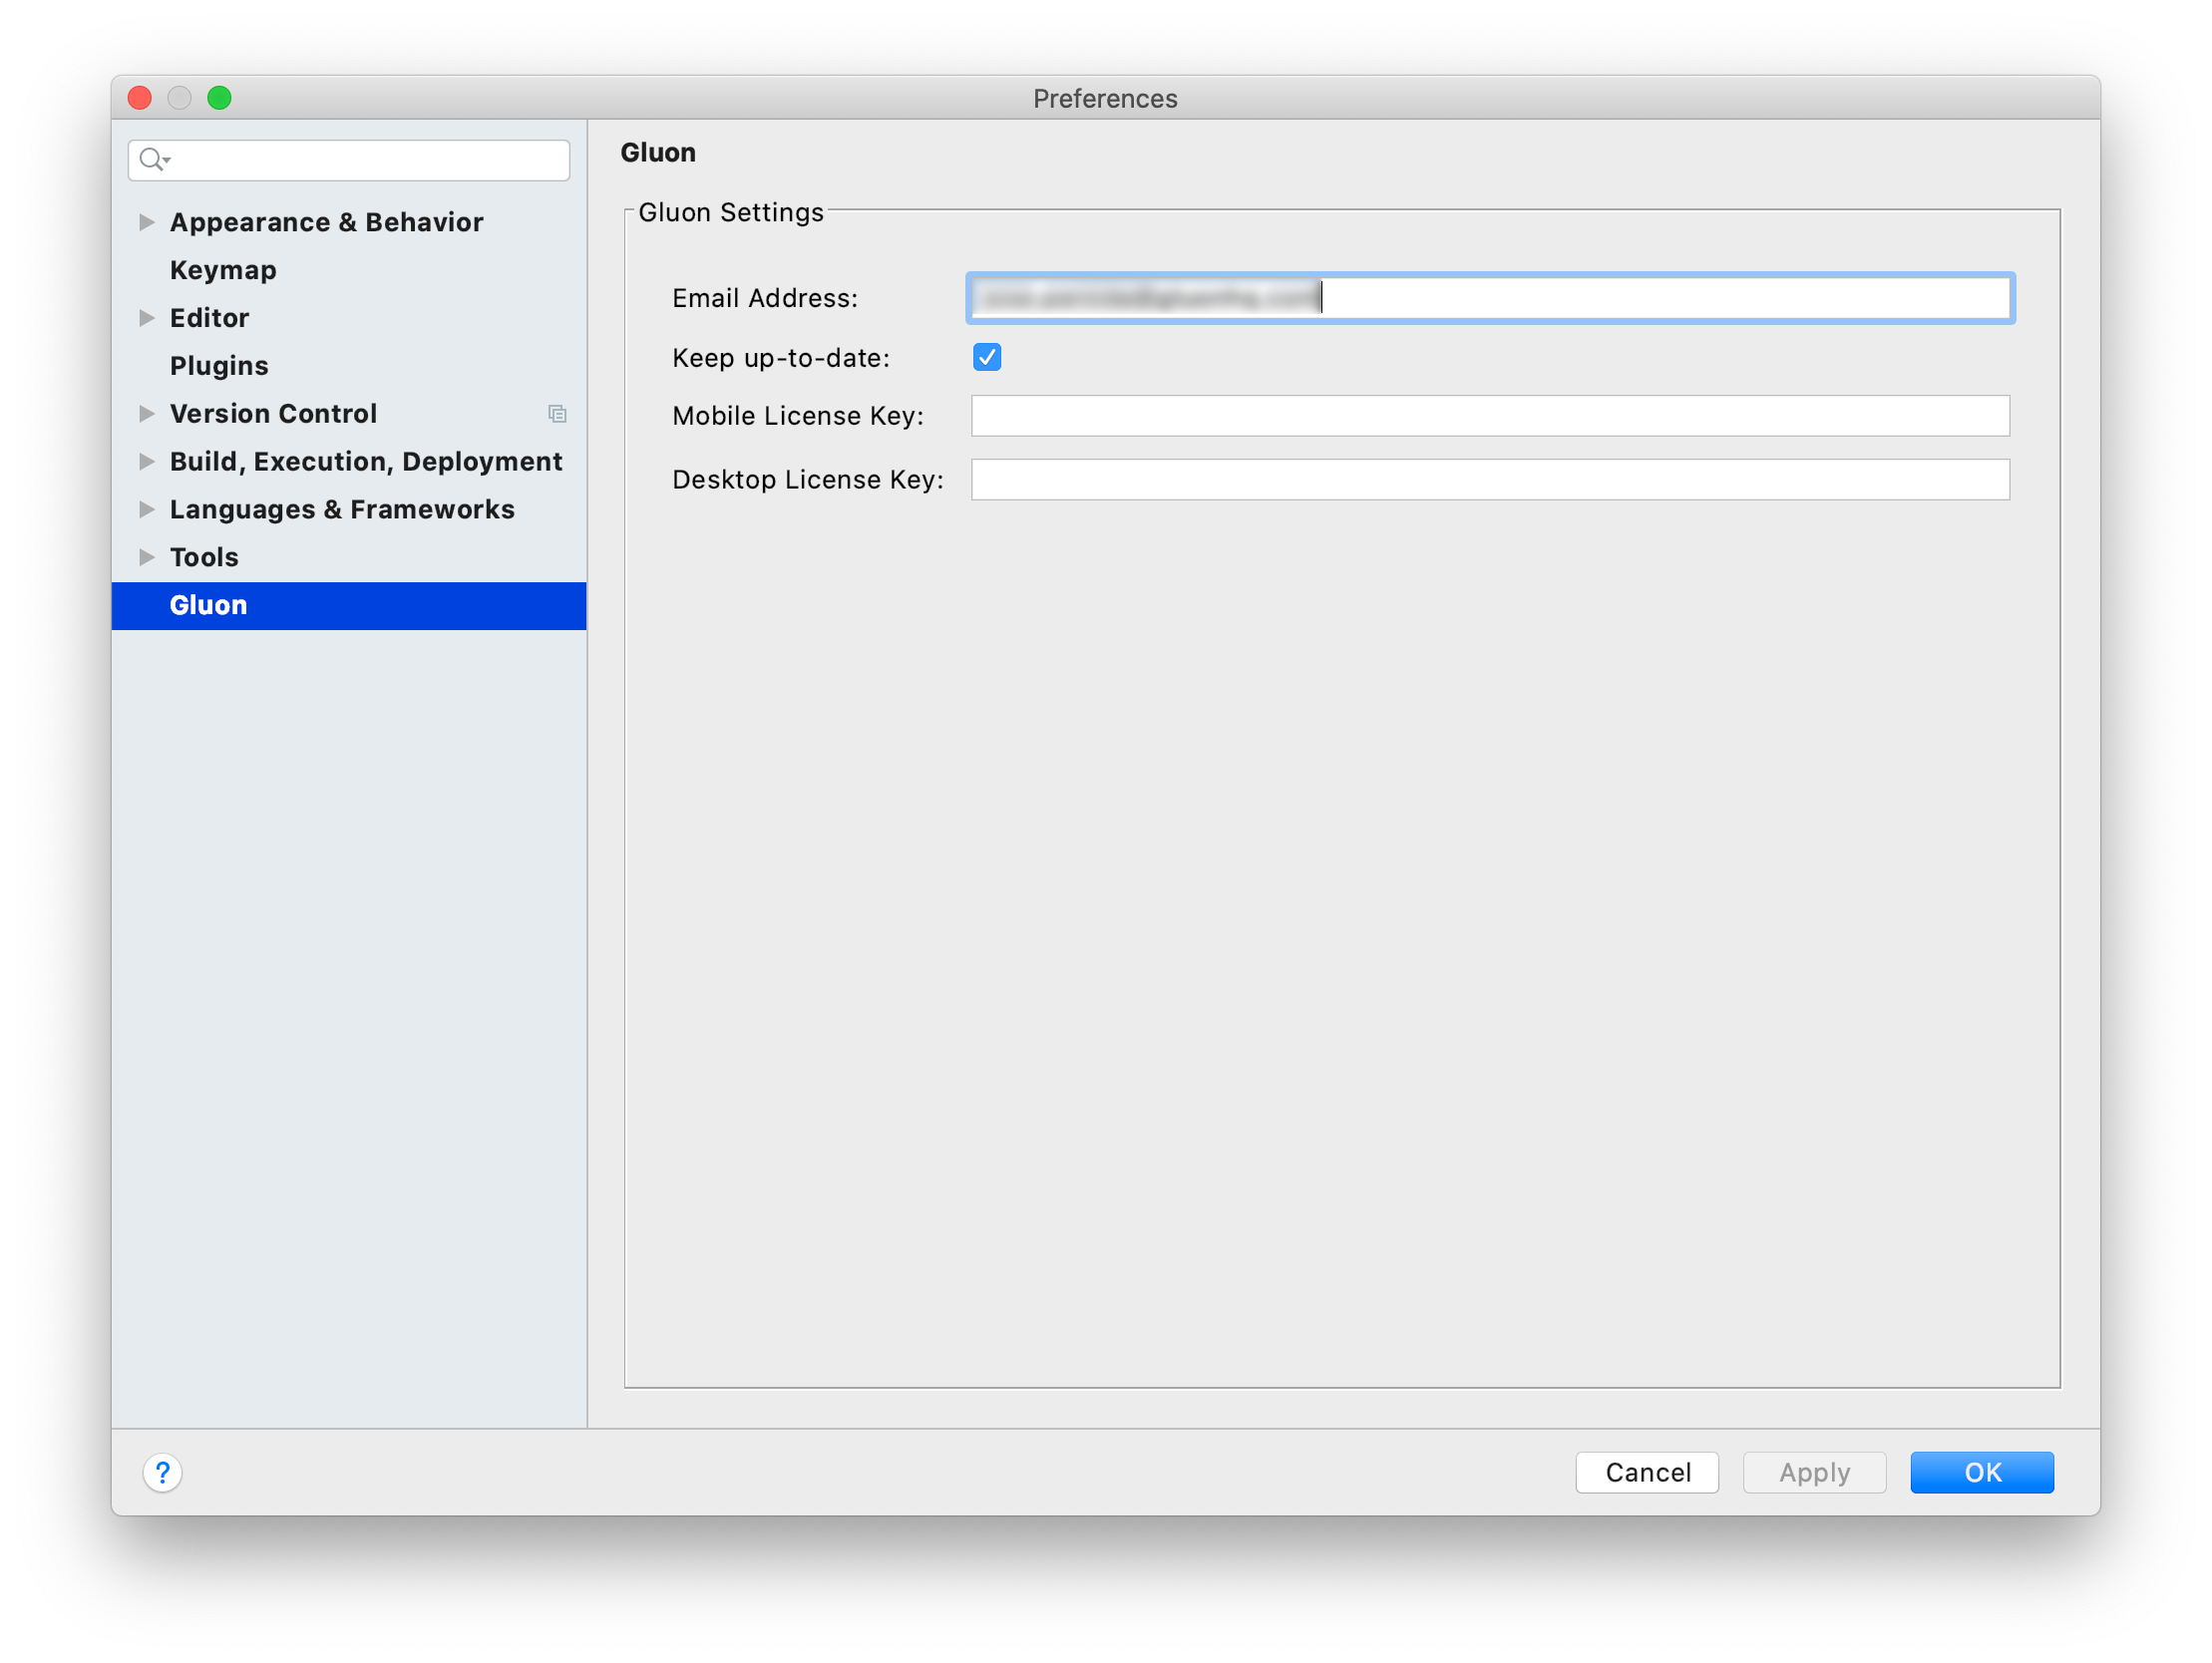
Once you have completed this first-time-only form, click Next.
Type the package name and the main class name.
Select the platforms to deploy the application, and the build tool of your choice.
For this tutorial, we will use the Maven build tool. Press Next.
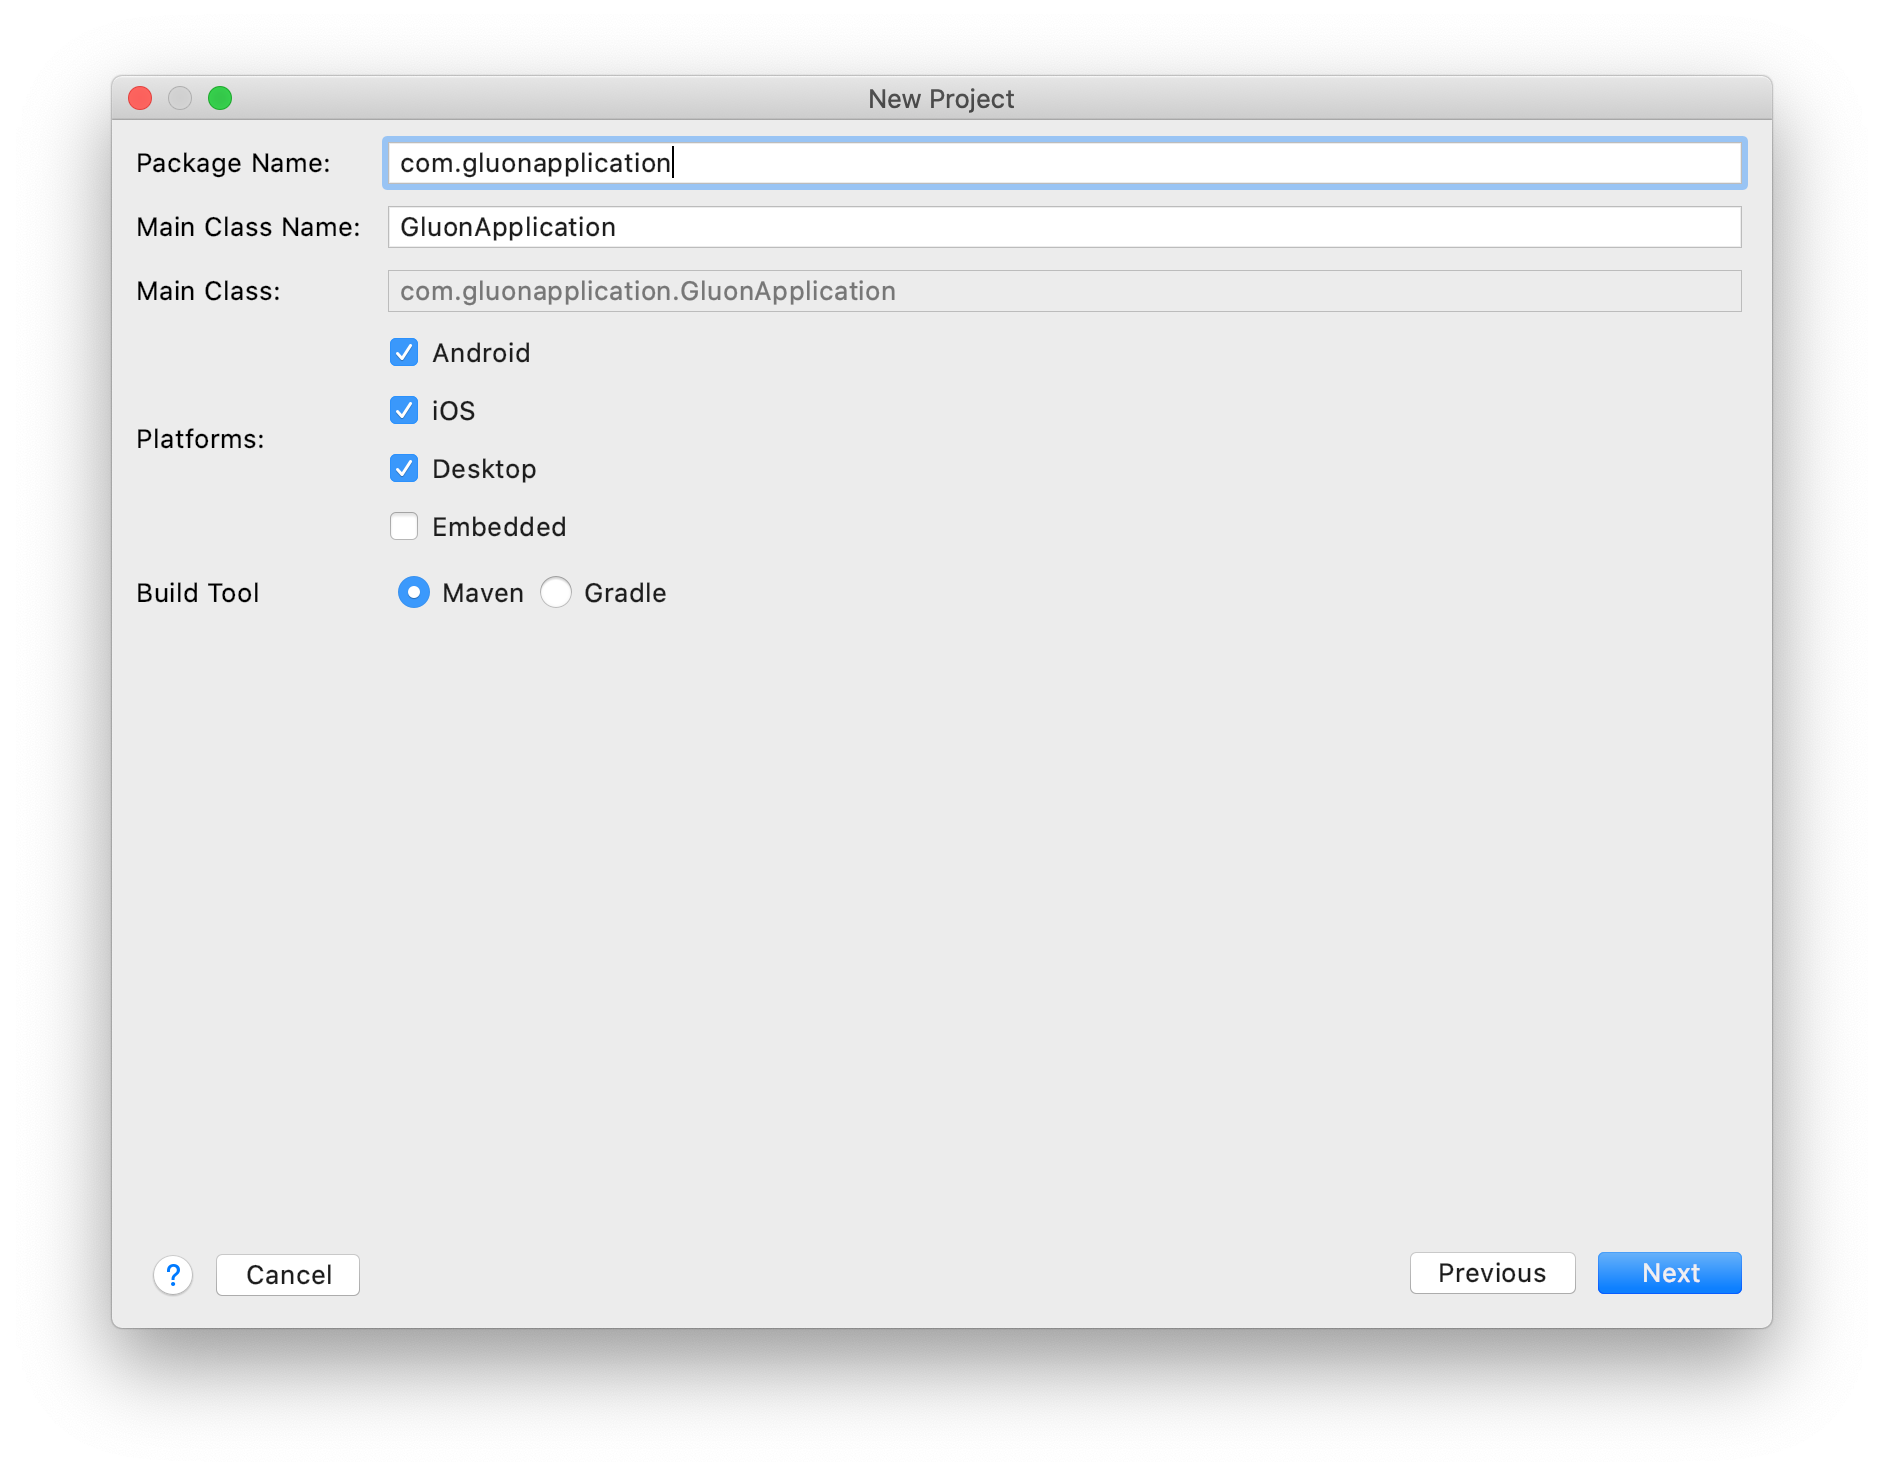
From the list, select a valid Java JDK (11+) and press Next.
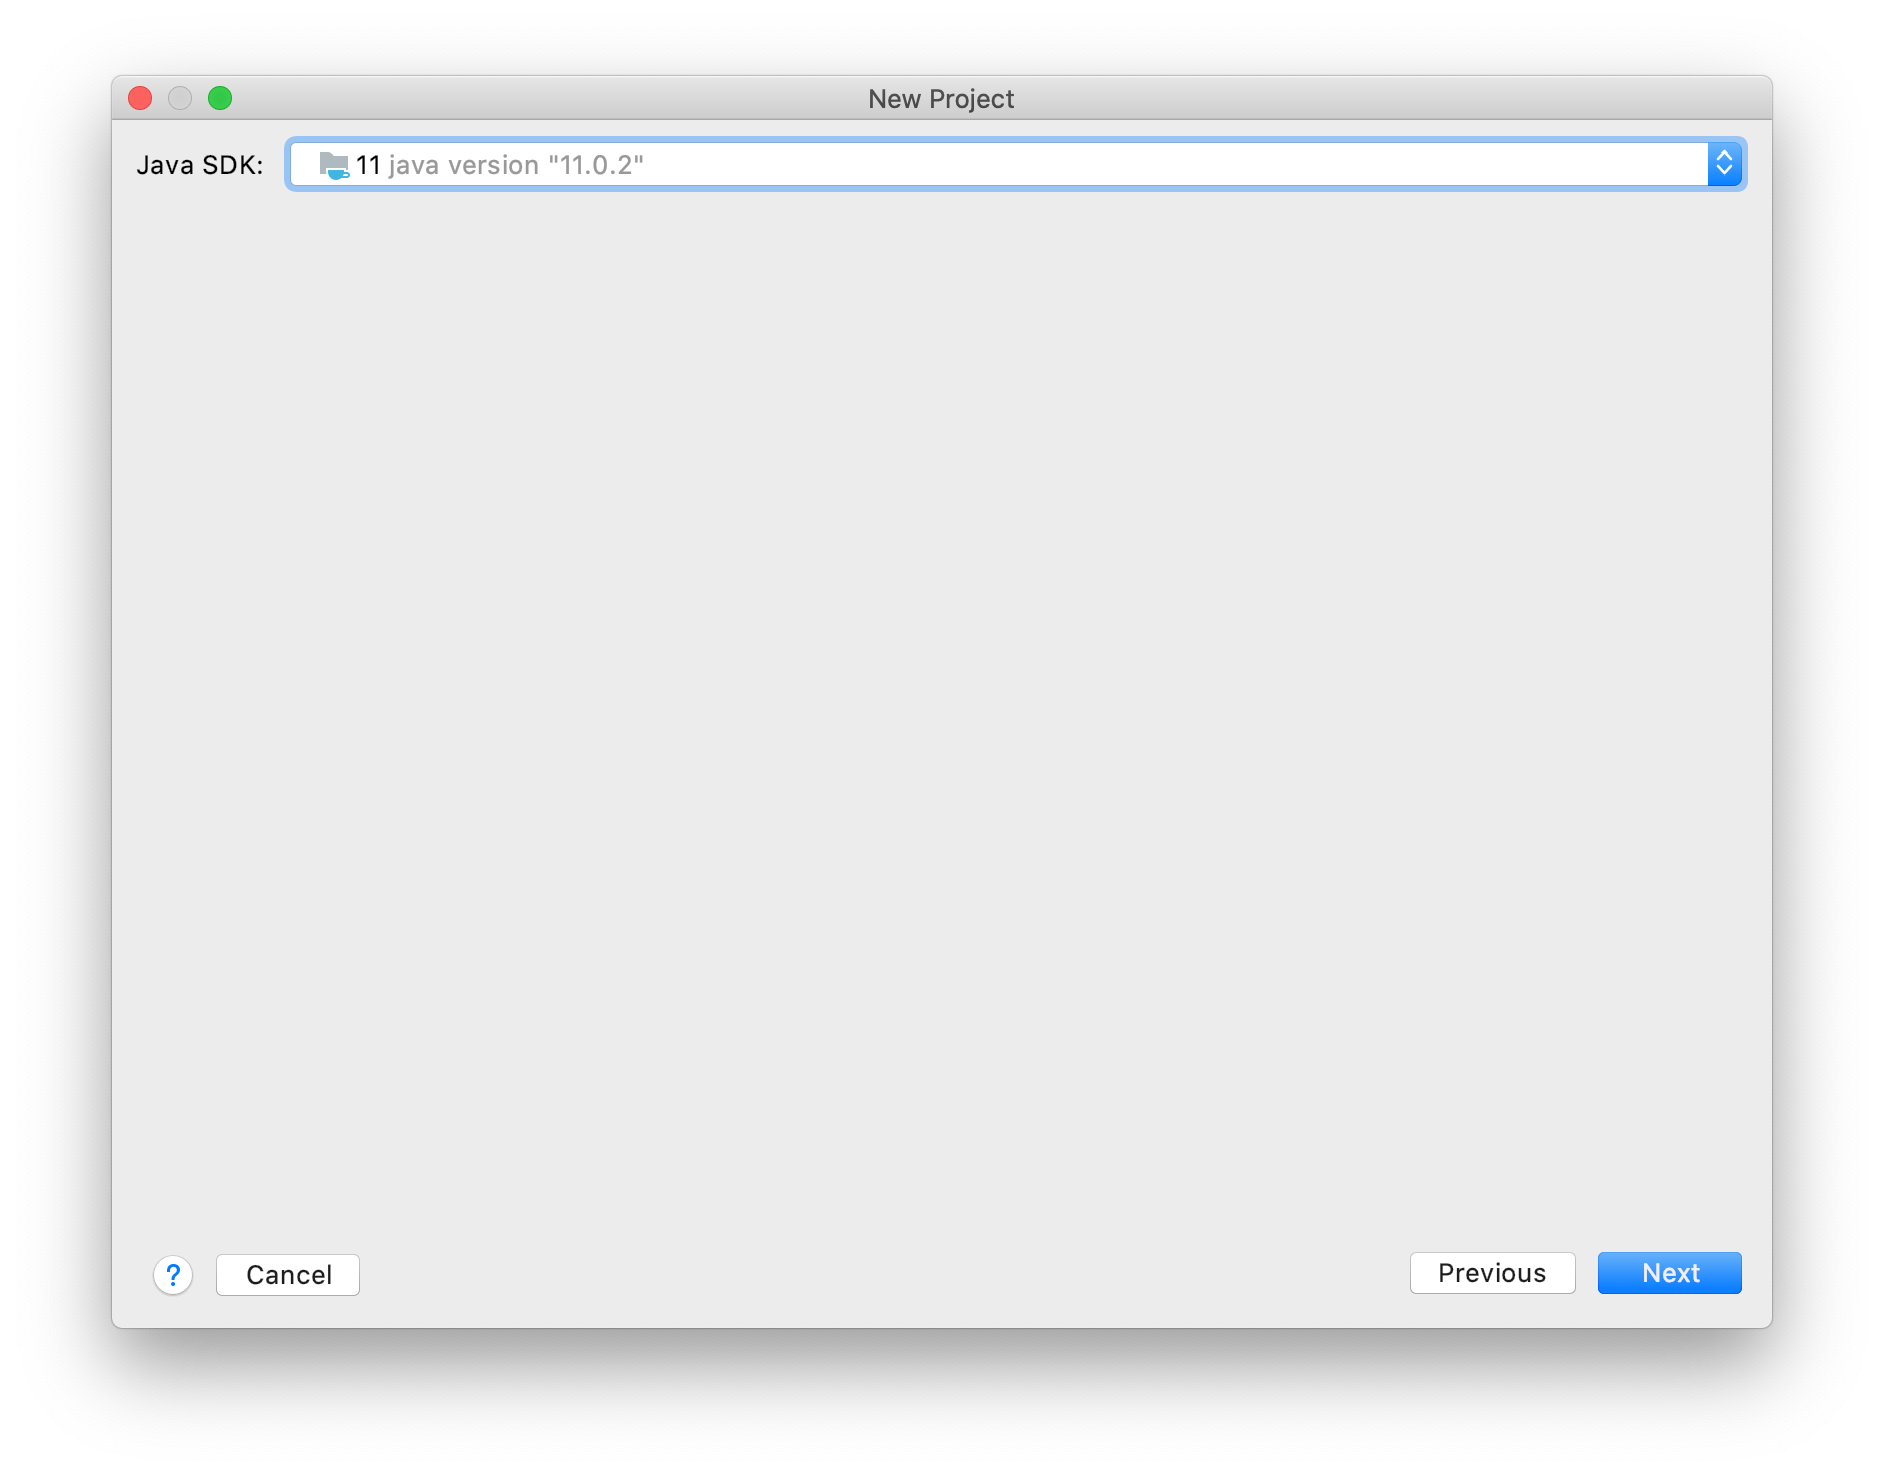
Now add a name and a location for the project and press Finish.

The project will be imported and opened.
6.1.3. The Gluon Mobile project
The plugin already adds some default code in the main folder, so we’ll be able to run it without adding a single line of code.
The Maven project has a dependency on the OpenJFX Maven Plugin and the Gluon Client Maven plugin to the project.
These plugins add a series of goals and to access them we just need to open Maven tool window in IntelliJ IDEA. The Maven tool window shows all the available Maven plugins along with their respective goals.
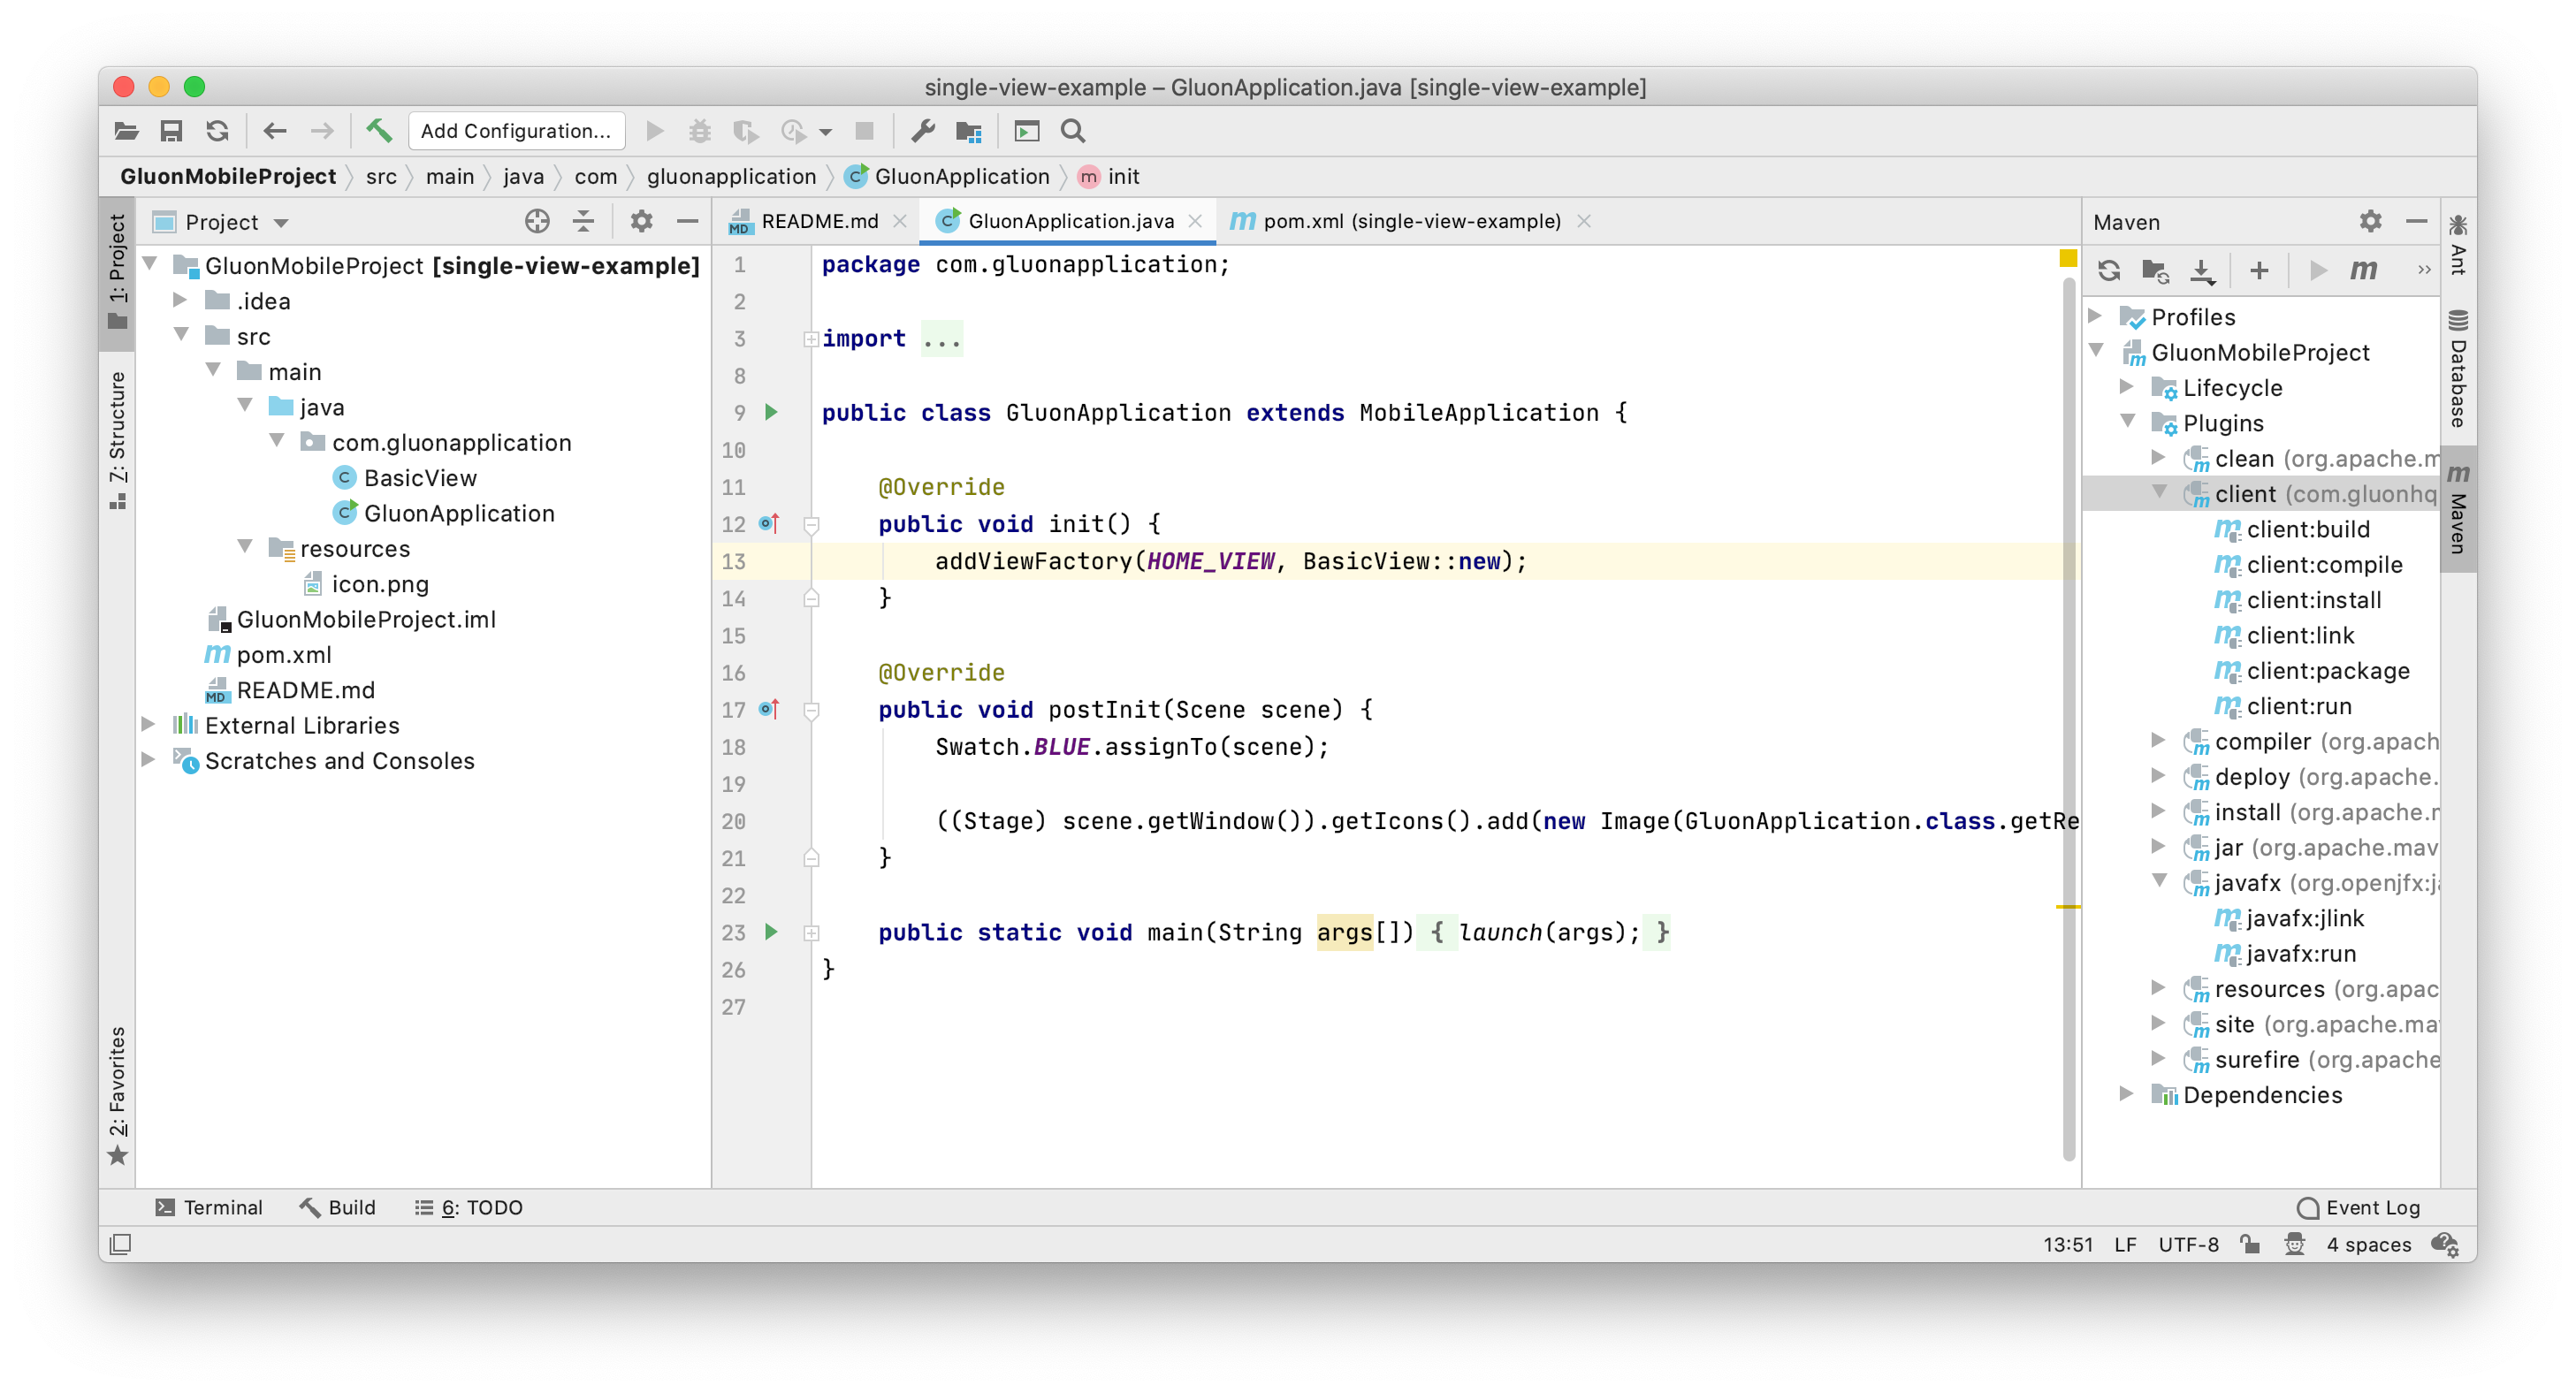
6.1.4. Run the application
|
Note
|
Make sure 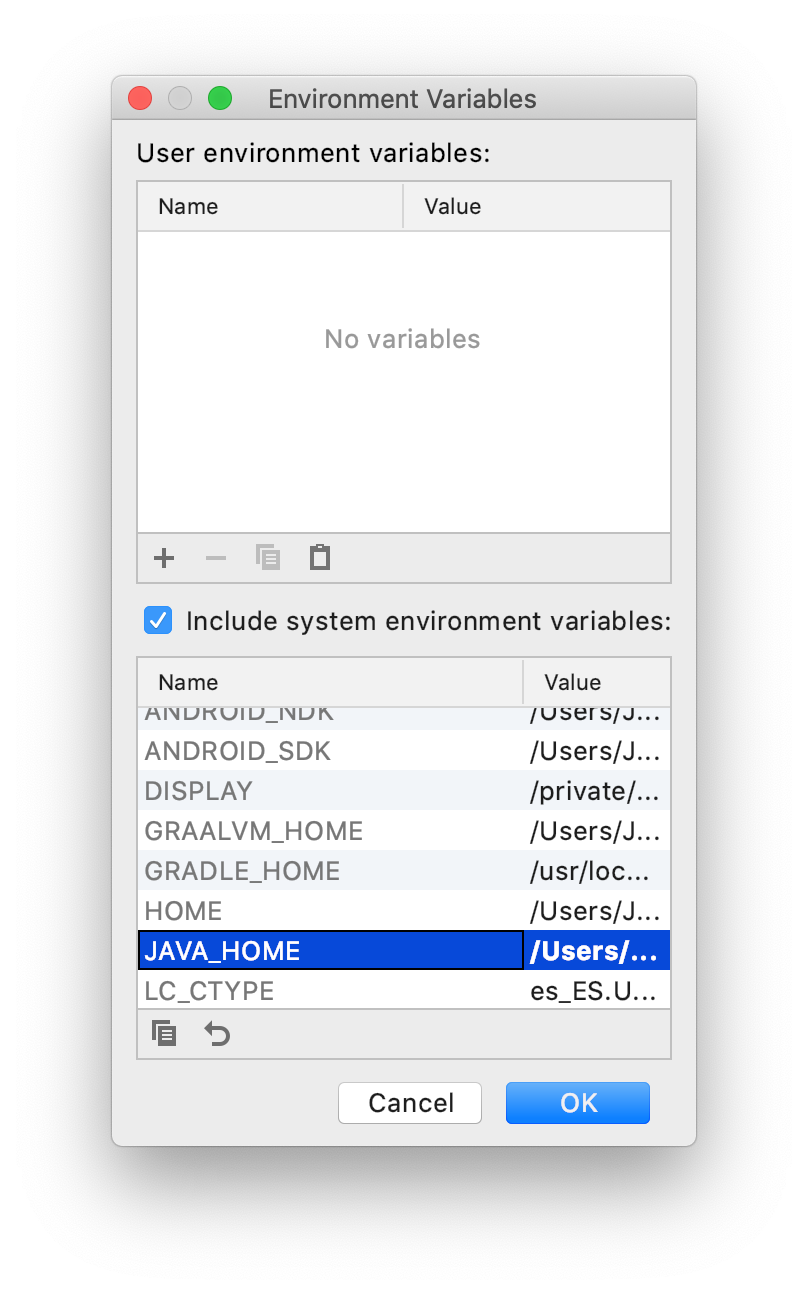
|
Before creating a native image, it’s easier to run the application first and verify that there are no errors.
Select Plugins → javafx → javafx:run from the Maven tool window. Verify that all the tasks are executed without errors, and the project runs fine on your desktop. Alternatively you can open the terminal (View→Tool Windows→Terminal) and run mvn javafx:run.
Now let’s make a slight change to the code. In the BasicView class, update the text of the label on line 20 to the following:
button.setOnAction(e -> label.setText("Hello from IntelliJ IDEA!"));Run it again to see that the new message shows up on your desktop when you click the button.

6.1.5. Create & run a native image of the application
In order to run the native image steps it is better to use a system terminal or the embedded terminal from your IDE. However, it is still possible to use the IDE’s Maven window for this.
|
Important
|
Make sure you set the environment variable |
|
Note
|
If you are running on Windows, you need to run all the Client goals from an x64 terminal. Please check the pre-requisites for Windows deployment. However, you can use the terminal from IntelliJ for this. Go to |
|
Note
|
If you are running from IDE, make sure that the mvn executable under |
The Gluon Client plugin provides us various goals which are explained in detail earlier in the documentation.
For this tutorial, we will be using the client:build goal to create a native image of the application.
Execute mvn client:build from the terminal, or, select Plugins → client → client:build goal from the Maven tool window.
This goal typically takes a couple of minutes to complete and may vary depending on the system.
Once the goal is executed successfully, the native image can be run by executing client:run goal.
6.1.6. Create & install an Android native image
|
Note
|
This part is only applicable for Linux. Please check the pre-requisites for Android deployment. |
Now we are ready to deploy the same application on an Android device.
Go to Maven tool window, expand Profiles and check android. Make sure that all other profiles are unchecked.
This will activate the pre-existing android profile.
Run mvn -Pandroid client:build from the terminal, or alternatively, execute the client:build goal from the Maven plugins section.
Once the native image is created, we need to package it into an apk before we can install it on a physical Android device.
Execute mvn -Pandroid client:package to create an apk. Once the goal is executed successfully, connect a physical device and
install the native image by executing the mvn -Pandroid client:install goal.
When the installation ends successfully, run mvn -Pandroid client:run or find the application on your device and open it up:
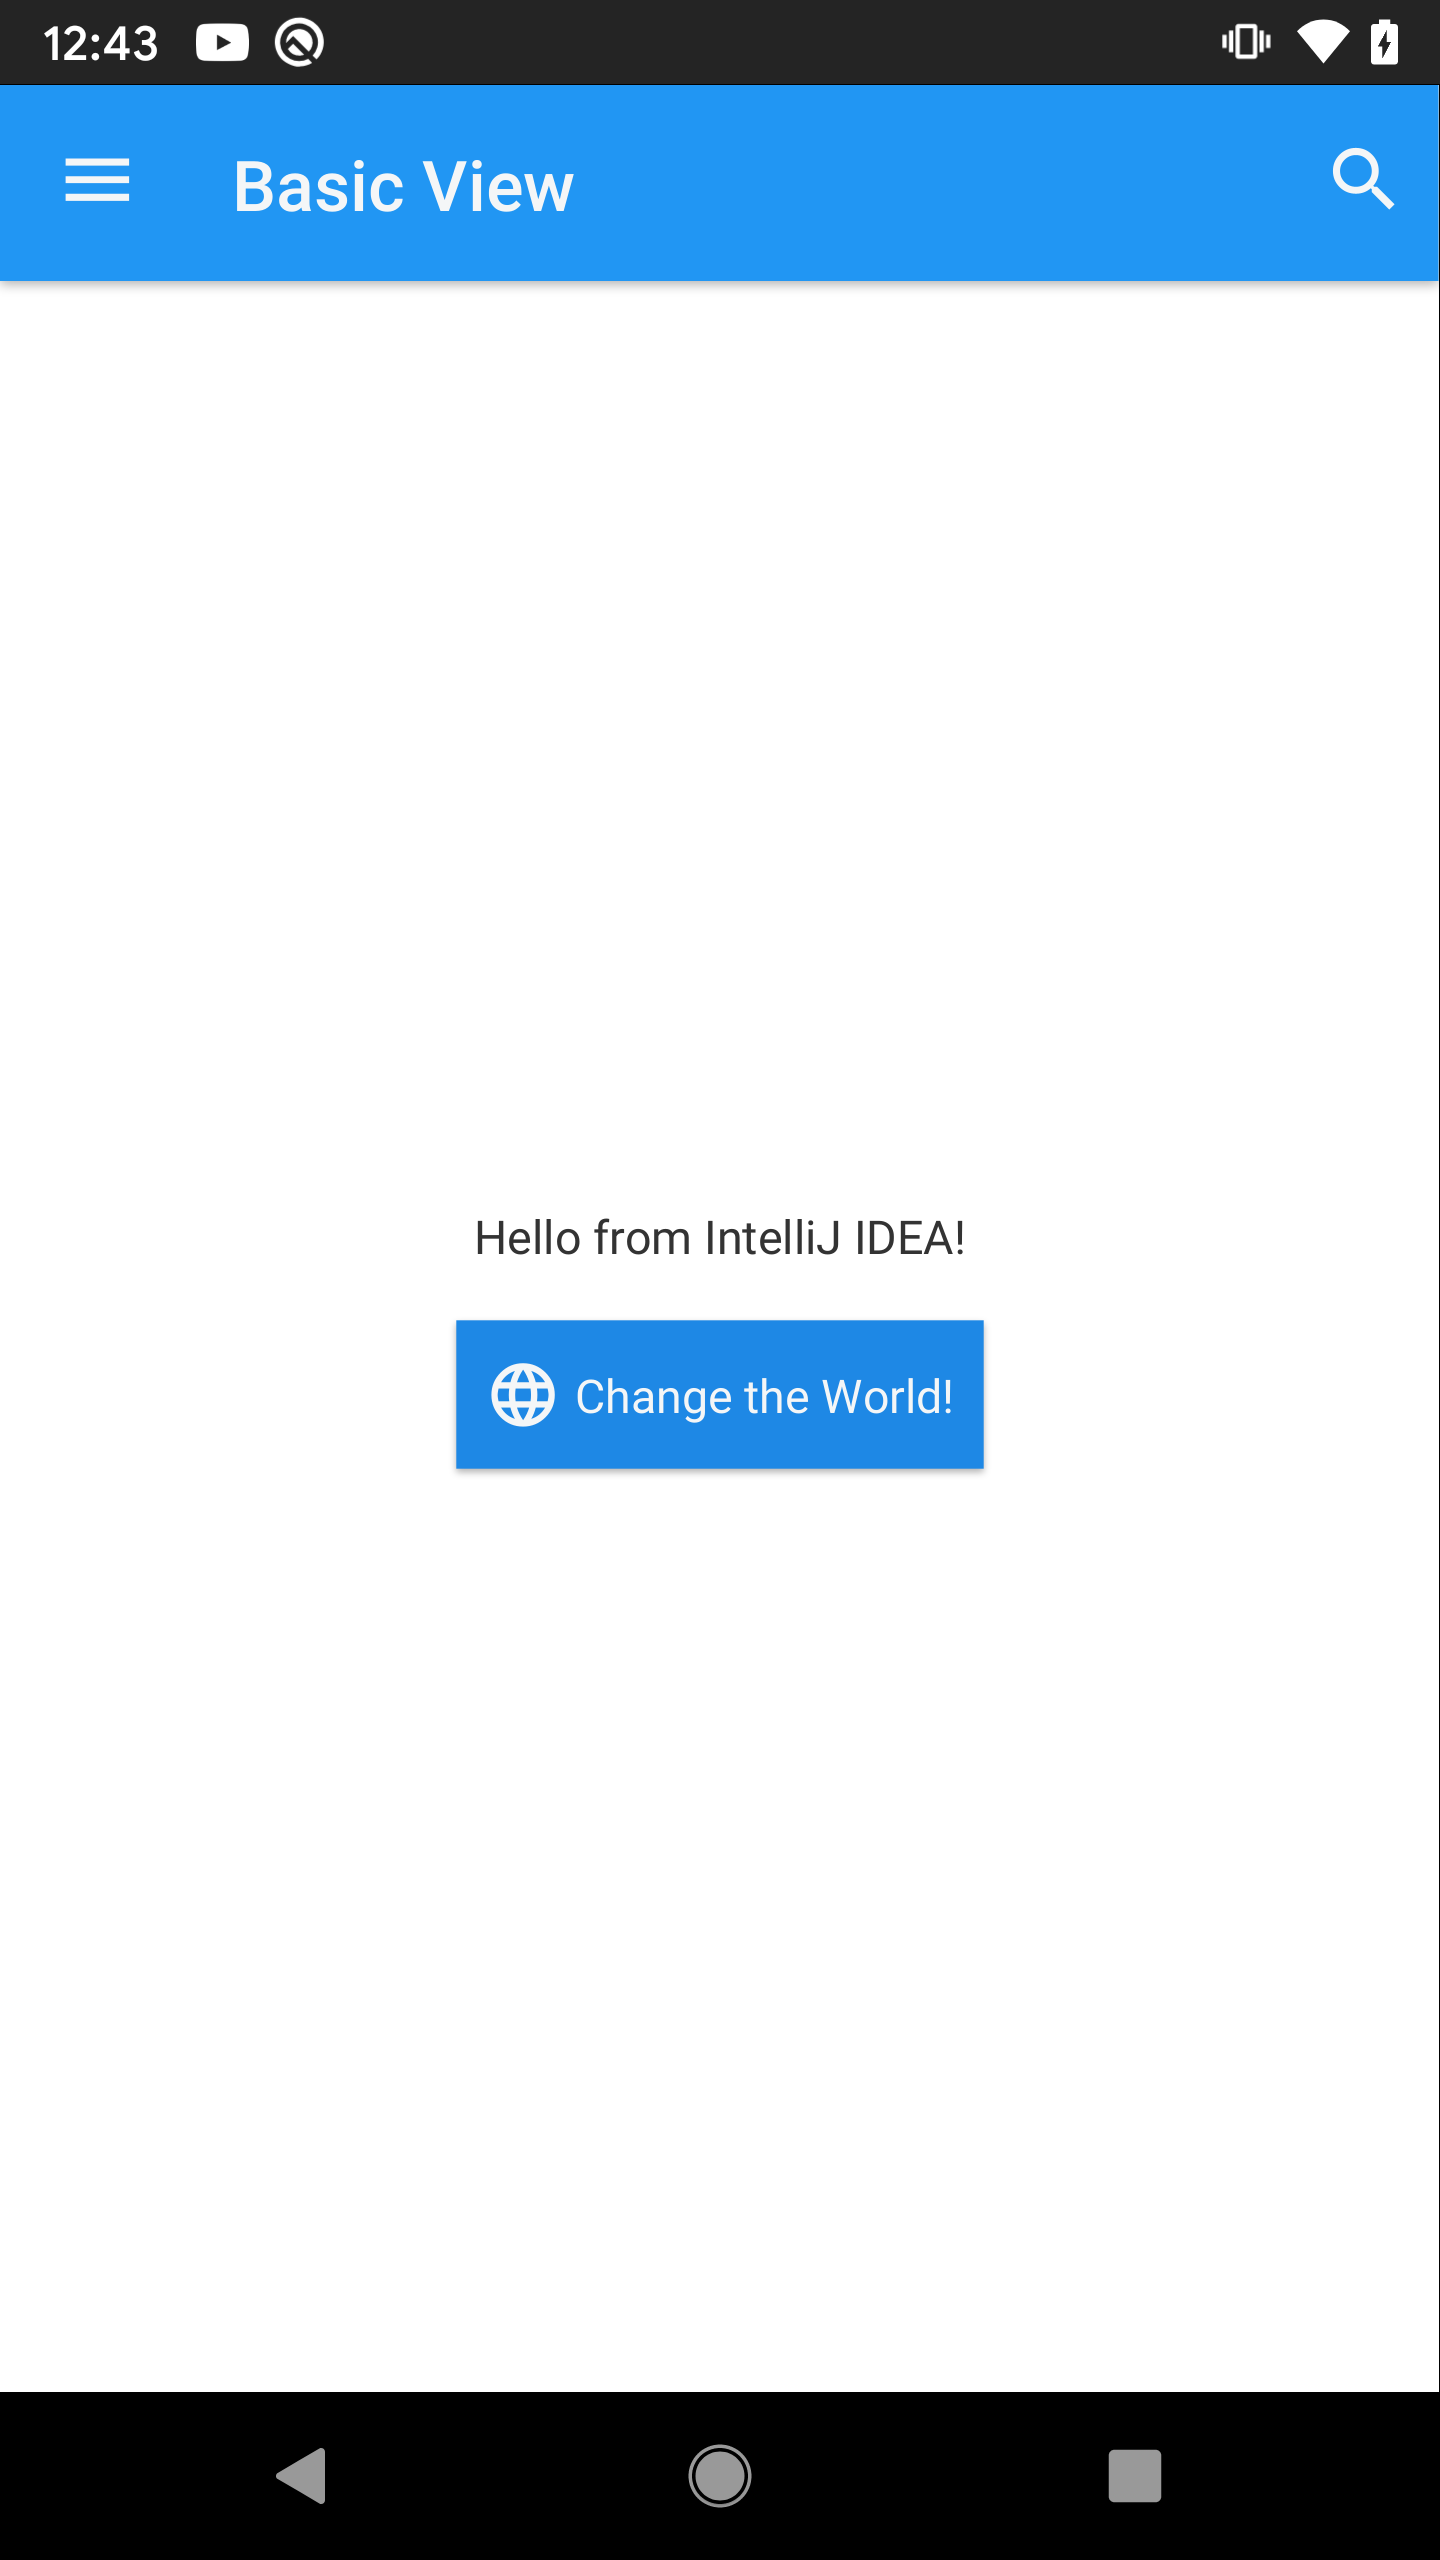
6.1.7. Create & install an iOS native image
|
Note
|
This part is only applicable for MacOS. Please check the pre-requisites for iOS deployment. |
Now we are ready for deploying the same application on an iOS device.
Go to Maven tool window, expand Profiles and check ios. Make sure that all other profiles are unchecked.
This will activate the pre-existing ios profile.
All client goals will now target iOS platform.
Run mvn -Pios client:build from the terminal, or alternatively, execute the client:build goal from the Maven plugins section.
Once the goal is executed successfully, connect a physical device and run the native image on it by executing by executing mvn -Pios client:run.
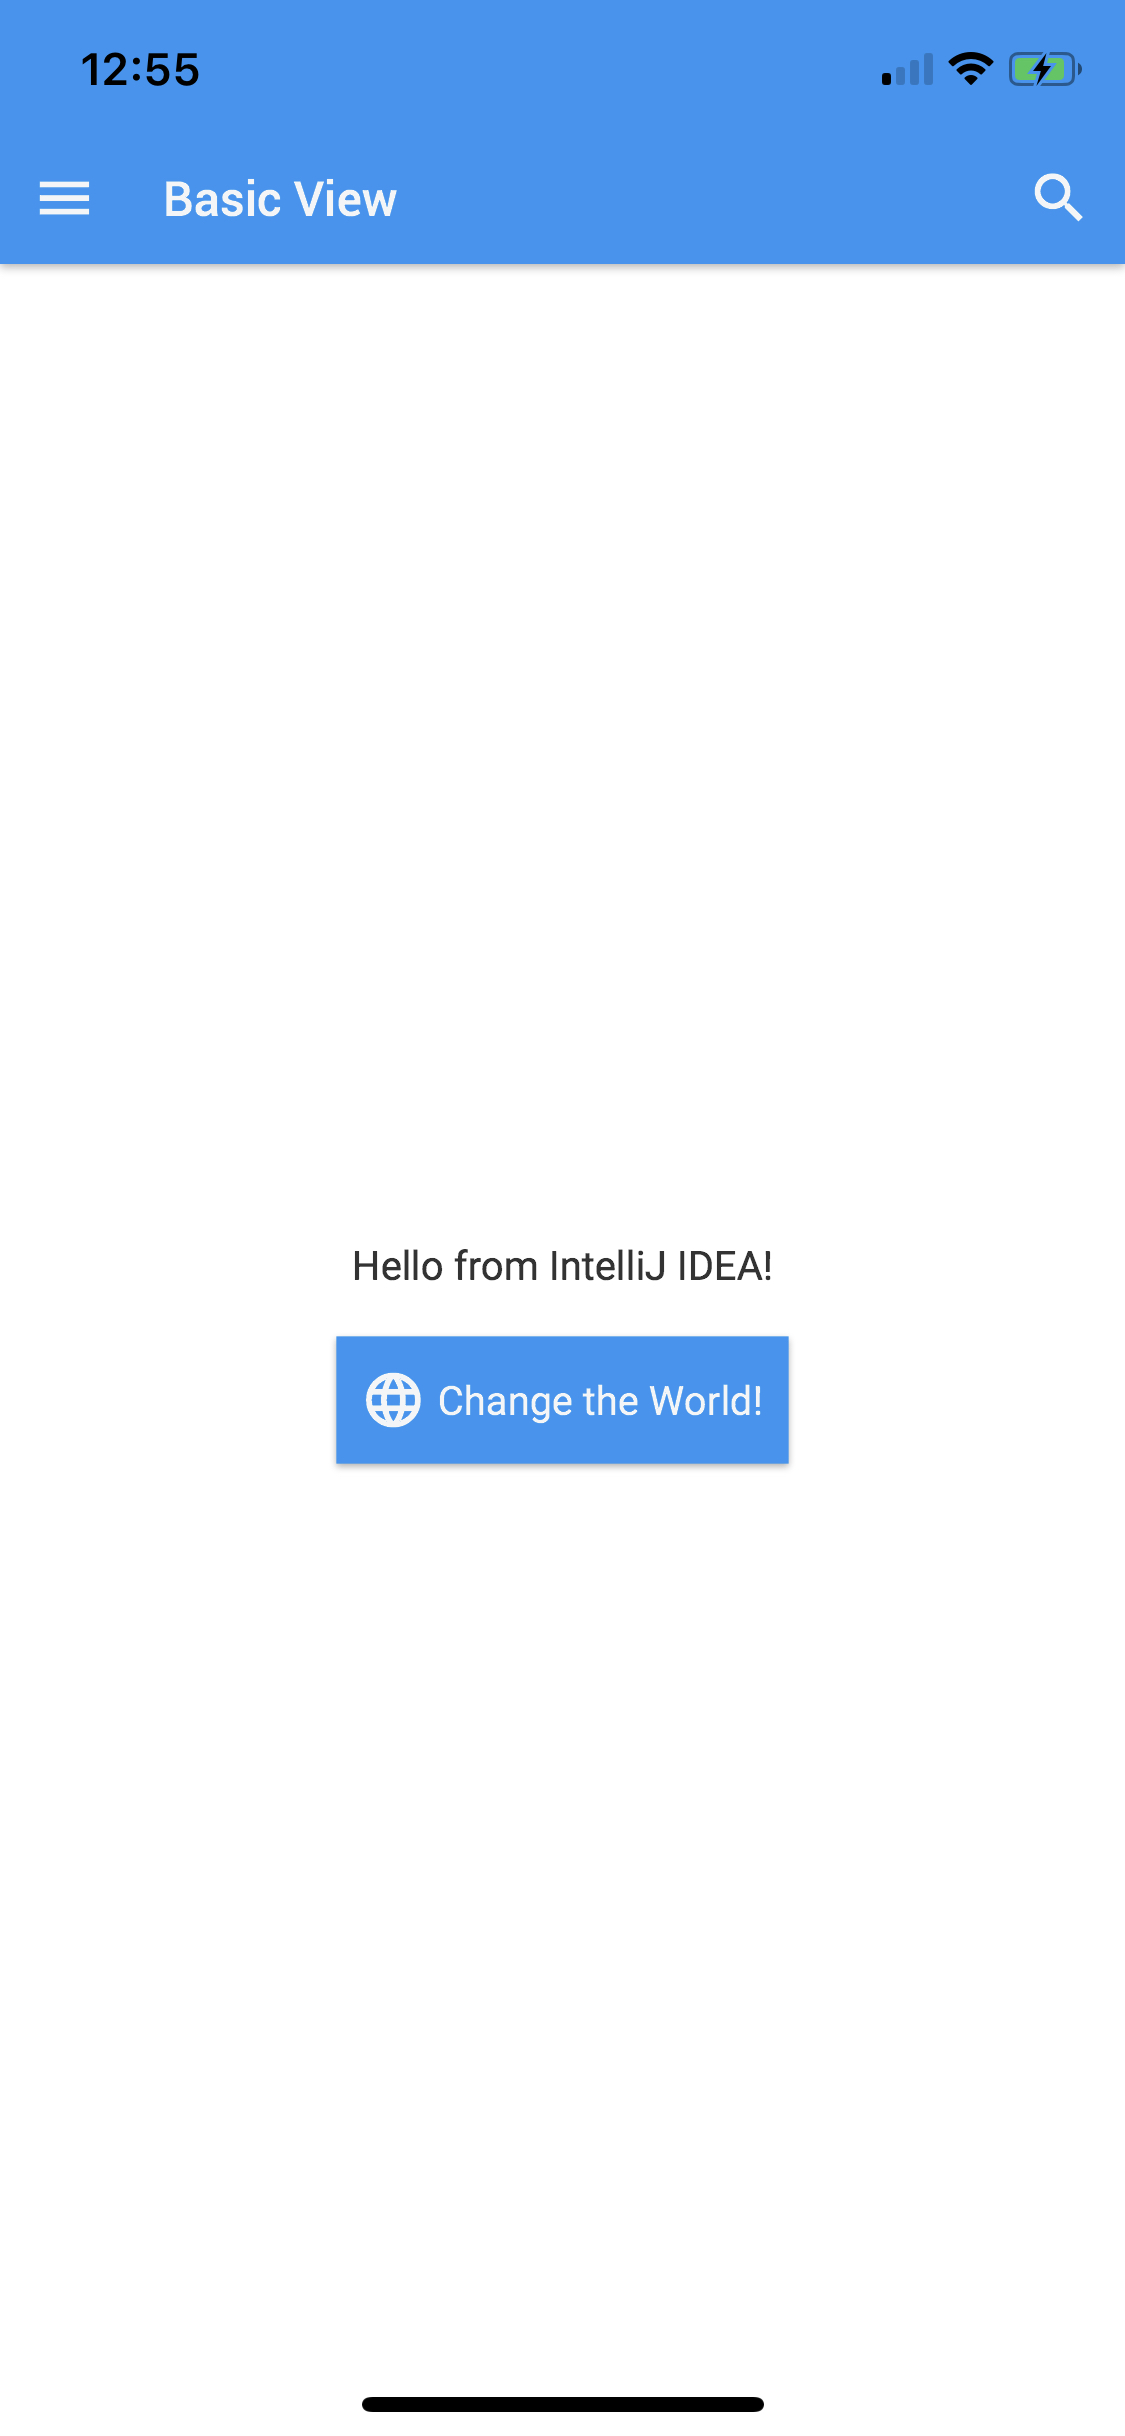
6.1.8. Conclusion
If you have made it here without problems, congratulations!
If you have found any difficulties along the way, please review the lists of prerequisites and try again. In case you have any questions, your first stop should be the Gluon support page, where you can access the latest documentation. Gluon also recommends the community to support each other over at the Gluon StackOverflow page. Finally, Gluon offers commercial support as well, to kick start your projects.
We encourage you to start developing new projects and creative native images that can be targeted for desktop, Android and iOS devices using the Gluon plugin on your favorite IDE. :imagesdir: images/ide
6.2. The Gluon Plugin for NetBeans
In this section, we’ll explain briefly how to install the Gluon plugin on Apache NetBeans and how to use it to create a sample application that can be deployed on desktop, Android and iOS devices. Before we start, make sure to check the list of prerequisites.
6.2.1. Plugin Installation
You can get it from the Apache NetBeans plugin portal,
or you can directly install it from NetBeans: click Tools → Plugins. Now select Available Plugins… and find Gluon Plugin.
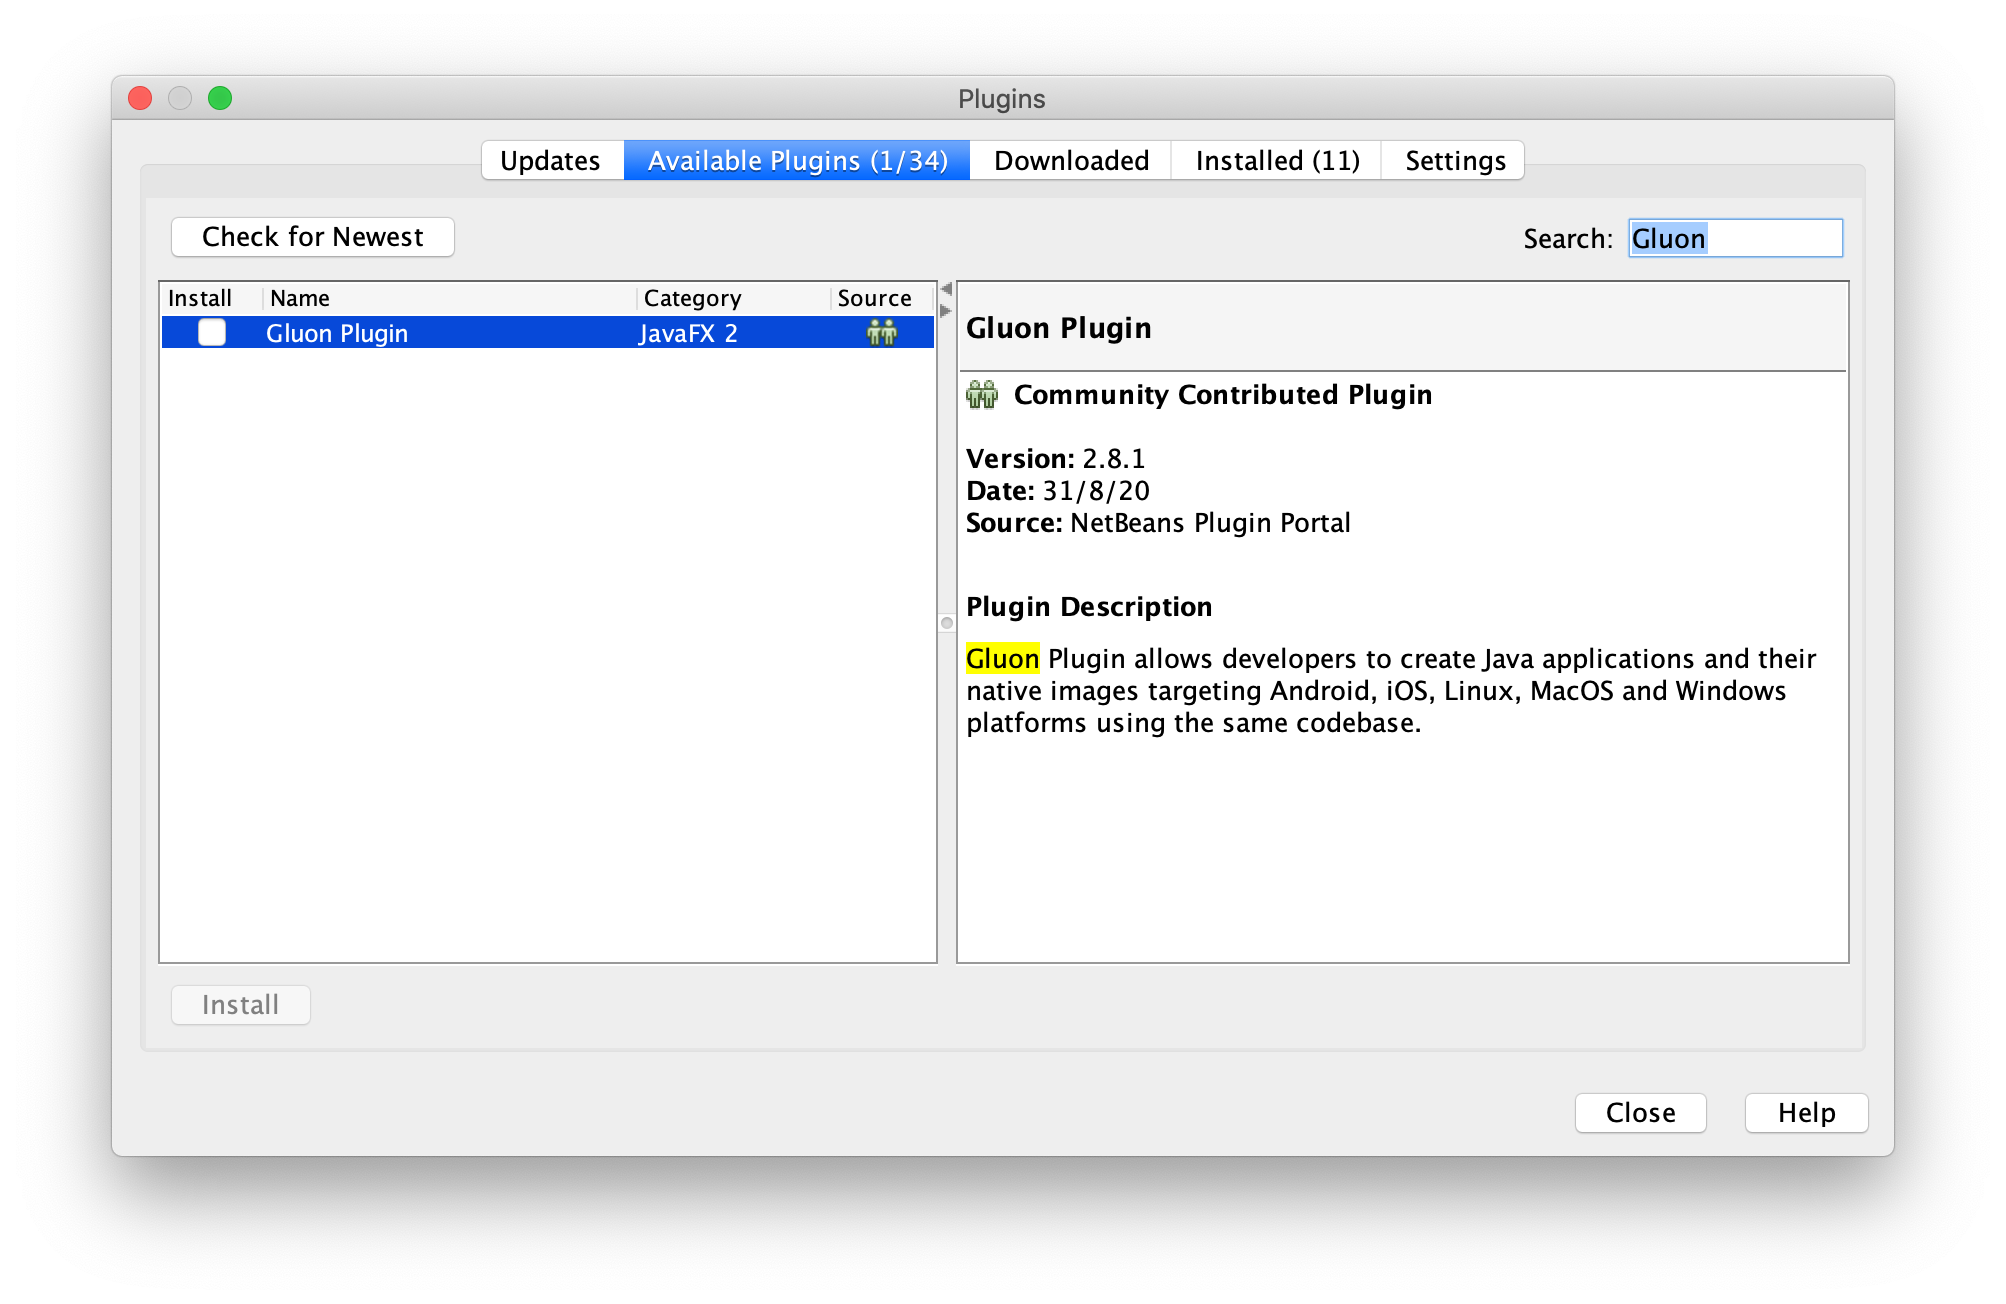
Select the plugin, click Install and follow the steps:
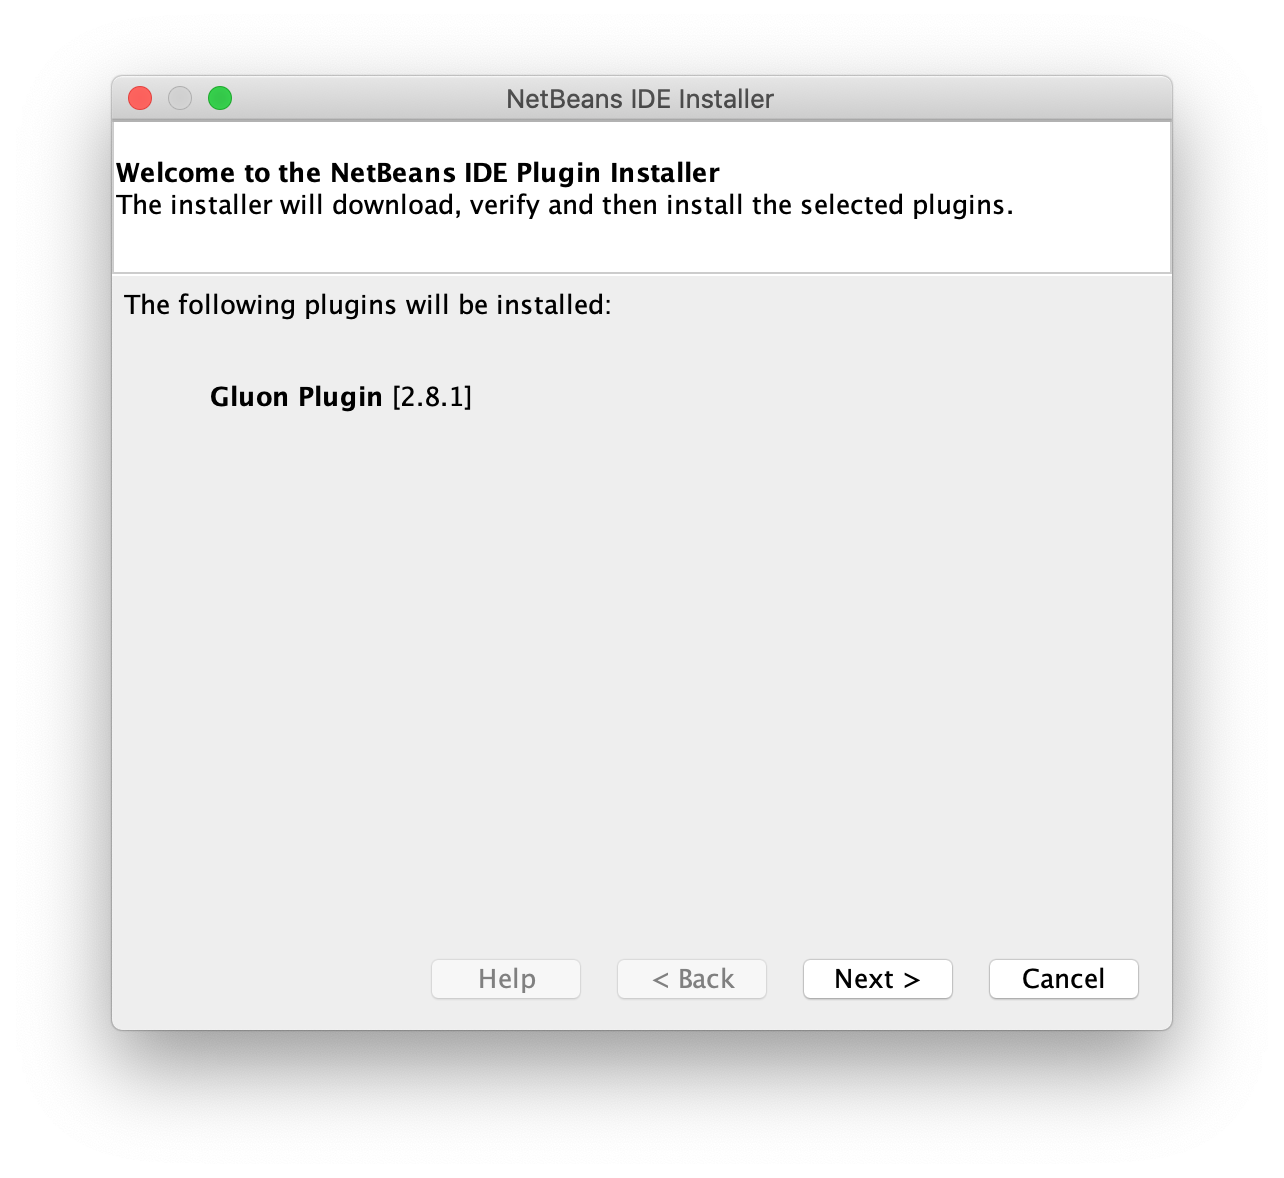
Accept the license and click Install. Click Continue when prompted:
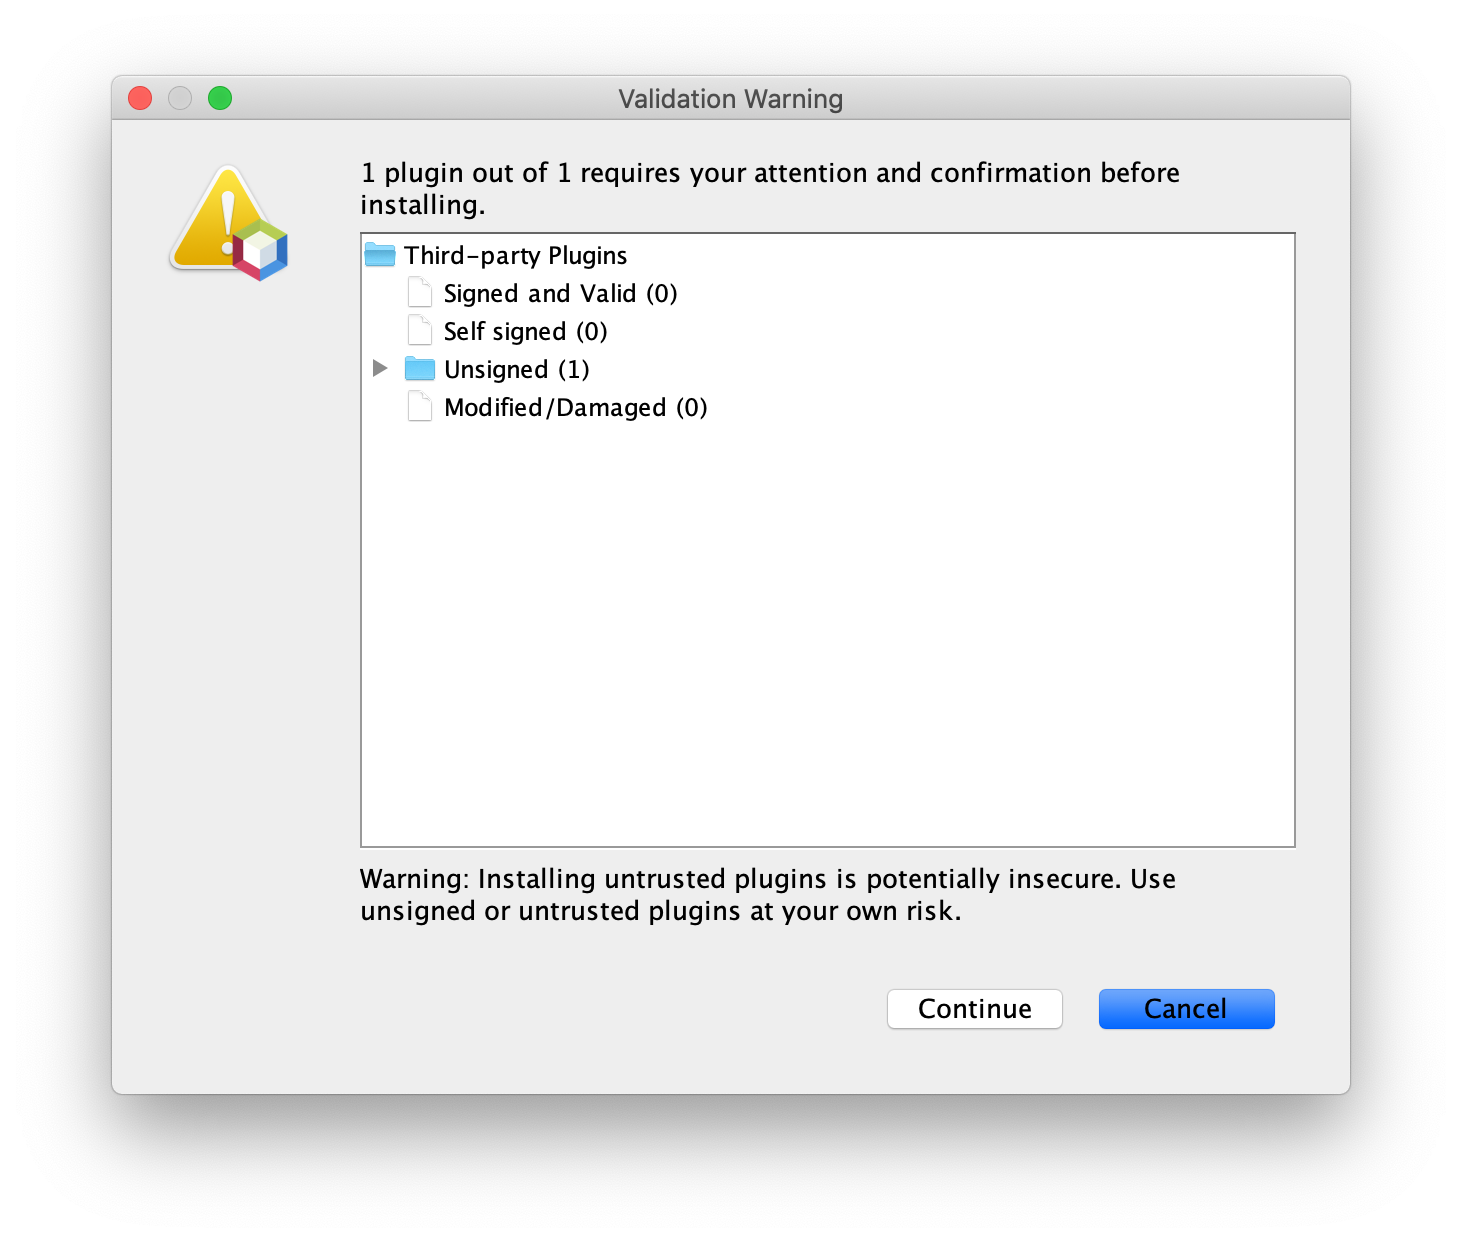
Wait until the Gluon Plugin is installed and click Finish.
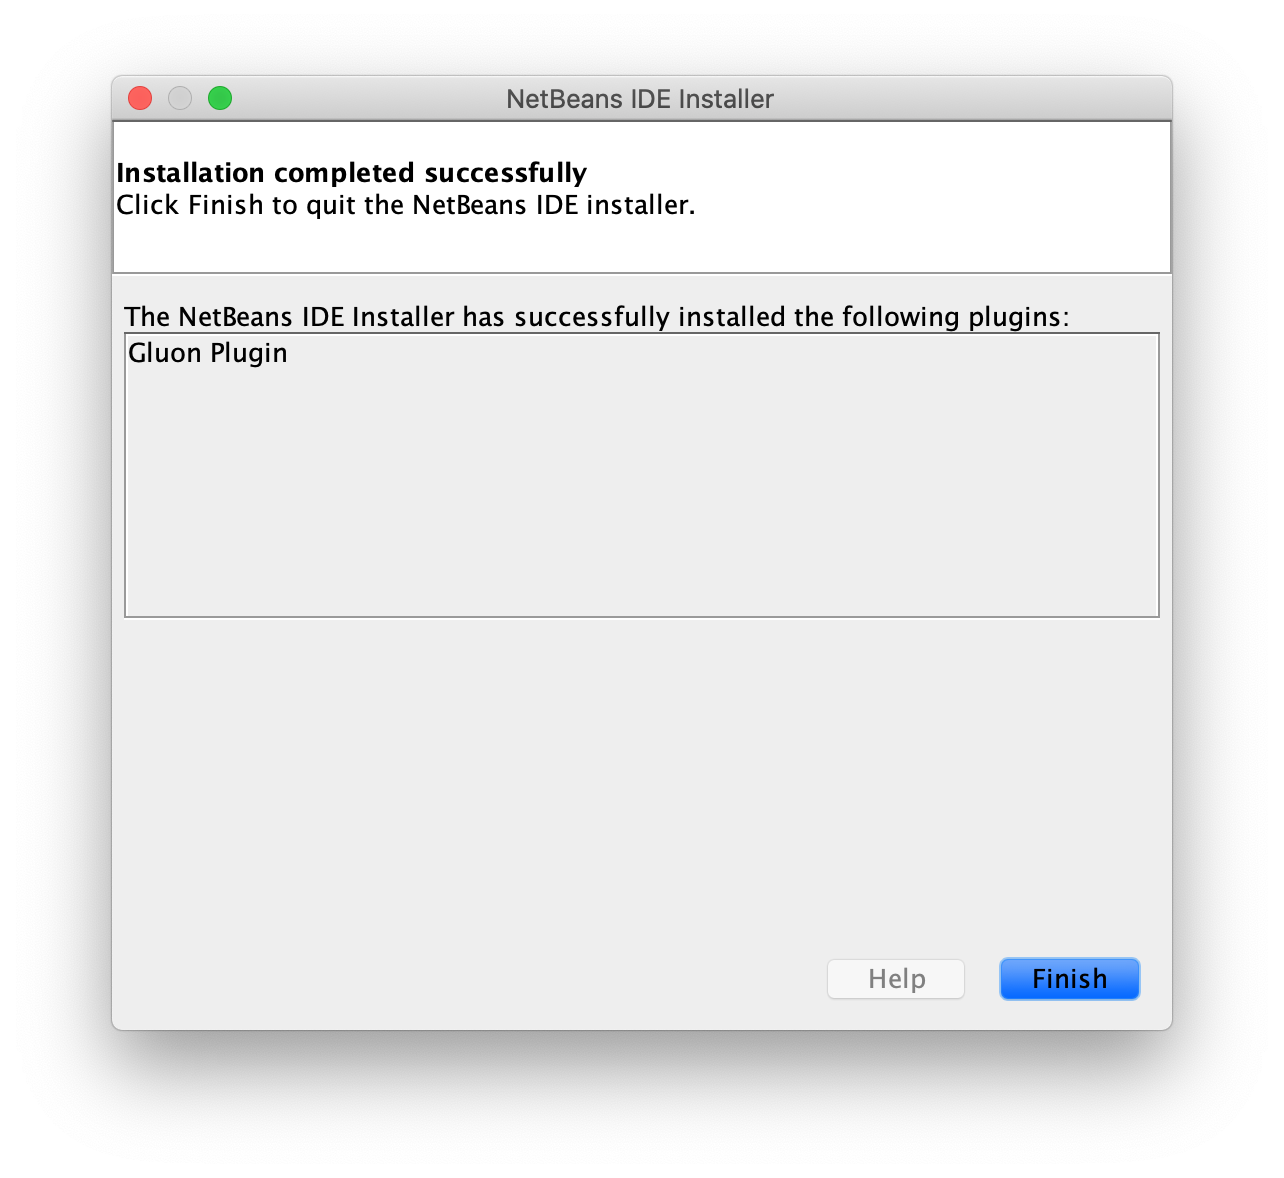
You will find the plugin under the Installed tab in the Plugins window.
6.2.2. Create a new Gluon project
Once the plugin is installed, we can use it to create a sample application.
In NetBeans, click File → New → Project… and select Gluon on the left, and one of the available projects on the right.
For instance, Gluon Mobile - Single View Project. Press Next.
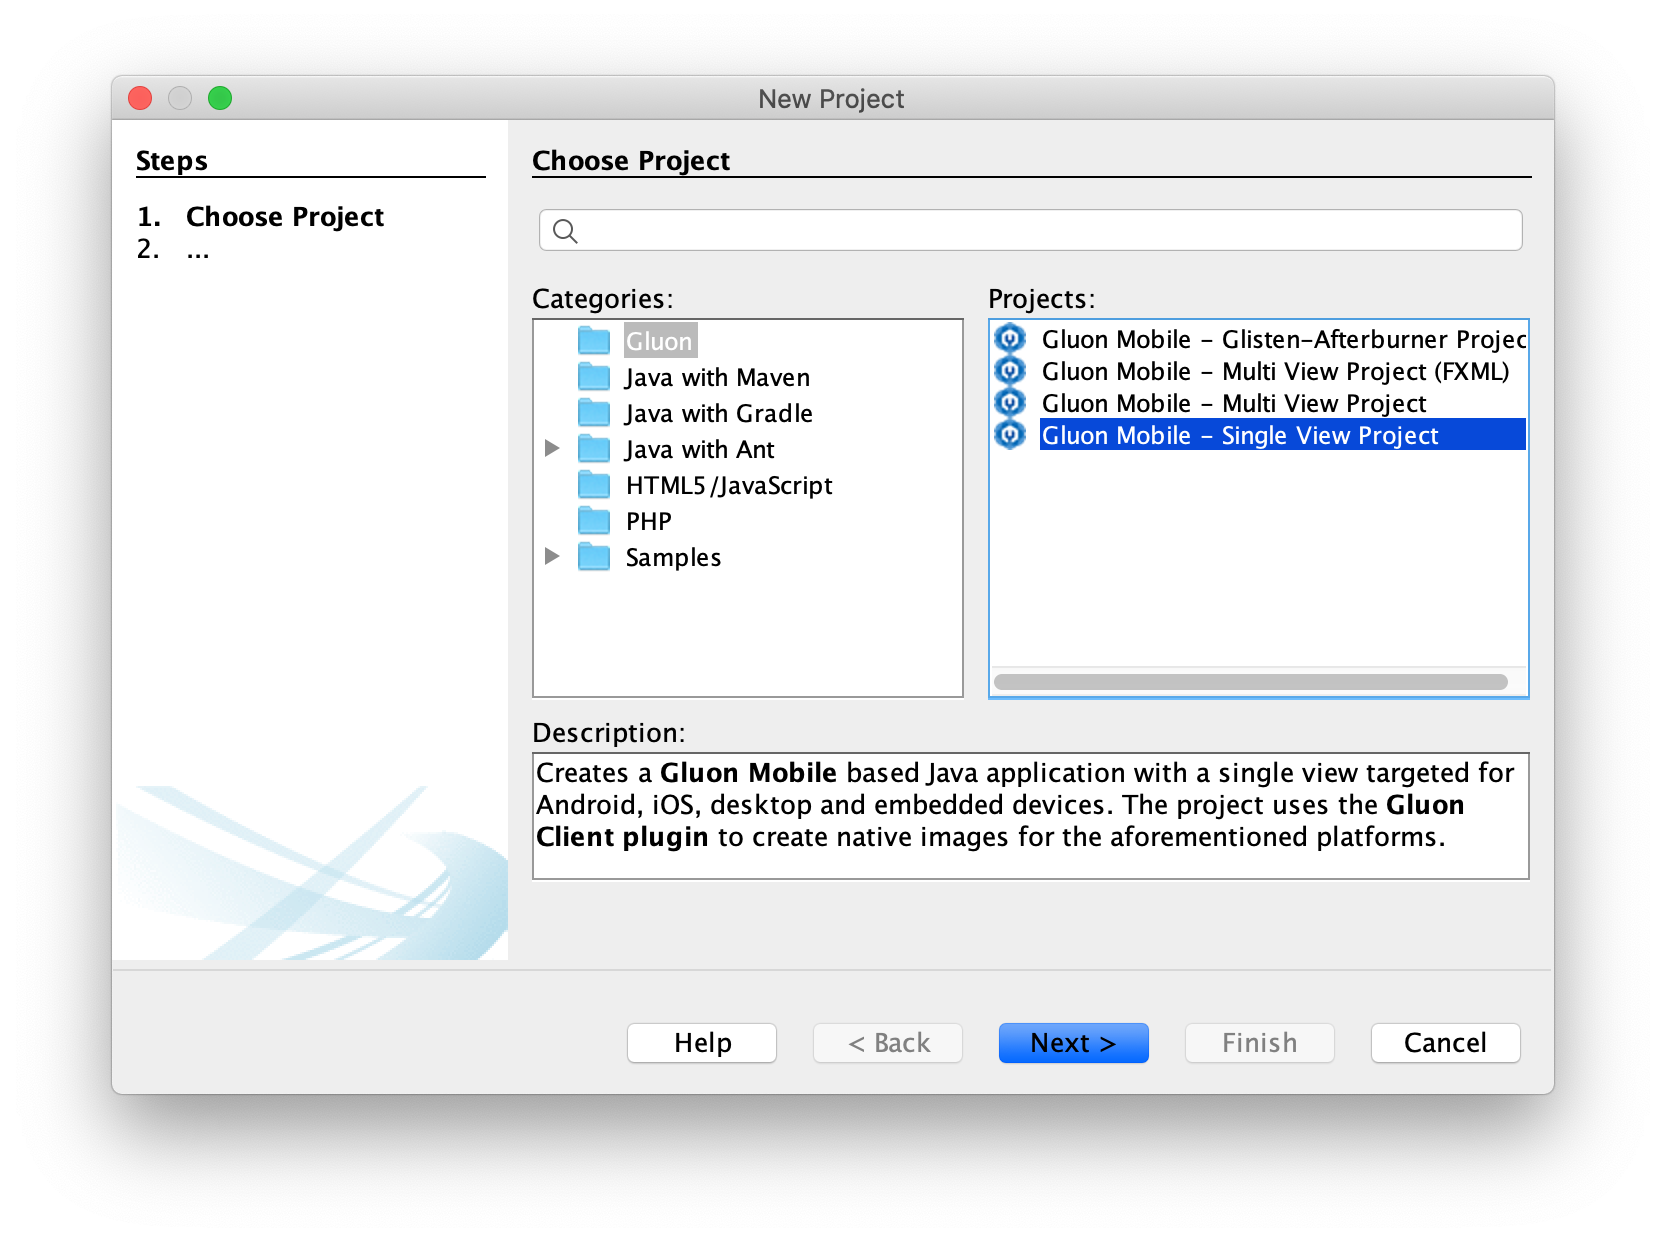
The first time you use the plugin, you will be asked to enter your email address.

If you already have a Gluon Mobile license key for your projects, you can insert them here as well, so they will be added by default to your new projects. If you don’t, you will be using the free (trial) version. Please find more about Gluon Mobile licenses.
You can access these settings later on from Tools→Options→Miscellaneous→Gluon (or NetBeans→Preferences…→Miscellaneous→Gluon):
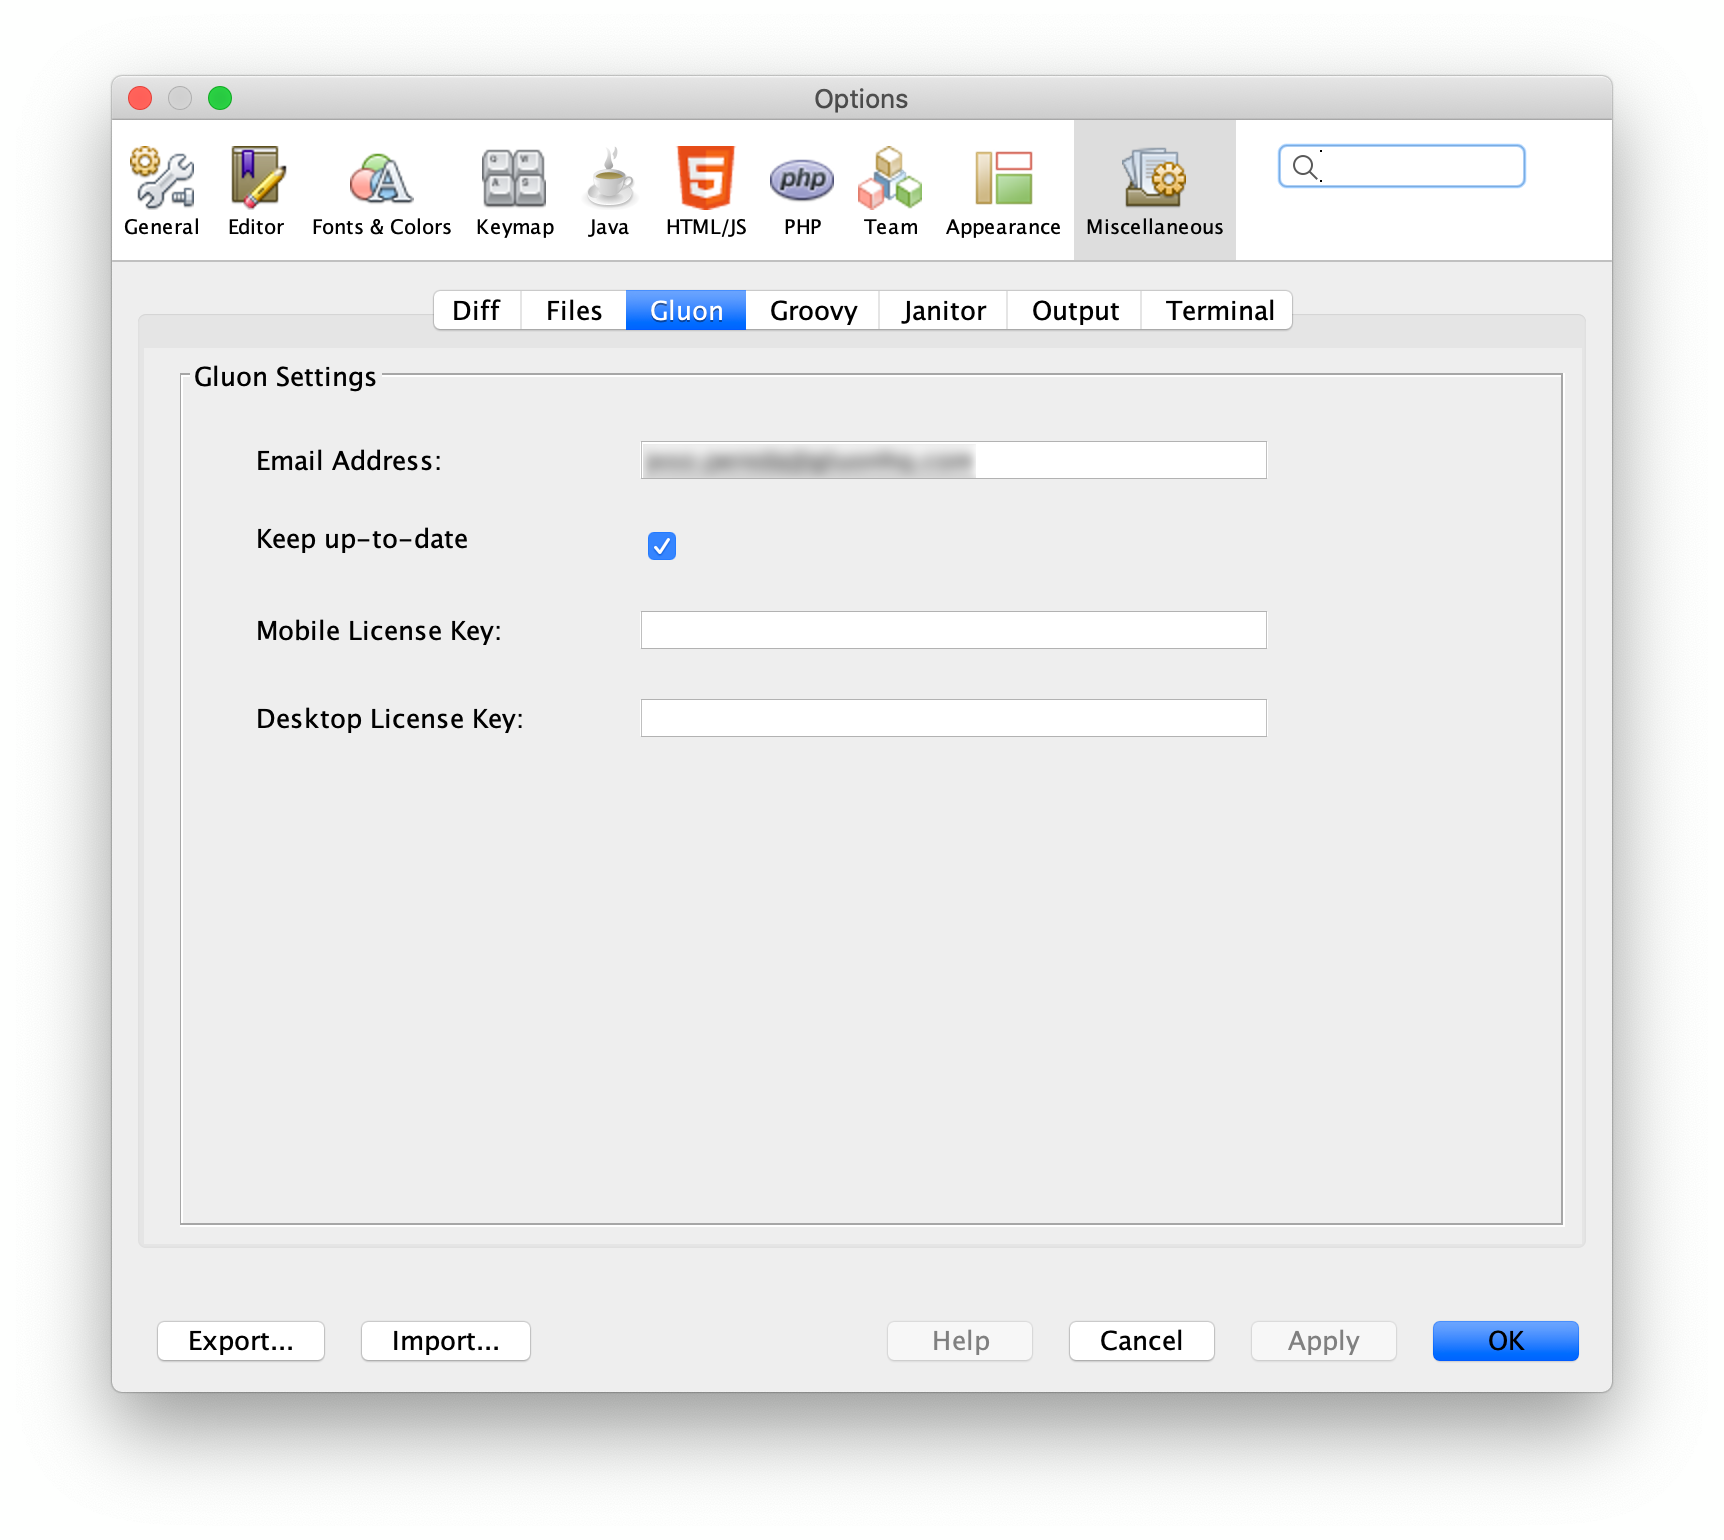
Once you have completed this first-time-only form, click Next.
Type the name of the project, find a proper location, add the package name and change the main class name if required. Select the platforms to deploy the application, and the build tool of your choice. For this tutorial, we will use the Maven build tool.
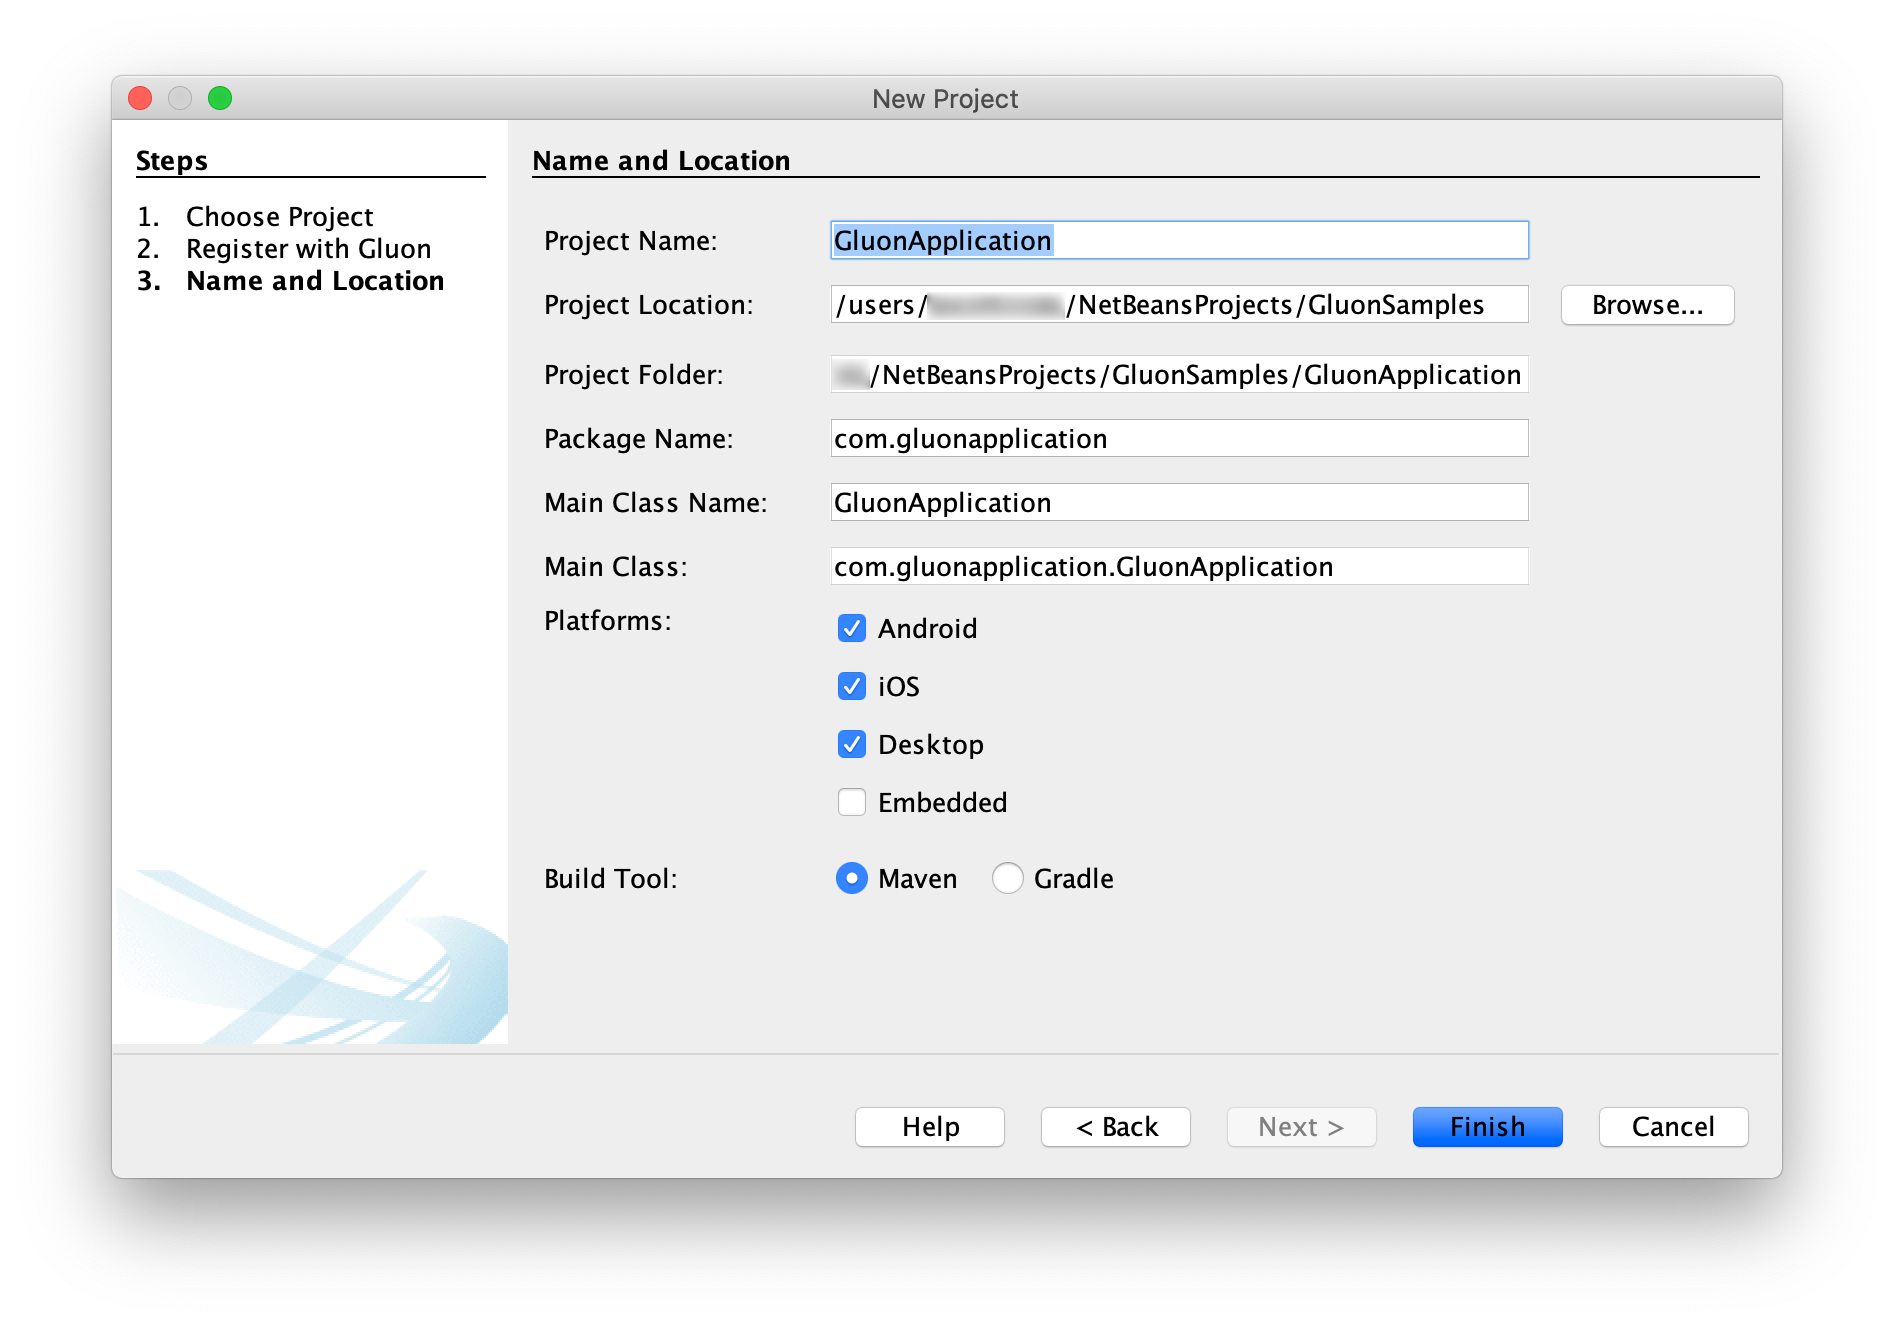
Press Finish and the project will be created and opened.
You will notice that a Maven project has been created with the pom containing profiles for the platforms you selected. These profiles make it easier to create native images targeted to each of these platforms.
6.2.3. The Gluon Mobile project
The plugin already adds some default code in the main folders, so we’ll be able to run it without adding a single line of code.
The Maven project has a dependency on the OpenJFX Maven Plugin and the Gluon Client Maven plugin to the project.
These plugins add a series of goals and to access them we just need to switch to the Navigator panel in NetBeans. The Navigator panel shows all the available Maven goals.
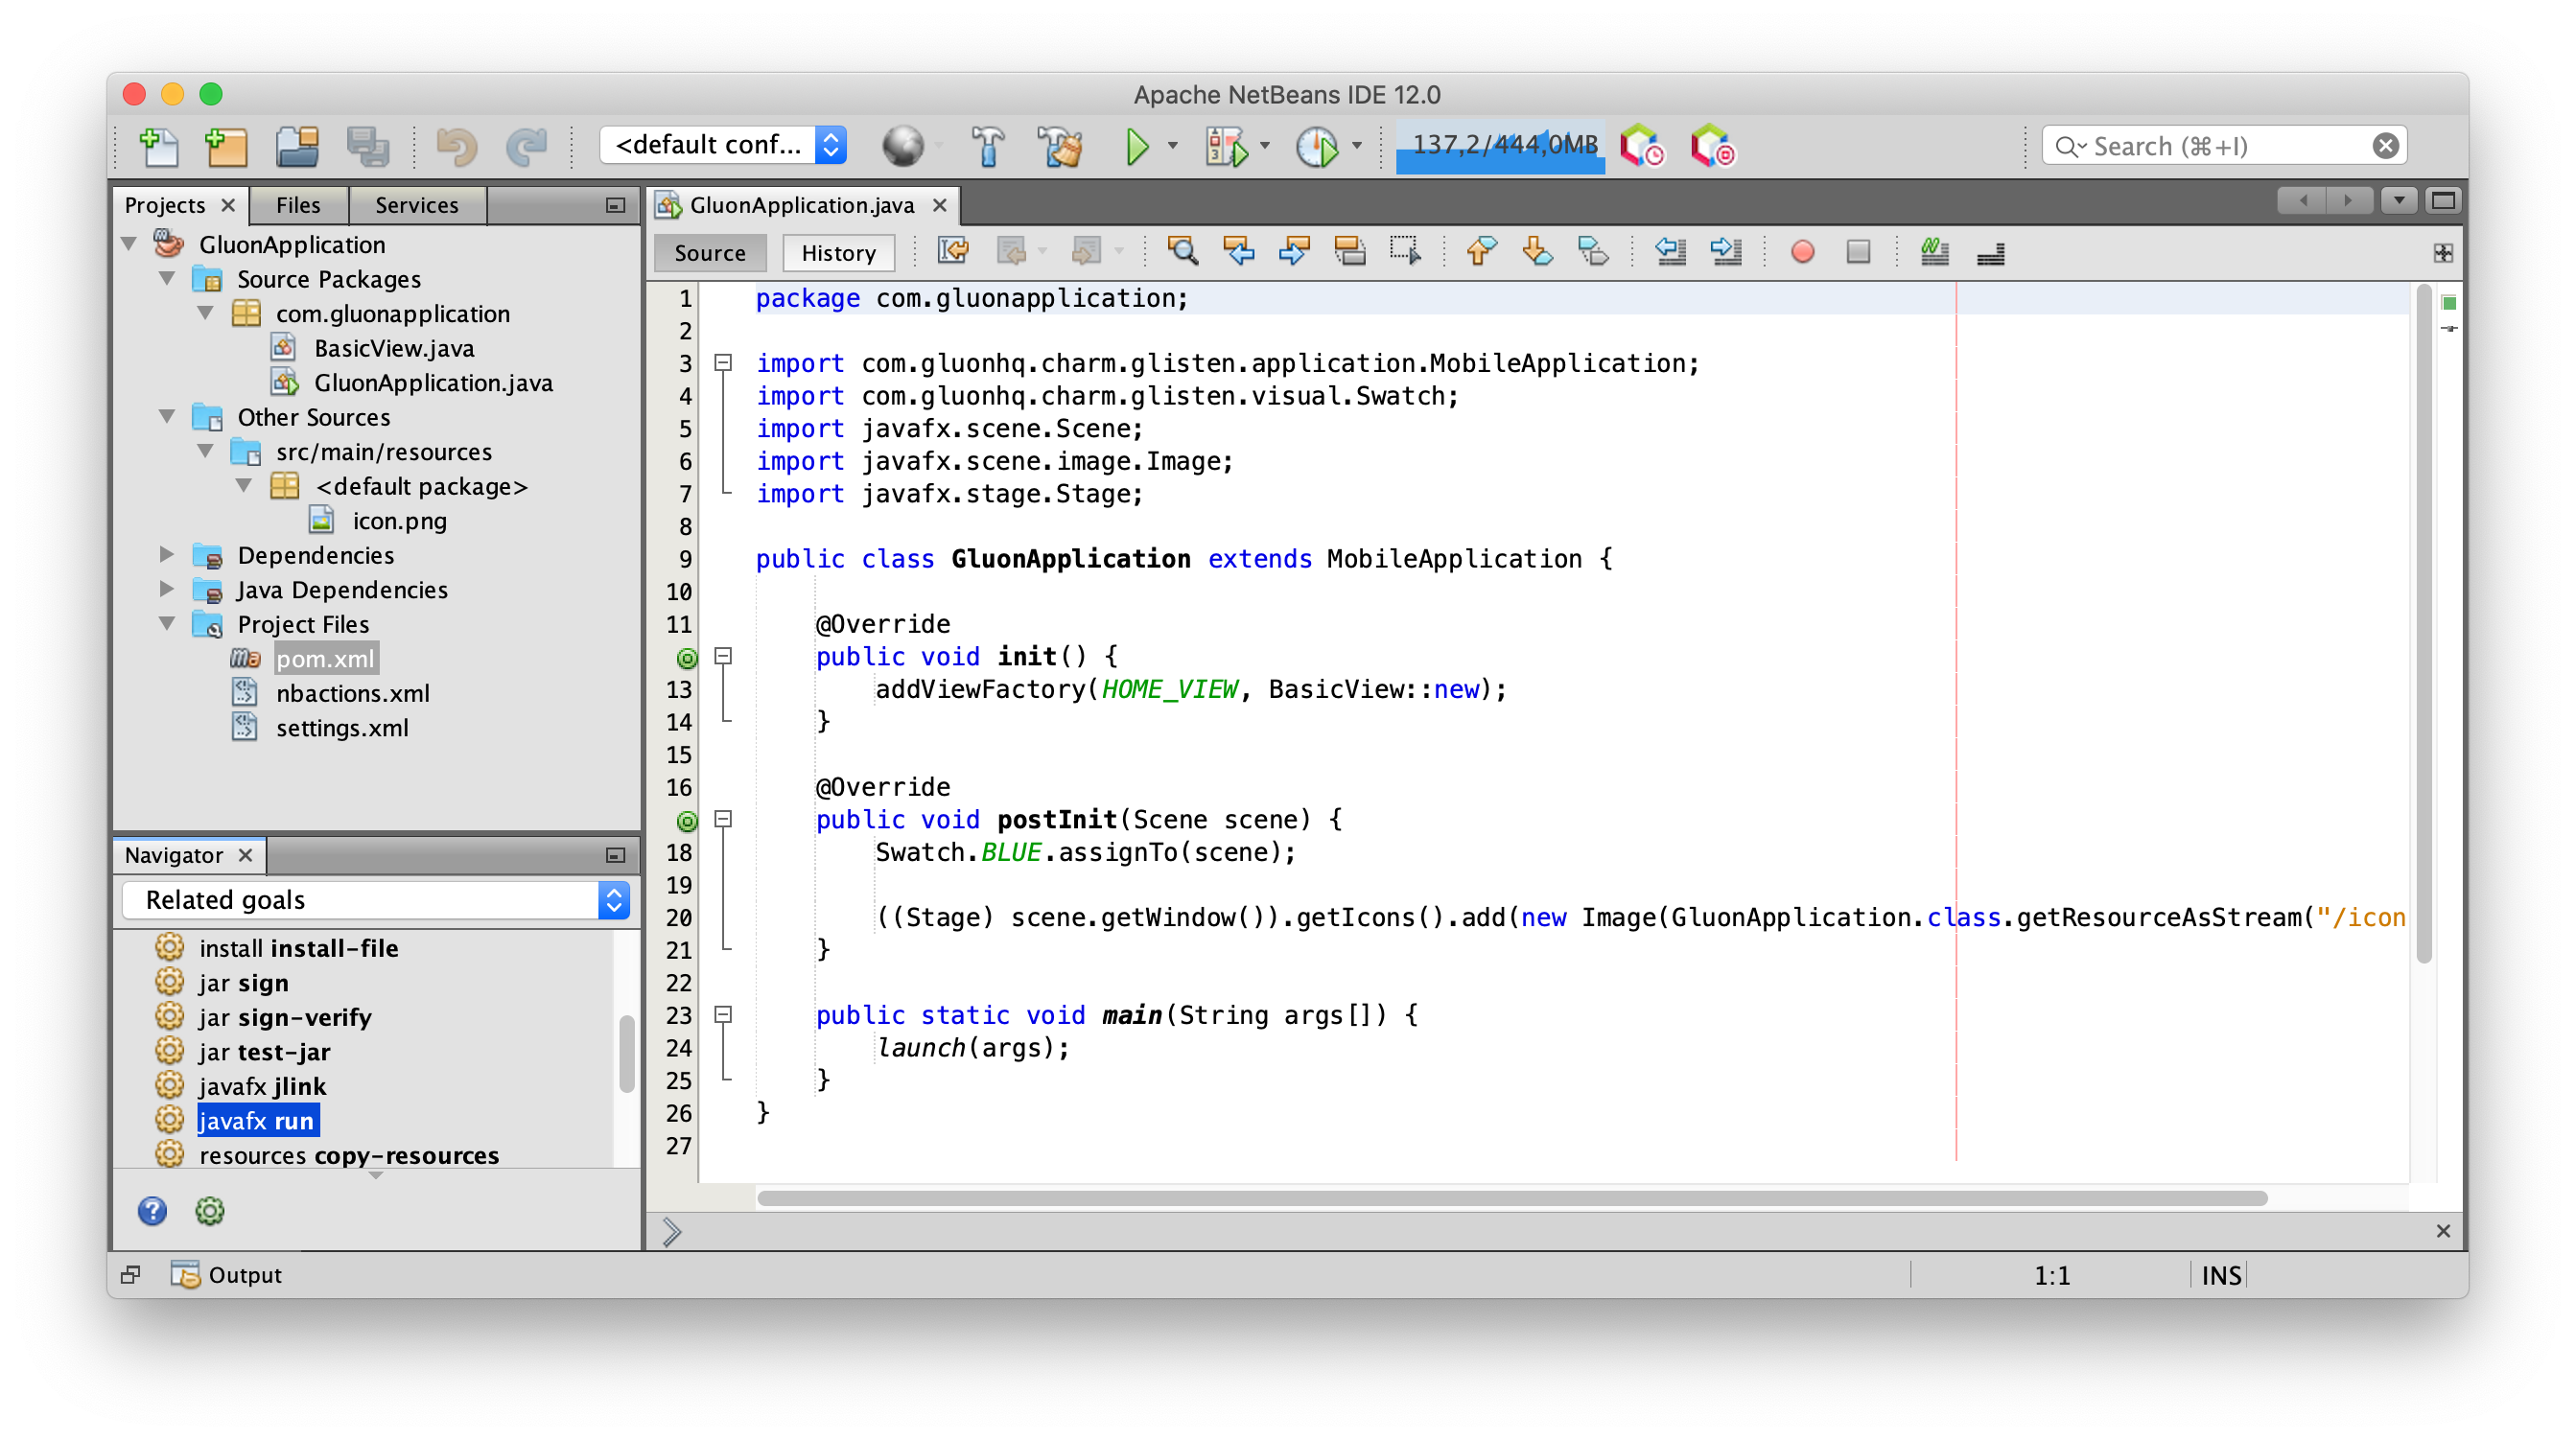
6.2.4. Run the application
|
Note
|
Make sure the Maven default JDK is properly set to 11+. 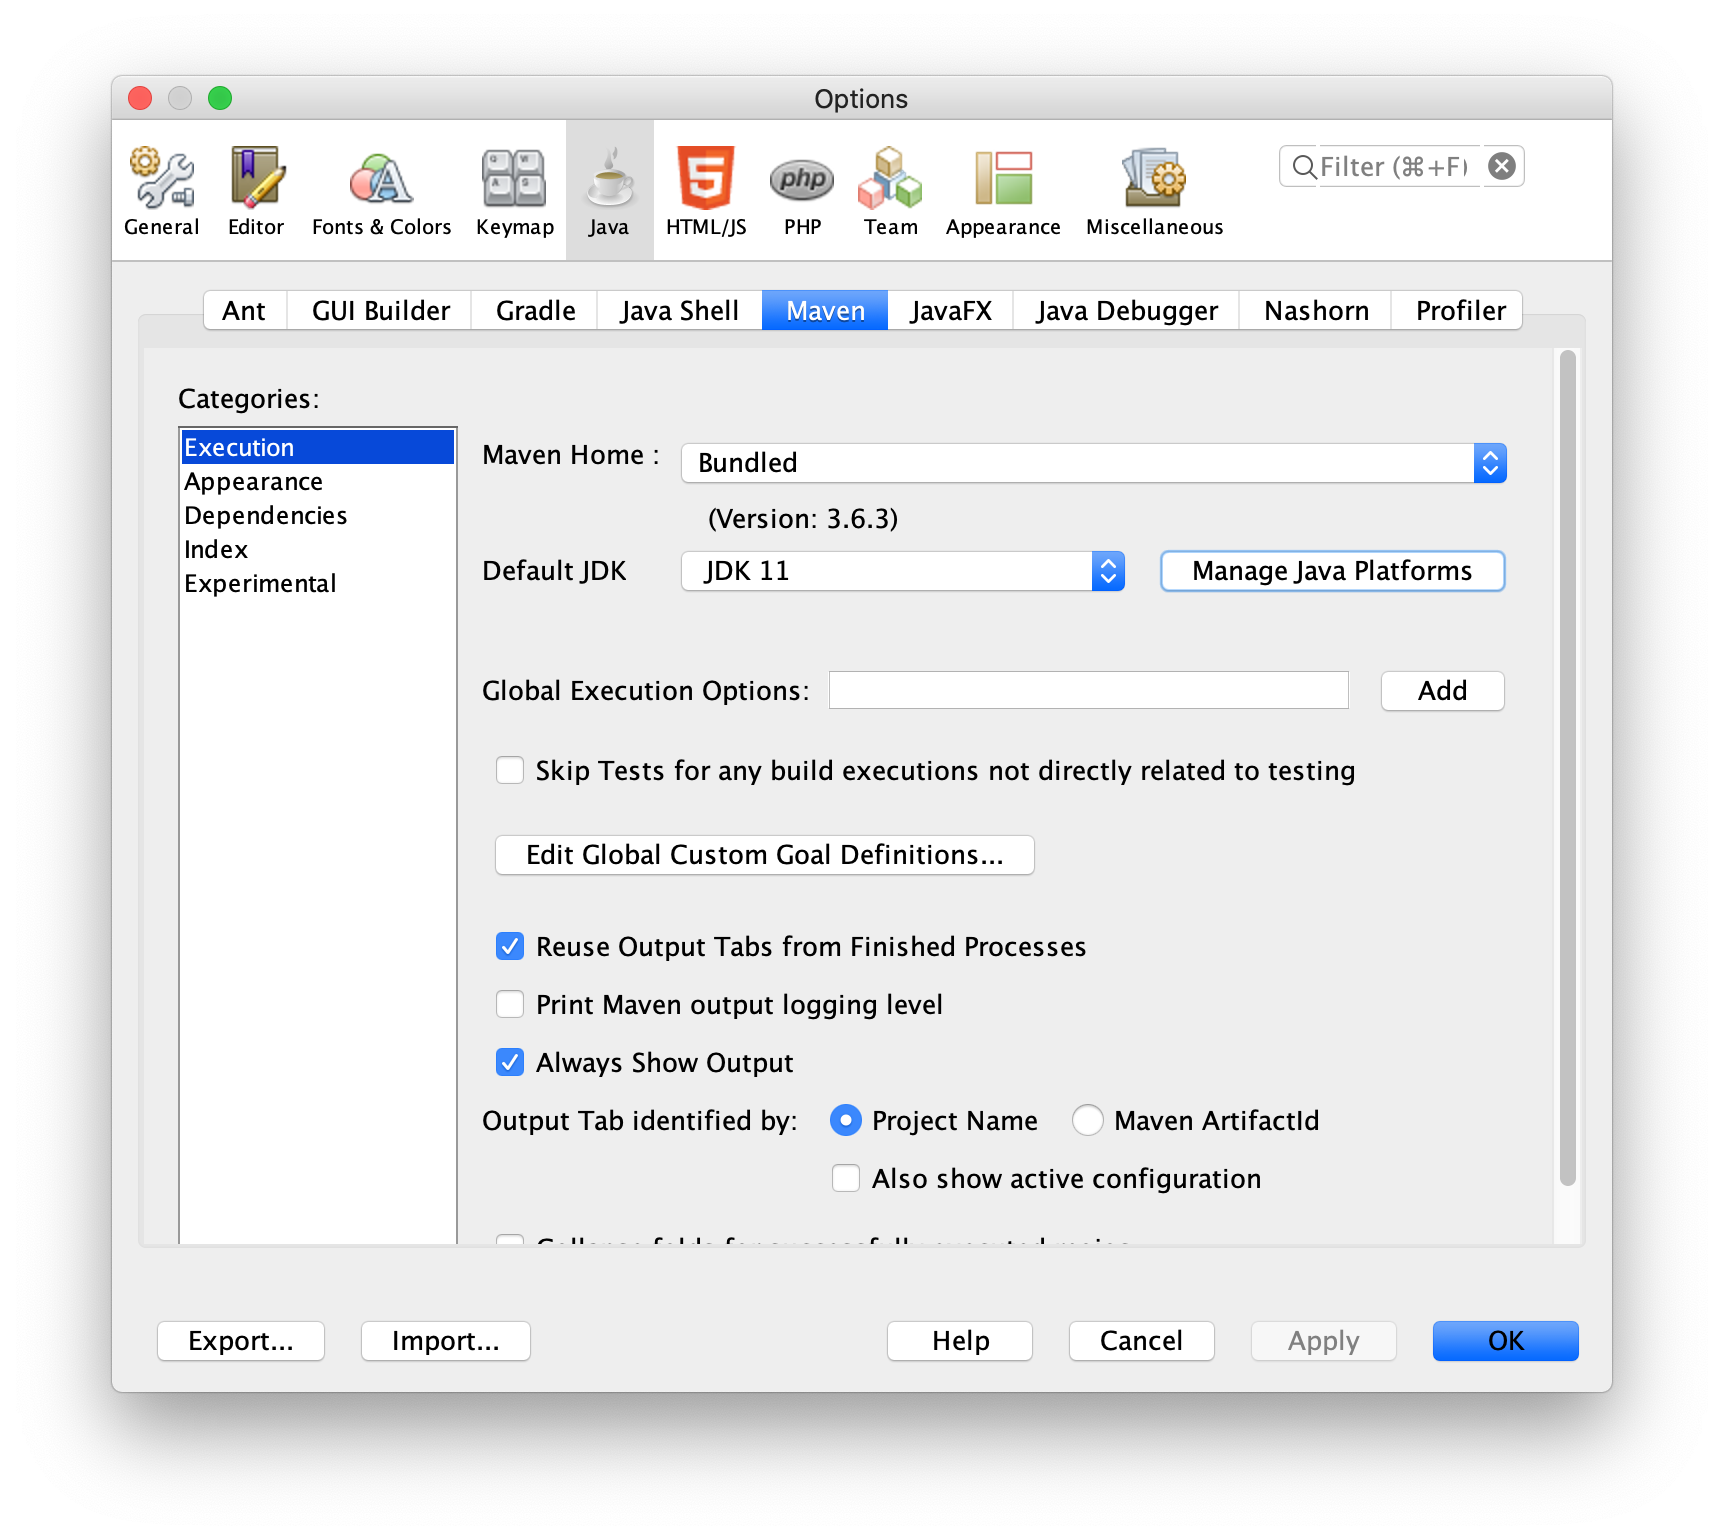
|
Before creating a native image, it’s easier to run the application first and verify that there are no errors.
Select Run project (F6) or select javafx:run from the Navigator. Verify that all the tasks are executed without errors, and the project runs fine on your desktop. Alternatively you can open the terminal (Tools→Open in Terminal) and run mvn javafx:run.
Let’s make a slight change to the code. In the BasicView class, update the text of the label on line 21 to the following:
button.setOnAction(e -> label.setText("Hello from NetBeans!"));Run it again to see that the new message shows up on your desktop when you click the button.
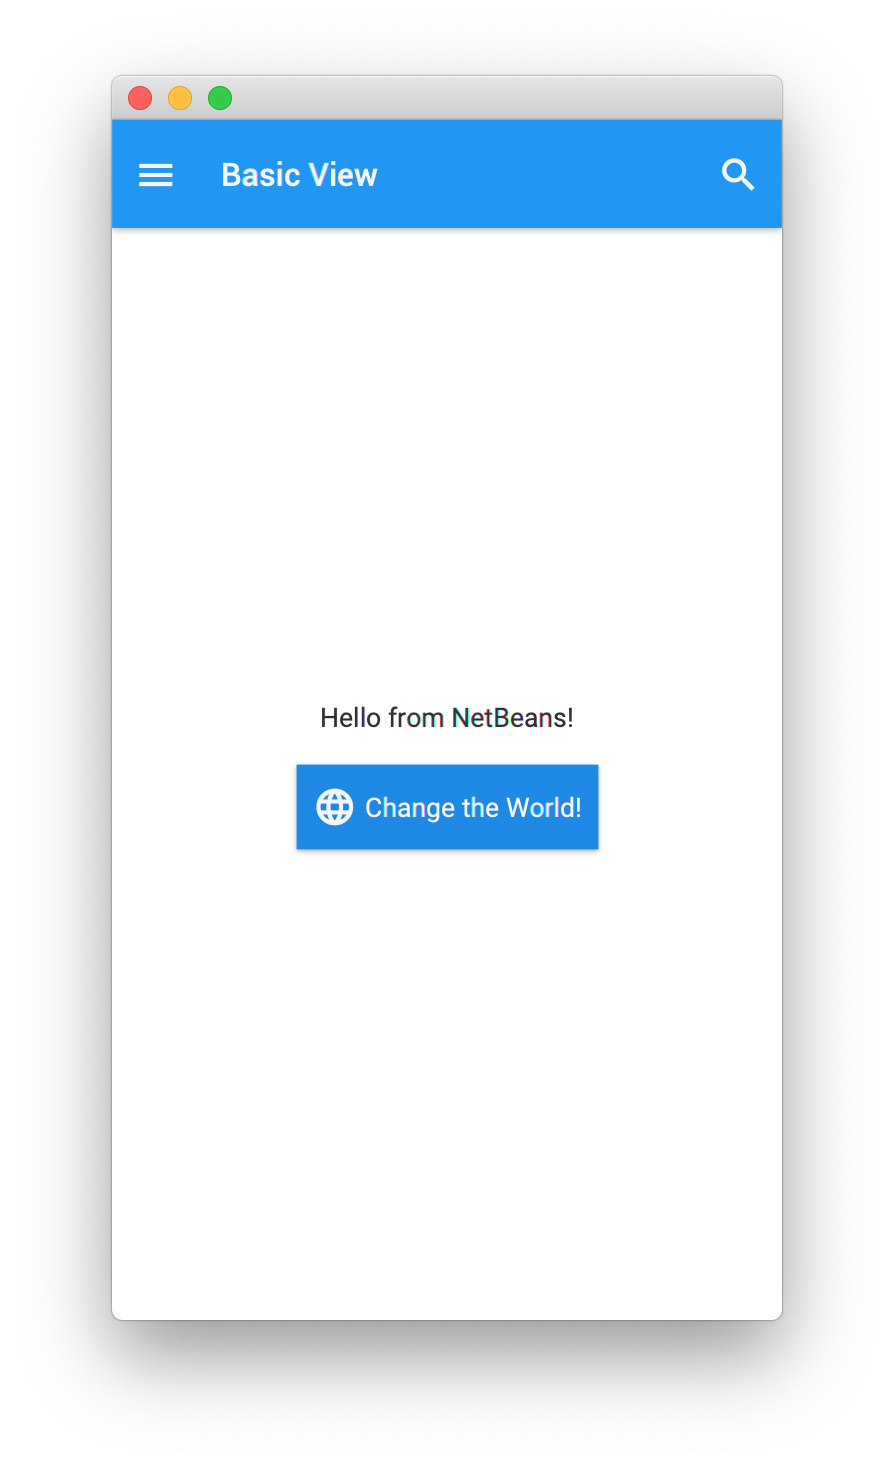
6.2.5. Create & run a native image of the application
In order to run the native image steps it is better to use a system terminal or the embedded terminal from your IDE. However, it is still possible to use the IDE’s Navigator window for this.
|
Important
|
Make sure you set the environment variable |
|
Note
|
If you are running on Windows, you need to run all the Client goals from an x64 terminal. Please check the pre-requisites for Windows deployment. However, you can use the terminal from NetBeans for this (it requires Cygwin installed). On the terminal, run once |
The Gluon Client plugin provides us various goals which are explained in details, earlier in the documentation.
For this tutorial, we will be using the client:build goal to create a native image of the application.
Execute mvn client:build from the terminal, or, run the client:build goal from the Navigator with modifiers, and add Env.GRAALVM_HOME=/path/to/GraalVM.
This goal typically takes a couple of minutes to complete and may vary depending on the system.
Once the goal is executed successfully, the native image can be run by executing client:run goal.
6.2.6. Create & install an Android native image
|
Note
|
This part is only applicable for Linux. Please check the pre-requisites for Android deployment. |
Now we are ready for deploying the same application on an Android device.
Right-click on the project and select Set Configuration and select android. This will activate the pre-existing android profile.
Run mvn -Pandroid client:build from the terminal, or alternatively, execute the client:build goal from the Navigator with modifiers, adding profile android, and Env.GRAALVM_HOME=/path/to/GraalVM.
Once the native image is created, we need to package it into an apk before we can install it on a physical Android device.
Execute mvn -Pandroid client:package to create an apk. Once the goal is executed successfully, connect a physical device and
install the native image by executing the mvn -Pandroid client:install goal.
When the installation ends successfully, run mvn -Pandroid client:run or find the application on your device and open it up:
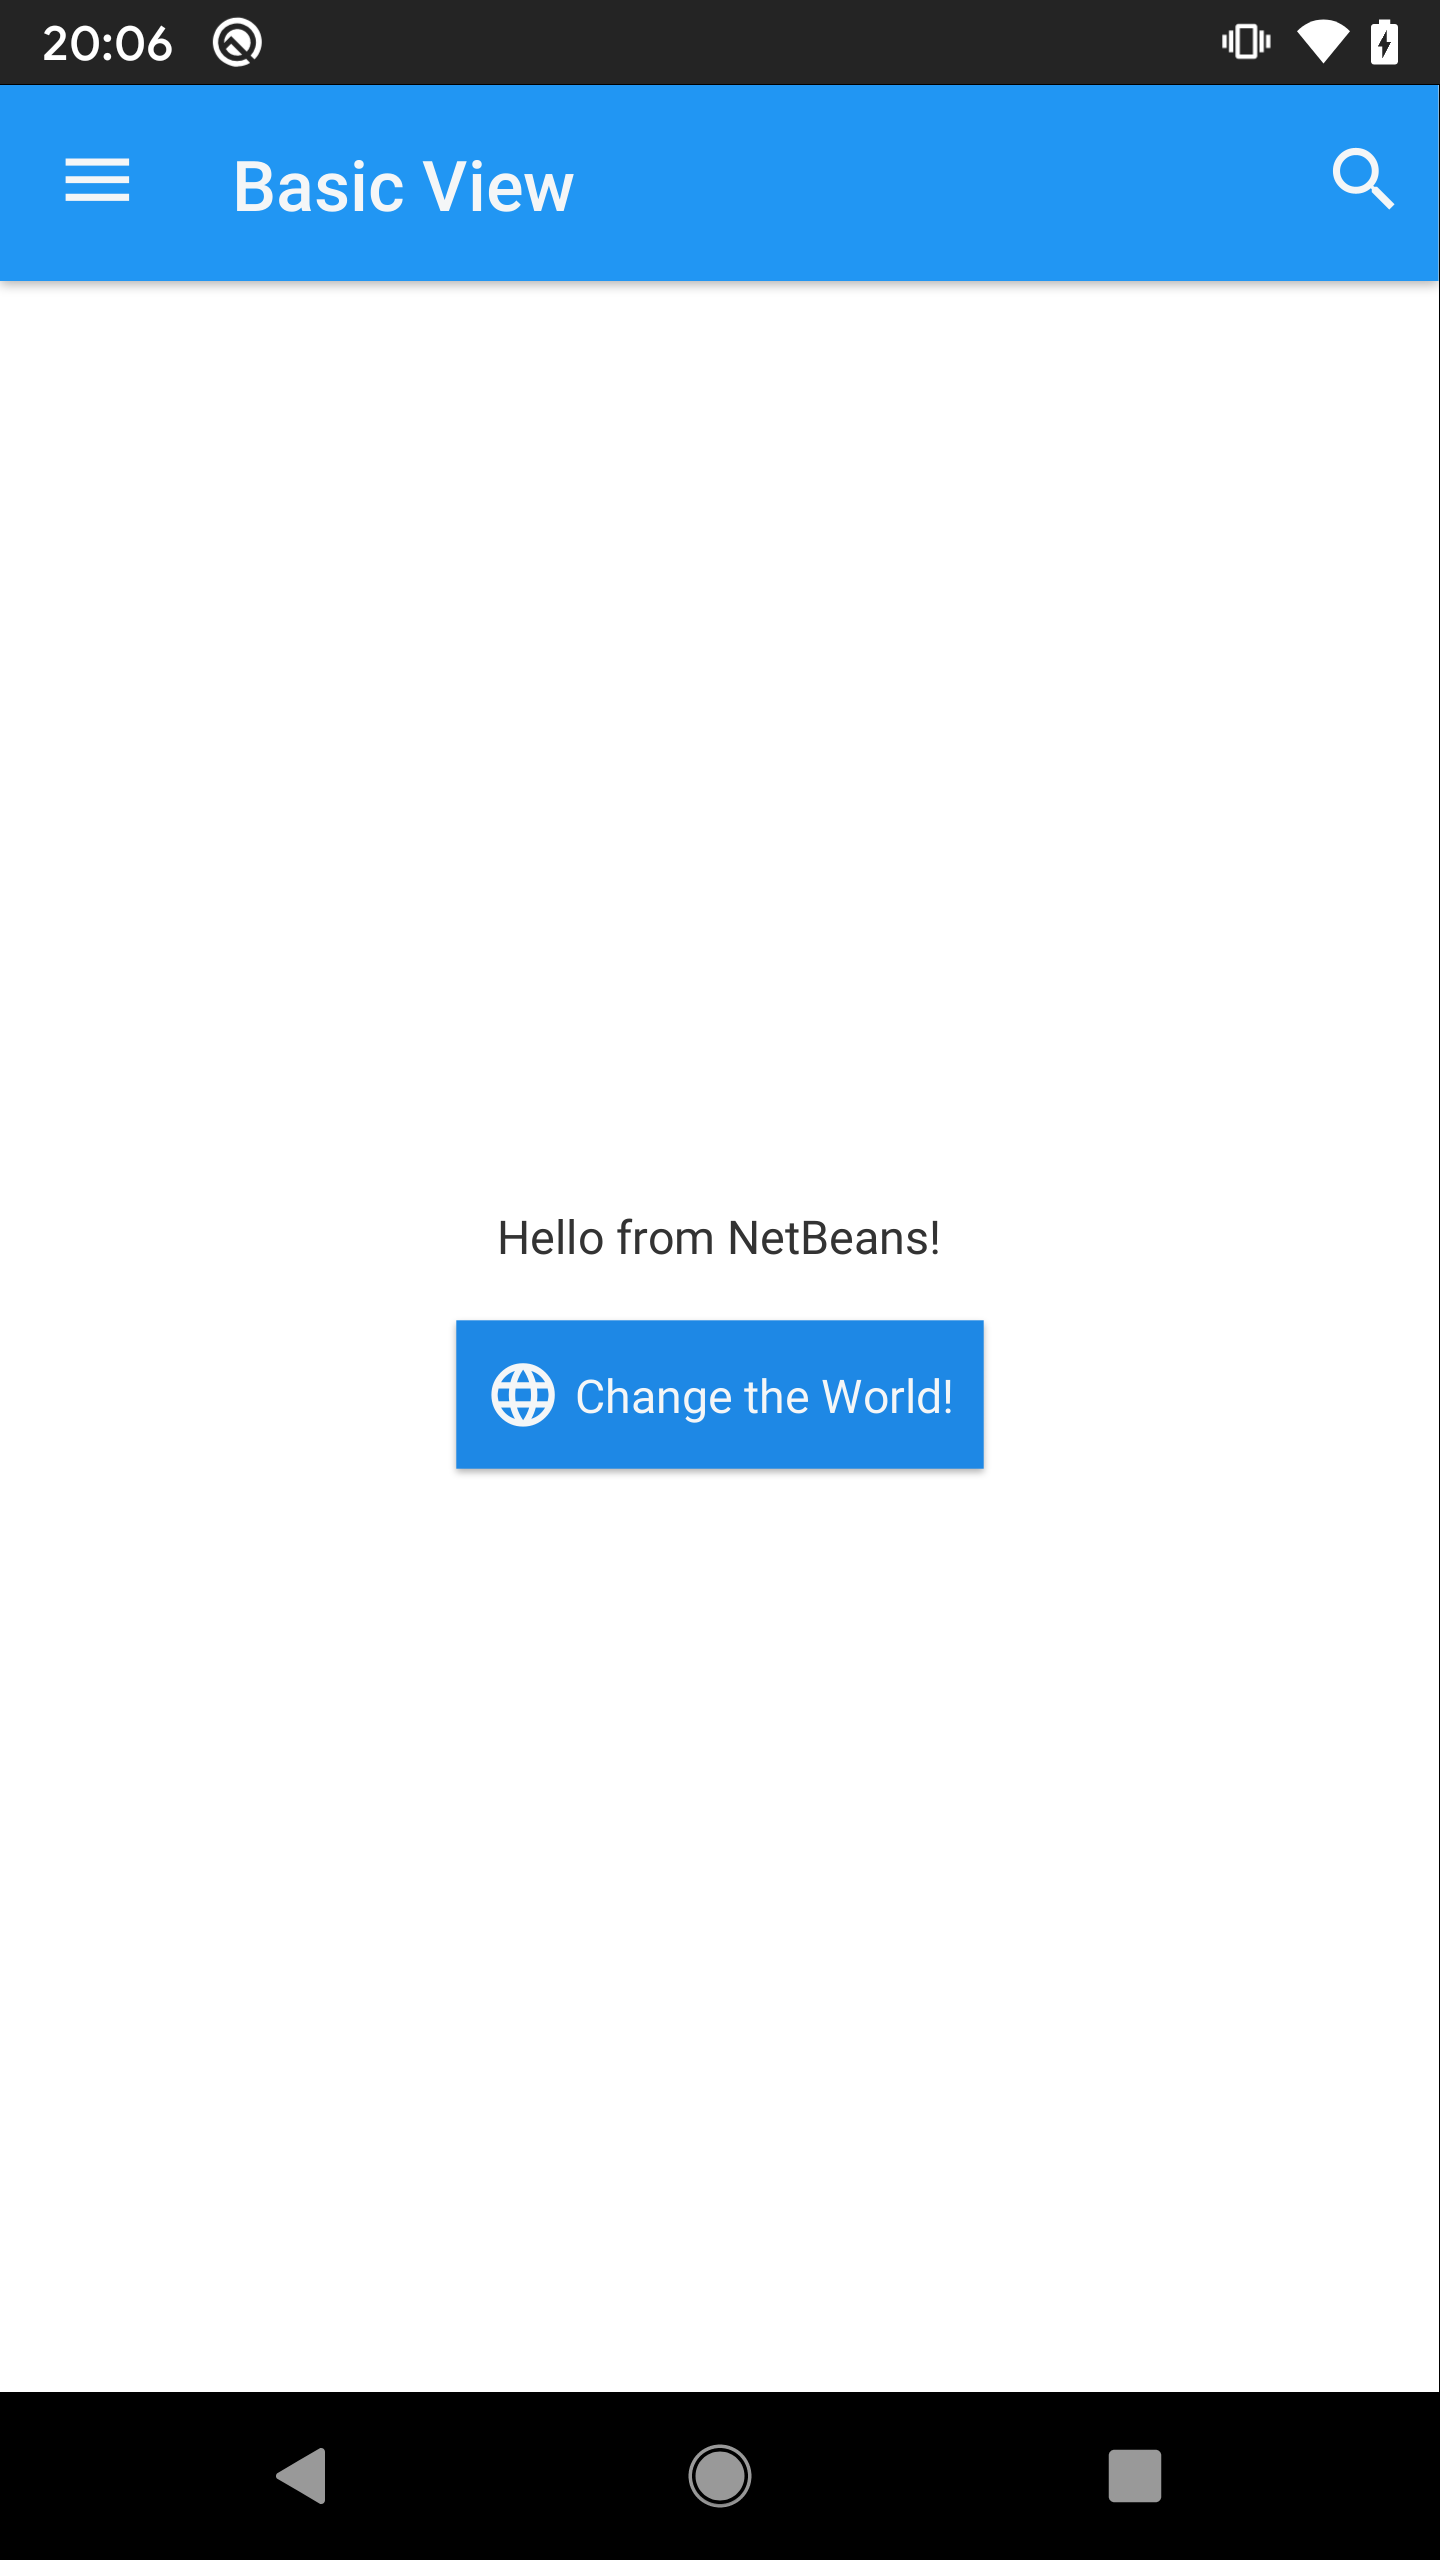
6.2.7. Create & install an iOS native image
|
Note
|
This part is only applicable for MacOS. Please check the pre-requisites for iOS deployment. |
Now we are ready for deploying the same application on an iOS device.
Right-click on the project and select Set Configuration and select ios. This will activate the pre-existing ios profile.
Run mvn -Pios client:build from the terminal, or alternatively, execute the client:build goal from the Navigator with modifiers, adding profile ios, and Env.GRAALVM_HOME=/path/to/GraalVM.
Once the goal is executed successfully, connect a physical device and run the native image on it by executing by executing mvn -Pios client:run.
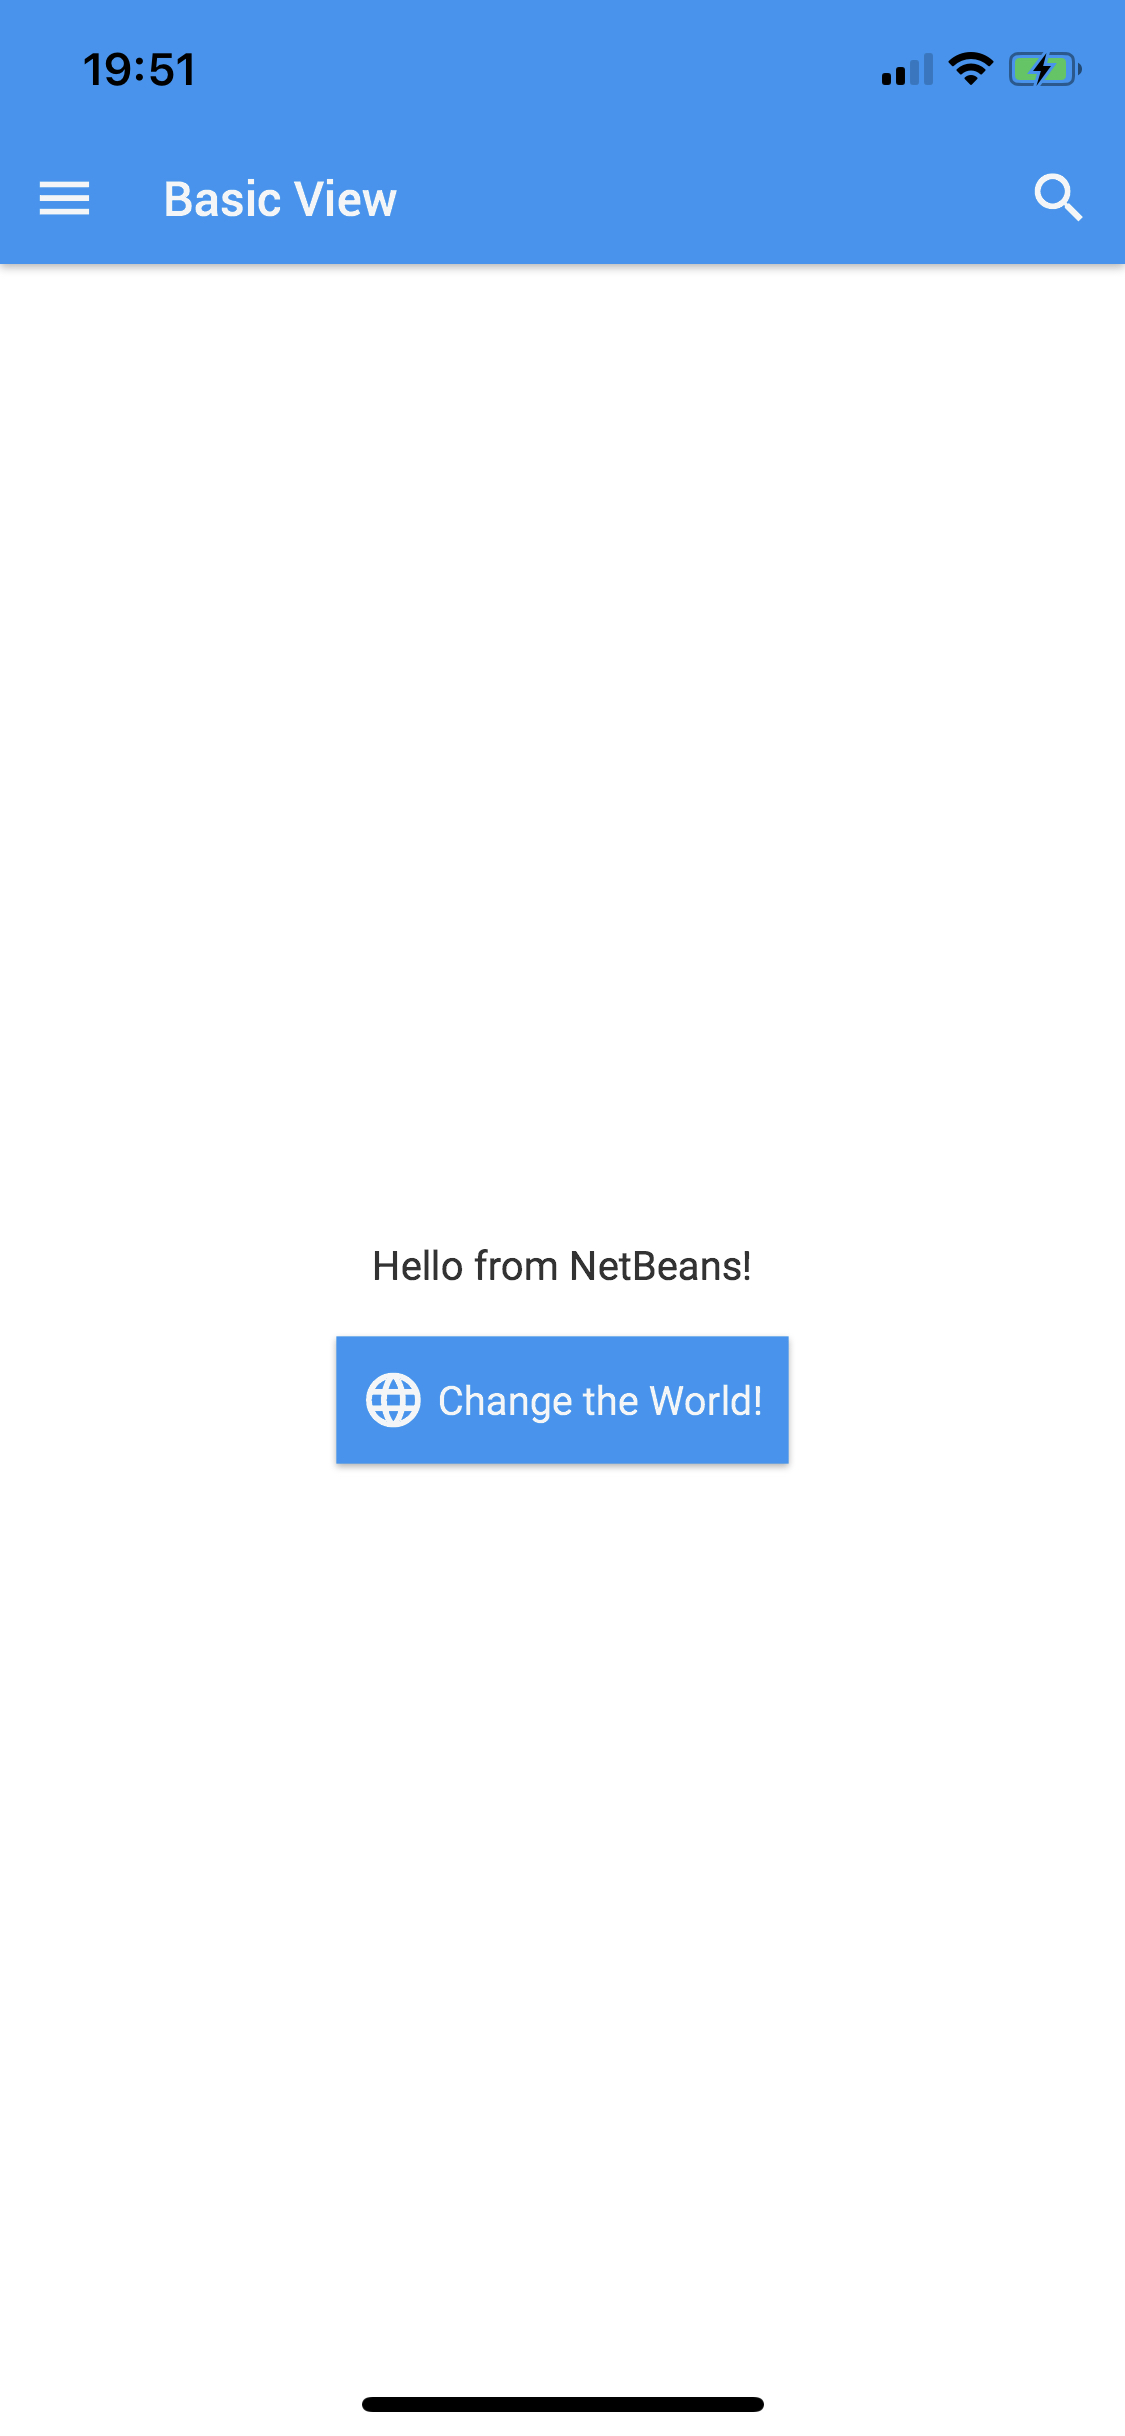
6.2.8. Conclusion
If you have made it here without problems, congratulations!
If you have found any difficulties along the way, please review the lists of prerequisites and try again. In case you have any questions, your first stop should be the Gluon support page, where you can access the latest documentation. Gluon also recommends the community to support each other over at the Gluon StackOverflow page. Finally, Gluon offers commercial support as well, to kick start your projects.
We encourage you to start developing new projects and creative native images that can be targeted for desktop, Android and iOS devices using the Gluon plugin on your favorite IDE. :imagesdir: images/ide
6.3. The Gluon Plugin for Eclipse
In this section, we’ll explain briefly how to install the Gluon plugin on Eclipse IDE and how to use it to create a sample application that can be deployed on desktop, Android and iOS devices. Before we start, make sure to check the list of prerequisites.
6.3.1. Plugin Installation
Eclipse Marketplace
The Gluon Plugin can be installed through the Eclipse Marketplace. You can install it from this link
or directly open the Eclipse Marketplace from Eclipse→Help→Eclipse MarketPlace…. Then type Gluon in the search field and press 'Go' to find the plugin.

Press Install, accept the terms of the license agreement when prompted and press Finish to begin the installation of the plugin. Press Confirm to install the installation of the selected features, and Install anyway when prompted with an unsigned sofware warning.
The Gluon Plugin will be downloaded and installed.
When the installation is completed, Eclipse will ask you to restart your IDE for the changes to take effect.
You can now continue to Creating a new Gluon Project.
Update Site
Alternatively, you can install the Gluon Plugin by providing an update site.
Open Eclipse and choose Help → Install New Software…. Paste the following Update Site URL in the Work with: text field: http://download.gluonhq.com/tools/eclipse/release, and select Gluon Plug-in for Eclipse. Then proceed as indicated above.
6.3.2. Create a new Gluon project
Now that the plugin is installed, we can use it to create a sample application.
In Eclipse, click File → New → Project… and select one of the available projects under the Gluon category, for instance, Gluon Mobile - Single View Project and click Next.
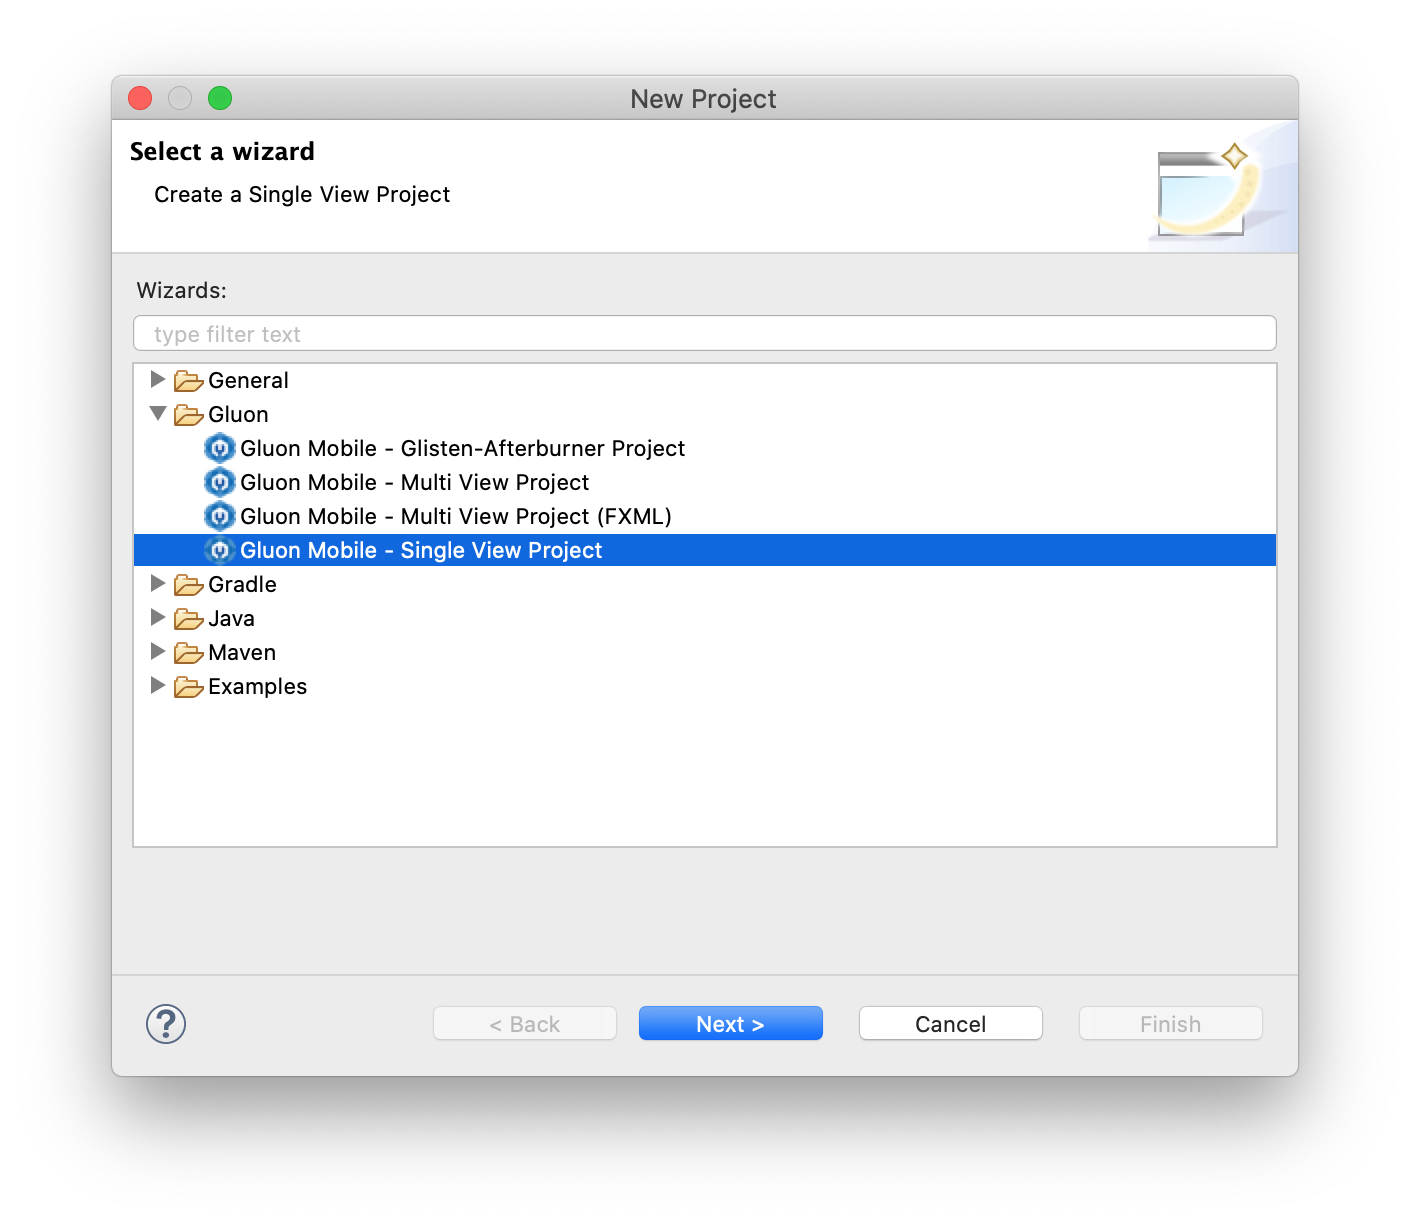
The first time you use the plugin, you will be asked to enter your email address.
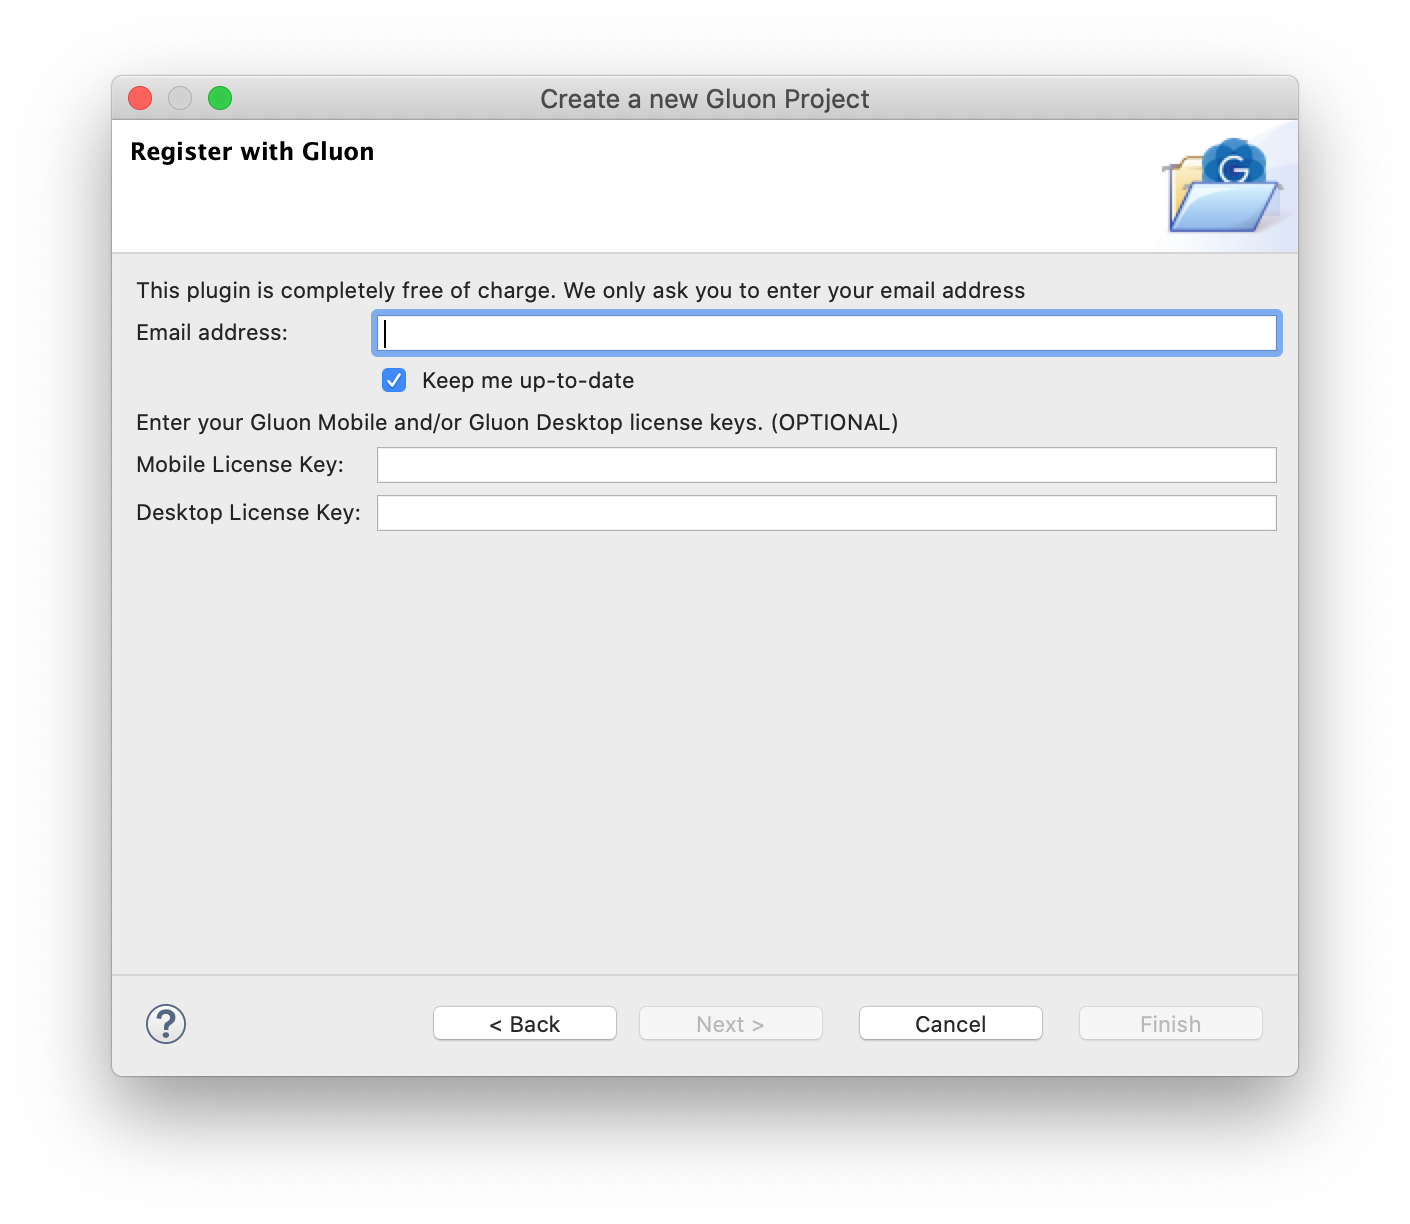
If you already have a Gluon Mobile license key for your projects, you can insert them here as well, so they will be added by default to your new projects. If you don’t, you will be using the free (trial) version. Please find more about Gluon Mobile licenses.
You can access these settings later on from Window→Preferences→Gluon (or Eclipse→Preferences…→Gluon):
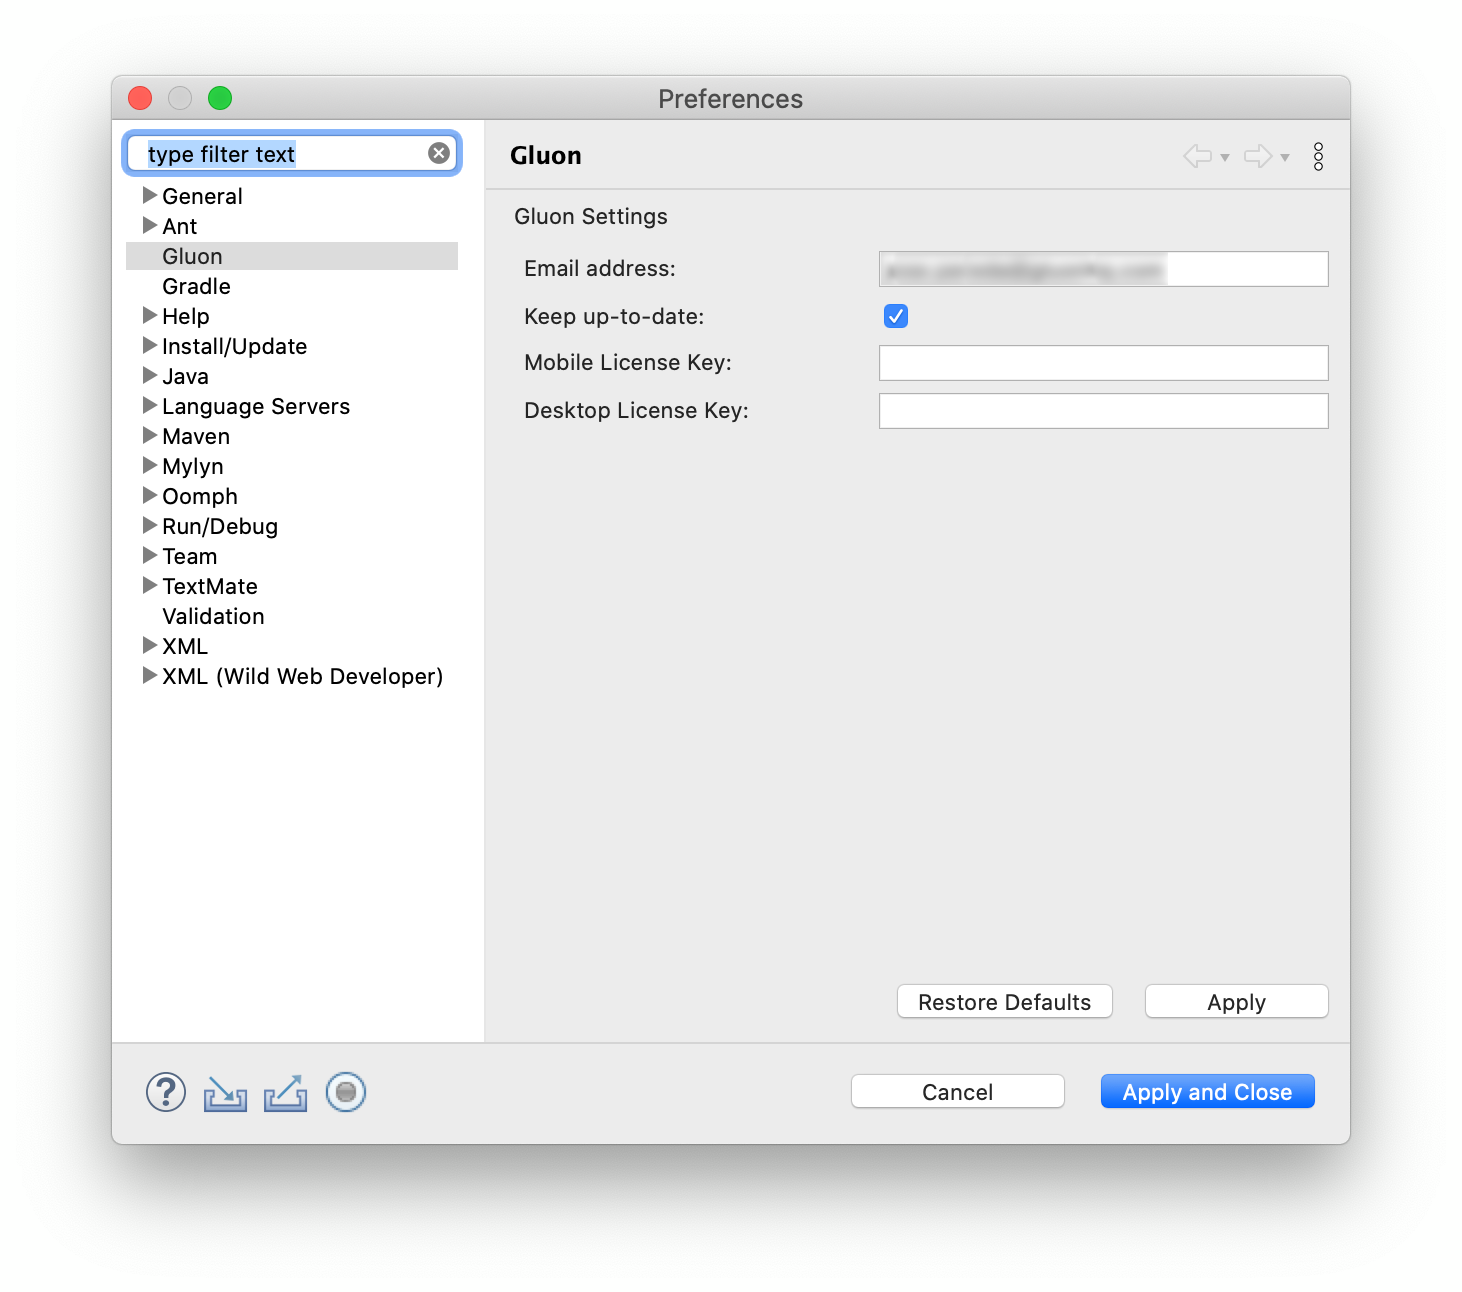
Once you have completed this first-time-only form, click Next.
Provide a name for the project, optionally choose a custom location to store the project and click Next.
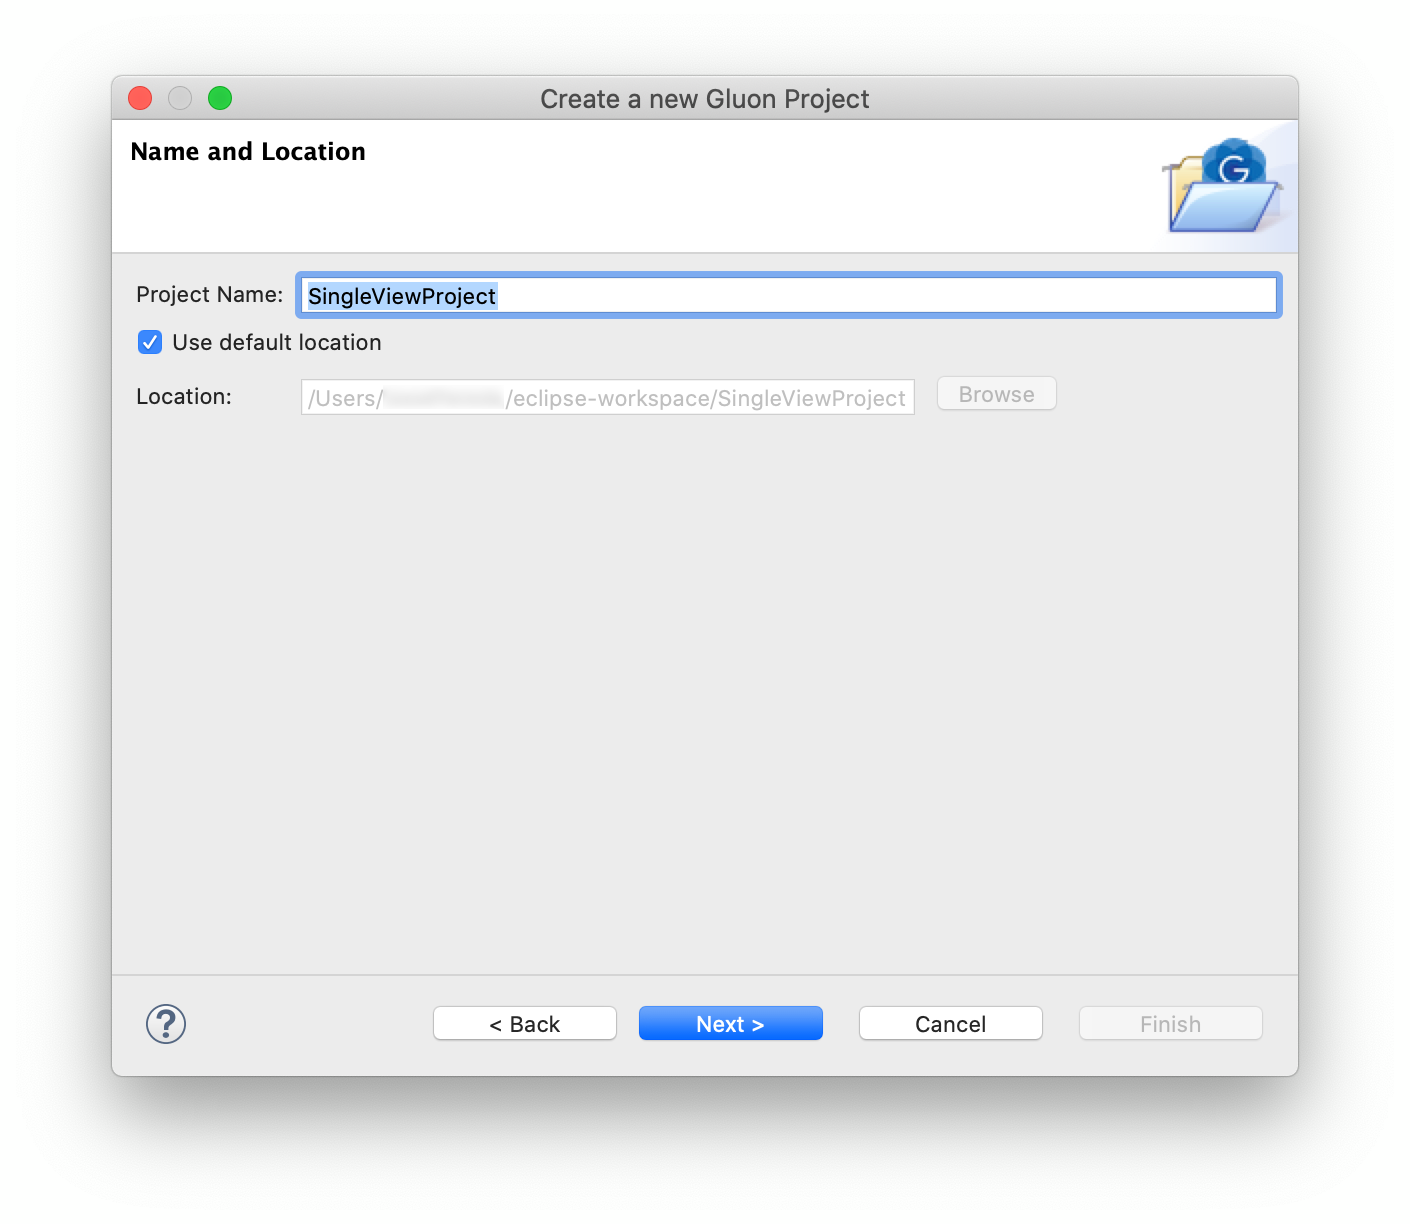
The plugin will generate a JavaFX application class. In the following step you can configure the name of the package and the name of the class that will be generated. Select the platforms to deploy the application, and the build tool of your choice. For this tutorial, we will use the Maven build tool.
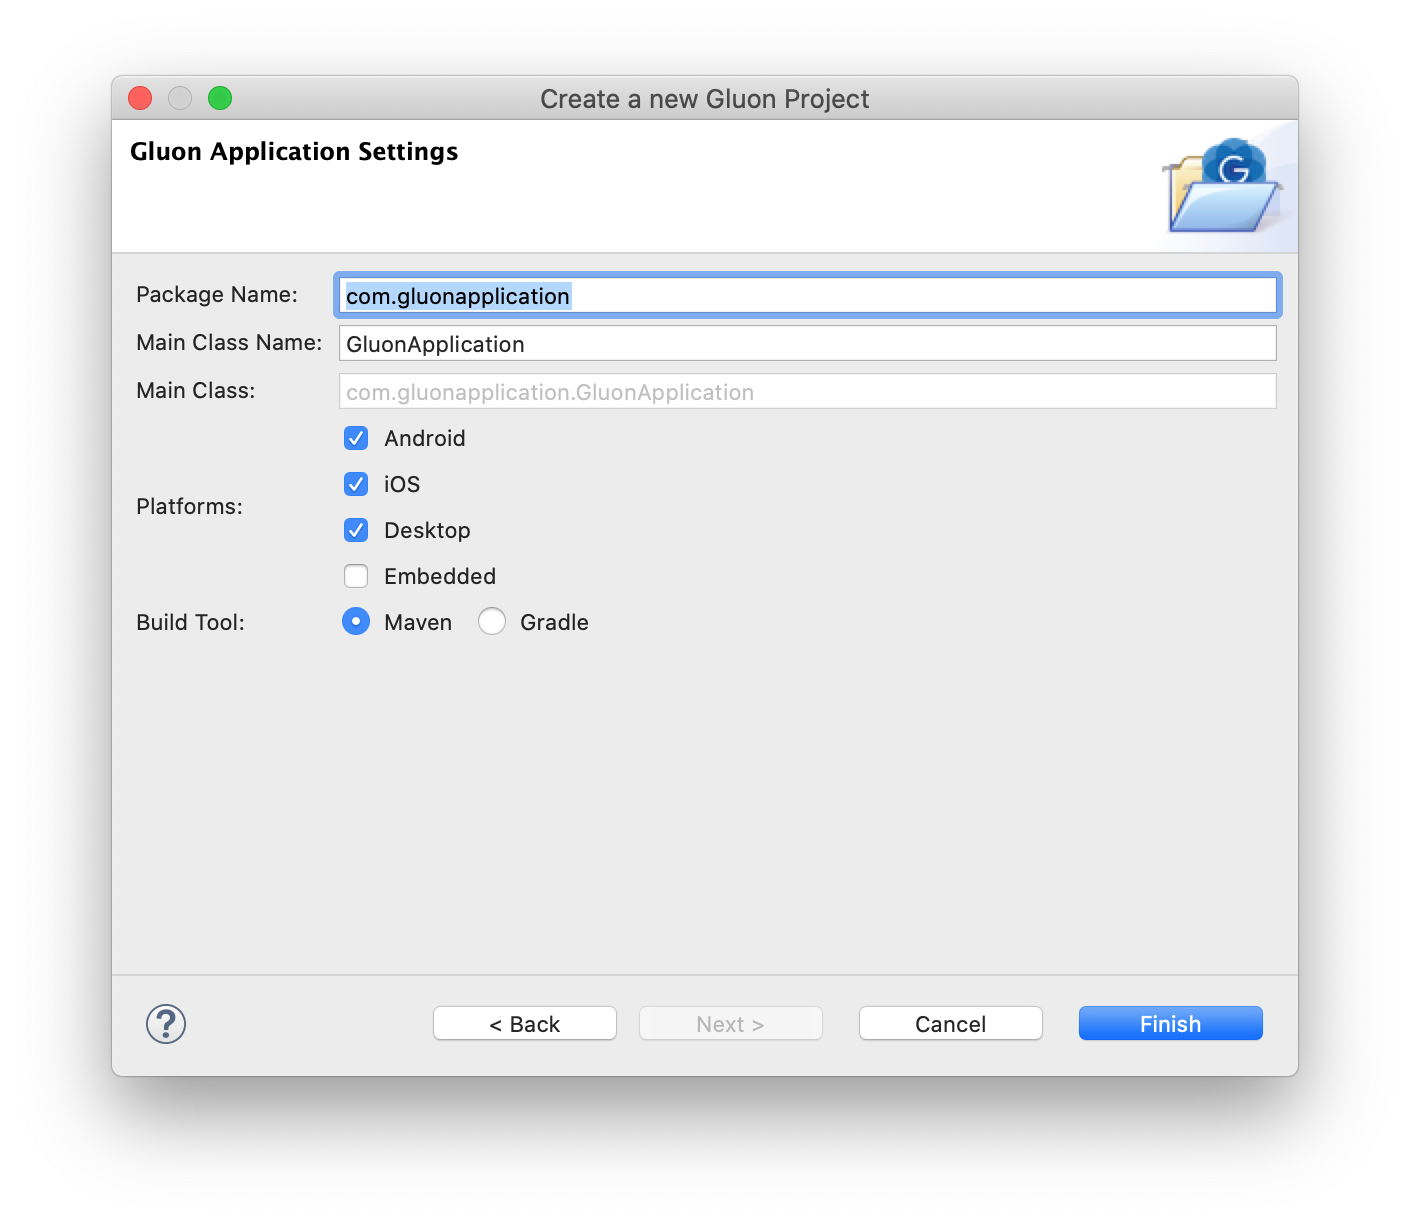
Click Finish to complete the creation of the Gluon project.
You will notice that a Maven project has been created with the pom containing profiles for the platforms you selected. These profiles make it easier to create native images targeted to each of these platforms.
6.3.3. The Gluon Mobile project
The plugin already adds some default code in the main folders, so we’ll be able to run it without adding a single line of code.
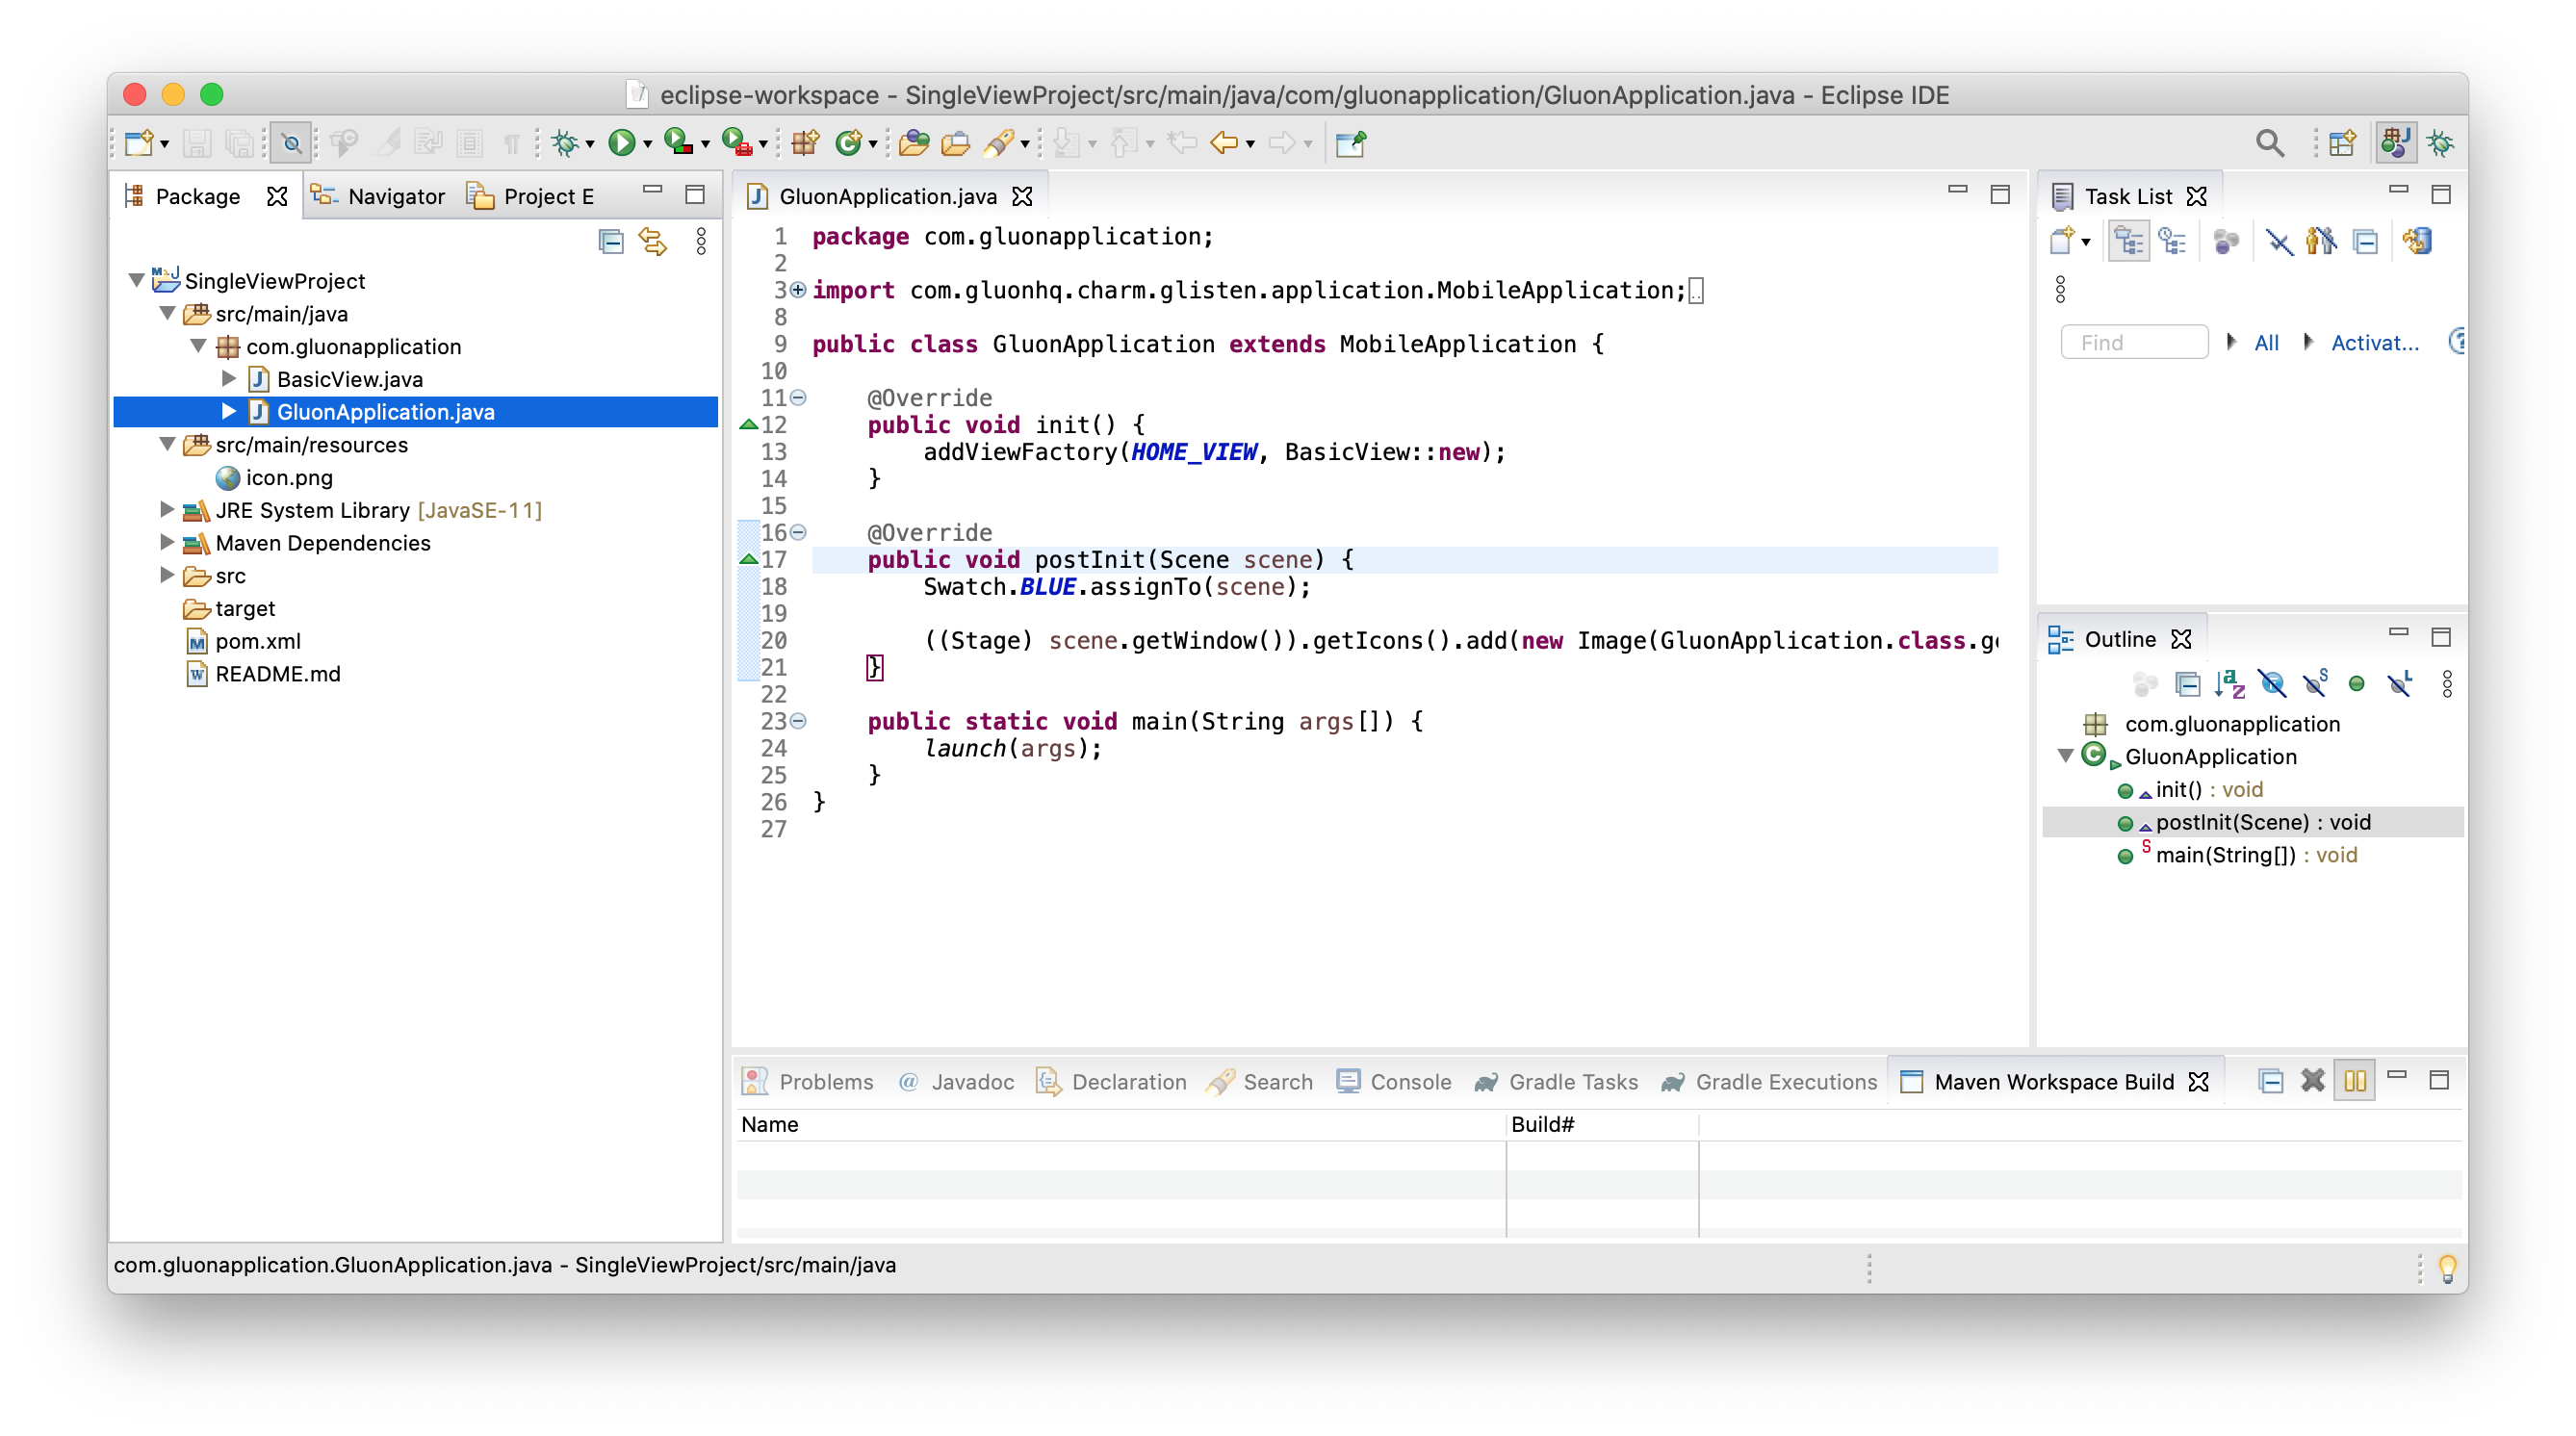
The Maven project has a dependency on the OpenJFX Maven Plugin and the Gluon Client Maven plugin to the project. These plugins add a series of goals which will be used to run and create native images of the application.
6.3.4. Run the application
Before creating a native image, it’s easier to run the application first and verify that there are no errors.
Right-click on the project, select Run As → Maven Build…. An "Edit Configuration" window opens.
In the Goals textfield, type javafx:run and click Run. Verify that all the tasks are executed without errors, and the project runs fine on your desktop.
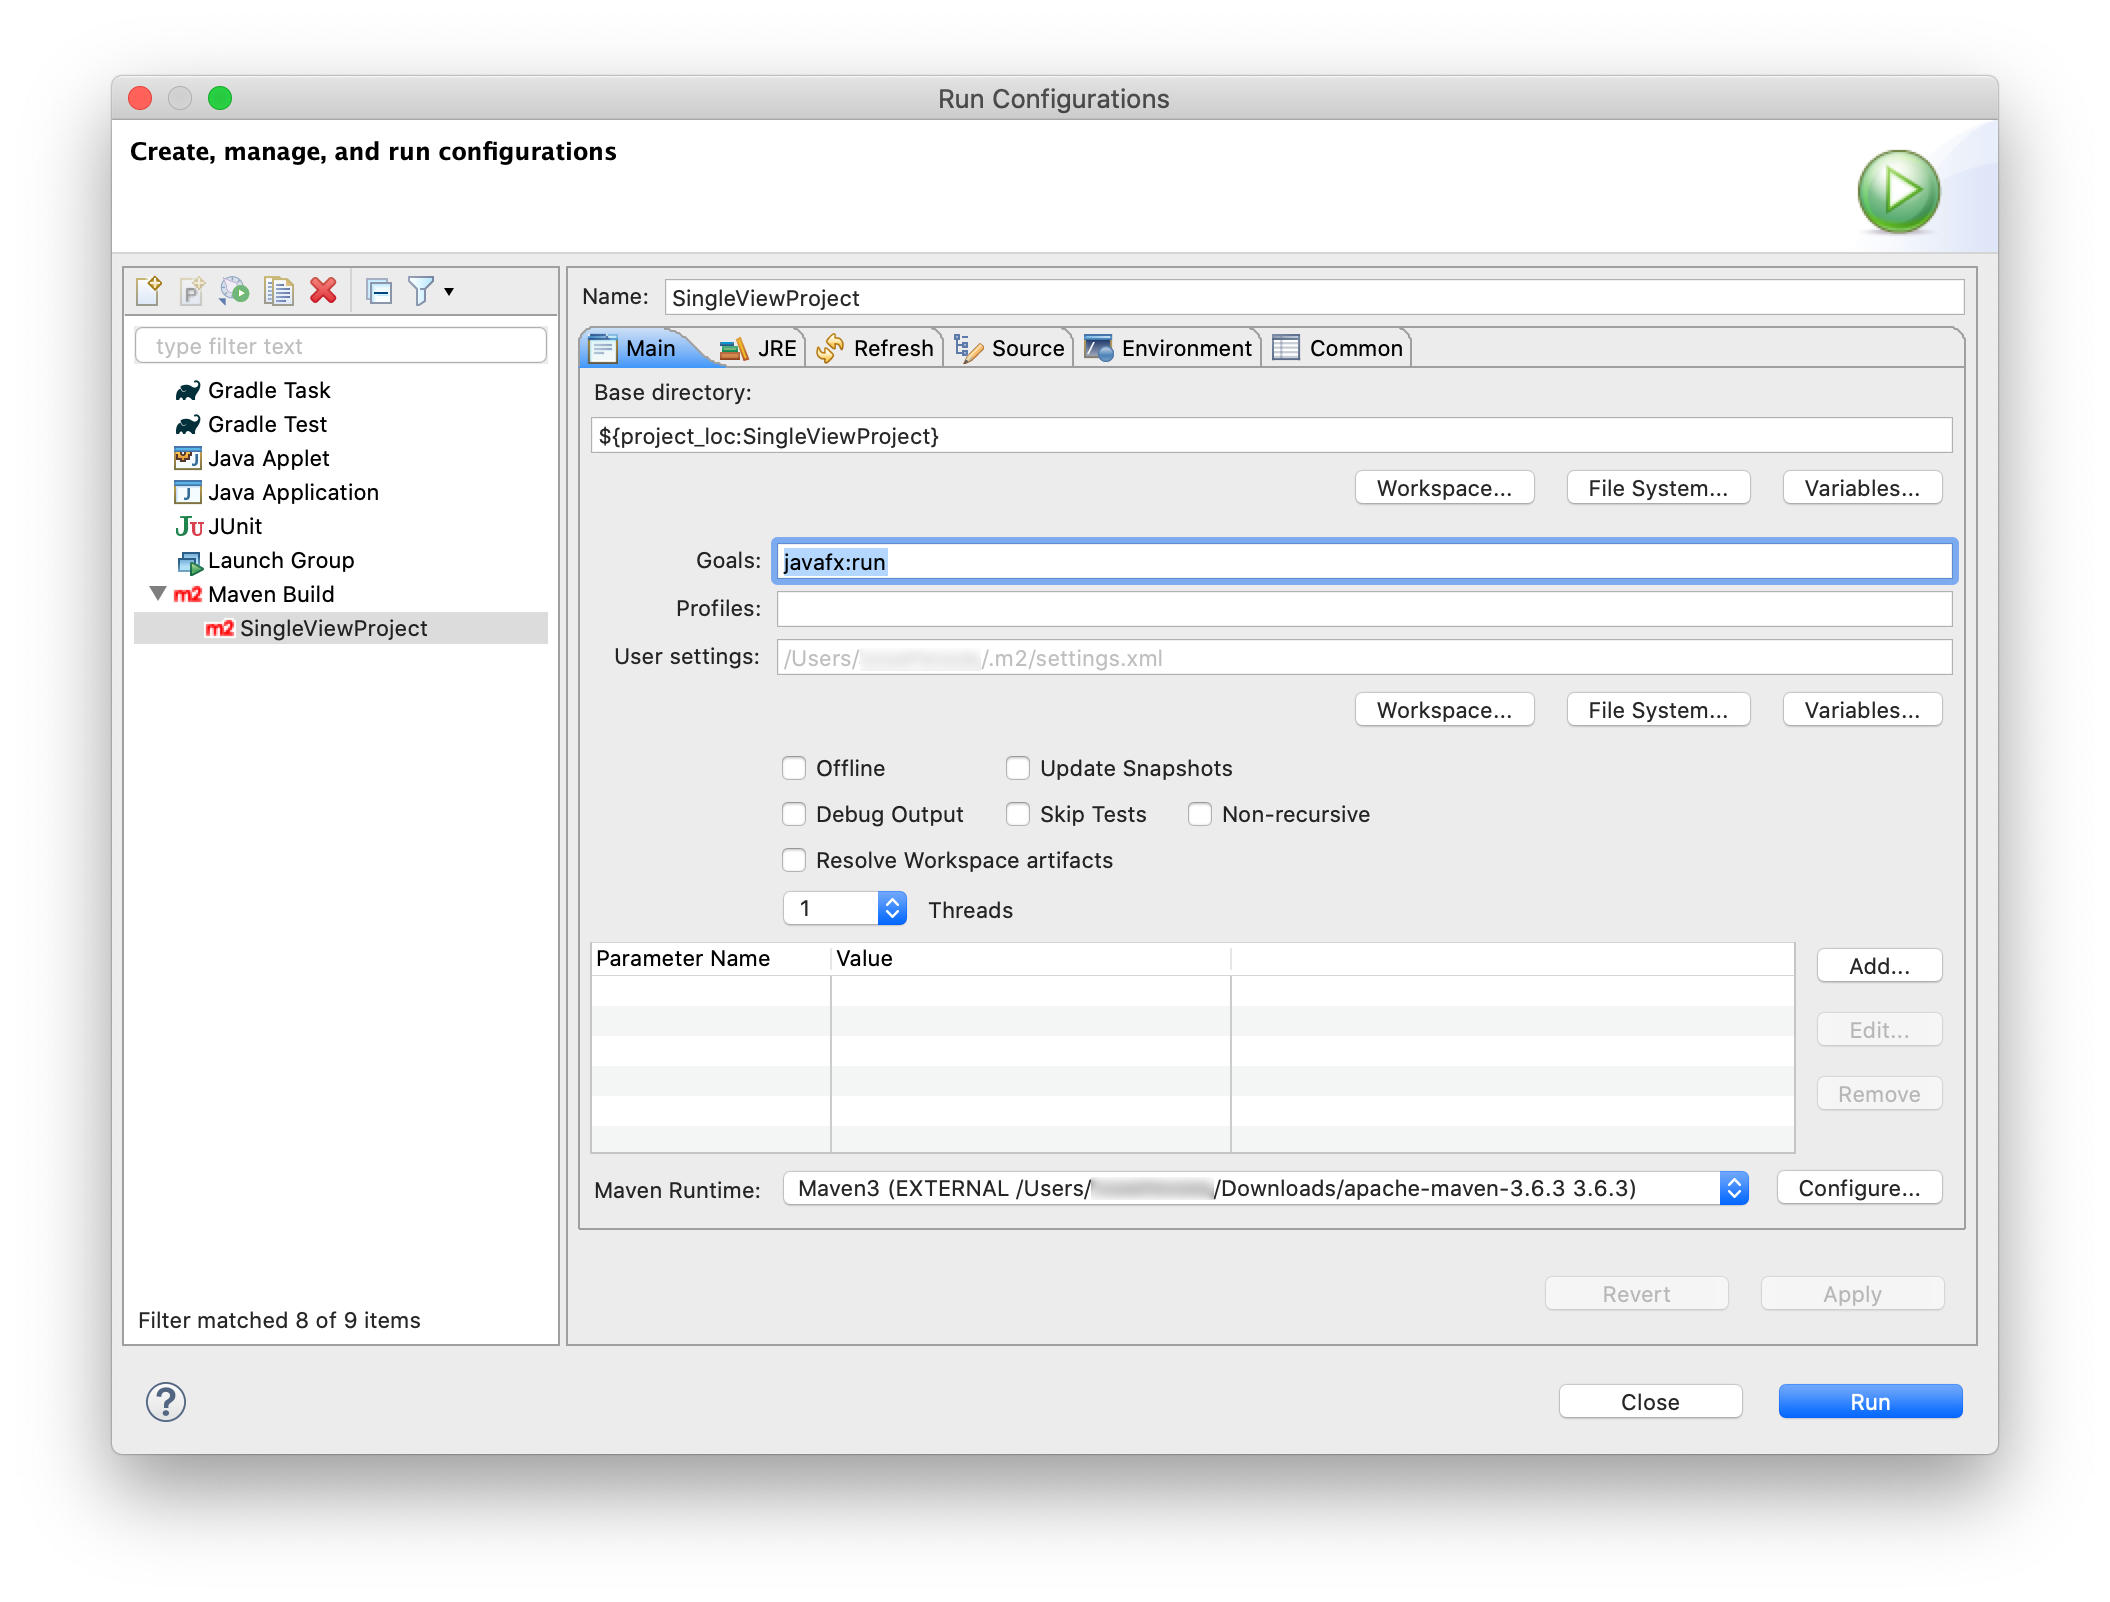
Let’s make a slight change to the code. In the BasicView class, update the text of the label on line 20 to the following:
button.setOnAction(e -> label.setText("Hello from Eclipse!"));Run the application again to verify that the text inside the label has changed.
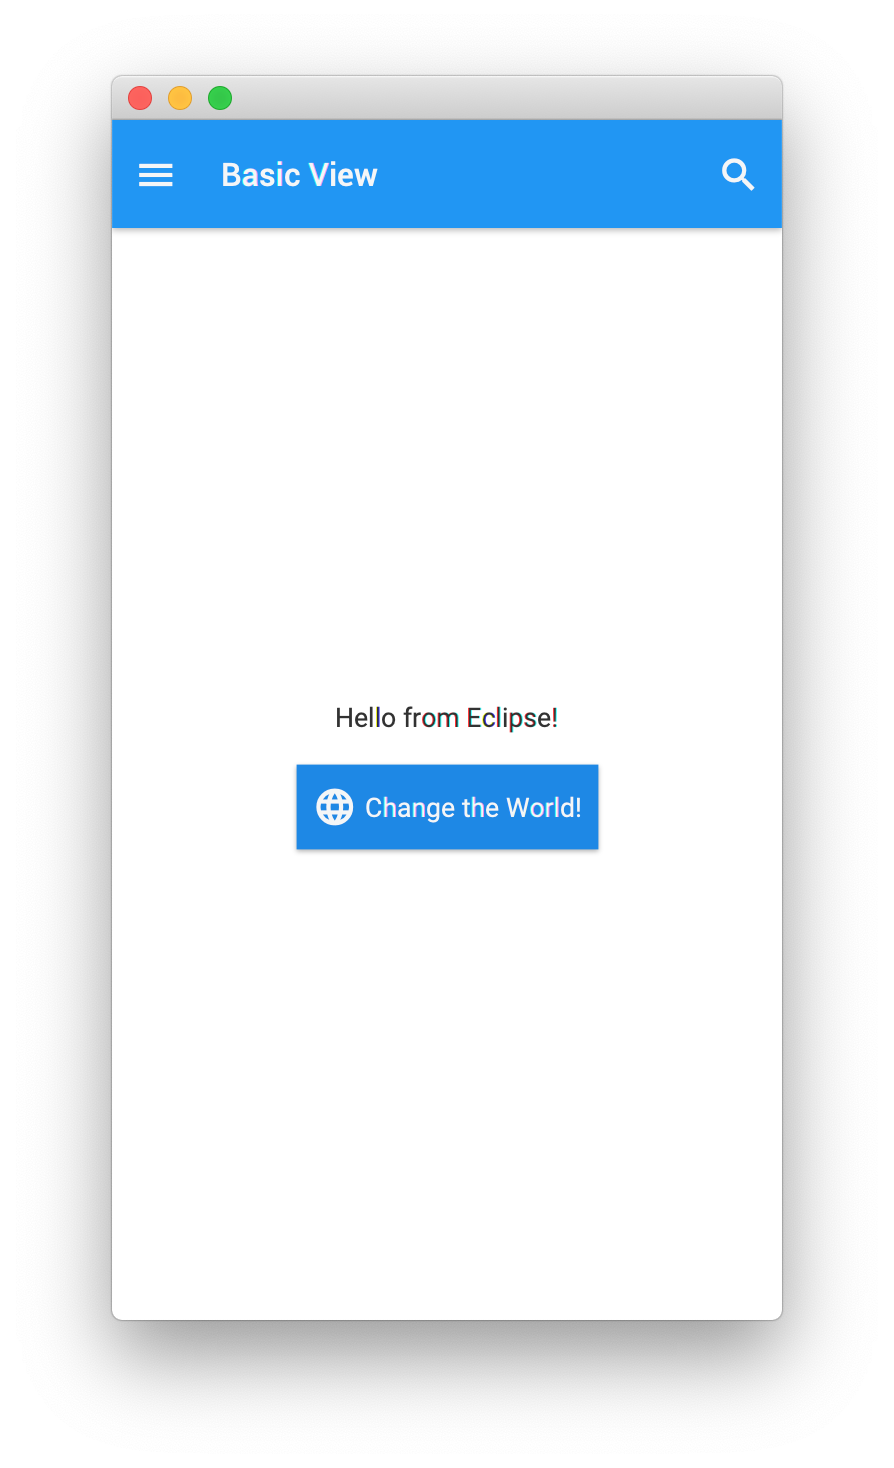
6.3.5. Create & run a native image of the application
In order to run the native image steps it is better to use a system terminal or the embedded terminal from your IDE. However, it is still possible to use the IDE’s Run Configurations dialog for this.
|
Important
|
Make sure you set the environment variable |
|
Note
|
If you are running on Windows, you need to run all the Client goals from an x64 terminal. Please check the pre-requisites for Windows deployment. However, you can use the terminal from Eclipse for this (it can be installed from the Eclipse Marketplace). On the terminal, run once |
The Gluon Client plugin provides us various goals which are explained in details, earlier in the documentation.
For this tutorial, we will be using the client:build goal to create a native image of the application.
Execute mvn client:build from the terminal, or, open the Run Configurations… window and update the Goal to client:build and click Run.
This goal typically takes a couple of minutes to complete and may vary depending on the system.
Once the goal is executed successfully, the native image can be run by executing client:run goal.
6.3.6. Create & install an Android native image
|
Note
|
This part is only applicable for Linux. Please check the pre-requisites for Android deployment. |
Now we are ready for deploying the same application on an Android device.
Right-click on the project and open Maven → Select Maven Profiles… window. Check android checkbox and uncheck all others.
This will activate the pre-existing android profile. All the client goals will now target android platform instead of desktop.
Run mvn -Pandroid client:build from the terminal, or alternatively, execute the client:build goal again, this time the android profile should be selected by default, else add it to the profiles field.
Once the native image is created, we need to package it into an apk before we can install it on a physical Android device.
Execute mvn -Pandroid client:package goal to create an apk. Once the goal is executed successfully, connect a physical device and
install the native image by executing client:install goal.
Once the goal is executed successfully, connect a physical device and
install the native image by executing the mvn -Pandroid client:install goal.
When the installation ends successfully, run mvn -Pandroid client:run or find the application on your device and open it up:
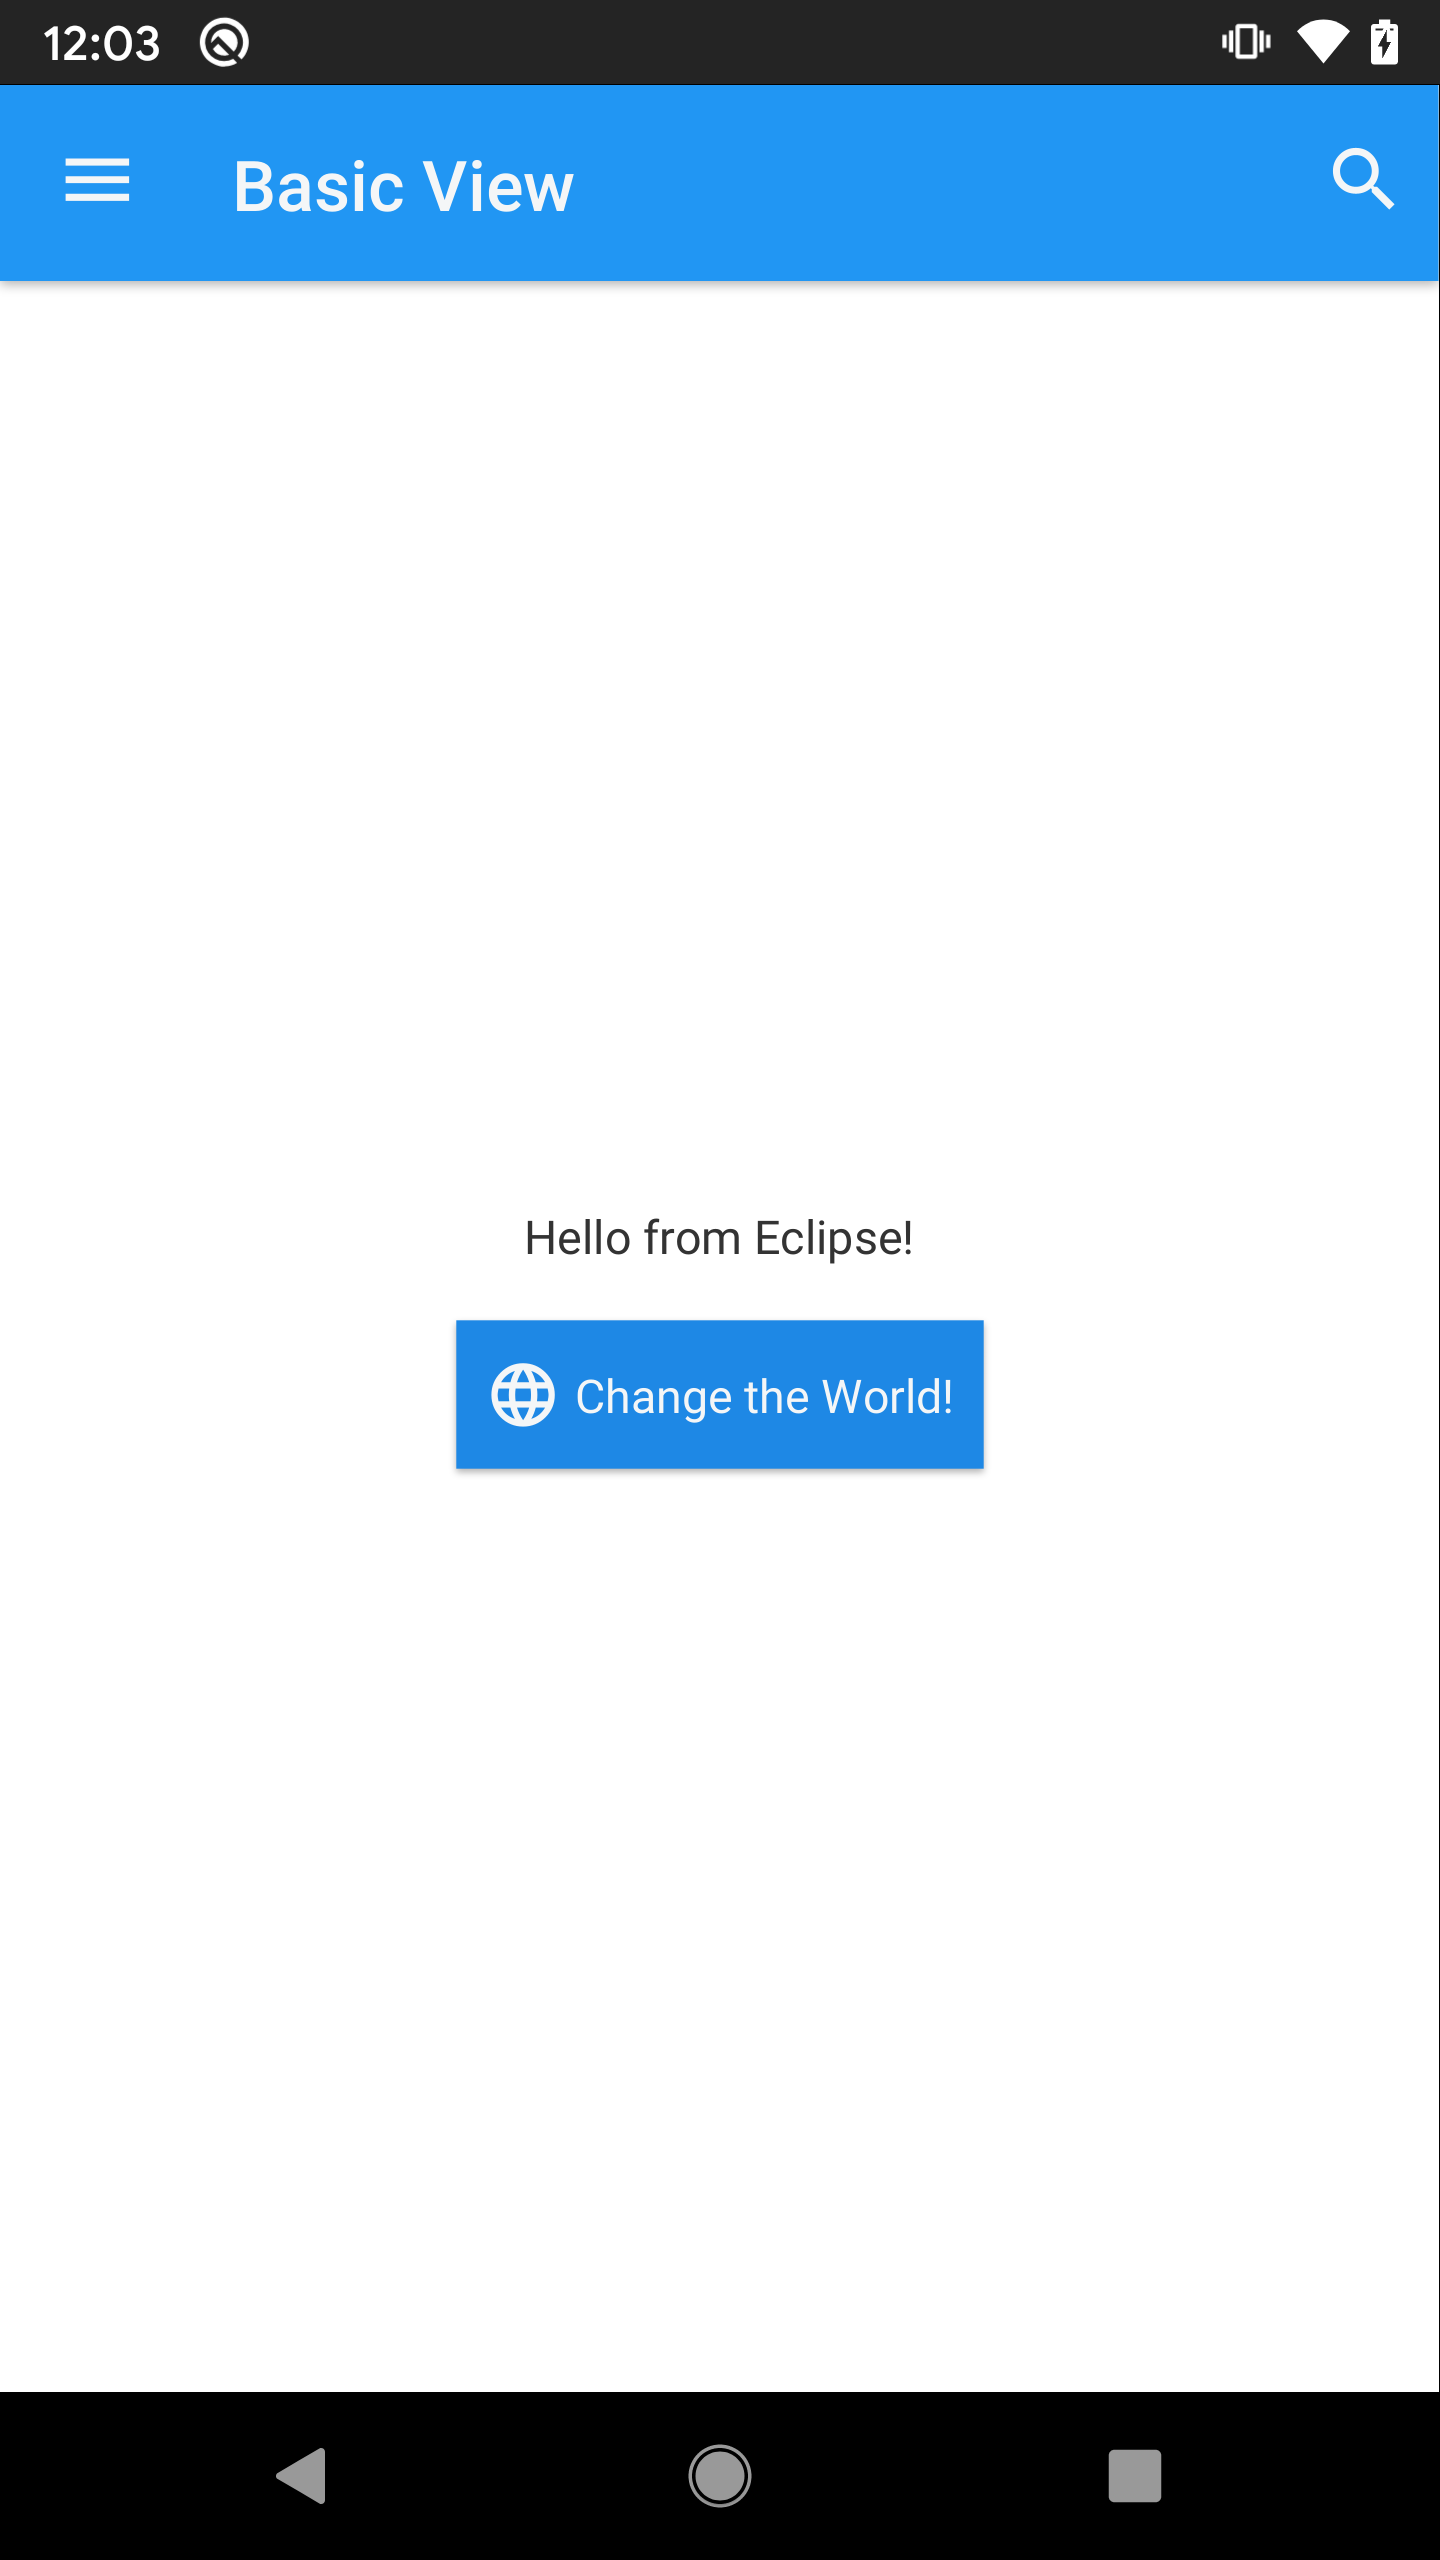
6.3.7. Create & install an iOS native image
|
Note
|
This part is only applicable for MacOS. Please check the pre-requisites for iOS deployment. |
Now we are ready for deploying the same application on an iOS device.
Right-click on the project and open Maven → Select Maven Profiles… window. Check ios checkbox and uncheck all others.
This will activate the pre-existing ios profile. All client goals will now target iOS platform.
Run mvn -Pios client:build from the terminal, or alternatively, execute the client:build goal again, this time the ios profile should be selected by default, else add it to the profiles field.
Once the goal is executed successfully, connect a physical device and run the native image on it by executing mvn -Pios client:run.

6.3.8. Conclusion
If you have made it here without problems, congratulations!
If you have found any difficulties along the way, please review the lists of prerequisites and try again. In case you have any questions, your first stop should be the Gluon support page, where you can access the latest documentation. Gluon also recommends the community to support each other over at the Gluon StackOverflow page. Finally, Gluon offers commercial support as well, to kick start your projects.
We encourage you to start developing new projects and creative native images that can be targeted for desktop, Android and iOS devices using the Gluon plugin on your favorite IDE.
7. Maven Archetype
A new project using Gluon Client plugin can be easily created on any IDE of your choice by using one of the various maven archetypes available. These archetypes can be used to create a basic project with all the required plugins to natively build the project and ultimately run the native image.
7.1. IntelliJ IDEA
In IntelliJ IDEA, click File → New → Project… and select Maven on the left. Check Create from archetype checkbox.
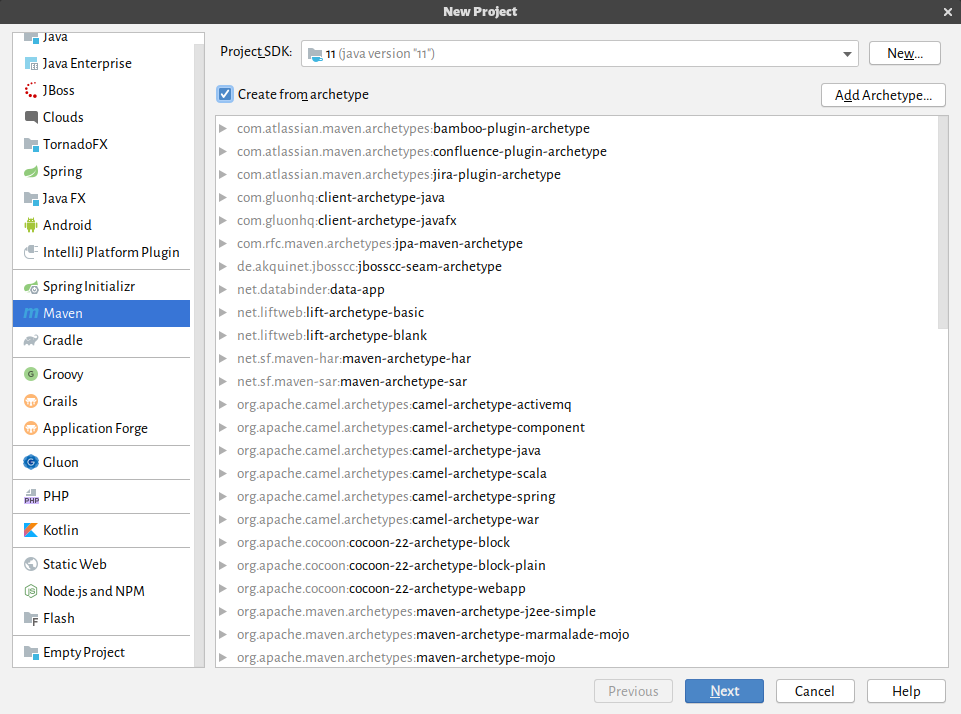
If the archetype is not available in the list, click on "Add Archetype" and enter the following details:
groupId: com.gluonhq
attributeId: client-archetype-javafx
version: {client-archetype-version}
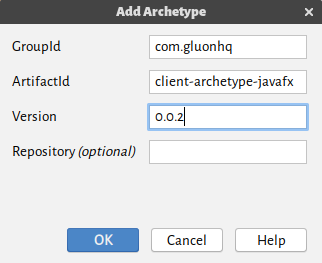
|
Note
|
For this example, we use |
Once the archetype has been added successfully, enter the groupId, artifactId and version for the project to be
created using this archetype.
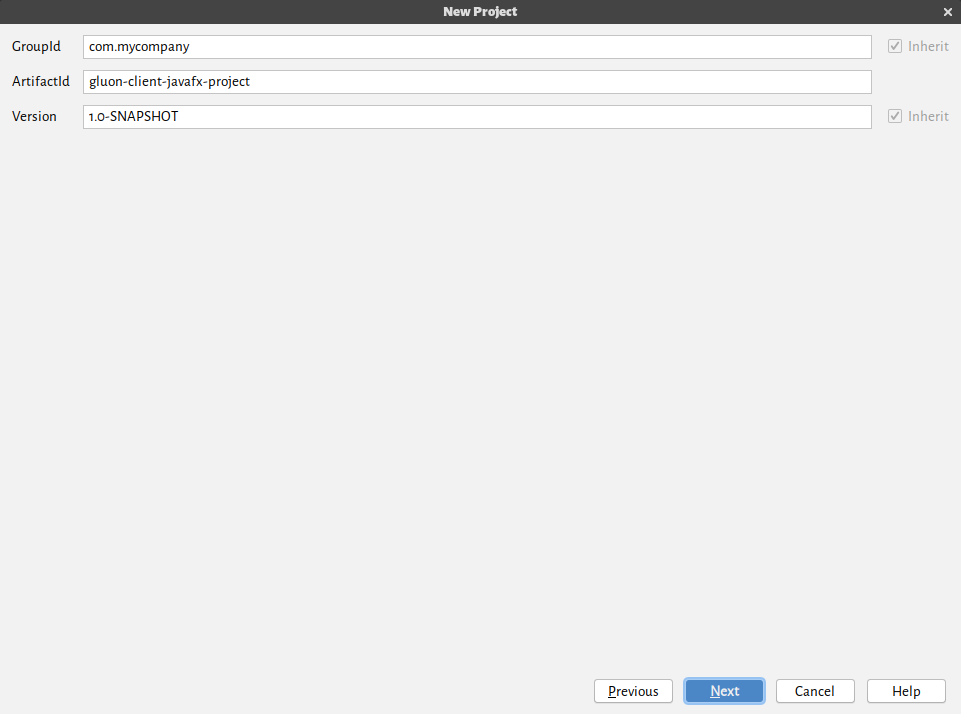
The next window is the summary of Maven settings in IntelliJ IDEA and the information entered by you so far.
Cross check if everything is ok and press Next.
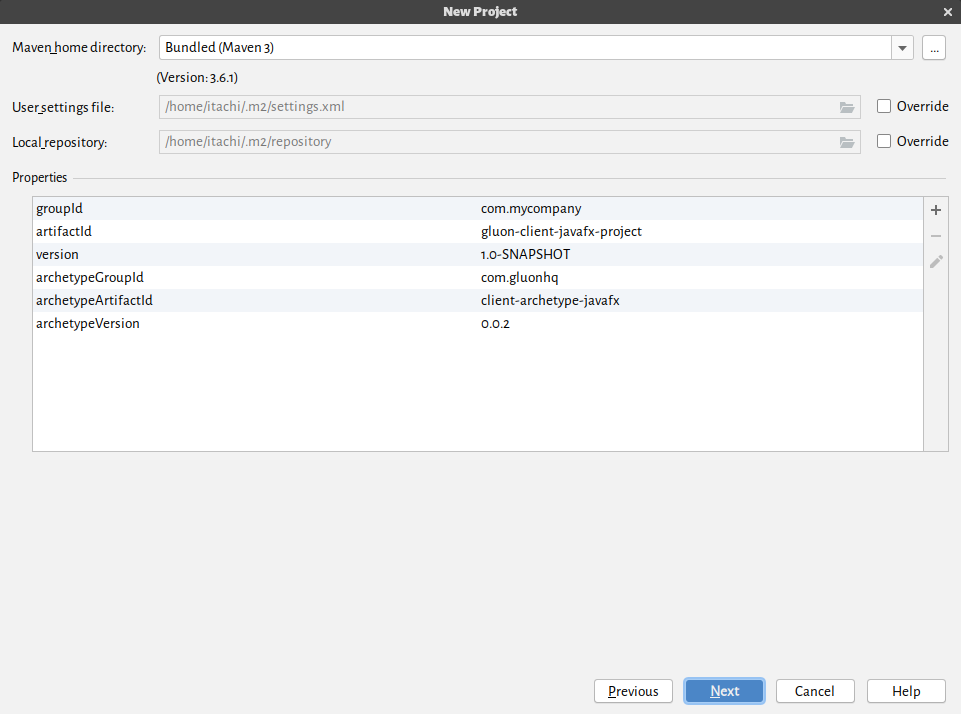
This window allows you to assign a project name, verify/change the location of the project:
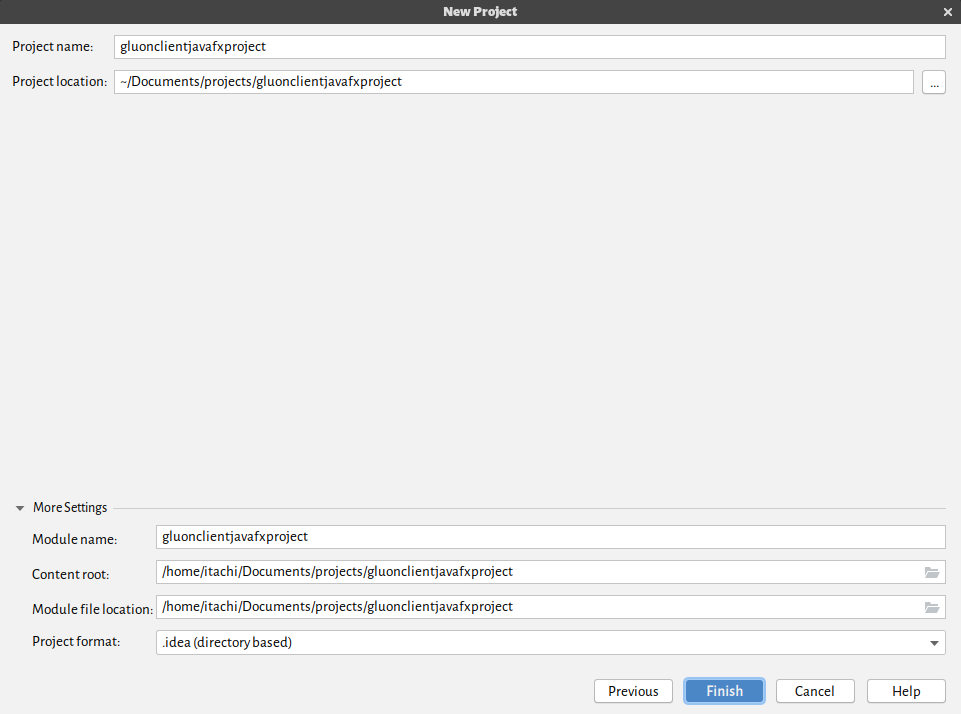
After making the necessary changes, press Finish. This will open a new window and use the Maven archetype to create the project.
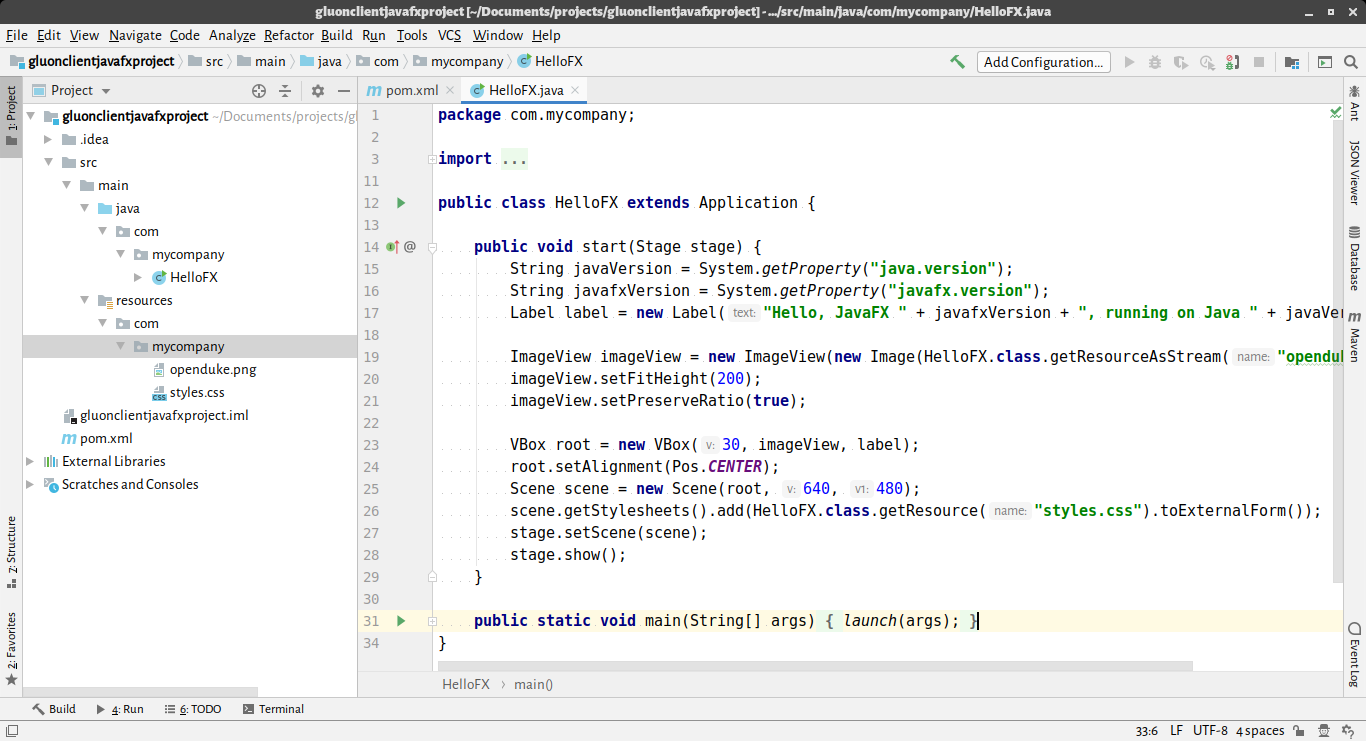
Maven window inside IntelliJ IDEA can be used to run the commands available via the Gluon client plugin:
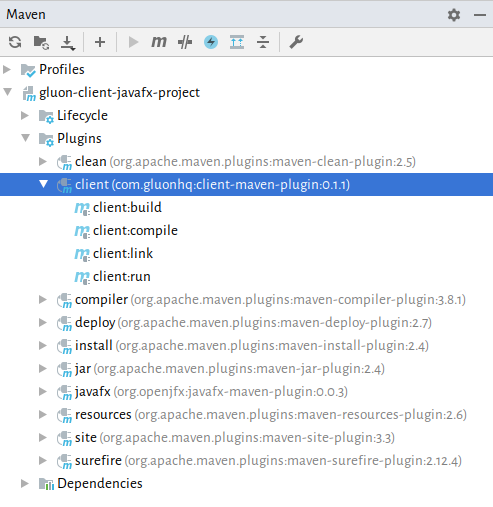
All goals of the client-maven-plugin have been described in detail earlier in the document.
Finally, we can build the project to create a native image using client:build goal. Once the build is successful,
client:run can be used to run the native image.
|
Note
|
These commands can be executed individually as well. |
7.2. NetBeans
In NetBeans, click File → New Project. Select Java with Maven on the left and then select Project from Archetype
from the right side. Click Next.
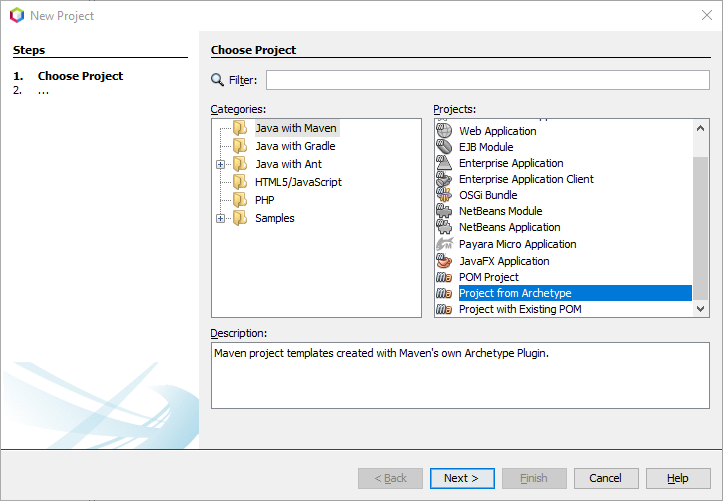
NetBeans will automatically show all archetypes from the local Maven repository. If the archetype is not available in the list, type the archetype details in the TextFields present below the list. For this example, we will enter the following details:
groupId: com.gluonhq
attributeId: client-archetype-javafx
version: {client-archetype-version}

|
Note
|
We are using the |
Once the archetype has been selected successfully, Netbeans will ask for project related information in the next step.
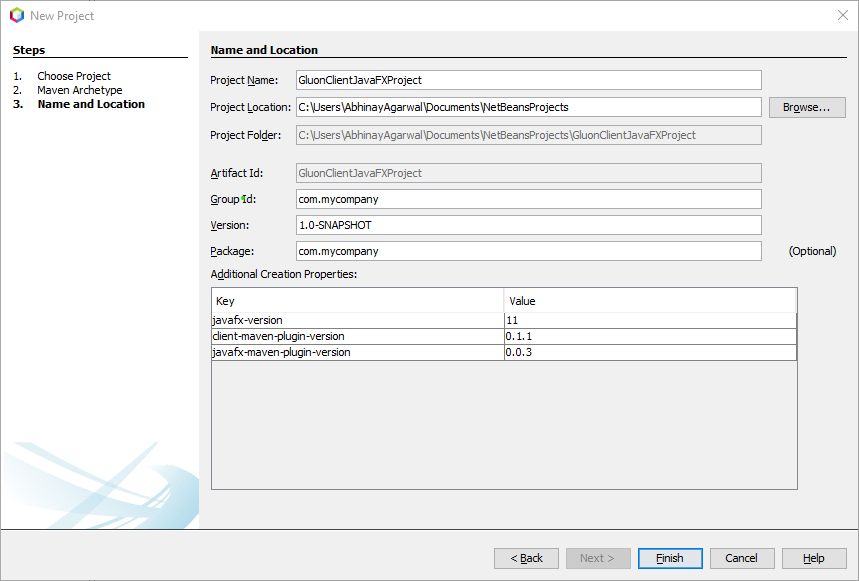
After making the necessary changes, press Finish. This will use the Maven archetype to create the project.
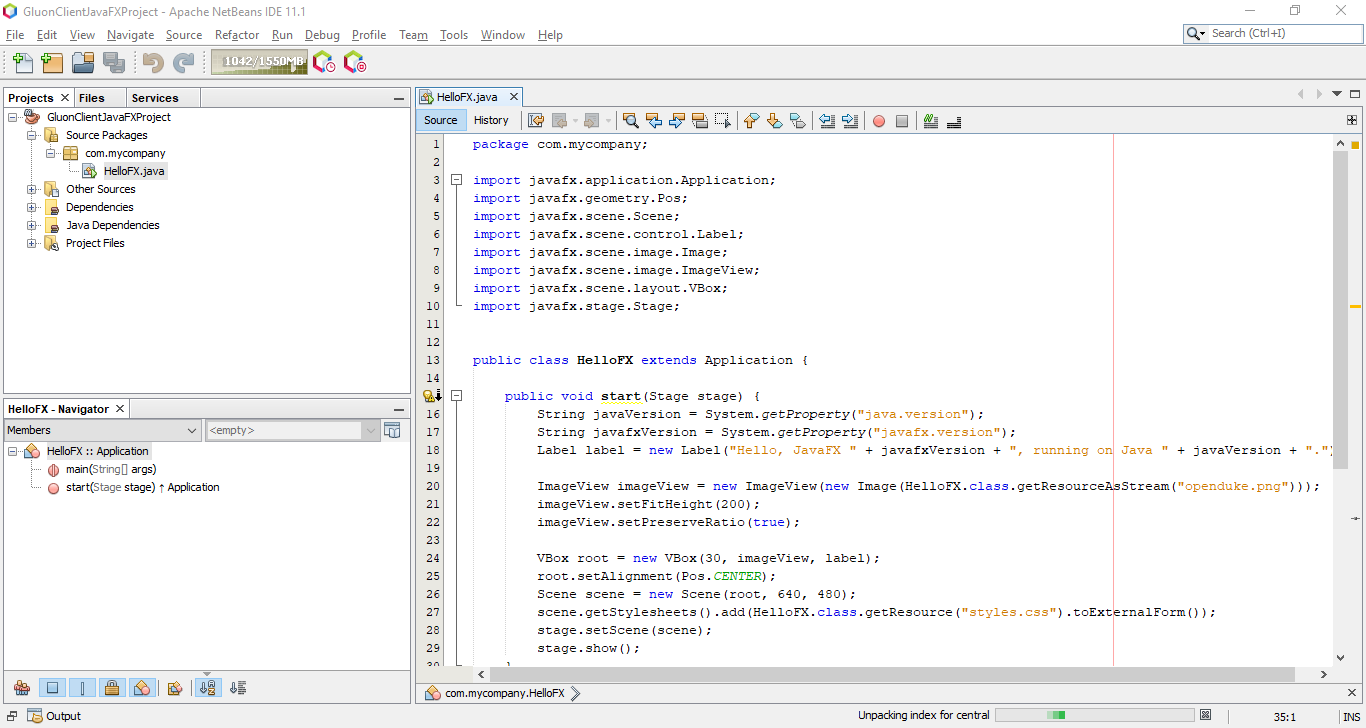
Navigator window inside NetBeans can be used to execute the Maven goals available via the Gluon client plugin:
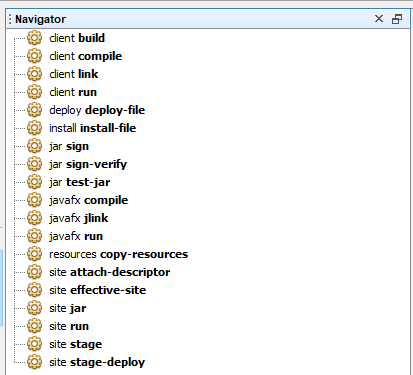
Various Maven goals has been described in detail earlier in the document.
Finally, we can build the project to create a native image using client:build goal. Once the build is successful,
client:run can be used to run the native image.
|
Note
|
These commands can be individually run by a user as well. |
7.3. Eclipse
In Eclipse, click File → New → Project…. Expand Maven and select Maven Project. Click Next.
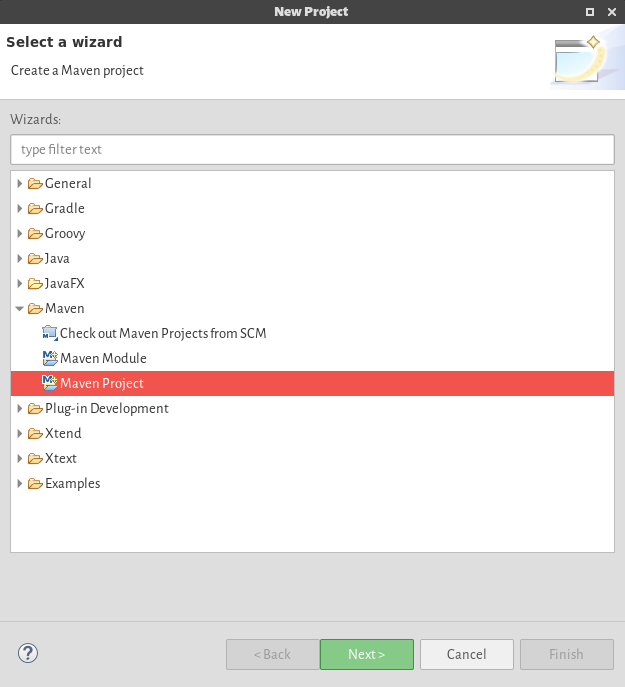
"Select project name and location" step can be used to specify a custom name and location to the project.
For this example, do not need to make any changes. Click Next.
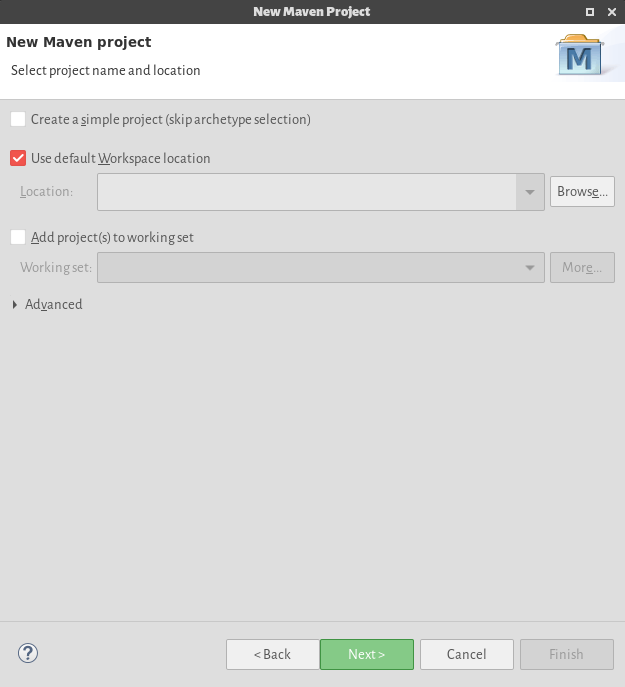
The next step allows to select an archetype from the list.
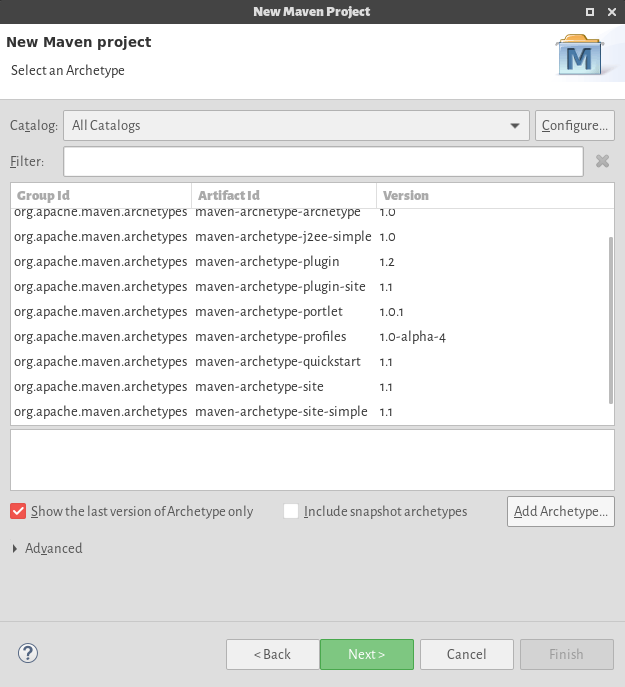
If the archetype is not available in the list, click on "Add Archetype…" and enter the following details:
groupId: com.gluonhq
attributeId: client-archetype-javafx
version: {client-archetype-version}
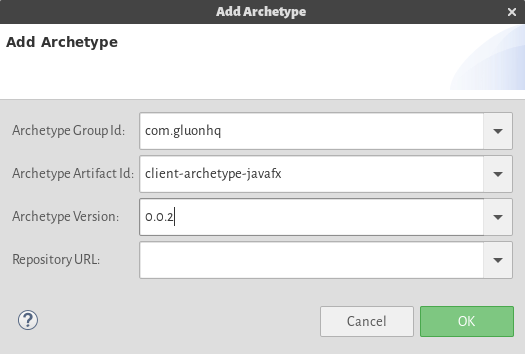
|
Note
|
For this example, we use |
Once the archetype has been added successfully, enter the groupId, artifactId and version for the project to be
created using this archetype.
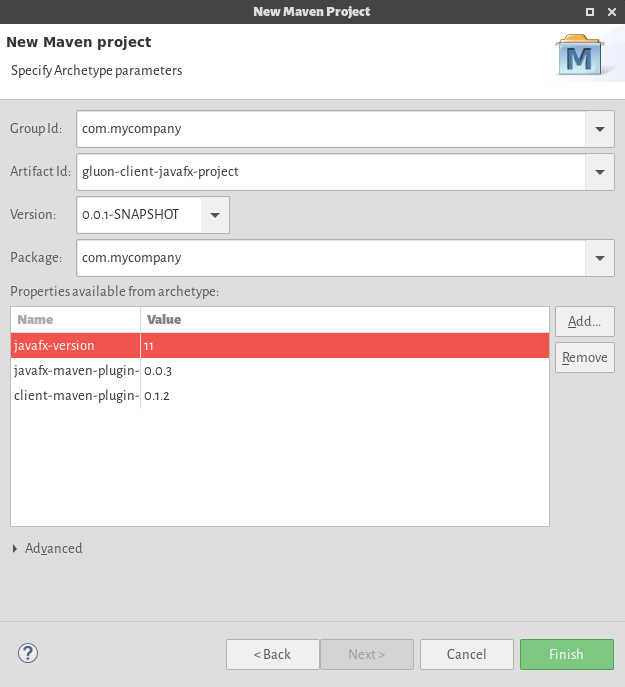
After making the necessary changes, press Finish. This will create the project using the archetype and
display it in the eclipse workspace.
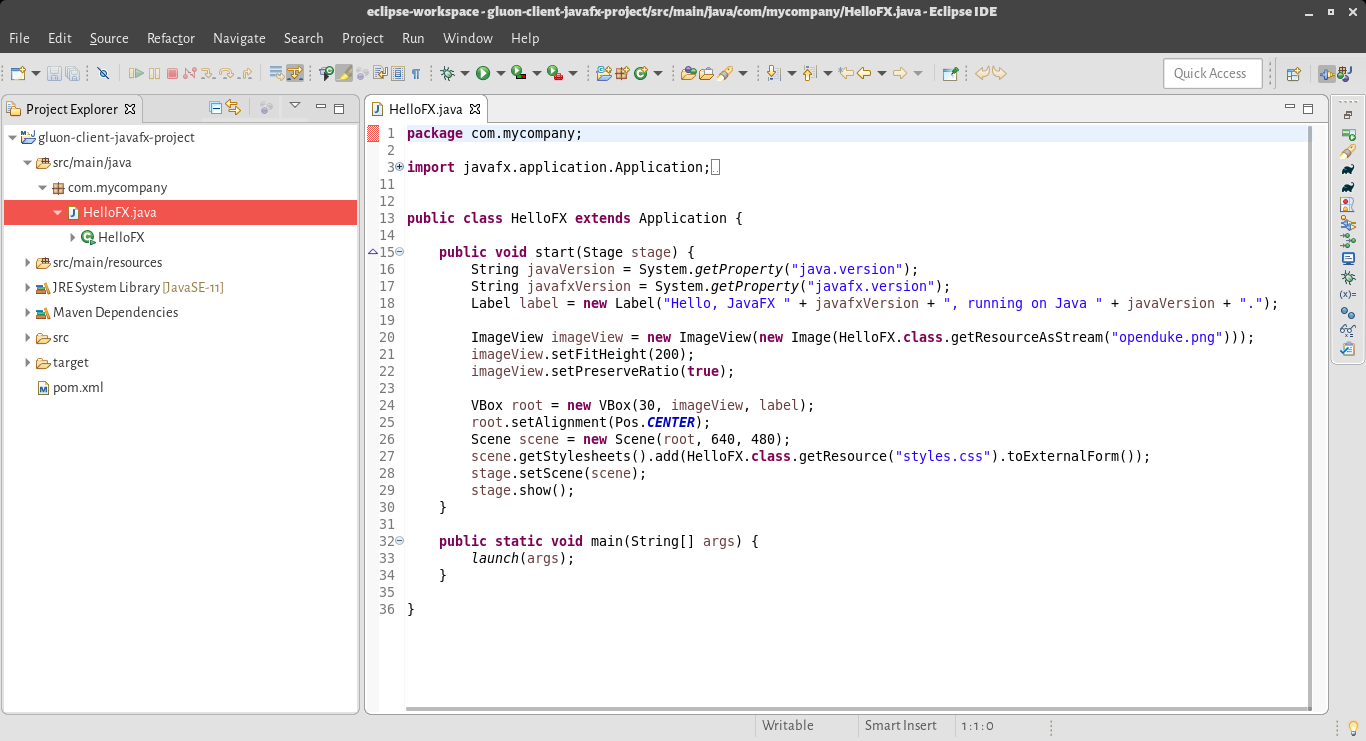
Two new run configurations need to added to Eclipse to make it easier for us to use the client maven goals from the IDE.
-
Client Build: This goal will execute the
buildgoal of the client plugin.
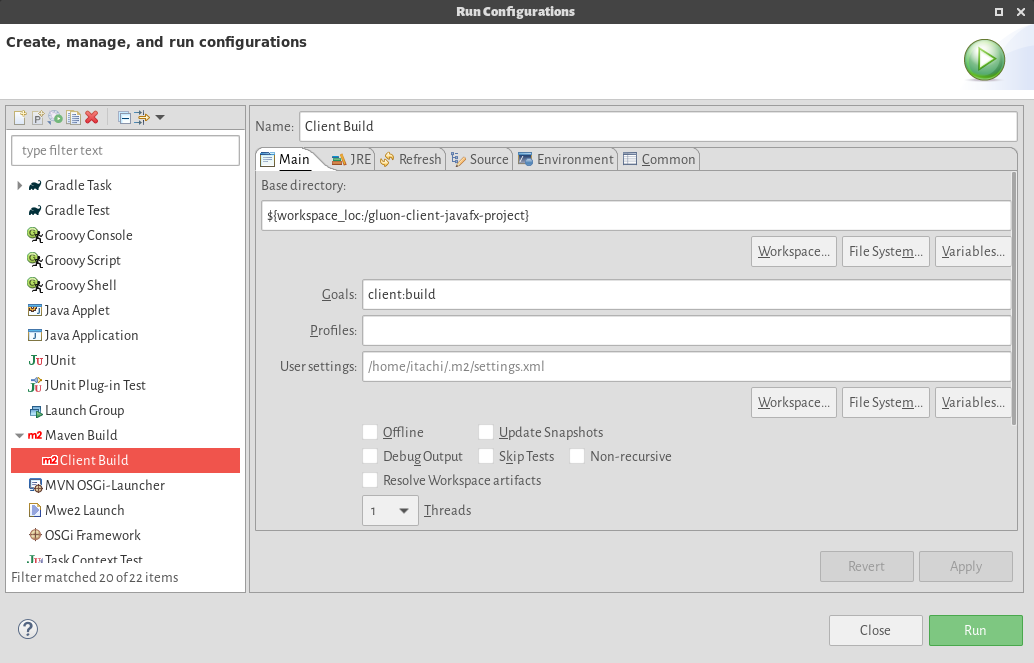
-
Client Run: This goal will execute the
rungoal of the client plugin.

All goals of the client-maven-plugin have been described in detail earlier in the document.
Finally, we can build the project to create a native image using Client Build configuration. Once the build is successful,
Client Run can be used to run the native image.
|
Note
|
These commands can be executed individually as well. |
8. Feedback and issues
Please submit your feedback to us at support@gluonhq.com.
For any possible issue, you can report it to the following repositories: