The 50 States App is a Gluon code sample. For a full list of Gluon code samples, refer to the Gluon website.
In this tutorial, we’ll explain how to create the 50 States application that can be deployed on desktop, Android and iOS devices.
Before you start, make sure to check the list of prerequisites for each platform.
Note: This tutorial will use the plugin for IntelliJ, but it works as well on NetBeans and Eclipse.
Code: The code for this project can be found in the samples repository at GitHub.
The sample is located under the directory fifty-states. The reader can clone this repository or create the entire project from scratch, based on the following steps.
Creating the project
Please check this tutorial to learn how to create a new Gluon project in IntelliJ.
Select Gluon Mobile - Single View Project from the list of available projects, set the package name as com.gluonhq.samples.fiftystates and the main class name as FiftyStates. Select a valid JDK 11+,
Set the project name as FiftyStates, and modify the location if required.
The project will be created and opened. The main class FiftyStates is shown, containing the code to instantiate the view BasicView.

Modifying the project
Let’s start modifying the default project to create our FiftyStates application. Our purpose is adding a CharmListView control to the main view.
The Model
To illustrate the possibilities of the control, we are going to use some basic data from the US States, retrieved from here.
With a POJO like this:
public class USState {

    private String name;
    private String abbr;
    private String capital;
    private int population;
    private int area;
    private String flag;

    public USState(String name, String abbr, String capital, int population, int area, String flag) {
        this.name = name;
        this.abbr = abbr;
        this.capital = capital;
        this.population = population;
        this.area = area;
        this.flag = flag;
    }

    // setters and getters

    public double getDensity() {
        if (area > 0) {
            return (double) population / (double) area;
        }
        return 0;
    }
we can have a static list with all the items.
Note that the 50 flag images will be downloaded from the Internet, so we’ll have to use a cache strategy. Based on the Cache implementation in Gluon Attach, we’ll download them just once (or if they are removed by the cache in the case we have memory issues).
Make sure you add the 'cache' service to the pom:
<dependencies>
    ...
    <dependency>
        <groupId>com.gluonhq.attach</groupId>
        <artifactId>cache</artifactId>
        <version>${attach.version}</version>
    </dependency>
</dependencies>
...
<plugin>
    <groupId>com.gluonhq</groupId>
    ...
    <configuration>
        ...
        <target>${gluonfx.target}</target>
        <attachList>
            <list>cache</list>
    ...
</plugins>
Click on the reimport icon on the Maven window to update the dependencies.
Now we can easily create a local cache:
public class USStates {

    private static final Cache<String, Image> CACHE;

    static {
        CACHE = CacheService.create()
                .map(cache -> cache.<String, Image>getCache("images"))
                .orElseThrow(() -> new RuntimeException("No CacheService available"));
    }

    private static final String URL_PATH = "https://upload.wikimedia.org/wikipedia/commons/thumb/";

    public static ObservableList<USState> statesList = FXCollections.observableArrayList(
            new USState("Alabama", "AL", "Montgomery", 4903185, 135767, URL_PATH + "5/5c/Flag_of_Alabama.svg/23px-Flag_of_Alabama.svg.png"),
            new USState("Alaska", "AK", "Juneau", 731545, 1723337, URL_PATH + "e/e6/Flag_of_Alaska.svg/21px-Flag_of_Alaska.svg.png"),
        ...
    );

    public static Image getUSFlag() {
        return getImage(URL_PATH + "a/a4/Flag_of_the_United_States.svg/320px-Flag_of_the_United_States.svg.png");
    }

    public static Image getImage (String image) {
        if (image==null || image.isEmpty()) {
            return null;
        }
        Image cachedImage = cache.get(image);
        if (cachedImage == null) {
            cachedImage = new Image(image, true);
            cachedImage.exceptionProperty().addListener((obs, ov, nv) -> CACHE.remove(image));
            cache.put(image, cachedImage);
        }
        return cachedImage;
    }
}
Our objective will be classifying the States according to their population density. For that we’ll have this enum:
public class Density {

    public enum DENSITY {
        D000(0, 10),
        D010(10, 50),
        D050(50, 100),
        D100(100, 250),
        D250(250, 500),
        D500(500, 10000);

        final double ini;
        final double end;

        private DENSITY(double ini, double end){
            this.ini = ini;
            this.end = end;
        }

        public double getEnd() {
            return end;
        }

        public double getIni() {
            return ini;
        }
    }

    public static DENSITY getDensity (USState state) {
        return getDensity(state.getDensity());
    }

    public static DENSITY getDensity (double density) {
        return Arrays.stream(DENSITY.values())
                .filter(d -> d.getIni() <= density && density < d.getEnd())
                .findFirst()
                .orElse(DENSITY.D000);
    }
}
The View
Let’s remove the default content from the Basic View and add the CharmListView control, populated with the list of states, from USStates.statesList.
public class BasicView extends View {

    private final CharmListView<USState, DENSITY> charmListView;

    public BasicView() {
        charmListView = new CharmListView<>(USStates.statesList);
        setCenter(charmListView);
    }

    @Override
    protected void updateAppBar(AppBar appBar) {
        appBar.setNavIcon(MaterialDesignIcon.STAR.button());
        appBar.setTitleText("50 States");
    }
}
Since we haven’t provided any header function, for now it will behave like a regular ListView control.
Running mvn gluonfx:run shows:

Let’s start by adding a cell factory to display the information on every USState. For that we need to use a CharmListCell, and override its updateItem method. To lay out the content, we’ll use ListTile.
public class USStateCell extends CharmListCell<USState> {

    private final ListTile tile;
    private final ImageView imageView;

    public USStateCell() {
        this.tile = new ListTile();
        imageView = new ImageView();
        imageView.setFitHeight(15);
        imageView.setFitWidth(25);
        tile.setPrimaryGraphic(imageView);
        setText(null);
    }

    @Override
    public void updateItem(USState item, boolean empty) {
        super.updateItem(item, empty);
        if (item != null && !empty) {
            tile.textProperty().setAll(item.getName() + " (" + item.getAbbr() + ")",
                    "Capital: " + item.getCapital() +
                            ", Population (M): " + String.format("%.2f", item.getPopulation() / 1_000_000d),
                    "Area (km" + "\u00B2" + "): " + item.getArea() +
                            ", Density (pop/km" + "\u00B2" + "): " + String.format("%.1f", item.getDensity())
            );
            final Image image = USStates.getImage(item.getFlag());
            if (image != null) {
                imageView.setImage(image);
            }
            setGraphic(tile);
        } else {
            setGraphic(null);
        }
    }
}
Set the cell factory:
public class BasicView extends View {

    public BasicView() {
        ...
        charmListView.setCellFactory(p -> new USStateCell());
        ...
    }
}
And now we’ll have a standard ListView with better styled cells:
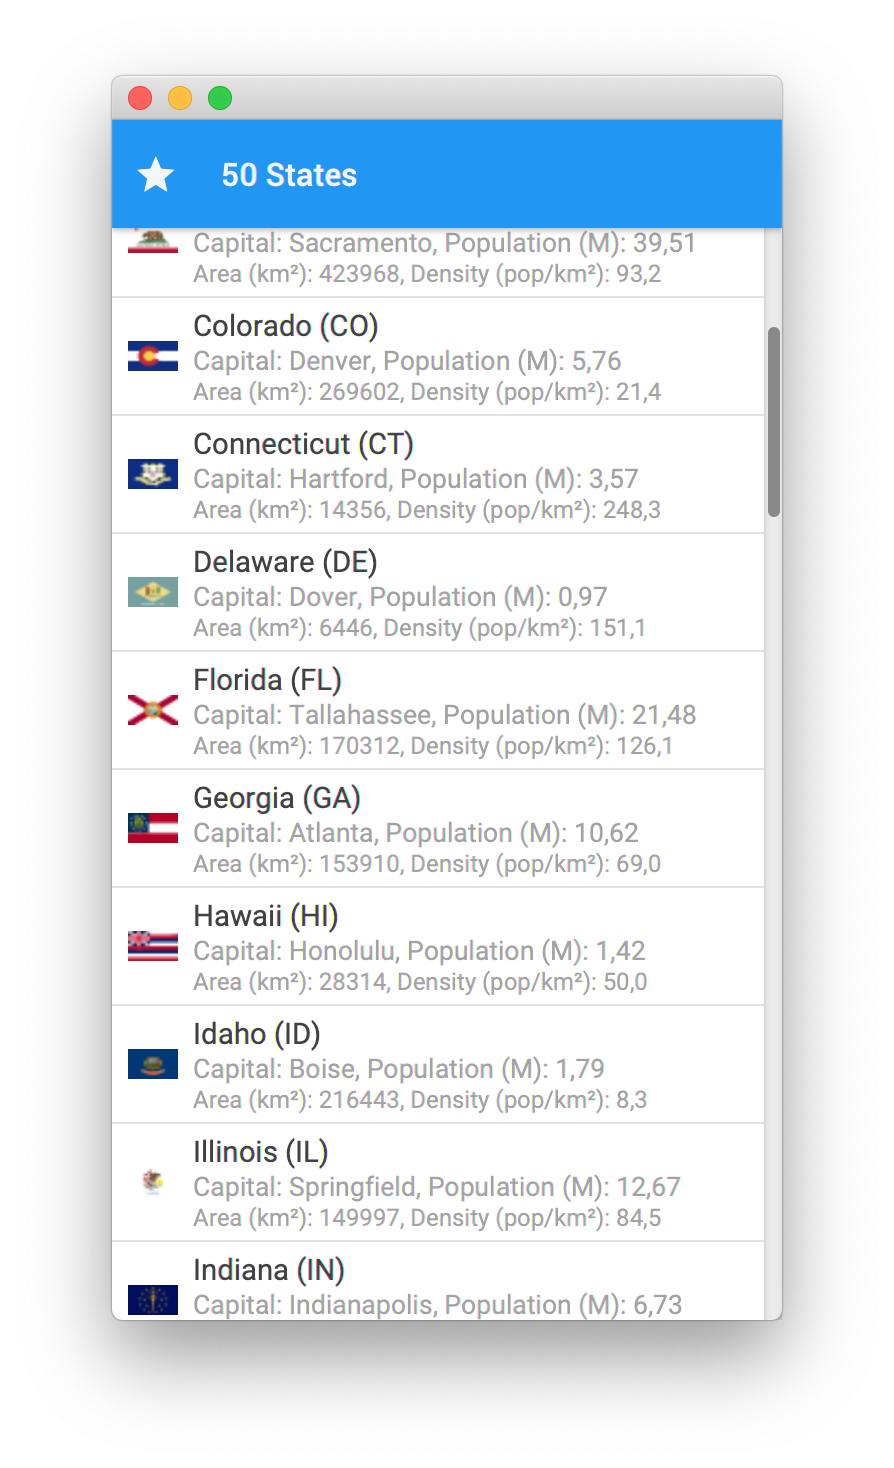
The header function
Time to add a header function and visualize some headers on our list.
For every US State, we can get the population density, and classify this State within the five categories created on the DENSITY enum. This is how we specify the header function:
public class BasicView extends View {
public BasicView() {
...
charmListView.setHeadersFunction(Density::getDensity);
...
}
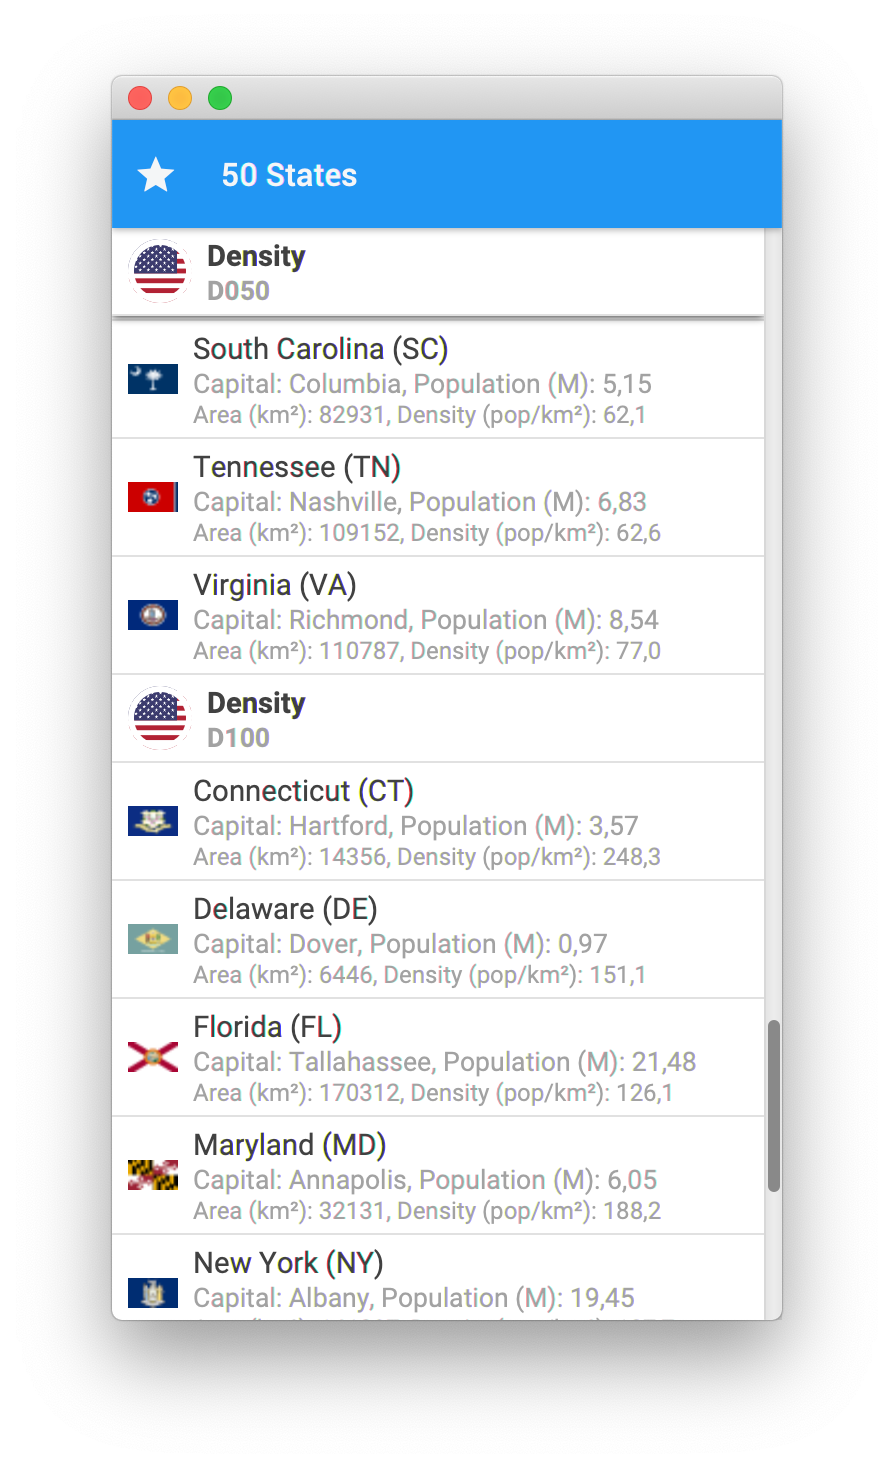
}And this is the result:

By default, the name of the enum is used on every header. Note also, that on top of the list there is a floating header for the first category visible.
Now we need a header cell factory to format properly the header.
public class BasicView extends View {

    public BasicView() {
        ...
        charmListView.setHeaderCellFactory(p -> new CharmListCell<USState>() {

            private final ListTile tile = new ListTile();
            {
                Avatar avatar = new Avatar(16, USStates.getUSFlag());
                tile.setPrimaryGraphic(avatar);
                setText(null);
            }

            @Override
            public void updateItem(USState item, boolean empty) {
                super.updateItem(item, empty);
                if (item != null && !empty) {
                    tile.textProperty().setAll("Density", charmListView.toString(item));
                    setGraphic(tile);
                } else {
                    setGraphic(null);
                }
            }
        });
        ...
    }
}
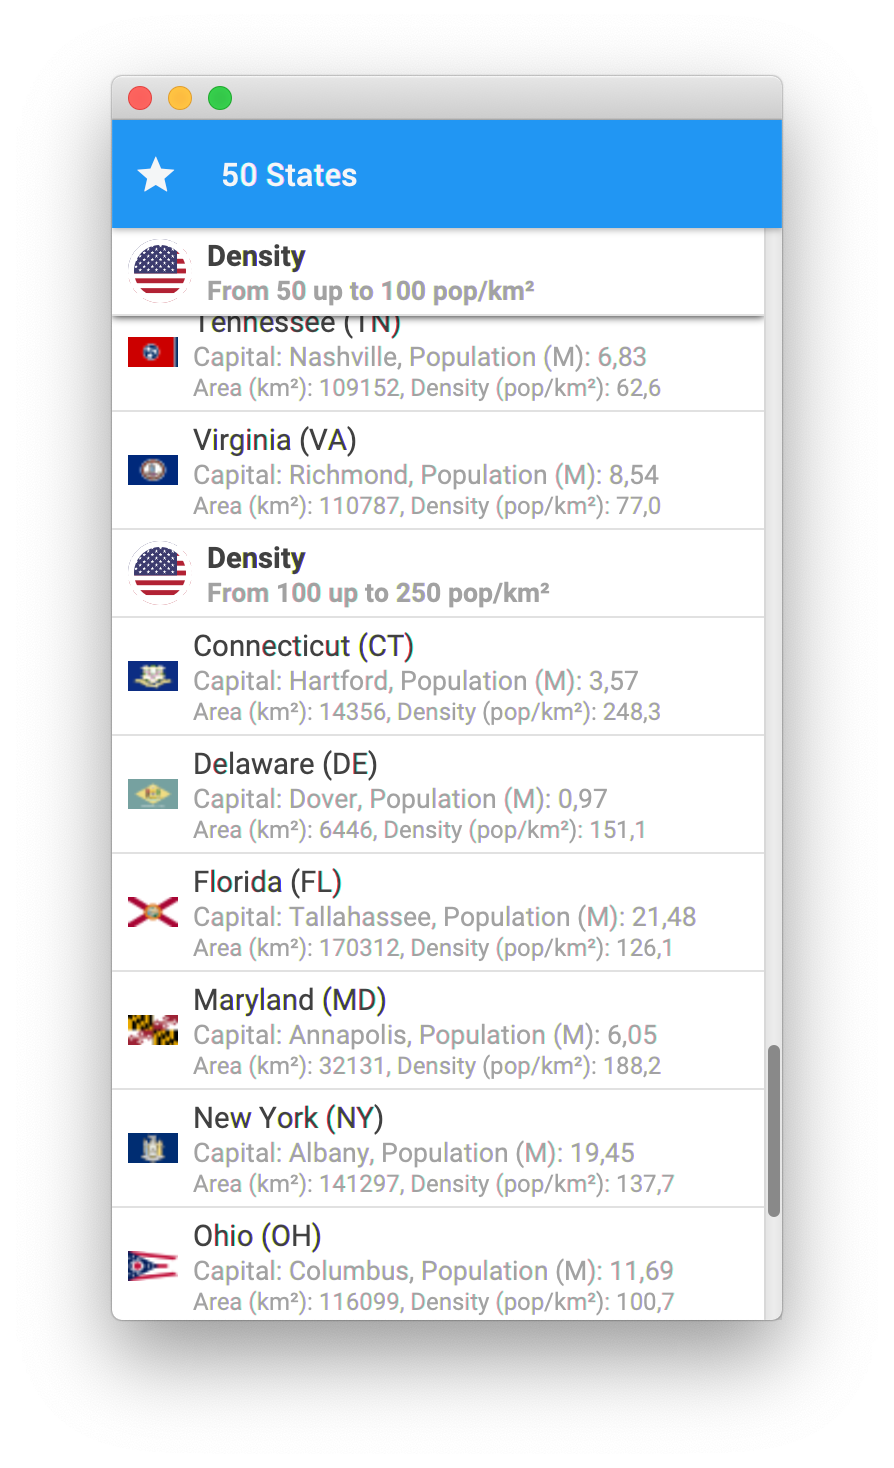
Instead of the enum name, we could get a proper formatting, by providing a StringConverter to the header:
public class BasicView extends View {

    public BasicView(String name) {
        ...
         charmListView.setConverter(new StringConverter<>() {

            @Override
            public String toString(DENSITY d) {
                return "From " + ((int) d.getIni()) + " up to " + ((int) d.getEnd()) + " pop/km" + "\u00B2";
            }

            @Override
            public DENSITY fromString(String string) {
                throw new UnsupportedOperationException("Not supported yet.");
            }
        });
        ...
    }
}
Styling the App
There are several style classes defined with default properties provided by Gluon Mobile. But those can be overridden by adding a custom style sheets file.
public class FiftyStatesFX extends Application {
private void postInit(Scene scene) {
scene.getStylesheets().add(getClass().getResource("style.css").toExternalForm());
}
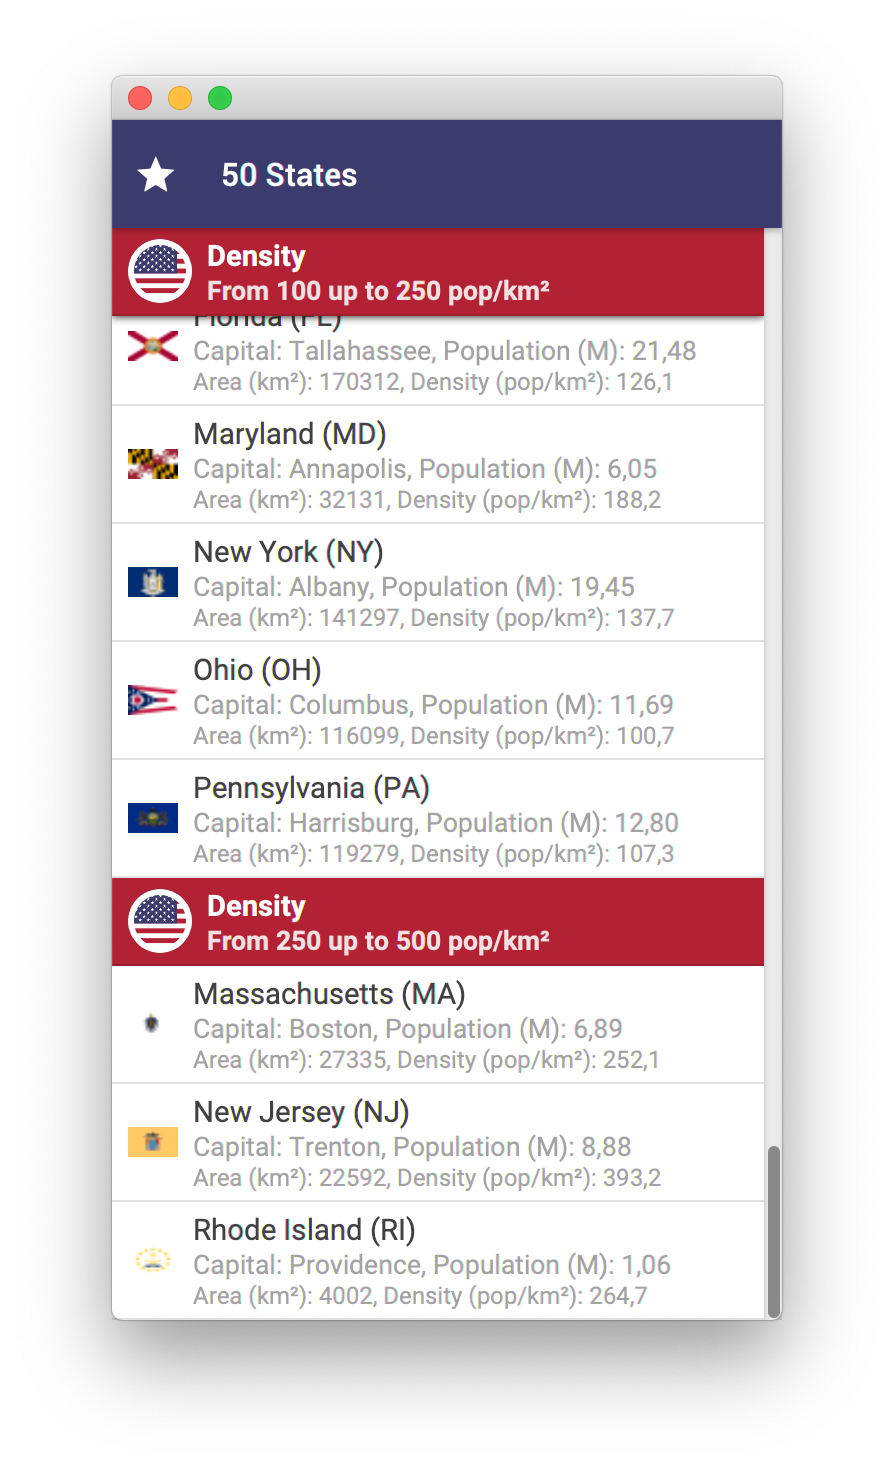
}This will be the CSS rules that modifies the default style:
.root {
/* https://en.wikipedia.org/wiki/Flag_of_the_United_States#Colors
AppBar: Old Glory Blue */
-primary-swatch-500: #3C3B6E;
}
.charm-list-view .list-cell.header-cell {
/* Headers: Old Glory Red */
-fx-background-color: #B22234;
}
.charm-list-view .list-cell.header-cell > .list-tile > .text-box > .primary-text {
/* Headers primary text */
-fx-text-fill: white;
}
.charm-list-view .list-cell.header-cell > .list-tile > .text-box > .secondary-text {
/* Headers secondary text */
-fx-text-fill: #FFFFFFDE;
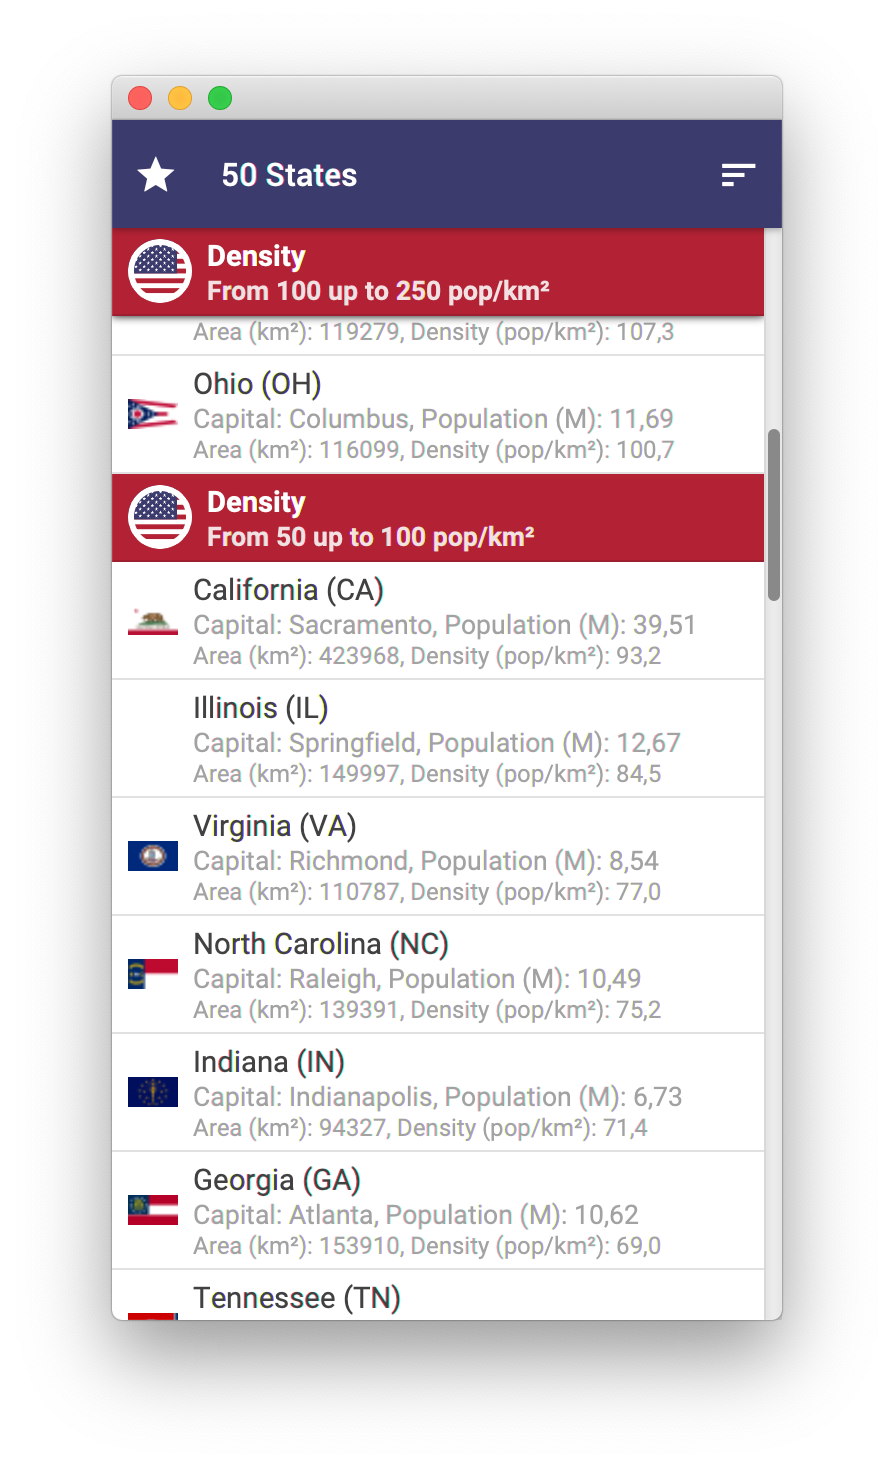
}And we see immediately the result:
Sorting headers and cells
By default, the headers are sorted in natural order (alphabetically), while standard cells are unsorted, just as they were provided (in this case sorted alphabetically by the state name).
But we can add a Comparator to the headers to sort them based on a user-defined criteria. Similarly, we can specify a separate Comparator for the standard cells to sort these based on a different user-defined criteria. Let’s add a button to the AppBar so the user can change the order.
public class BasicView extends View {
private boolean ascending = true;
@Override
protected void updateAppBar(AppBar appBar) {
...
Button sort = MaterialDesignIcon.SORT.button(e -> {
if (ascending) {
charmListView.setHeaderComparator(Enum::compareTo);
charmListView.setComparator(Comparator.comparingDouble(USState::getDensity));
ascending = false;
} else {
charmListView.setHeaderComparator(Comparator.reverseOrder());
charmListView.setComparator((s1, s2) -> Double.compare(s2.getDensity(), s1.getDensity()));
ascending = true;
}
});
appBar.getActionItems().add(sort);
appBar.getActionItems().add(sort);
}
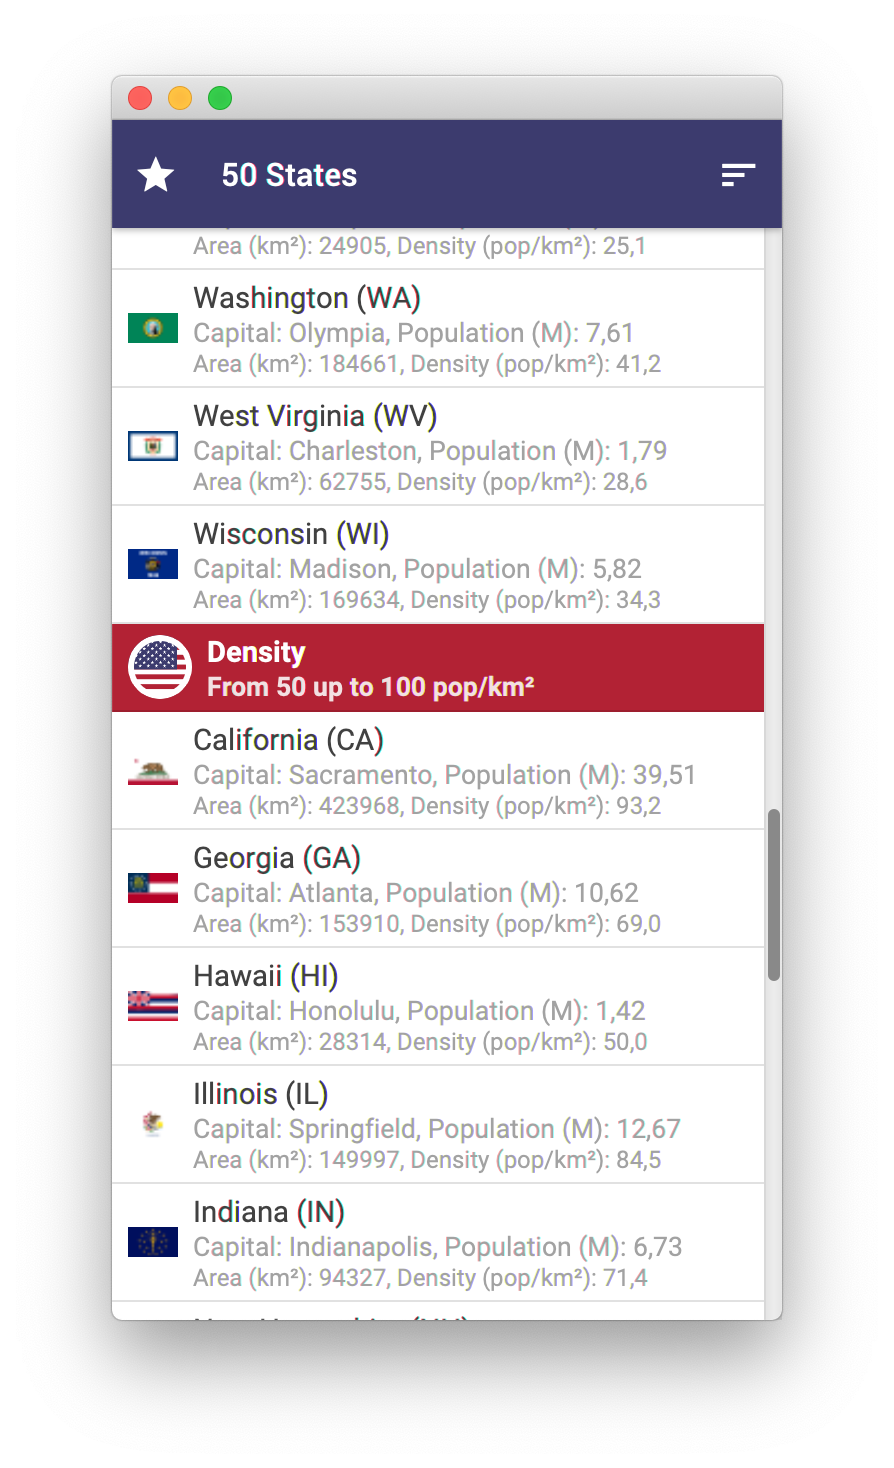
}This is the same control, with descending order:
Floating header
By default, the header for the most top visible cell is displayed floating on top of the list view, and it is replaced with the next one when the list is scrolled with a slide out effect.
This floating header can be hidden if required:
public class BasicView extends View {

    public BasicView() {
        ...
        charmListView.setFloatingHeaderVisible(false);
        ...
    }
}
Filtering the data
Since the content is bundled in an ObservableList, a FilteredList can be added with a predicate to allow filtering the underlaying list under given conditions:
public class BasicView extends View {
private final FilteredList<USState> filteredList;
public BasicView() {
filteredList = new FilteredList<>(USStates.statesList, getStatePredicate(null));
charmListView = new CharmListView(filteredList);
...
}
private Predicate<USState> getStatePredicate(Double population) {
return state -> population == null || state.getPopulation() >= population * 1_000_000;
}
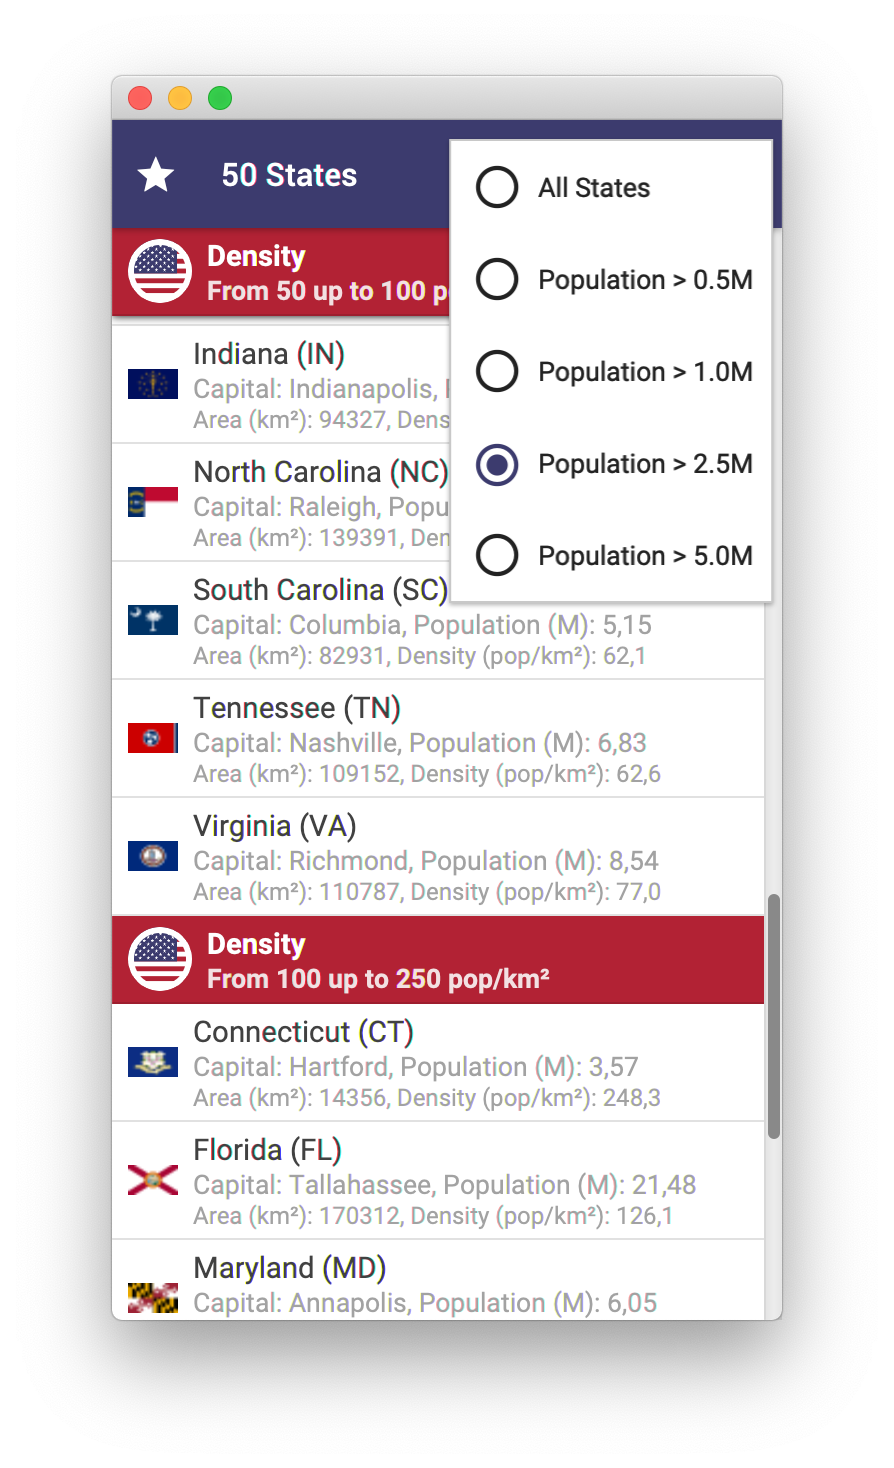
}Let’s add a popup menu to the AppBar so the user can select between different filtering options:
public class BasicView extends View {

    @Override
    protected void updateAppBar(AppBar appBar) {
        ...
        appBar.getMenuItems().setAll(buildFilterMenu());
    }

    private List<MenuItem> buildFilterMenu() {
        final List<MenuItem> menu = new ArrayList<>();

        EventHandler<ActionEvent> menuActionHandler = e -> {
            MenuItem item = (MenuItem) e.getSource();
            Double population = (Double) item.getUserData();
            filteredList.setPredicate(getStatePredicate(population));
        };

        ToggleGroup toggleGroup = new ToggleGroup();

        RadioMenuItem allStates = new RadioMenuItem("All States");
        allStates.setOnAction(menuActionHandler);
        allStates.setSelected(true);
        menu.add(allStates);
        toggleGroup.getToggles().add(allStates);

        List<Double> items = Arrays.asList(0.5, 1.0, 2.5, 5.0);
        for (Double d : items) {
            RadioMenuItem item = new RadioMenuItem("Population > " + d + "M");
            item.setUserData(d);
            item.setOnAction(menuActionHandler);
            menu.add(item);
            toggleGroup.getToggles().add(item);
        }

        return menu;
    }
}
Testing the application
Now that the code is ready, you can build, run and test the application on desktop, both on HotSpot and creating a native image:
HotSpot
Before creating a native image, let’s run first the app on HotSpot with the regular JDK 11+, as this will be faster for spotting and fixing any possible issue.
Select Plugins → gluonfx → gluonfx:run from the Maven tool window, or open a terminal and run: mvn gluonfx:run.
Native image
Open a terminal and run: mvn gluonfx:build gluonfx:nativerun
If everything works as it should, it is time to target the application for mobile platforms like Android and iOS.
These steps are already documented in the client docs for each IDE. We will refer to the NetBeans section.
-
For Android: Create & install an Android native image
-
For iOS: Create & install an iOS native image
Android
From a Linux machine, plug an Android device and run:
mvn -Pandroid gluonfx:build gluonfx:package gluonfx:install gluonfx:nativerun
You should get the application running on the device:
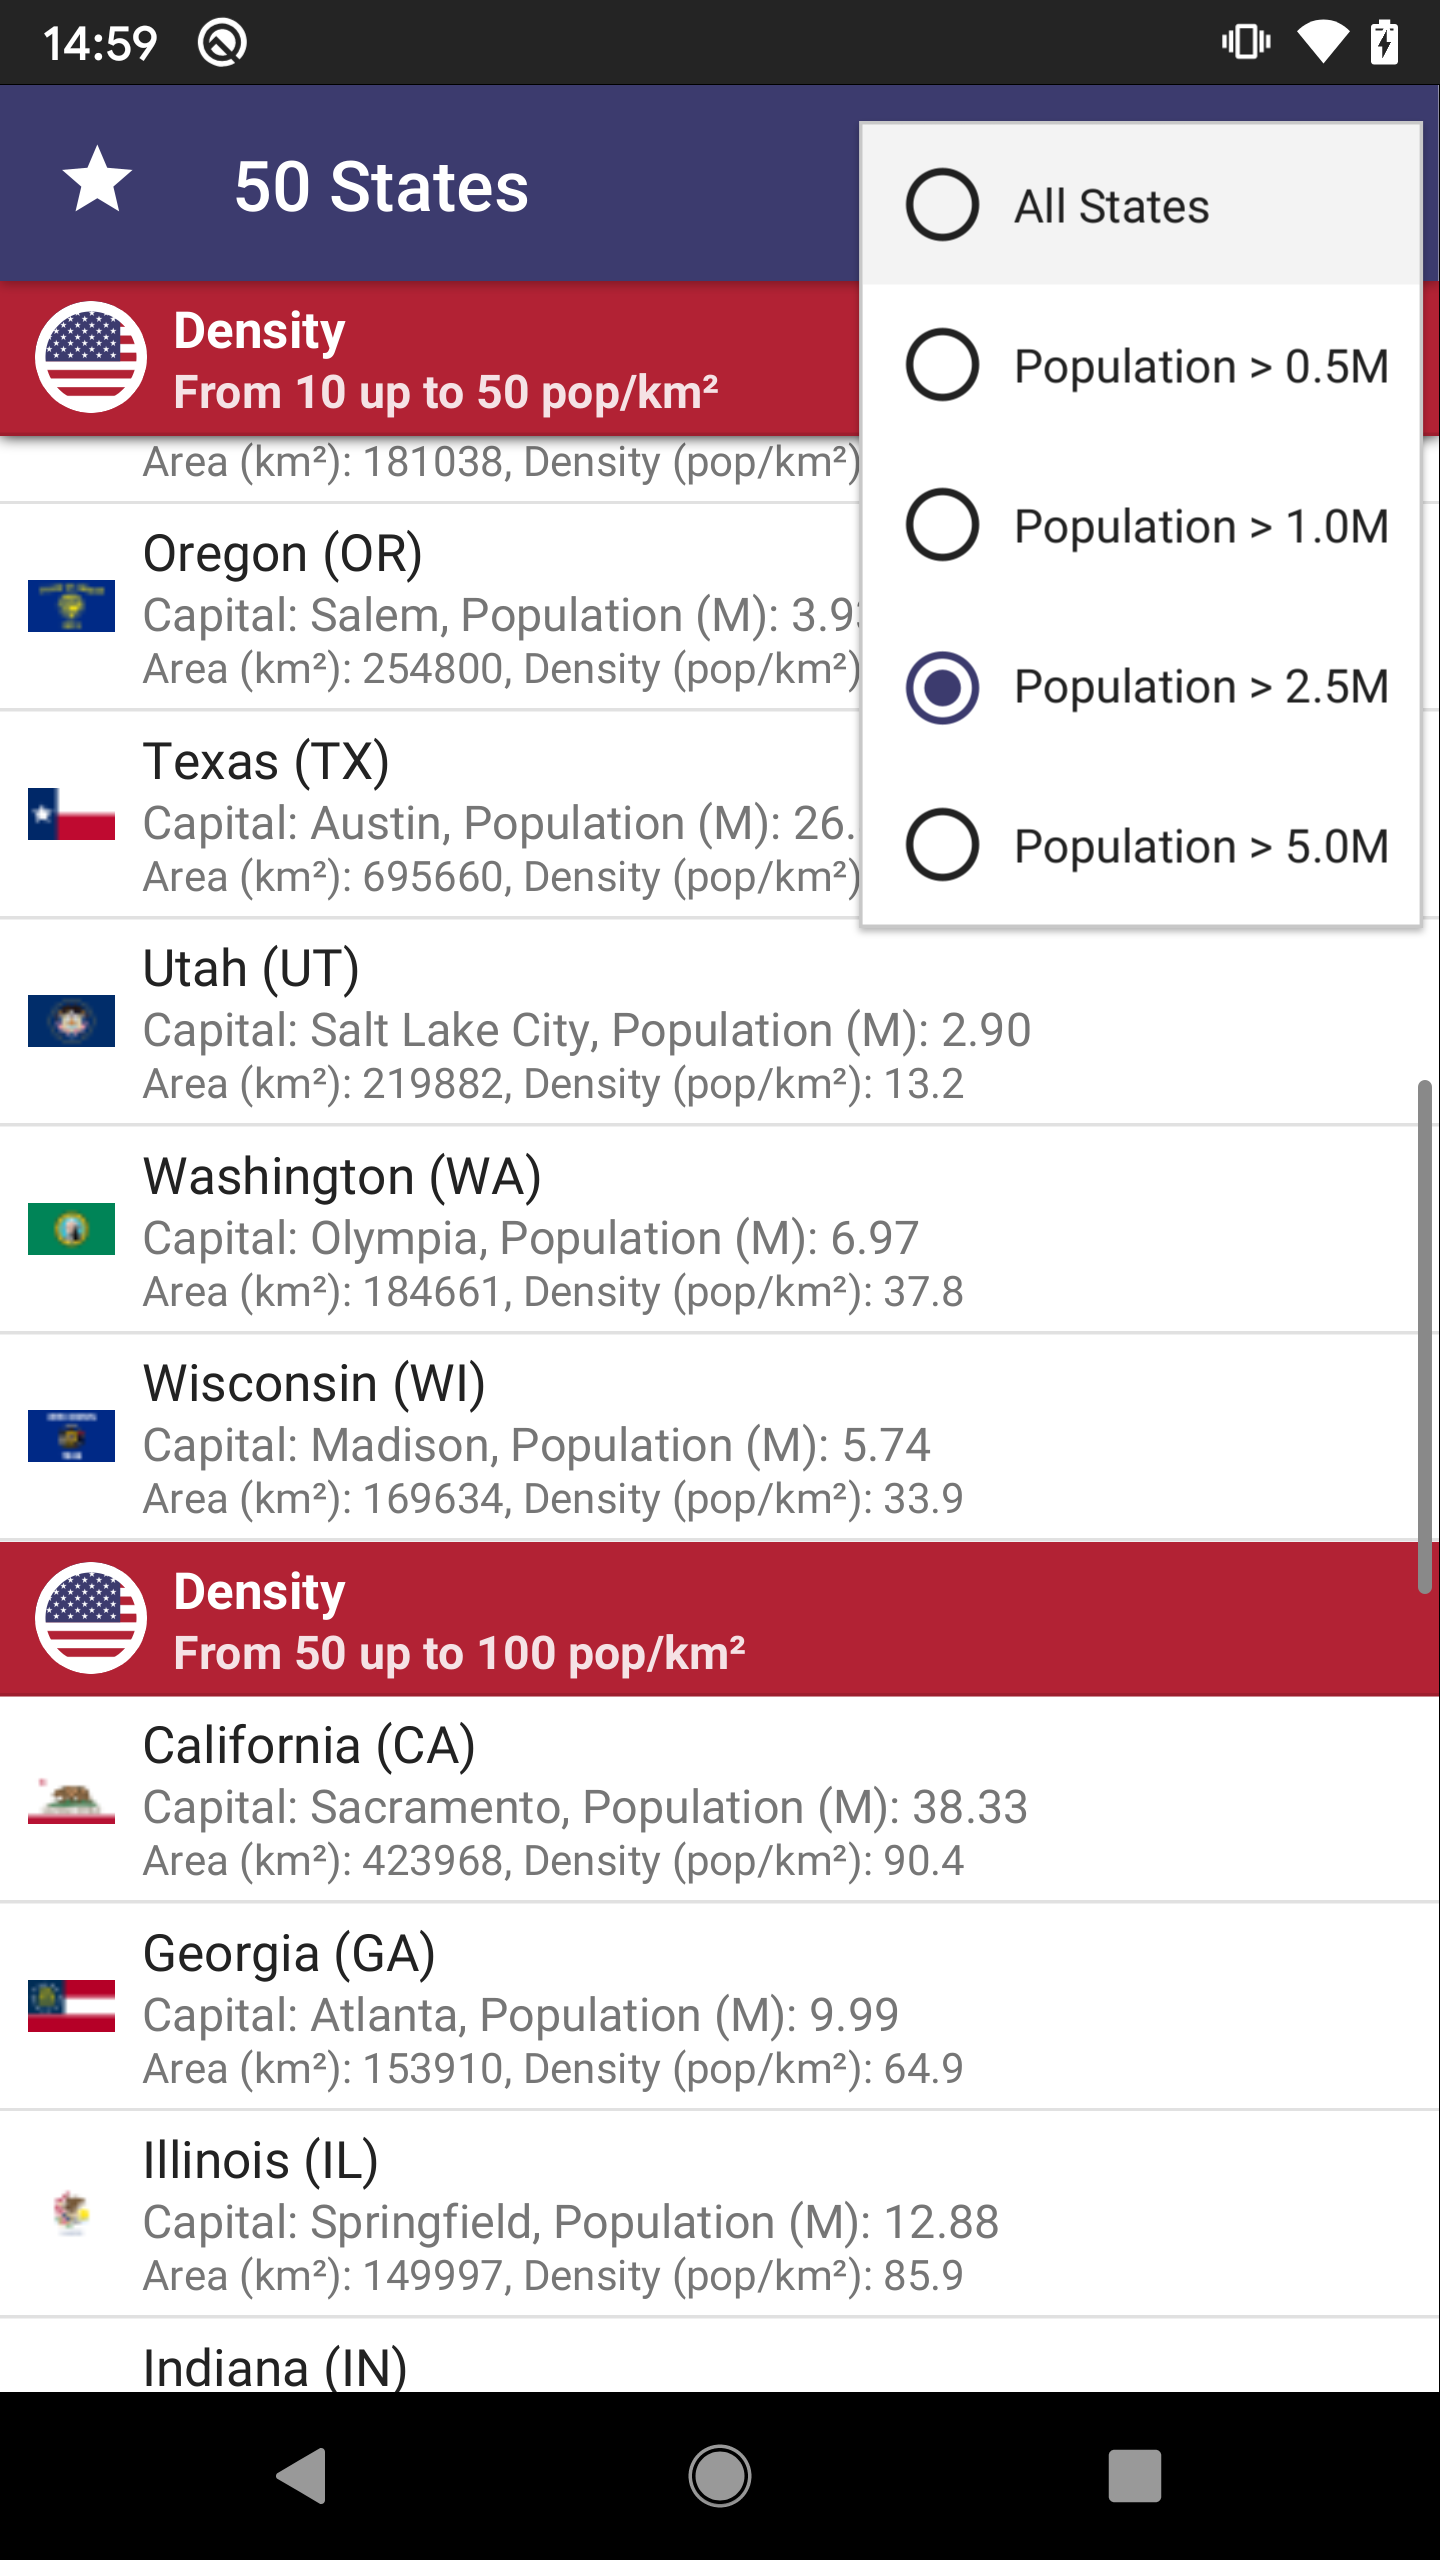
Notice that scrolling the list should feel almost like a native application, thanks to the use of a native image, combined with the cache strategy.
iOS
On MacOS, plug an iOS device and run:
mvn -Pios gluonfx:build gluonfx:nativerun
You should get the application running on the device:

Conclusion
Throughout this post we’ve covered in detail the basic steps to use the CharmListView control within a Single View project, and we have tested the application on desktop and mobile devices, by building a native image.
If you have made it this far, congratulations, we hope this sample and the documentation was helpful to you! In case you have any questions, your first stop should be the Gluon support page, where you can access the latest documentation. Gluon also recommends the community to support each other over at the Gluon StackOverflow page. Finally, Gluon offers commercial support as well, to kick start your projects.