The CloudLink Remote Functions with AWS Lambda App is a Gluon code sample. Refer to the Gluon website for a full list of Gluon code samples.
In this tutorial we’ll explain how you can integrate your Java Mobile application with Amazon AWS Lambda. The tutorial consists of three parts:
-
creating an AWS Lambda function in Amazon
-
creating a Gluon CloudLink Remote Function that links with the AWS Lambda function
-
creating a mobile application that calls the Remote Function in Gluon CloudLink
The idea of the tutorial is that we record a piece of audio on the mobile device. When recording has completed, the recorded bytes can be uploaded to the Remote Function in Gluon CloudLink. The remote function will in turn call the AWS Lambda function passing on the provided array of raw bytes. The AWS Lambda function then stores these bytes in a file in an AWS S3 bucket.
The image below shows how the different components are interacting with each other:

Before you start, make sure to check the list of prerequisites for each platform, and that you have installed the Gluon plugin for your IDE.
Note: This tutorial will use the Gluon plugin for IntelliJ, but it works equally well on NetBeans or Eclipse.
Code: The code for this project can be found in the samples repository at GitHub.
The sample is located under the directory cloudlink-function-mapper-aws-lambda.
The reader can clone that repository or create the entire project from scratch, based on the following steps.
Gluon Dashboard
For this sample, you’ll need a valid subscription to Gluon CloudLink. If you don’t have it yet, get it here (there is a 30-day free trial). Sign up to get a valid account on Gluon CloudLink and a link to access Gluon Dashboard.
Creating the AWS Lambda function
We’ll start by creating the AWS Lambda function. The function will take an array of bytes as input and store it as a file in an AWS S3 bucket. Sign in to the Amazon AWS console and navigate to the Lambda service.
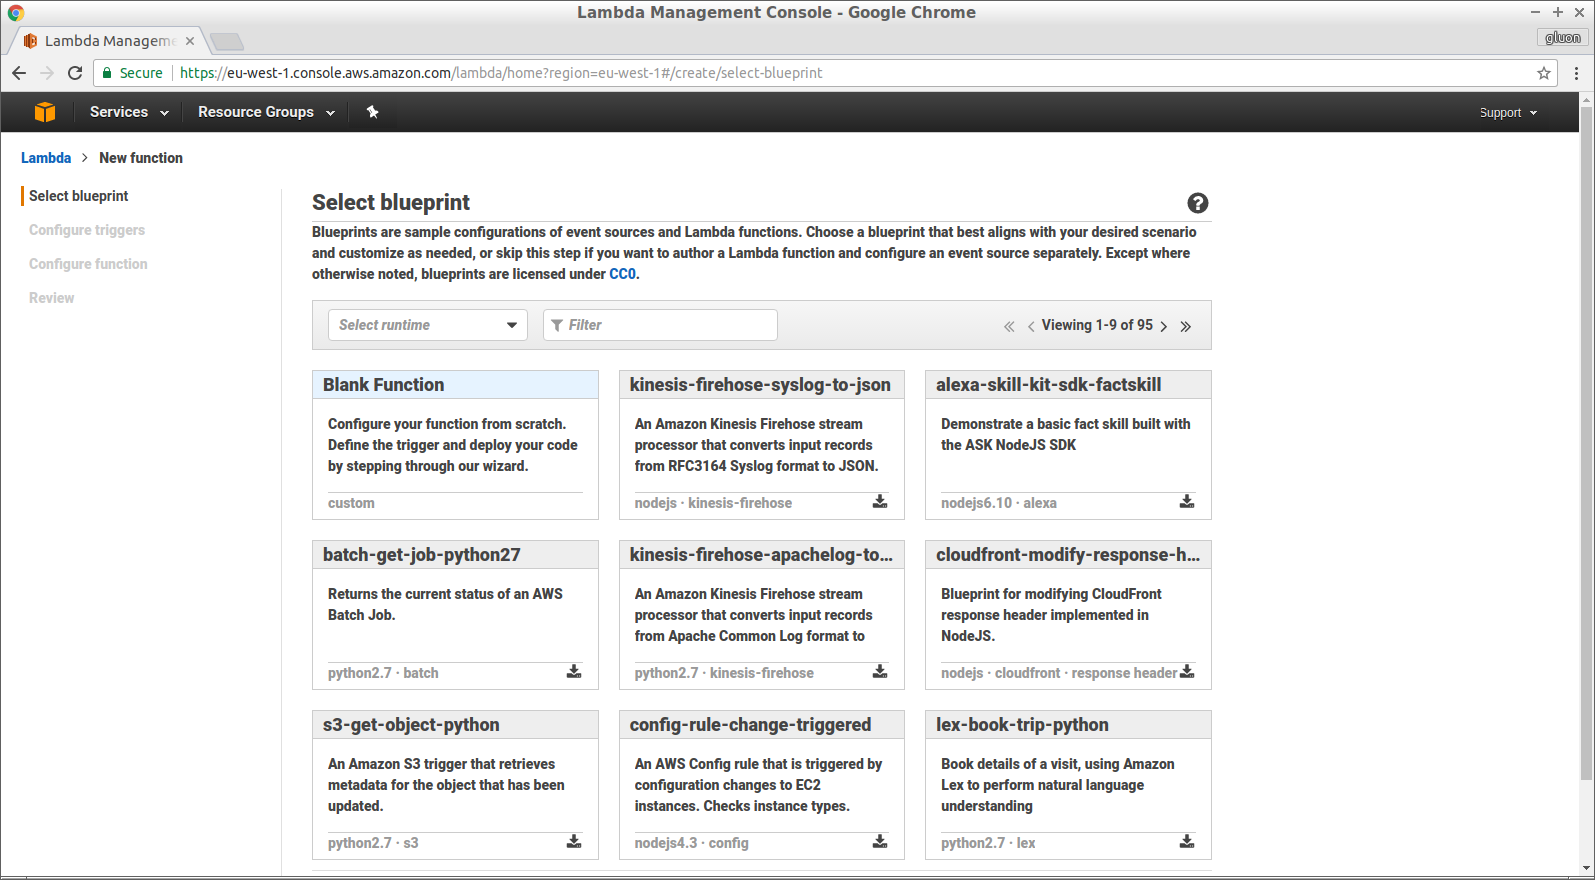
Click Create a Lambda function to create a new AWS Lambda function and select the Blank Function blueprint.
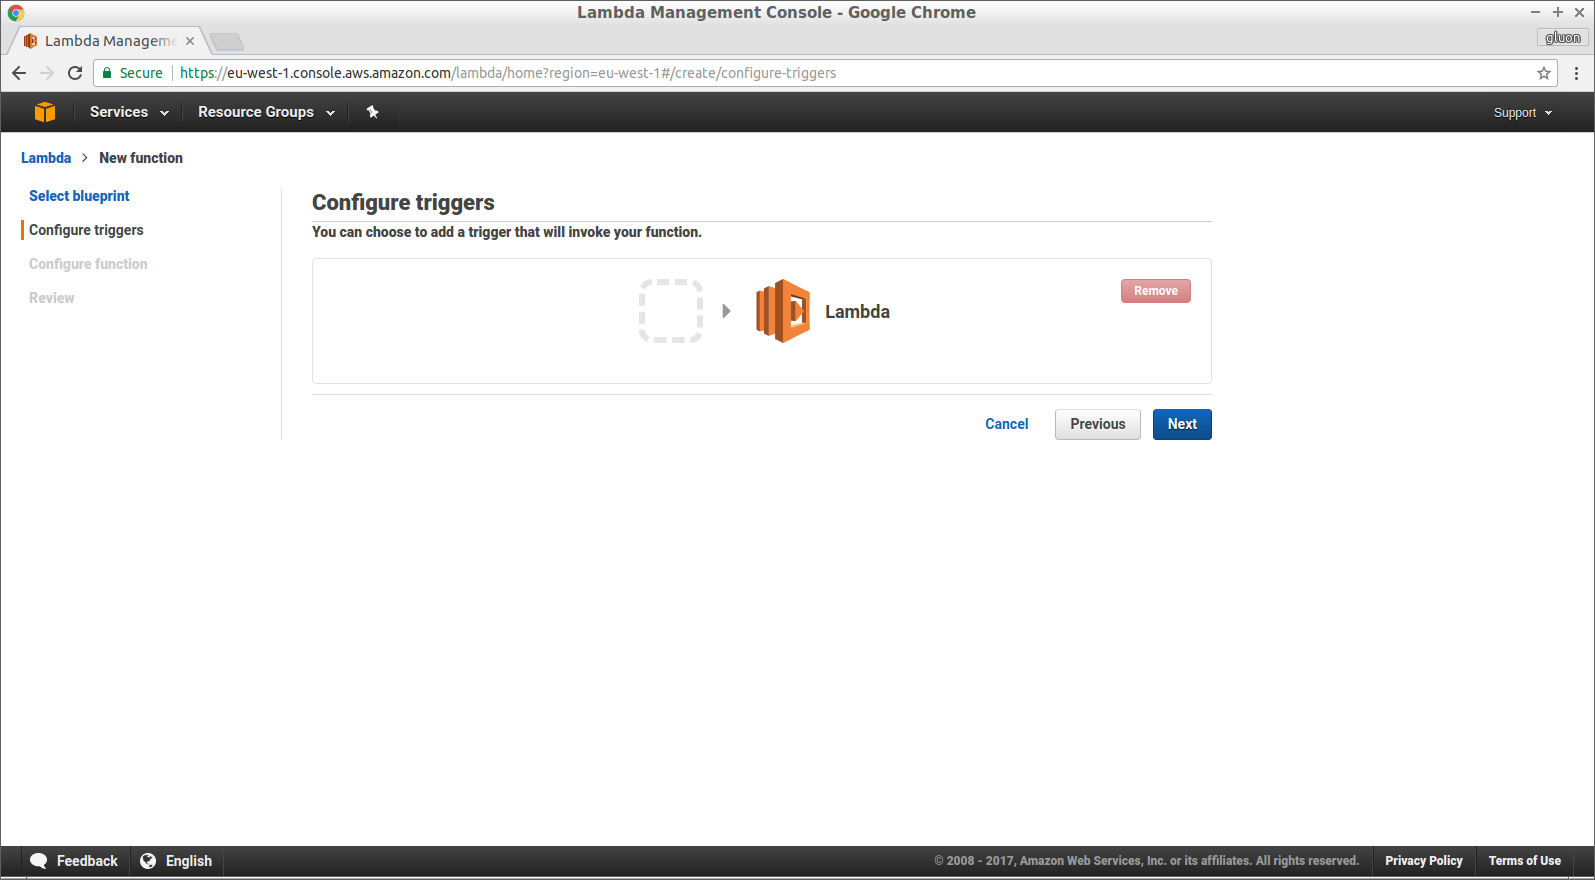
Click next on the Configure triggers page to leave the triggers empty. We don’t need a trigger because the AWS Lambda function will be invoked directly by Gluon CloudLink.
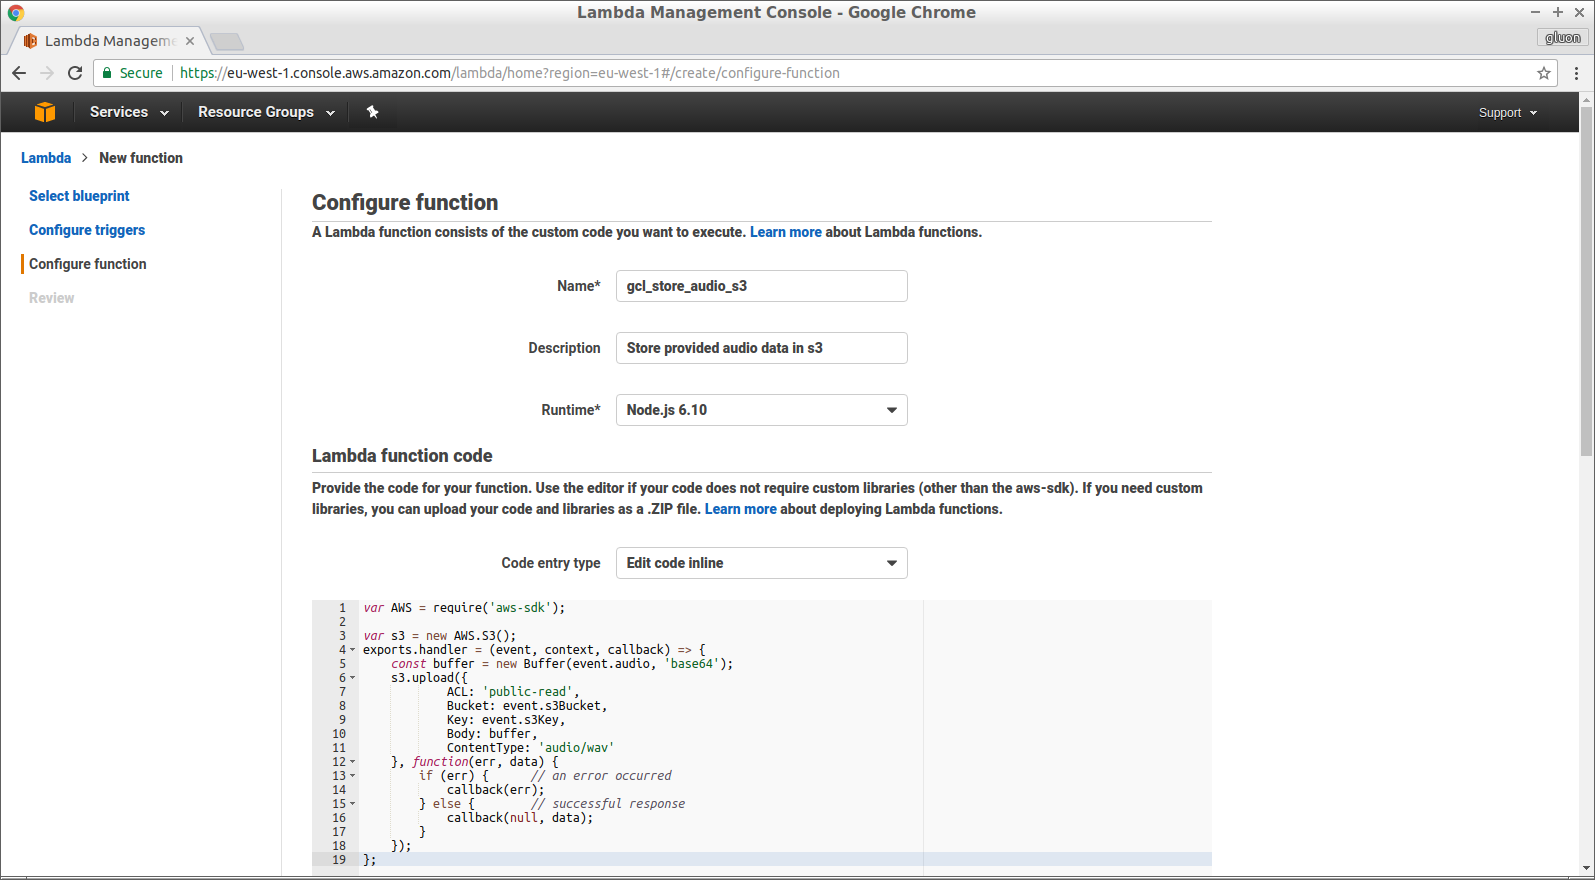
Provide a name and description for the function and select Node.js 6.10 as the runtime environment. You can paste the code below inside the text area for the Lambda function code.
var AWS = require('aws-sdk');

var s3 = new AWS.S3();
exports.handler = (event, context, callback) => {
    const buffer = new Buffer(event.audio, 'base64');
    s3.upload({
            ACL: 'public-read',
            Bucket: event.s3Bucket,
            Key: event.s3Key,
            Body: buffer,
            ContentType: 'audio/wav'
    }, function(err, data) {
        if (err) { // an error occurred
            callback(err);
        } else { // successful response
            callback(null, data);
        }
    });
};
Scroll down to configure the Lambda function role. Choose Create a custom role from the dropdown.

A new browser window will be opened where the custom role can be edited. Enter a name for the role and paste the text below inside the Policy Document. You’ll need to click the edit link before you can alter the provided policy document. When you are finished, click Allow to save the role and close the window.
{
  "Version": "2012-10-17",
  "Statement": [
    {
      "Effect": "Allow",
      "Action": [
        "logs:CreateLogGroup",
        "logs:CreateLogStream",
        "logs:PutLogEvents"
      ],
      "Resource": "arn:aws:logs:*:*:*"
    },
    {
      "Effect": "Allow",
      "Action": [
        "s3:PutObject",
        "s3:PutObjectAcl"
      ],
      "Resource": "arn:aws:s3:::*"
    }
  ]
}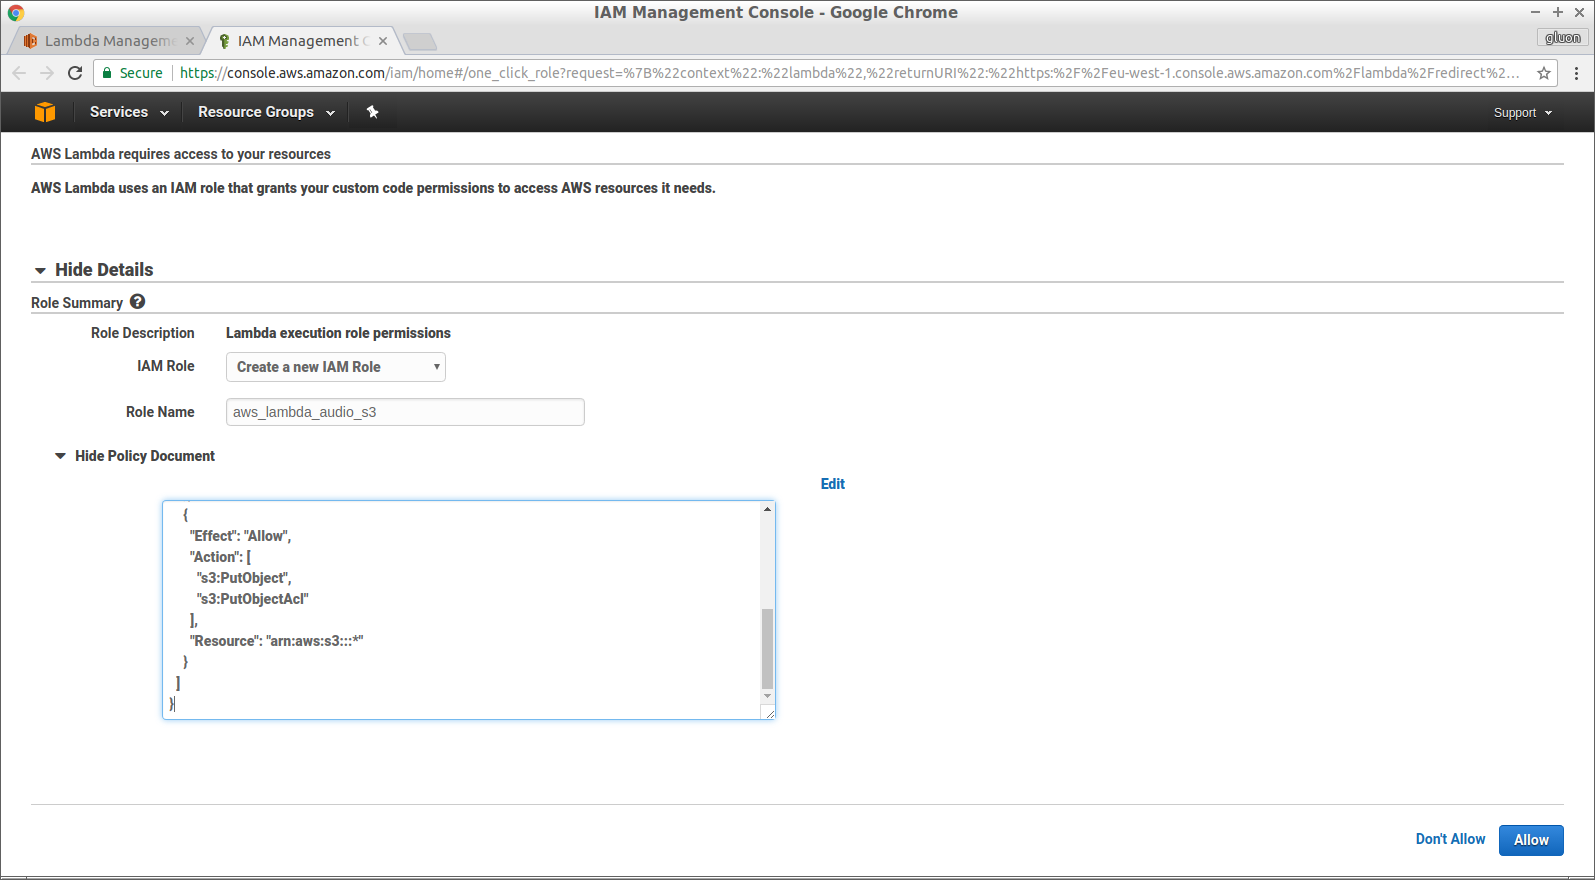
The new role is now automatically selected in the function configuration page.
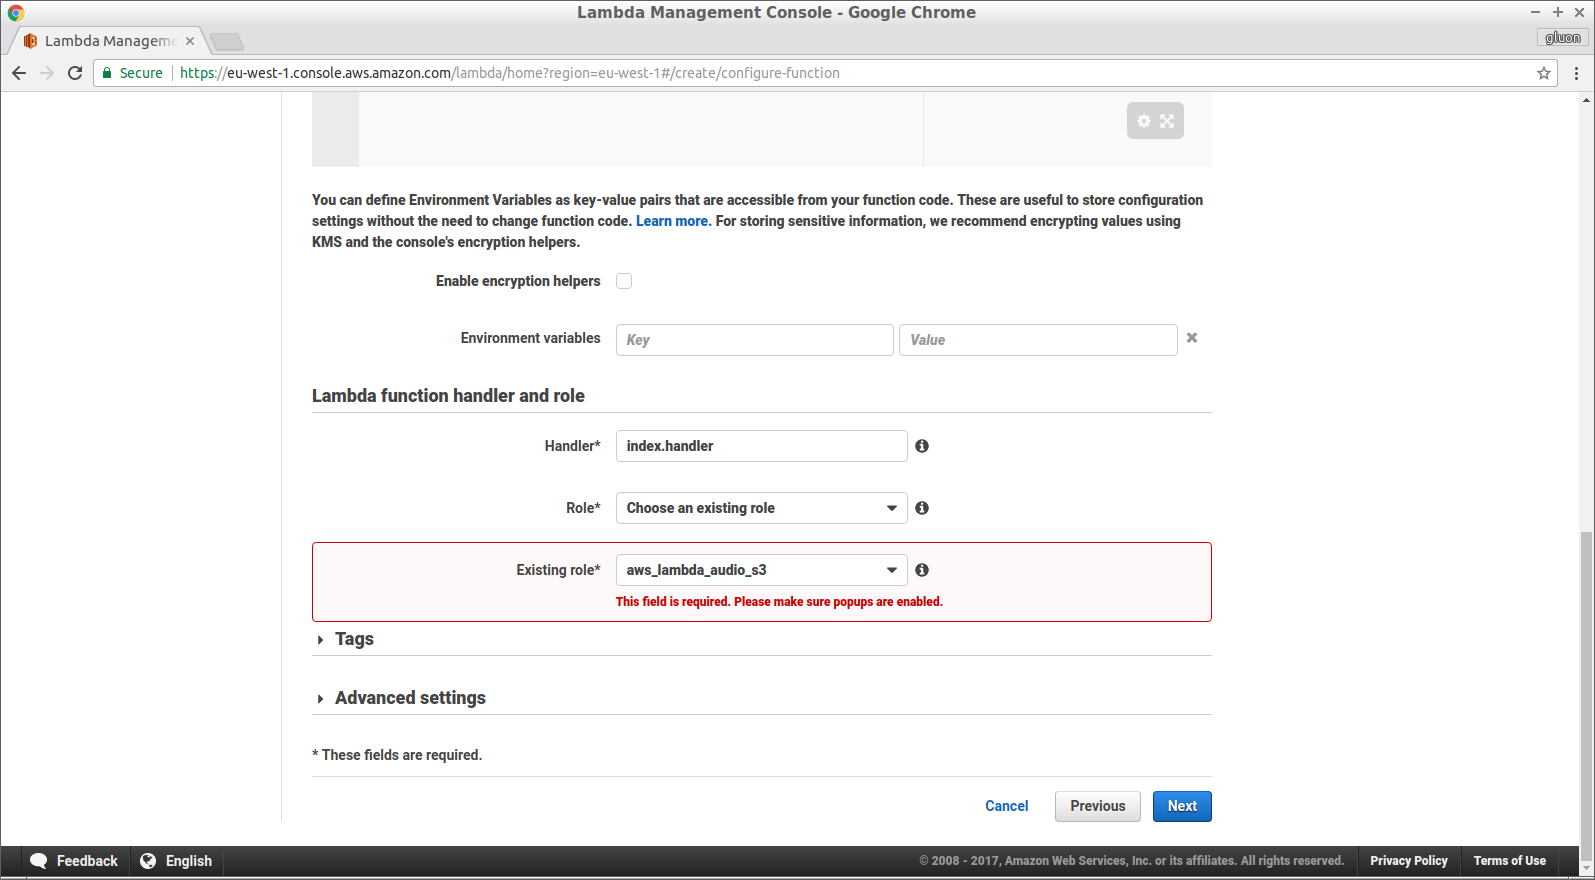
Click Next, review the function configuration and click Create function.
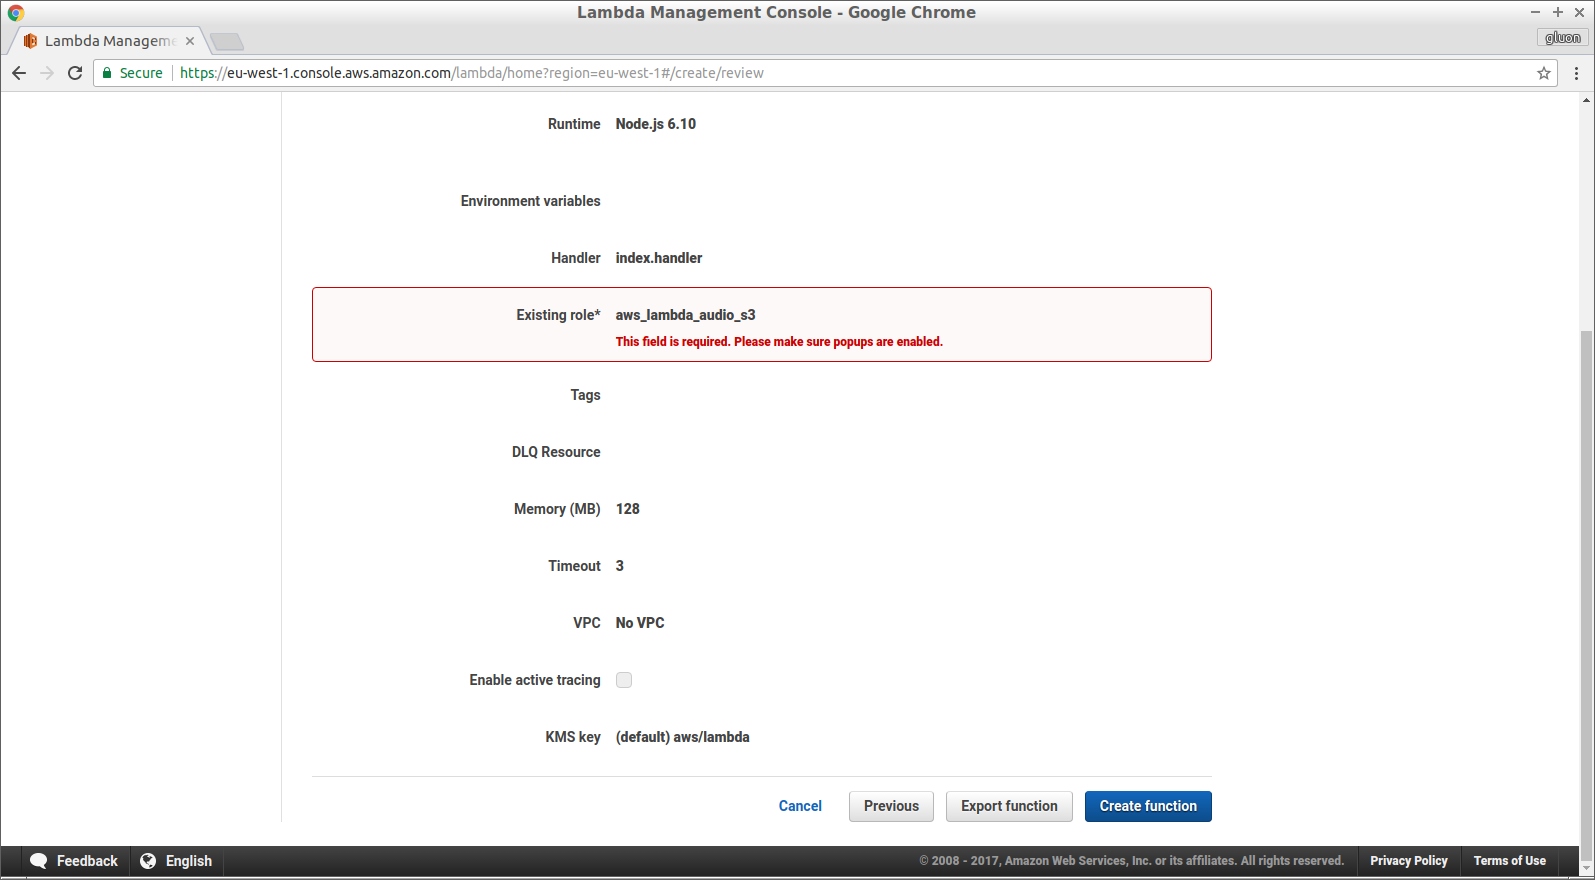
The AWS Lambda function is created successfully and we can now link it with a Remote Function in Gluon CloudLink.
Creating the CloudLink Remote Function
Navigate with your browser to Gluon Dashboard at https://gluon.io and sign in with the
credentials that you used when creating a Gluon CloudLink subscription. Before we can create
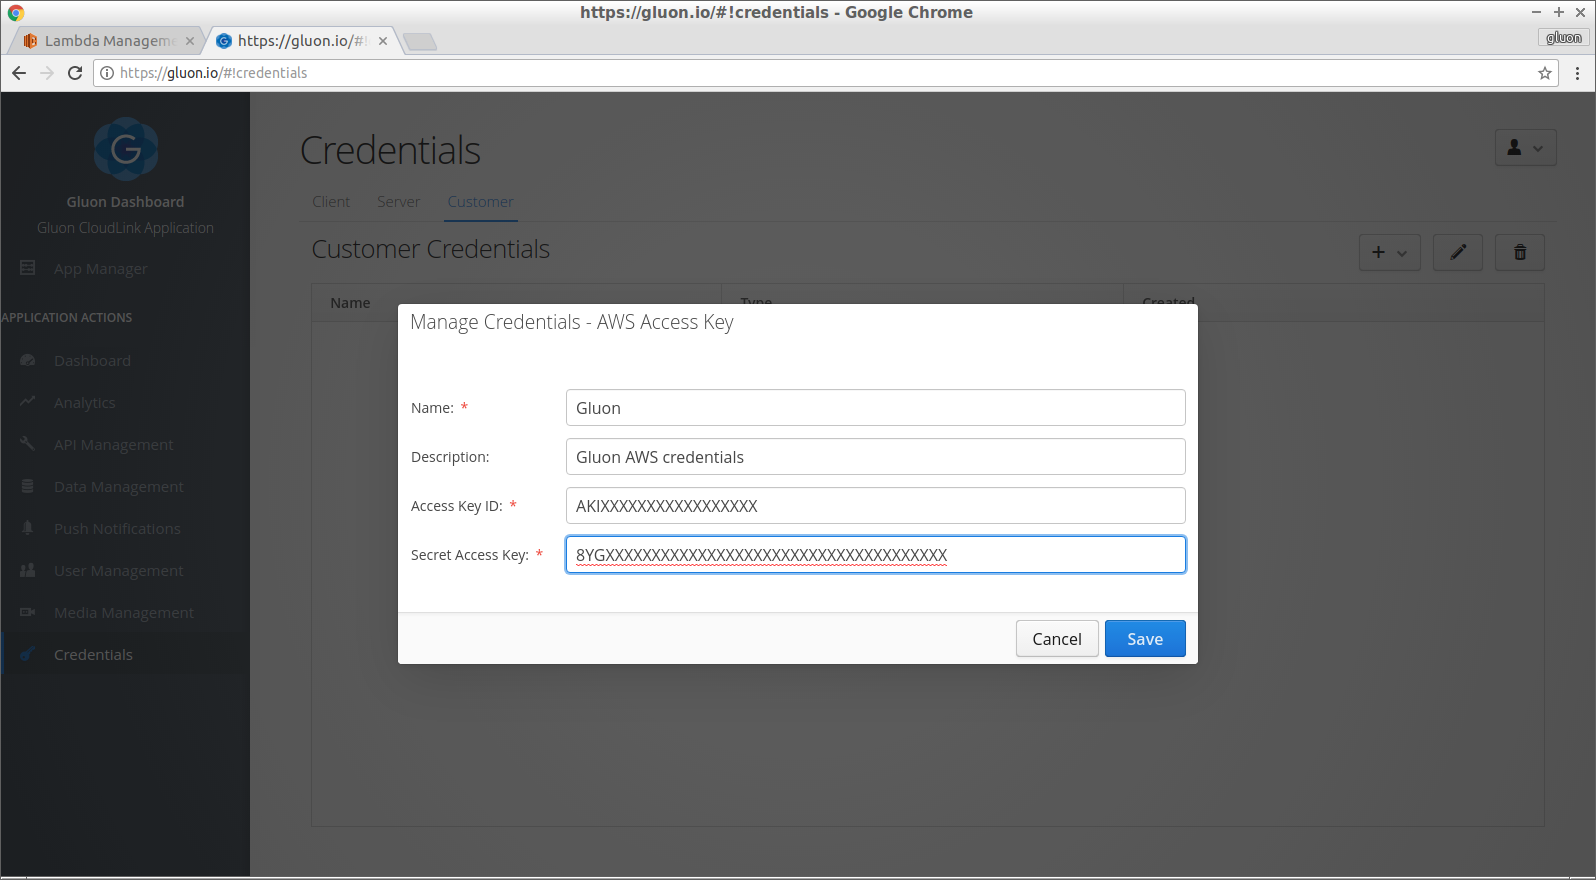
the Remote Function we need to configure an AWS Access Key. Navigate to the Credentials view
and open the Customer tab. Click the + button and choose AWS Access Key from the dropdown.
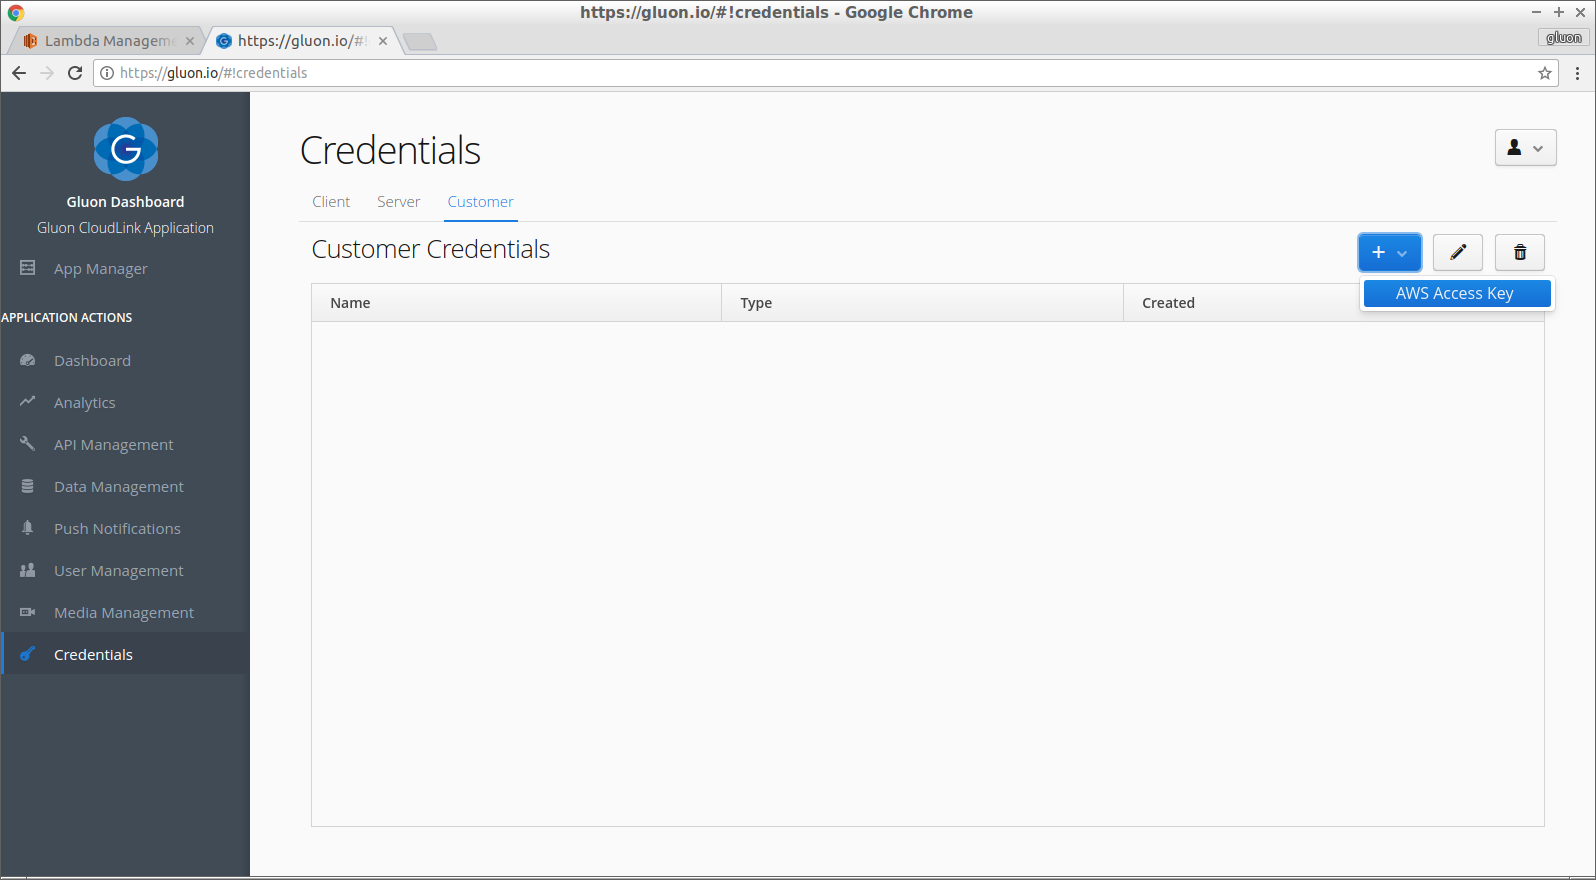
Provide all the required fields for the AWS Access Key credentials and click Save. The provided
AWS Access Key must be able to list and invoke the AWS Lambda function we created in the
previous section.
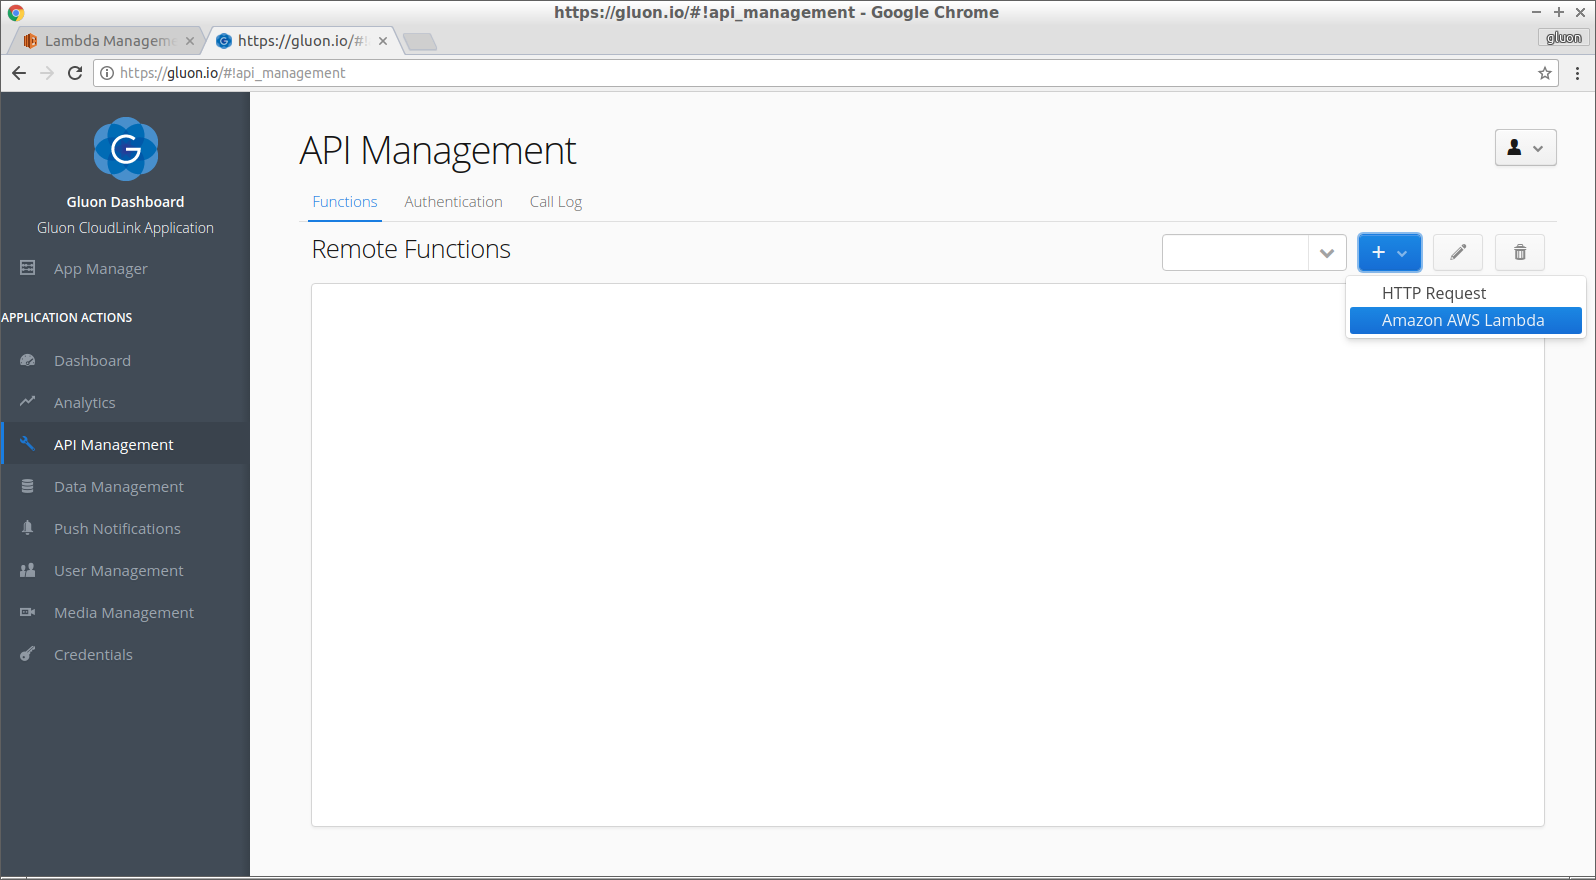
Now that the credentials are created, we can navigate to the API Management view and create the
Remote Function. Click on the + button and choose Amazon AWS Lambda from the dropdown.
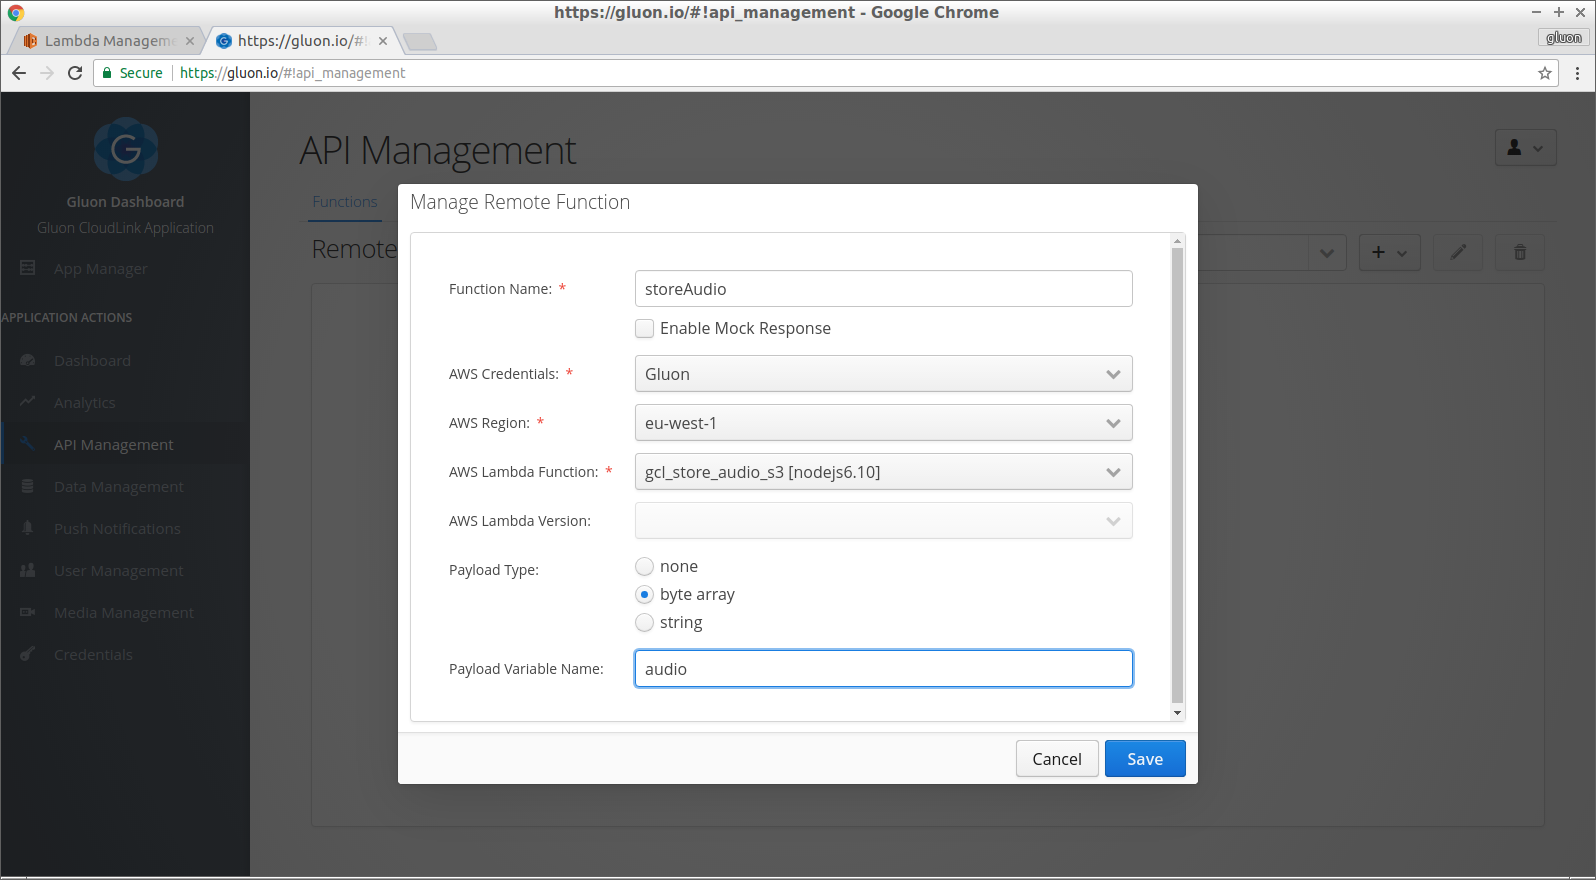
Name the Remote Function storeAudio and select the credentials you just created from the combobox. Select the AWS region where you created the AWS Lambda function and then select the actual function from the combobox below.
The mobile application will call the remote function by passing in a byte array holding the recorded audio stream. So we need to choose the payload type to be byte array. Gluon CloudLink will automatically encode the raw bytes using Base64 encoding before passing it on to the AWS Lambda function. Set the name of the payload variable to audio. The AWS Lambda function is able to access the Base64 encoded audio stream by accessing the key with name audio from the event parameter in the node.js handler function.
Click Save to create the remote function and close the dialog.
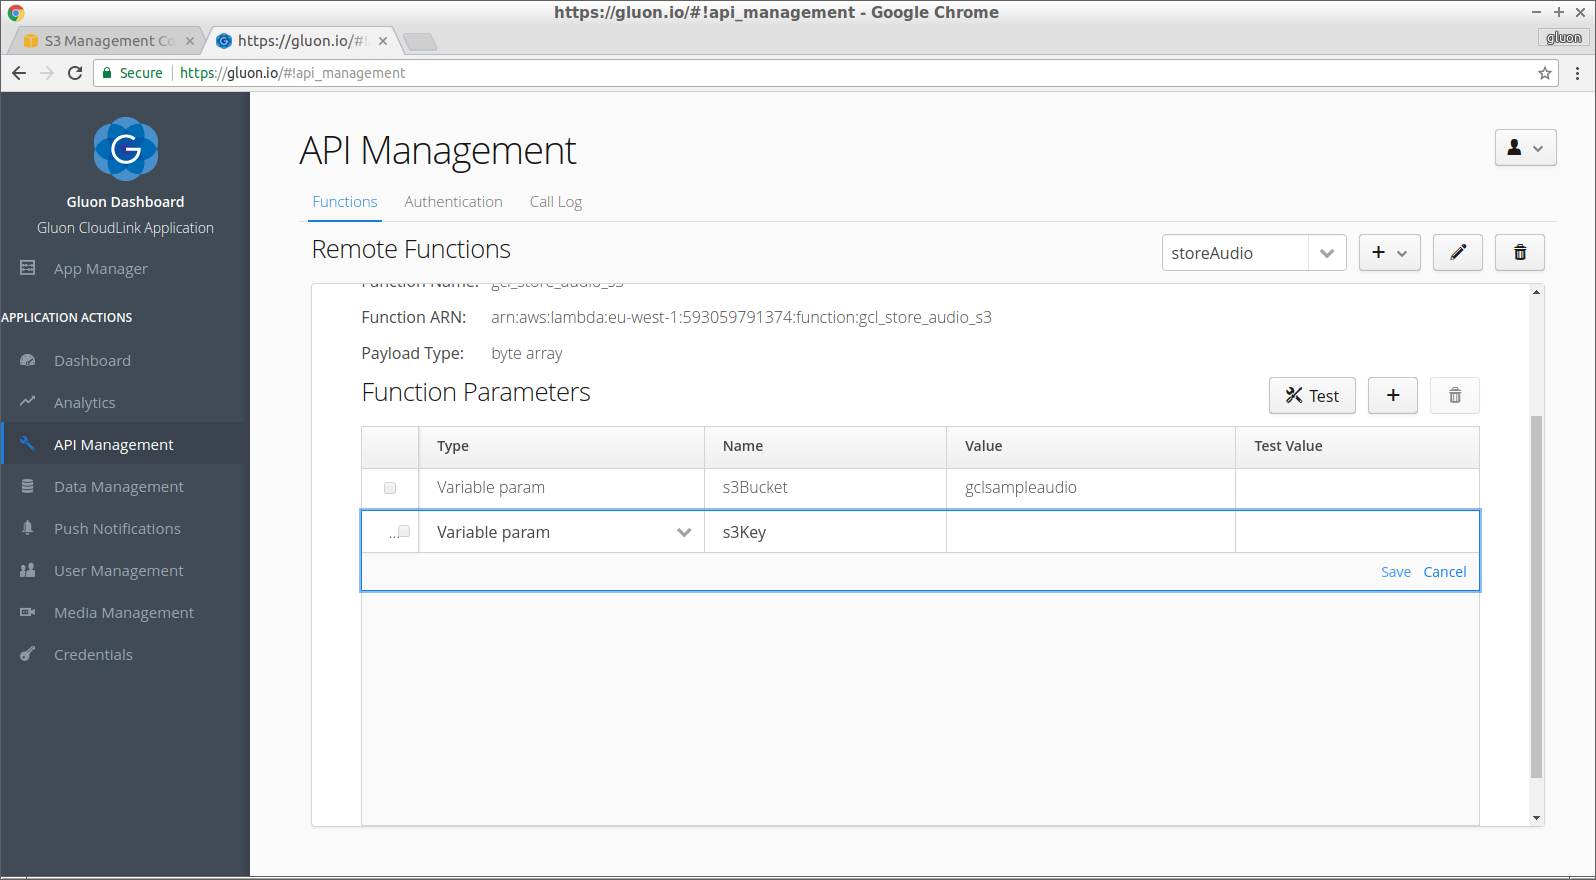
Next we will add two function parameters. One parameter contains the name of the AWS S3 bucket where we want to store the audio files. The value for this parameter will be hardcoded and must point to an existing S3 bucket in the same account as where the AWS Lambda function is created.
The second parameter will be used to name the S3 object itself. The value for that parameter will be provided by the mobile application when making a call to this remote function.
To add a function parameter, click on the + button below the section with the function
information. Then double click inside the newly added row to start editing the values. Click on
Save to persist the edits to the function parameter.
Now that we have the remote function ready, we can start creating the mobile application.
Creating the Gluon Mobile Application
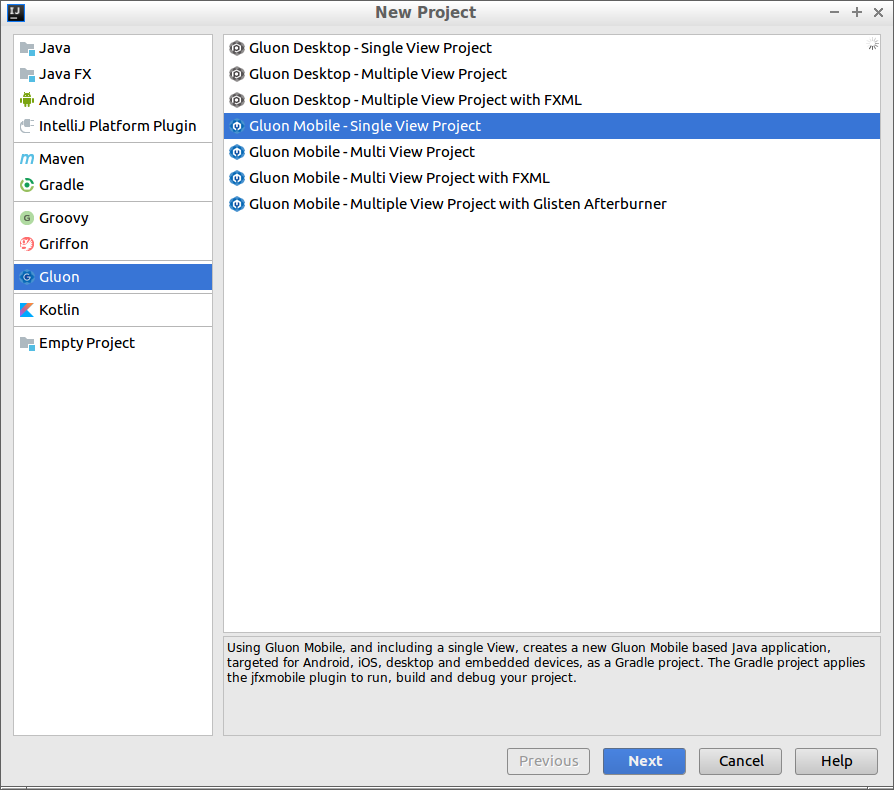
Let’s create a new project using the Gluon plugin with IntelliJ. Click File→New→Project…
and select Gluon on the left. Select Gluon Mobile - Single View Project from the list of
available projects and press Next.
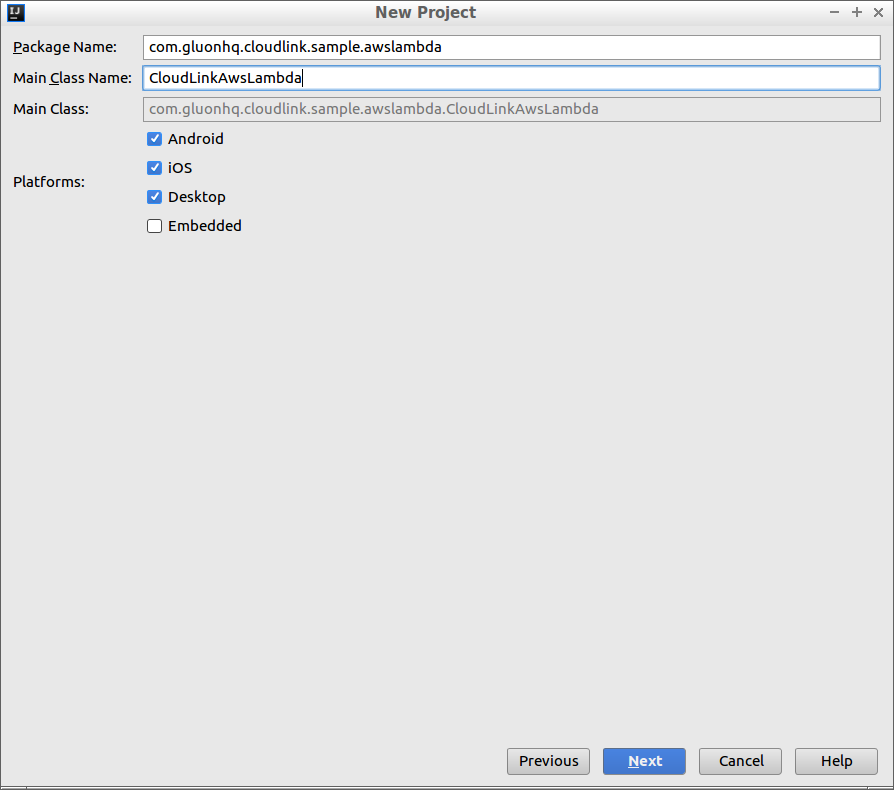
Choose a proper package name and class name for the main application class and click Next.
Choose a JDK 8 for the project’s Java SDK and finally provide a name and location for the project itself.
Press Finish to complete the project creation wizard. The Gluon Mobile project will be created
and opened.
Adding the Client Credentials
In order to let the Gluon Mobile application communicate with Gluon CloudLink, we need to
store the client credentials under the src/main/resources folder of our Gluon Mobile project.
The client credentials can be found in Gluon Dashboard from the Credentials page. Click the
download button to save the gluoncloudlink_config.json configuration file.
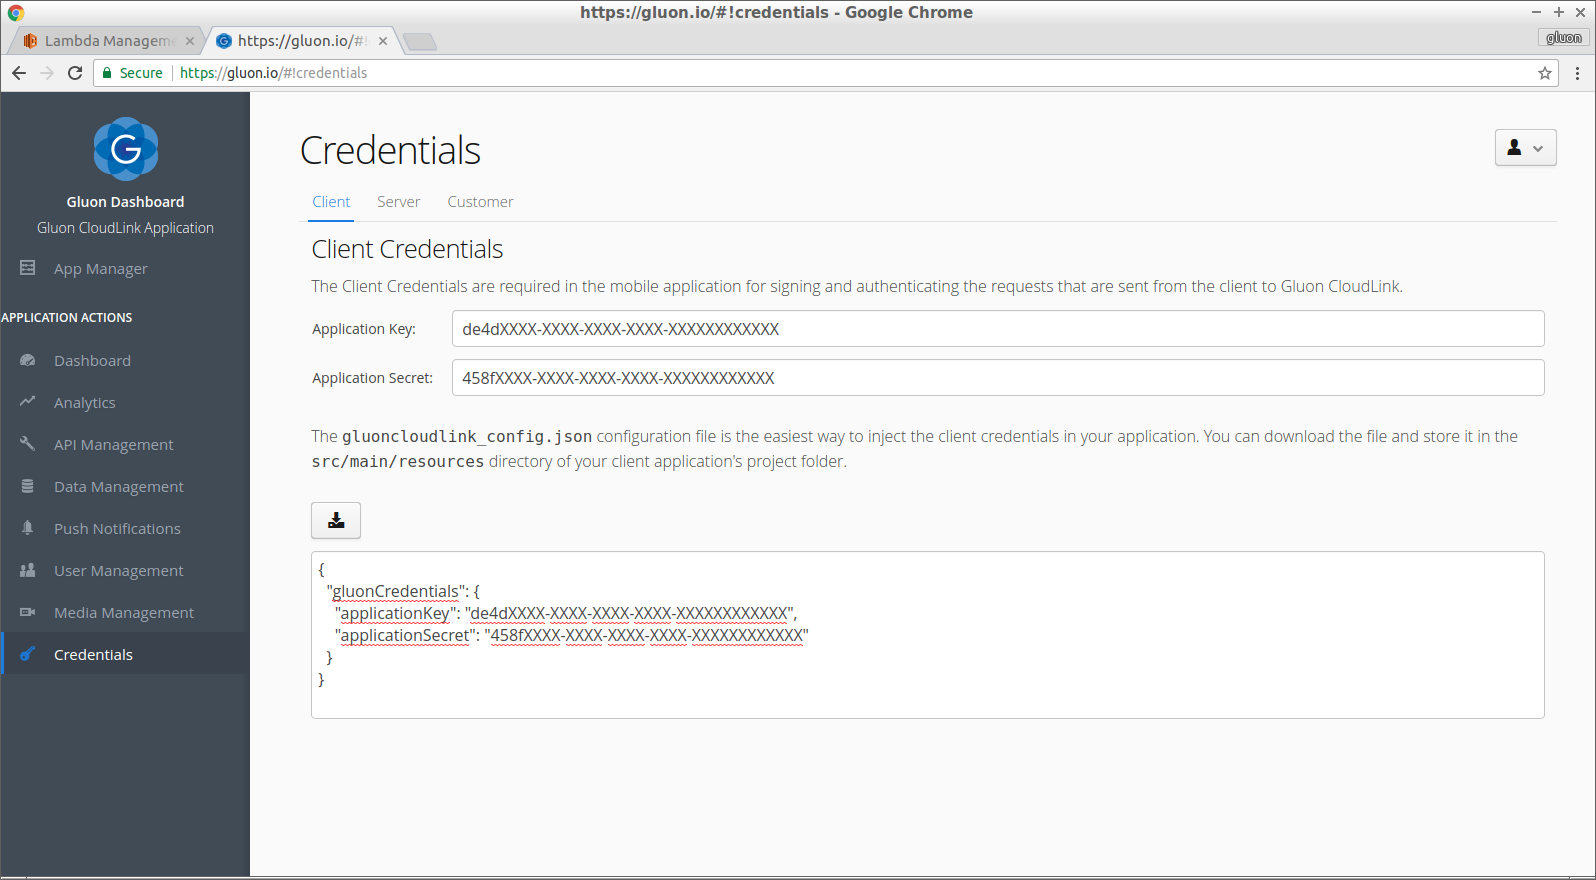
The content of the file is a JSON object with a key and secret that are used to sign and authenticate all the requests that are made to Gluon CloudLink.
{
  "gluonCredentials": {
    "applicationKey": "de4dXXXX-XXXX-XXXX-XXXX-XXXXXXXXXXXX",
    "applicationSecret": "458fXXXX-XXXX-XXXX-XXXX-XXXXXXXXXXXX"
  }
}
Implementing Audio Recording
Next we will edit the sample so that we can record a piece of audio and pass it on to the remote function on Gluon CloudLink.
Adding the dependency
We will use the Audio Recording plugin of Attach. Attach is an open source framework provided by Gluon, that gives access to platform specific services using a cross-platform interface. From IntelliJ we can easily add the Audio Recording service with the Gluon Mobile Settings dialog. Right click with the mouse on the root node of the application project in the Project tool window and select Gluon Mobile Settings from the bottom of the context menu.
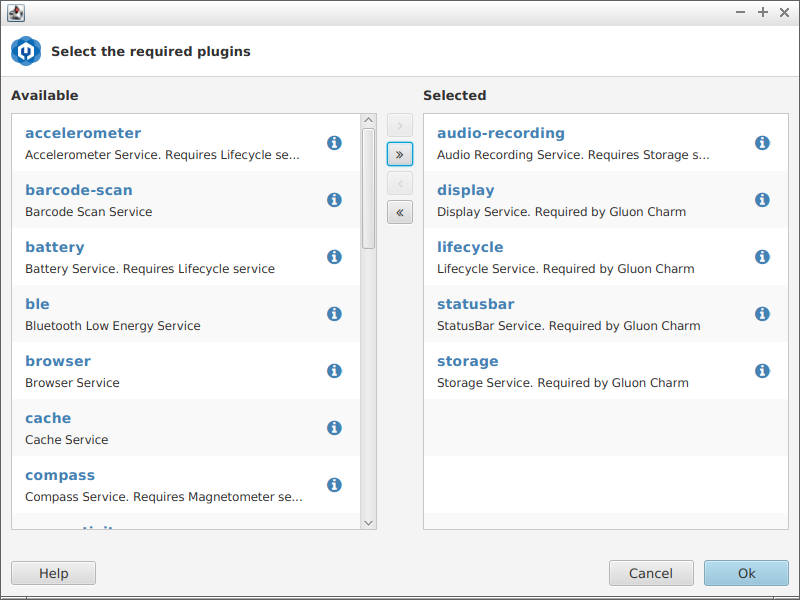
From the Gluon Mobile Settings dialog, choose the audio-recording service and click on the > button to add the service to your project.
Click Ok to save your changes and close the dialog.
You might need to refresh the gradle project now, to apply the change of adding the dependency to the Charm Down Audio Recording service.
Adding required permissions
To be able to use audio recording on a mobile device, we will need to add the required permissions to the Android and iOS specific configuration files.
For Android, open the AndroidManifest.xml file, located under the src/android folder and add
the permission named android.permission.RECORD_AUDIO:
<manifest xmlns:android="http://schemas.android.com/apk/res/android" package="com.gluonhq.cloudlink.sample.awslambda" android:versionCode="1" android:versionName="1.0">
    ...
    <uses-permission android:name="android.permission.INTERNET"/>
    <uses-permission android:name="android.permission.READ_EXTERNAL_STORAGE"/>
    <uses-permission android:name="android.permission.WRITE_EXTERNAL_STORAGE"/>

    <!-- permission to record audio -->
    <uses-permission android:name="android.permission.RECORD_AUDIO" />
    ...
</manifest>
For iOS, open the Default-Info.plist file, located under the src/ios folder and add the
following keys at the bottom of the file to specify that the application wants to use the
microphone:
<plist version="1.0">
    <dict>
        ...
        <key>NSMicrophoneUsageDescription</key>
        <string>Need microphone access for recording audio</string>
        <key>UIBackgroundModes</key>
        <array>
            <string>audio</string>
        </array>
    </dict>
</plist>
Using Audio Recording service
Next we will update the default view to include buttons for starting and stopping audio recording.
Open the BasicView.java class which contains the code for building the UI controls. In the
constructor, after the super keyword, we retrieve an instance of the Audio Recording service:
public BasicView() {
AudioRecordingService audioRecordingService = Services.get(AudioRecordingService.class)
.orElseThrow(() -> new RuntimeException("Could not find Audio Recording service."));
...
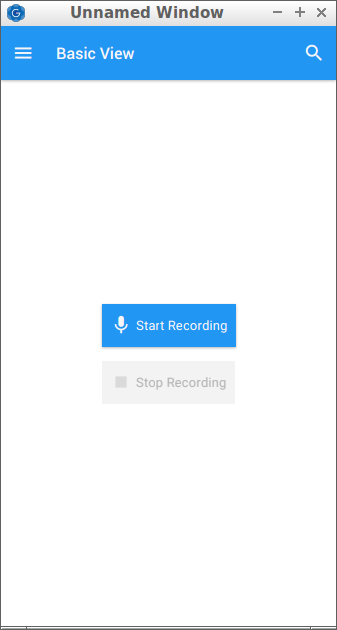
}The next step is to remove the existing label and button controls and replace them with two new buttons: one for starting audio recording and the second one for stopping it again. Clicking the start button will first clear the existing audio chunks as well before recording is started.
The disabled status of the buttons will be bound to the recording property of the
AudioRecordingService. This will cause the buttons to become disabled/enabled appropriately
when audio recording is active/inactive. Finally, make sure you don’t forget to add both buttons
to the VBox layout at the bottom.
public BasicView() {
    AudioRecordingService audioRecordingService = Services.get(AudioRecordingService.class)
            .orElseThrow(() -> new RuntimeException("Could not find Audio Recording service."));

    Button start = new Button("Start Recording", new Icon(MaterialDesignIcon.MIC));
    start.setOnAction(e -> {
        audioRecordingService.clearAudioFolder();
        audioRecordingService.startRecording(8000.0f, 16, 2, 60);
    });
    start.disableProperty().bind(audioRecordingService.recordingProperty());

    Button stop = new Button("Stop Recording", new Icon(MaterialDesignIcon.STOP));
    stop.setOnAction(e -> audioRecordingService.stopRecording());
    stop.disableProperty().bind(audioRecordingService.recordingProperty().not());

    VBox controls = new VBox(15.0, start, stop);
    ...
}
We have now completed the required functionality to record pieces of audio. You can test the application on your desktop and it should store the audio files in a folder called AudioRecording under your user home directory.
Using the Remote Function
The final step in the tutorial is to use the remote function we created earlier in Gluon Dashboard
to upload a recorded audio file into the configured AWS S3 bucket. The DataClient is the class
we need to make calls to a remote function that is configured in Gluon CloudLink. Head back to the
BasicView class to add a DataClient instance, after the code for the stop button:
public BasicView() {
    ...
    stop.disableProperty().bind(audioRecordingService.recordingProperty().not());

    DataClient dataClient = DataClientBuilder.create().build();

    VBox controls = new VBox(15.0, start, stop);
    ...
}
Now that we have an instance of the DataClient, we only need to use it to call the remote function with the binary data of the audio file. The list of recorded audio files is available from the AudioRecordingService. We can add a third button that will take each recorded audio file, read in its bytes and pass those bytes into the remote function. We also make sure that uploading is only possible if at least one recorded audio file exists. Let’s add code for this step by step.
Adding TextArea and Upload button
First, add a text area that will hold the response from the remote function when it has completed. Create the upload button as well that clears the text area when it is clicked. Apply the correct binding to the disable property of the button and add the two new controls to the end of the VBox layout.
public BasicView() {
    ...
    DataClient dataClient = DataClientBuilder.create().build();

    TextArea responseDebug = new TextArea();

    Button upload = new Button("Upload Audio", new Icon(MaterialDesignIcon.CLOUD_UPLOAD));
    upload.setOnAction(e -> {
        responseDebug.clear();
    });
    upload.disableProperty().bind(audioRecordingService.recordingProperty()
            .or(audioRecordingService.getAudioChunkFiles().emptyProperty()));

    VBox controls = new VBox(15.0, start, stop, upload, responseDebug);
    ...
}
Reading in bytes
The next step is to loop over the list of audio chunk files.
The AudioRecordingService will automatically split up the recording in chunks.
The length of each chunk can be defined by the chunkRecordTime parameter of the
startRecording
function. Having smaller chunks allows easier processing of the binary data.
After we cleared the text area, we loop over the audio chunk files and read the bytes of each file into a local byte array.
public BasicView() {
    ...
    Button upload = new Button("Upload Audio", new Icon(MaterialDesignIcon.CLOUD_UPLOAD));
    upload.setOnAction(e -> {
        responseDebug.clear();

        for (String audioChunk : audioRecordingService.getAudioChunkFiles()) {
            File file = new File(audioRecordingService.getAudioFolder(), audioChunk);
            try (ByteArrayOutputStream baos = new ByteArrayOutputStream();
                 FileInputStream fis = new FileInputStream(file)) {
                int bytesRead;
                byte[] bytes = new byte[4096];
                while ((bytesRead = fis.read(bytes)) != -1) {
                    baos.write(bytes, 0, bytesRead);
                }
            } catch (IOException ex) {
                ex.printStackTrace();
            }
        }
    });
    ...
}
Calling the remote function
The final step is to pass the read bytes into our remote function. For that, we need to build an
instance of the remote function object from
RemoteFunctionBuilder.
The remote function object is then used to receive an instance of a GluonObservableObject.
The observable object will eventually hold the response of the call to the AWS Lambda function as
a plain string. When the call completes successfully, we add the value of the response to the text
area.
We also pass one parameter called s3Key to the remote function, which will be used as the name
for the S3 object in the Amazon S3 bucket. Here we simply use the name of the audio file that was
being recorded.
public BasicView() {
...
try (ByteArrayOutputStream baos = new ByteArrayOutputStream();
FileInputStream fis = new FileInputStream(file)) {
int bytesRead;
byte[] bytes = new byte[4096];
while ((bytesRead = fis.read(bytes)) != -1) {
baos.write(bytes, 0, bytesRead);
}
RemoteFunctionObject storeAudio = RemoteFunctionBuilder.create("storeAudio")
.param("s3Key", audioChunk)
.rawBody(baos.toByteArray())
.object();
GluonObservableObject<String> response = storeAudio.call(String.class);
response.stateProperty().addListener((obs, ov, nv) -> {
if (nv == ConnectState.FAILED) {
response.getException().printStackTrace();
} else if (nv == ConnectState.SUCCEEDED) {
responseDebug.appendText("Audio File " + audioChunk + " successfully uploaded to Amazon S3 bucket.");
responseDebug.appendText("\nResponse from AWS Lambda was:");
responseDebug.appendText("\n" + response.get());
responseDebug.appendText("\n===================");
}
});
} catch (IOException ex) {
ex.printStackTrace();
}
...
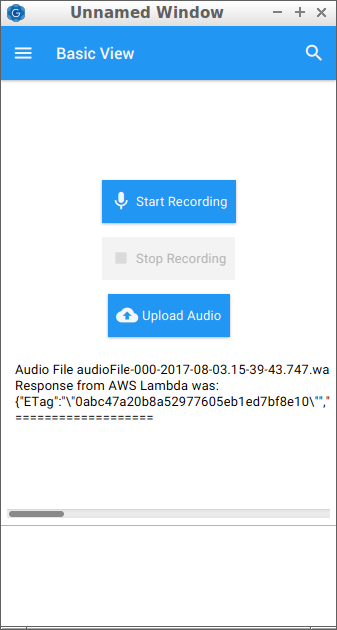
}We have now completed the application and you can try and launch it again. Start recording a few seconds of audio, stop recording and click the upload button. It might take a while to upload the bytes to S3. After it completes, the text area contains the response with the URL of the audio file in Amazon S3. The AWS Lambda function specified that the file should be publicly readable by anyone, so you can try to open the URL in a browser and you’ll be able to hear the recording if your browser knows how to handle playing WAV audio files.
Now is also a good time to try your application on a mobile device.
For Android, connect your device to your computer and run ./gradlew androidInstall
For iOS, connect the device to your computer and run ./gradlew launchIOSDevice
Conclusion
During this tutorial we have accomplished several tasks:
-
We have used Gluon Dashboard to create a remote function that invokes an AWS Lambda function.
-
We have added the Audio Recording Charm Down plugin to the mobile application.
-
We have created a mobile application that records an audio stream and pushes the stream to the remote function.
One of the main advantages from the point of view of a mobile/front-end developer is the complete decoupling from the back-end side implementation: no HTTP protocols, no AWS credentials, no JSON parsing, no URL dependencies…: the client side just gets observable data, that can be easily rendered using the controls provided by the Gluon Mobile library. This allows fast development, short time to market and making changes in the back-end without the need for resubmitting the application to the app stores.
If you have made it this far, congratulations, we hope this sample and the documentation was helpful to you! In case you have any questions, your first stop should be the Gluon support page, where you can access the latest CloudLink documentation. Gluon also recommends the community to support each other over at the Gluon StackOverflow page. Finally, Gluon offers commercial support as well, to kick start your projects.