The GluonSQLite App is a Gluon code sample. For a full list of Gluon code samples, refer to the Gluon website.
In this tutorial, we’ll explain how to create the GluonSQLite application that can be deployed on desktop, Android and iOS devices. It makes use of the different SQLite drivers to create and read embedded databases.
Before you start, make sure to check the list of prerequisites for each platform, and you have installed the Gluon plugin for your IDE.
Note: This tutorial will use the plugin for IntelliJ, but it works as well on NetBeans and Eclipse.
Code: The code for this project can be found in the samples repository at
GitHub. The sample is located under the directory gluon-SQLite.
The reader can clone this repository or create the entire project from scratch, based on the following steps.
SQL and SQLite
While technically it is possible to directly access a database (the only difficulty is in choosing the right dependencies (some of the latest mysql jars don’t work well on iOS, for instance)), it is not really good practice to allow this from the client application. In these kinds of situations it typically makes better sense to use the backend services available on each platform to reach out over the network (e.g. using something like Gluon CloudLink).
However, things are different when the problem is just having a local database embedded within your application (i.e. embedded within the device), where there is no security involved and there is no need to access any outside backend service.
For this type of database, SQLite is the perfect solution, since it’s an <em>embedded SQL database engine</em>, purposefully intended for these situations. Have a look at this post explaining when SQLite is more appropriate than MySQL or any other server-based RDBMS.
In order to create real cross-platform Java applications, it is encouraged to stick with Java standards as much as possible. The JDBC API is the standard way in Java to talk with relational databases. Luckily, there are drivers for both Android and iOS systems that provide a JDBC interface on top of the SQLite functionality offered by the platforms. By using these drivers, developers can use familiar and portable JDBC technology in their mobile and desktop applications.
Choosing the right Java SQLite to JDBC wrapper
If you find your project listed in those bulleted points where SQLite is more convenient, and you want to provide a cross-platform solution, the next step is deciding which of the several implementations that include a JDBC driver, is required for each platform.
Desktop and Embedded
While xerial SQLite JDBC library requires no configuration, since native libraries for major OSs, including Windows, macOS and Linux, are assembled into a single JAR file, it is not suitable for mobile devices. The latest version 3.8.11.2 works fine on desktop, but it has some issues on embedded devices (Raspberry Pi), where an older 3.7.2 works:
dependencies{

    // https://github.com/xerial/sqlite-jdbc
    desktopRuntime 'org.xerial:sqlite-jdbc:3.8.11.2'

    // https://github.com/xerial/sqlite-jdbc
    embeddedRuntime 'org.xerial:sqlite-jdbc:3.7.2'

}
Since Gluon’s IDE plugins already allow deployment on embedded devices as well, using the remote platform concept (check the documentation), if you want to use it, make sure you have the added the JDK for ARM from here to your JDK 8 distro, and add this to your build.gradle file, with your own settings:
jfxmobile {
    embedded {
        remotePlatforms {
            Pi50 {
                host = '192.168.1.10'
                username = 'pi'
                password = 'raspberry'
                execPrefix = 'sudo '
                workingDir = '/home/pi/Gluon/'
                jreLocation = '/usr/lib/jvm/jdk-8-oracle-arm32-vfp-hflt'
            }
        }
    }
}
And finally select the runEmbedded task to deploy and run the project on your Raspberry Pi.
Mobile
For Android we rely on SQLDroid, a JDBC driver for Android’s SQLite database android.database.sqlite.SQLiteDatabase, given that Android doesn’t provide one.
For iOS we’ll use SQLiteJDBC, already bundled with RoboVM, based on the original version by Christian Werner. We don’t need any dependency, but we must link the SQLite package using the forceLinkClasses option:
dependencies{

    // https://github.com/SQLDroid/SQLDroid
    androidRuntime 'org.sqldroid:sqldroid:1.0.3'

    // iOS: no extra dependency required, SQLite is bundled
}

jfxmobile {
    ios {
        forceLinkClasses = [ 'SQLite.**.*']
    }
}
Creating the project
Let’s create a new project using the Gluon plugin. Open IntelliJ and click Create New Project… and select Gluon on the left. Select Gluon Mobile - Single View Project from the list of available Projects:

Add the package name and change the main class name. Select embedded platform as well.
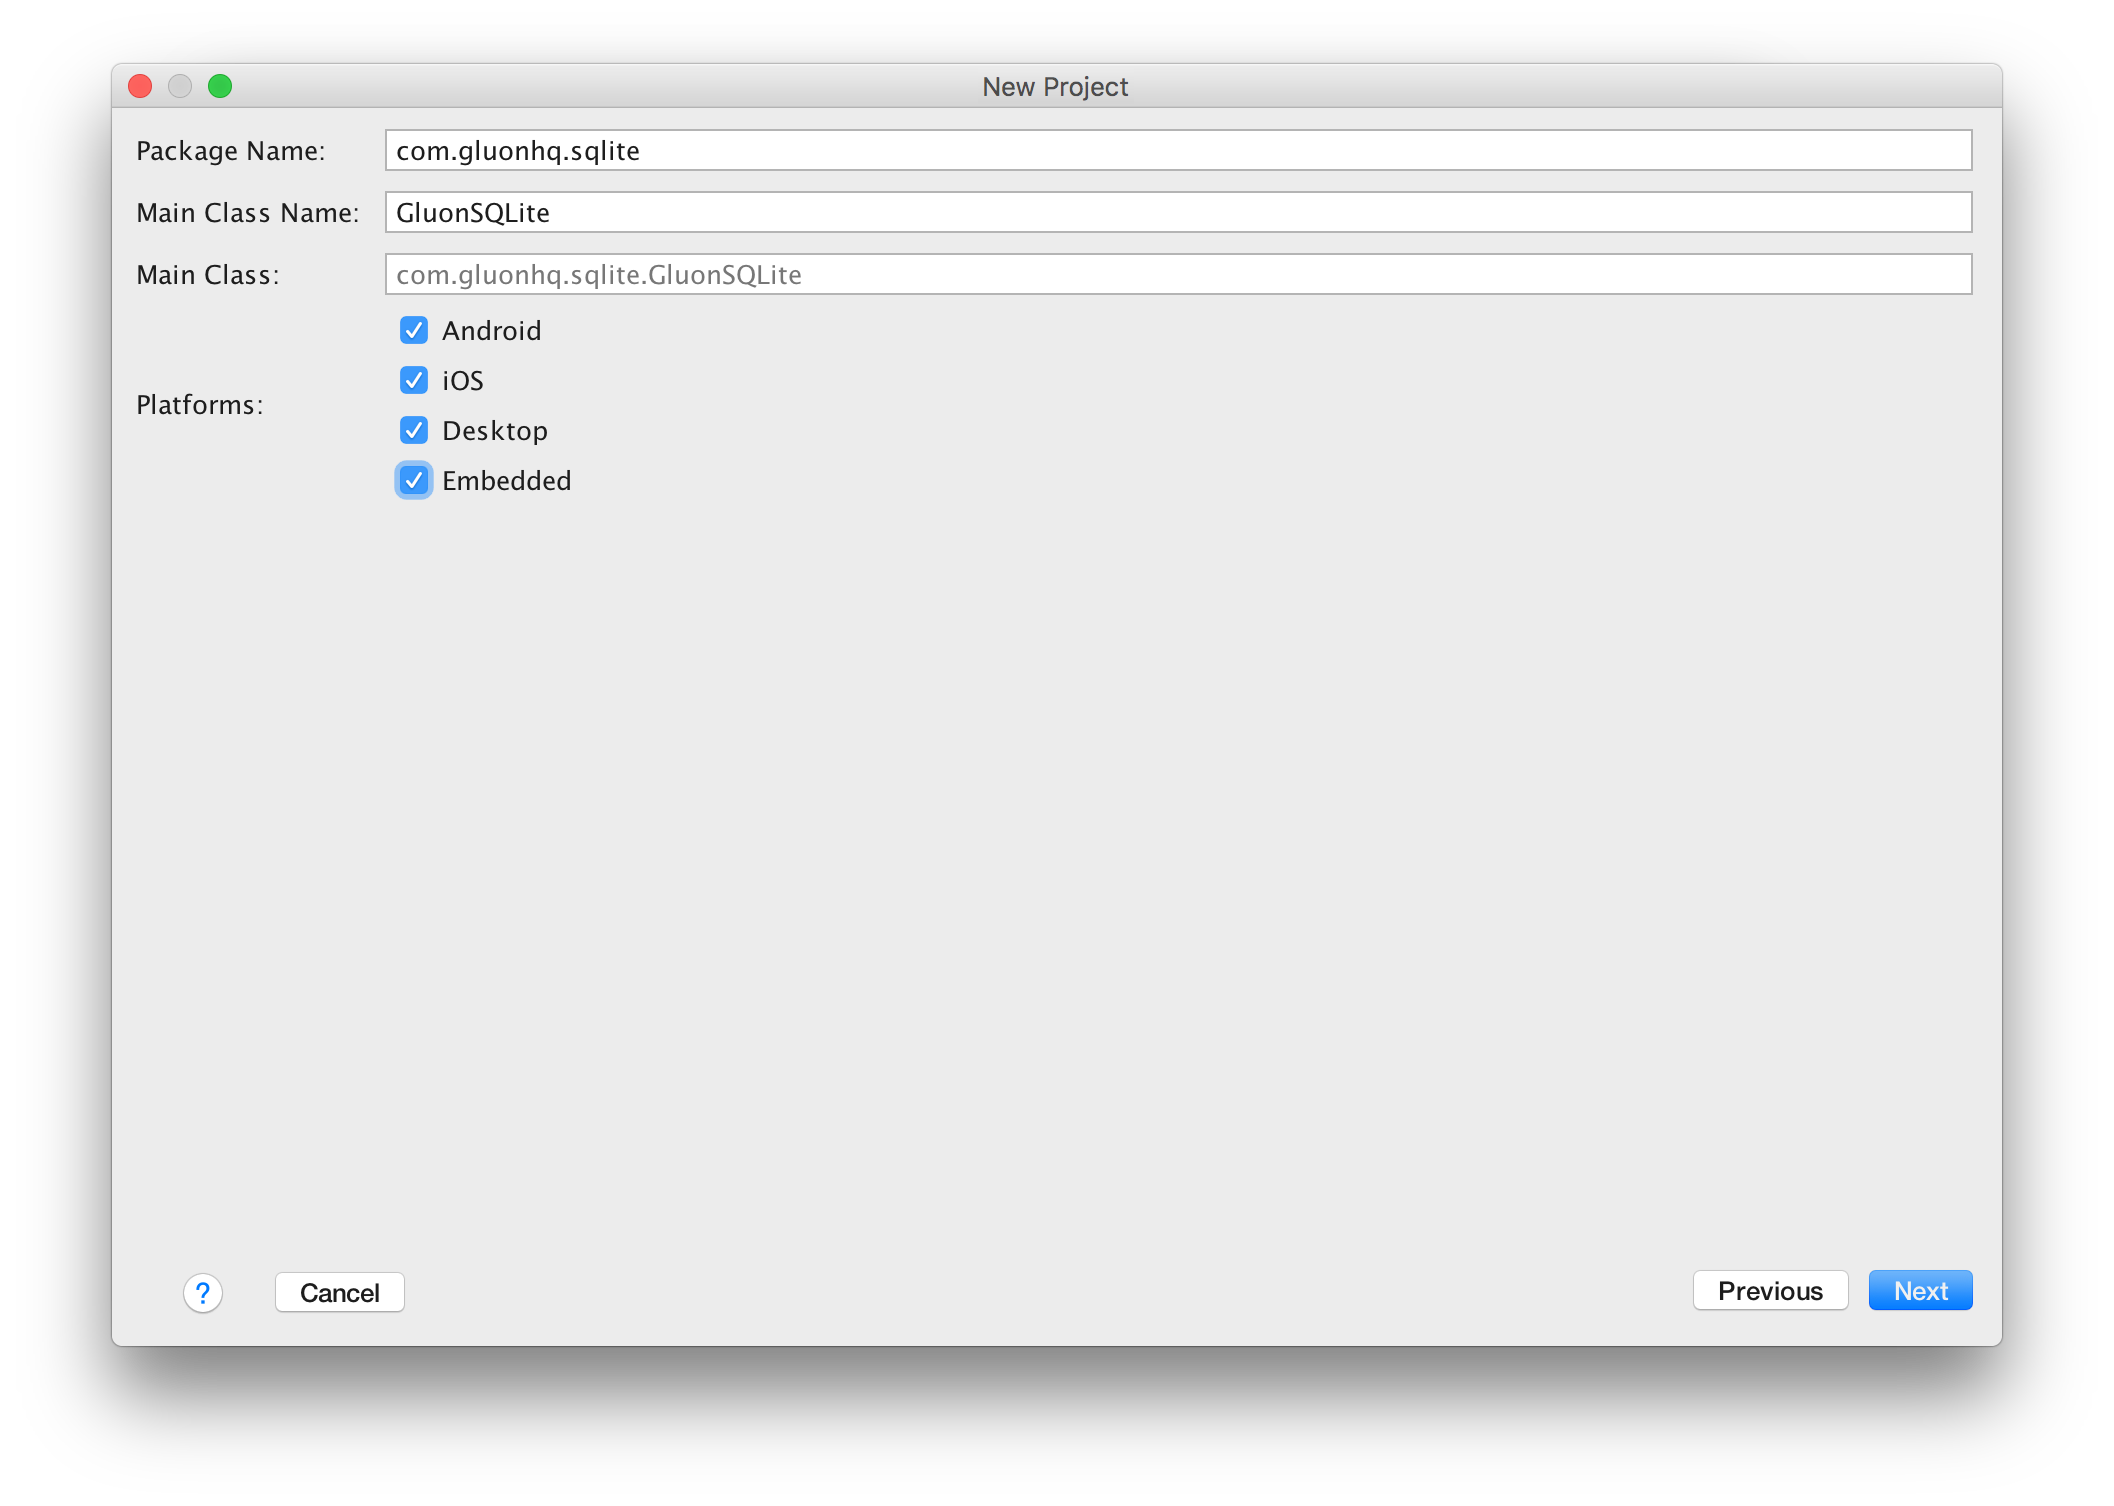
Press Next and select a valid JDK 8:
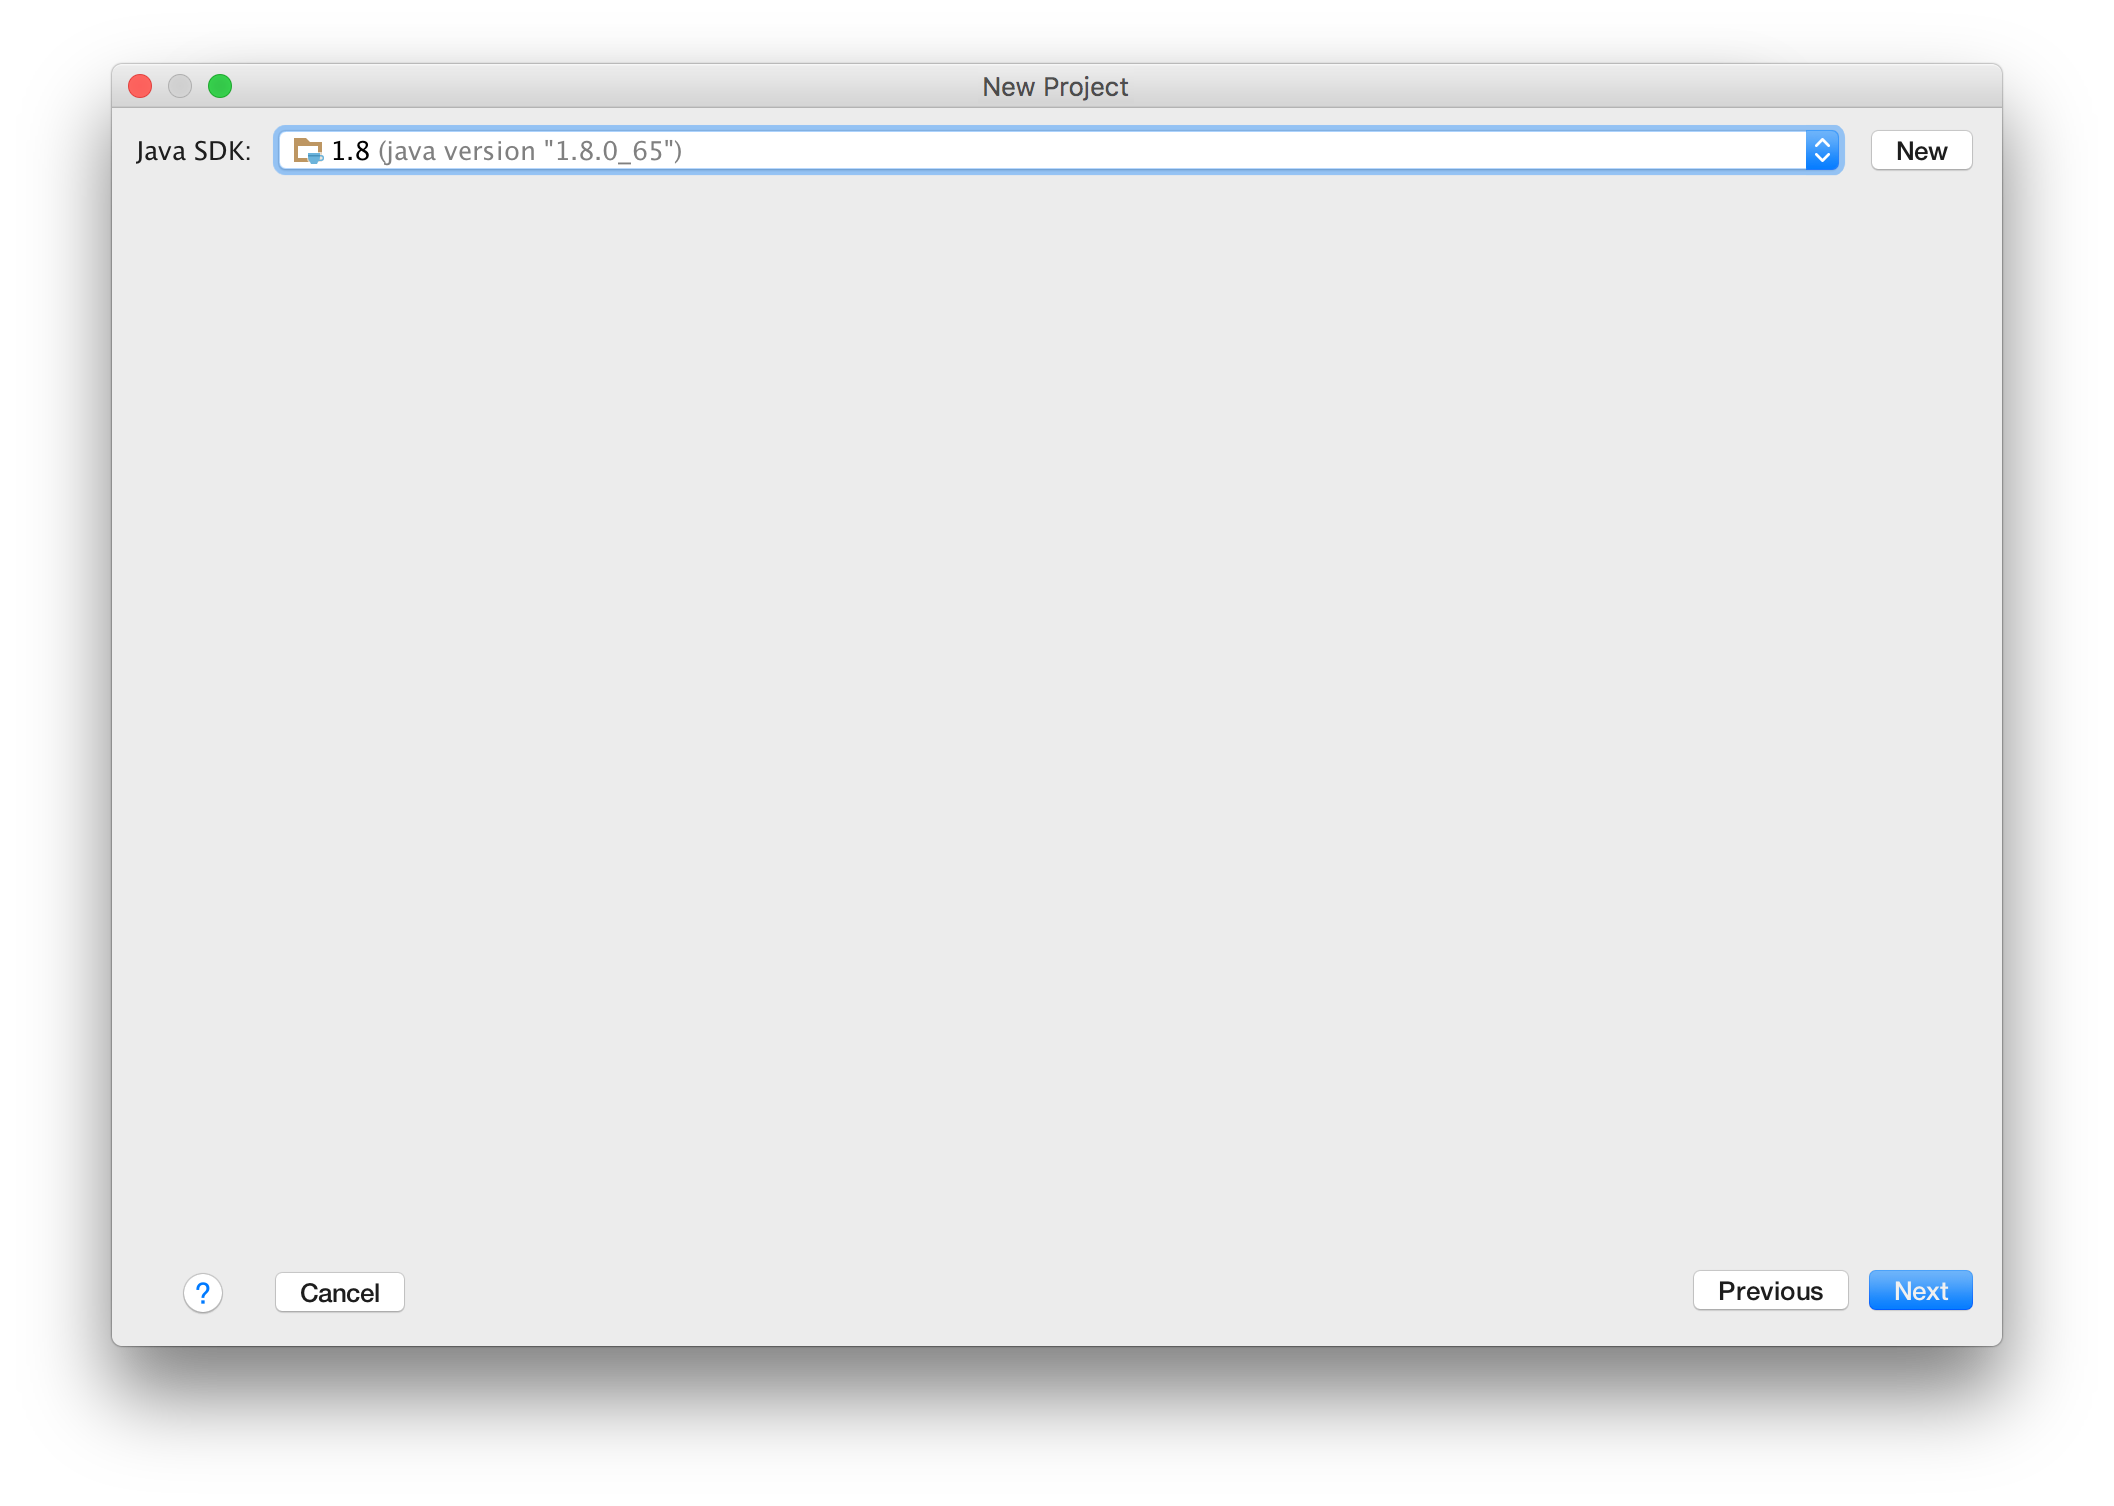
Press Next and add the project name, and modify the location if required.
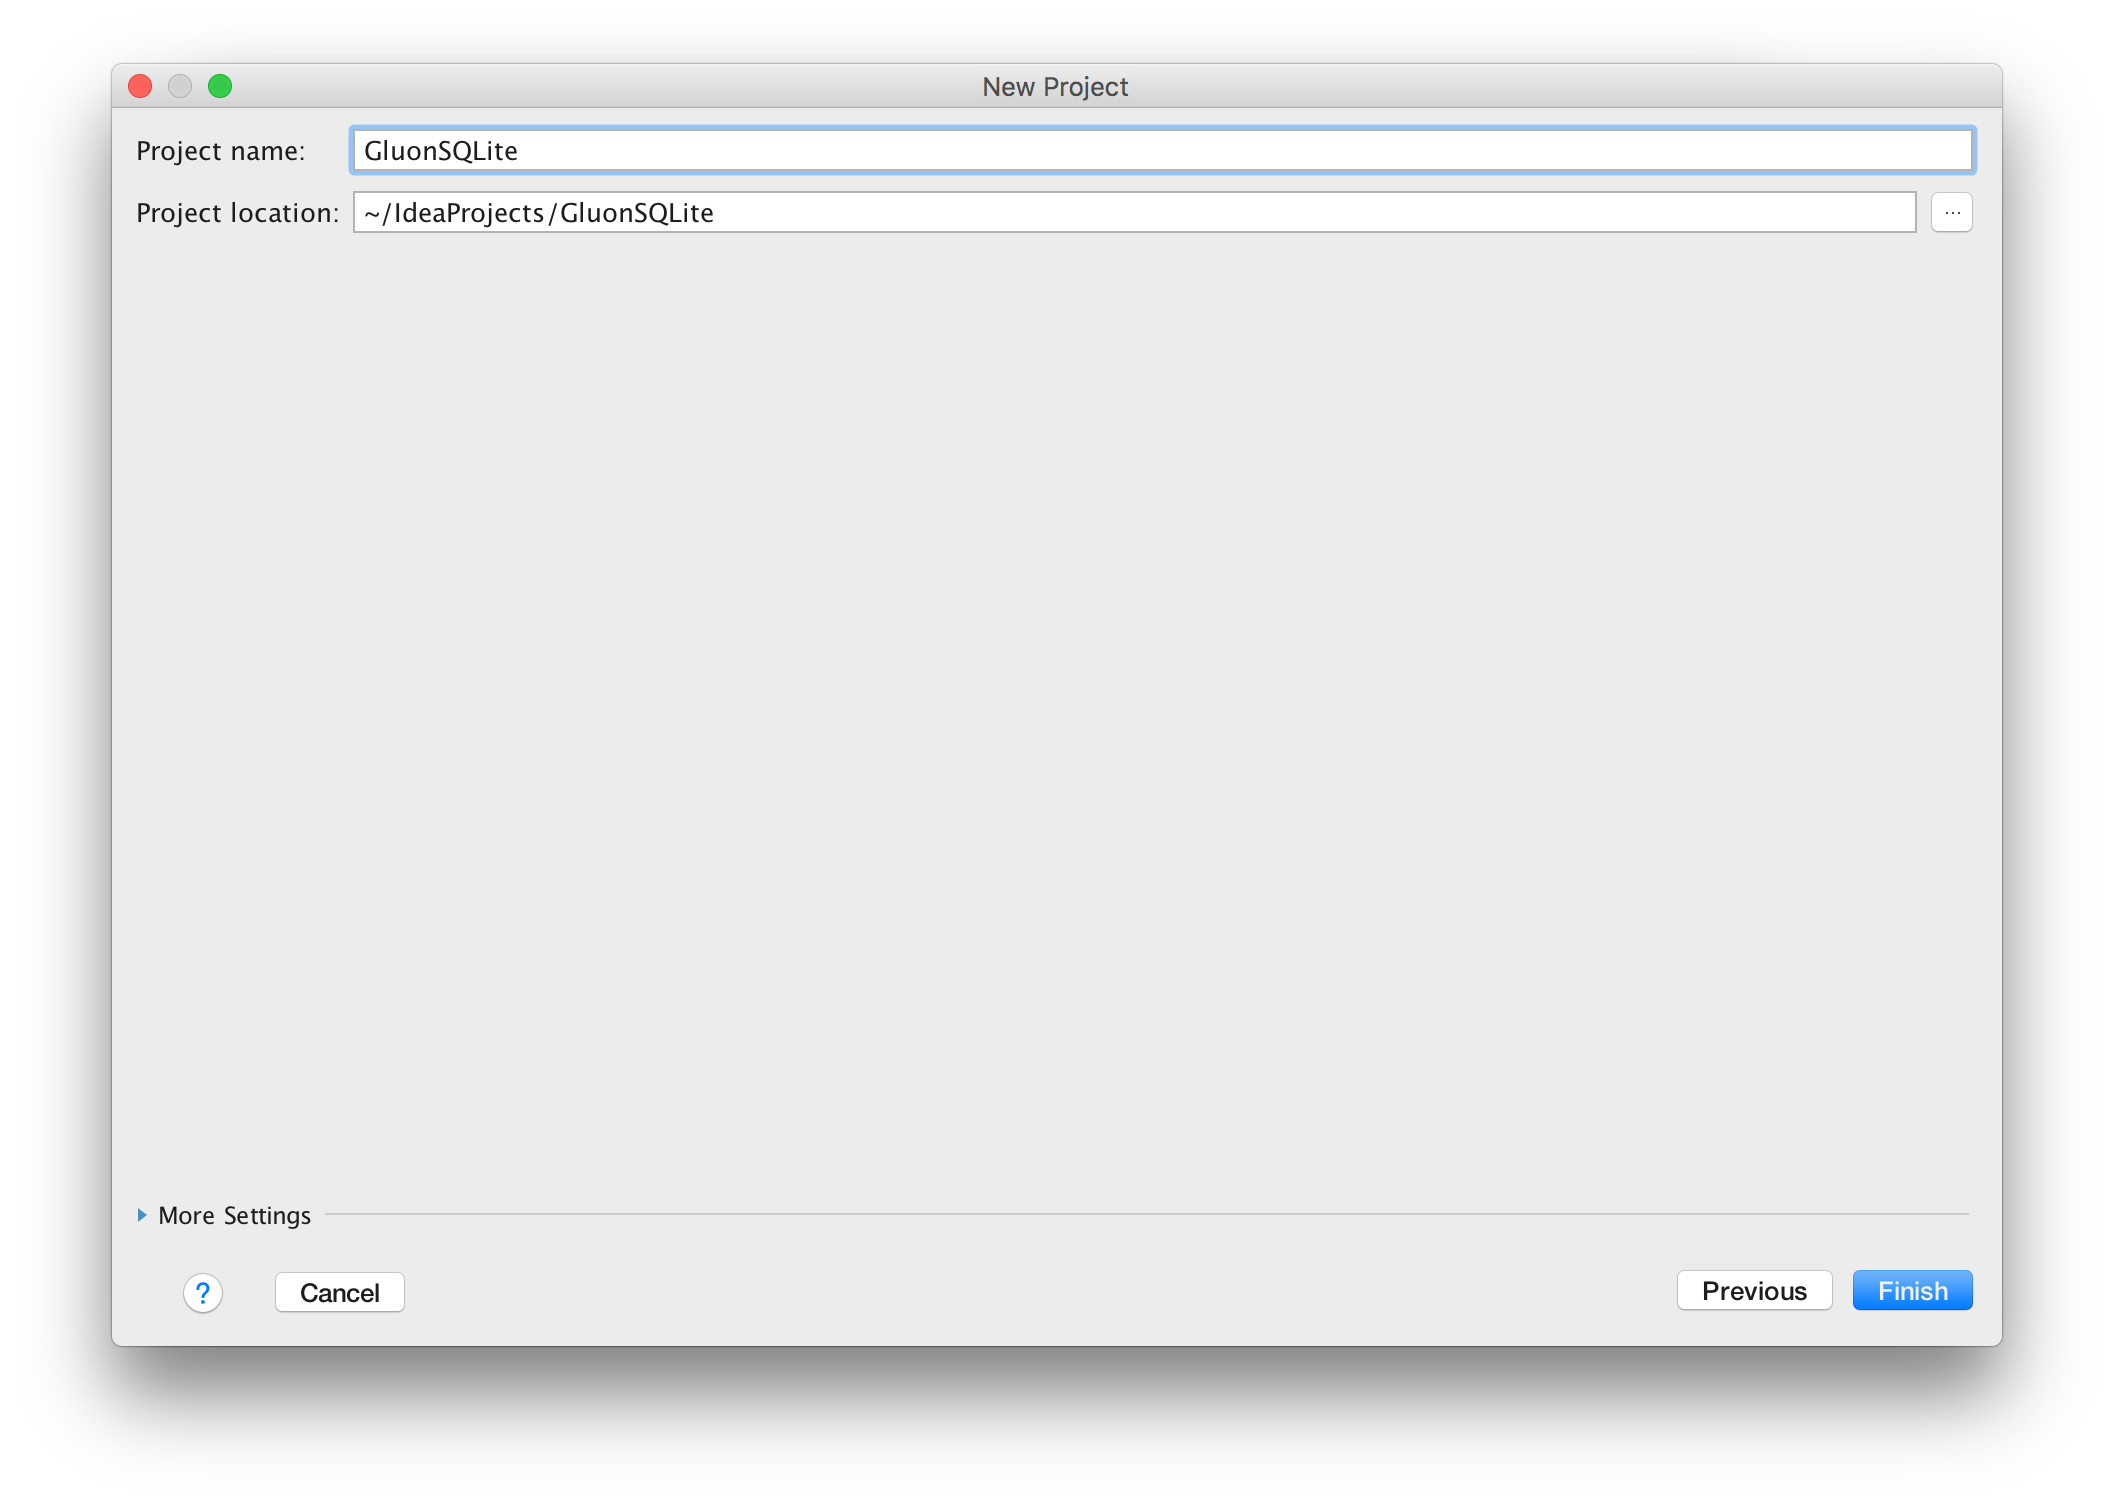
Press Next, and finally import the gradle project. Review the settings and click Ok.
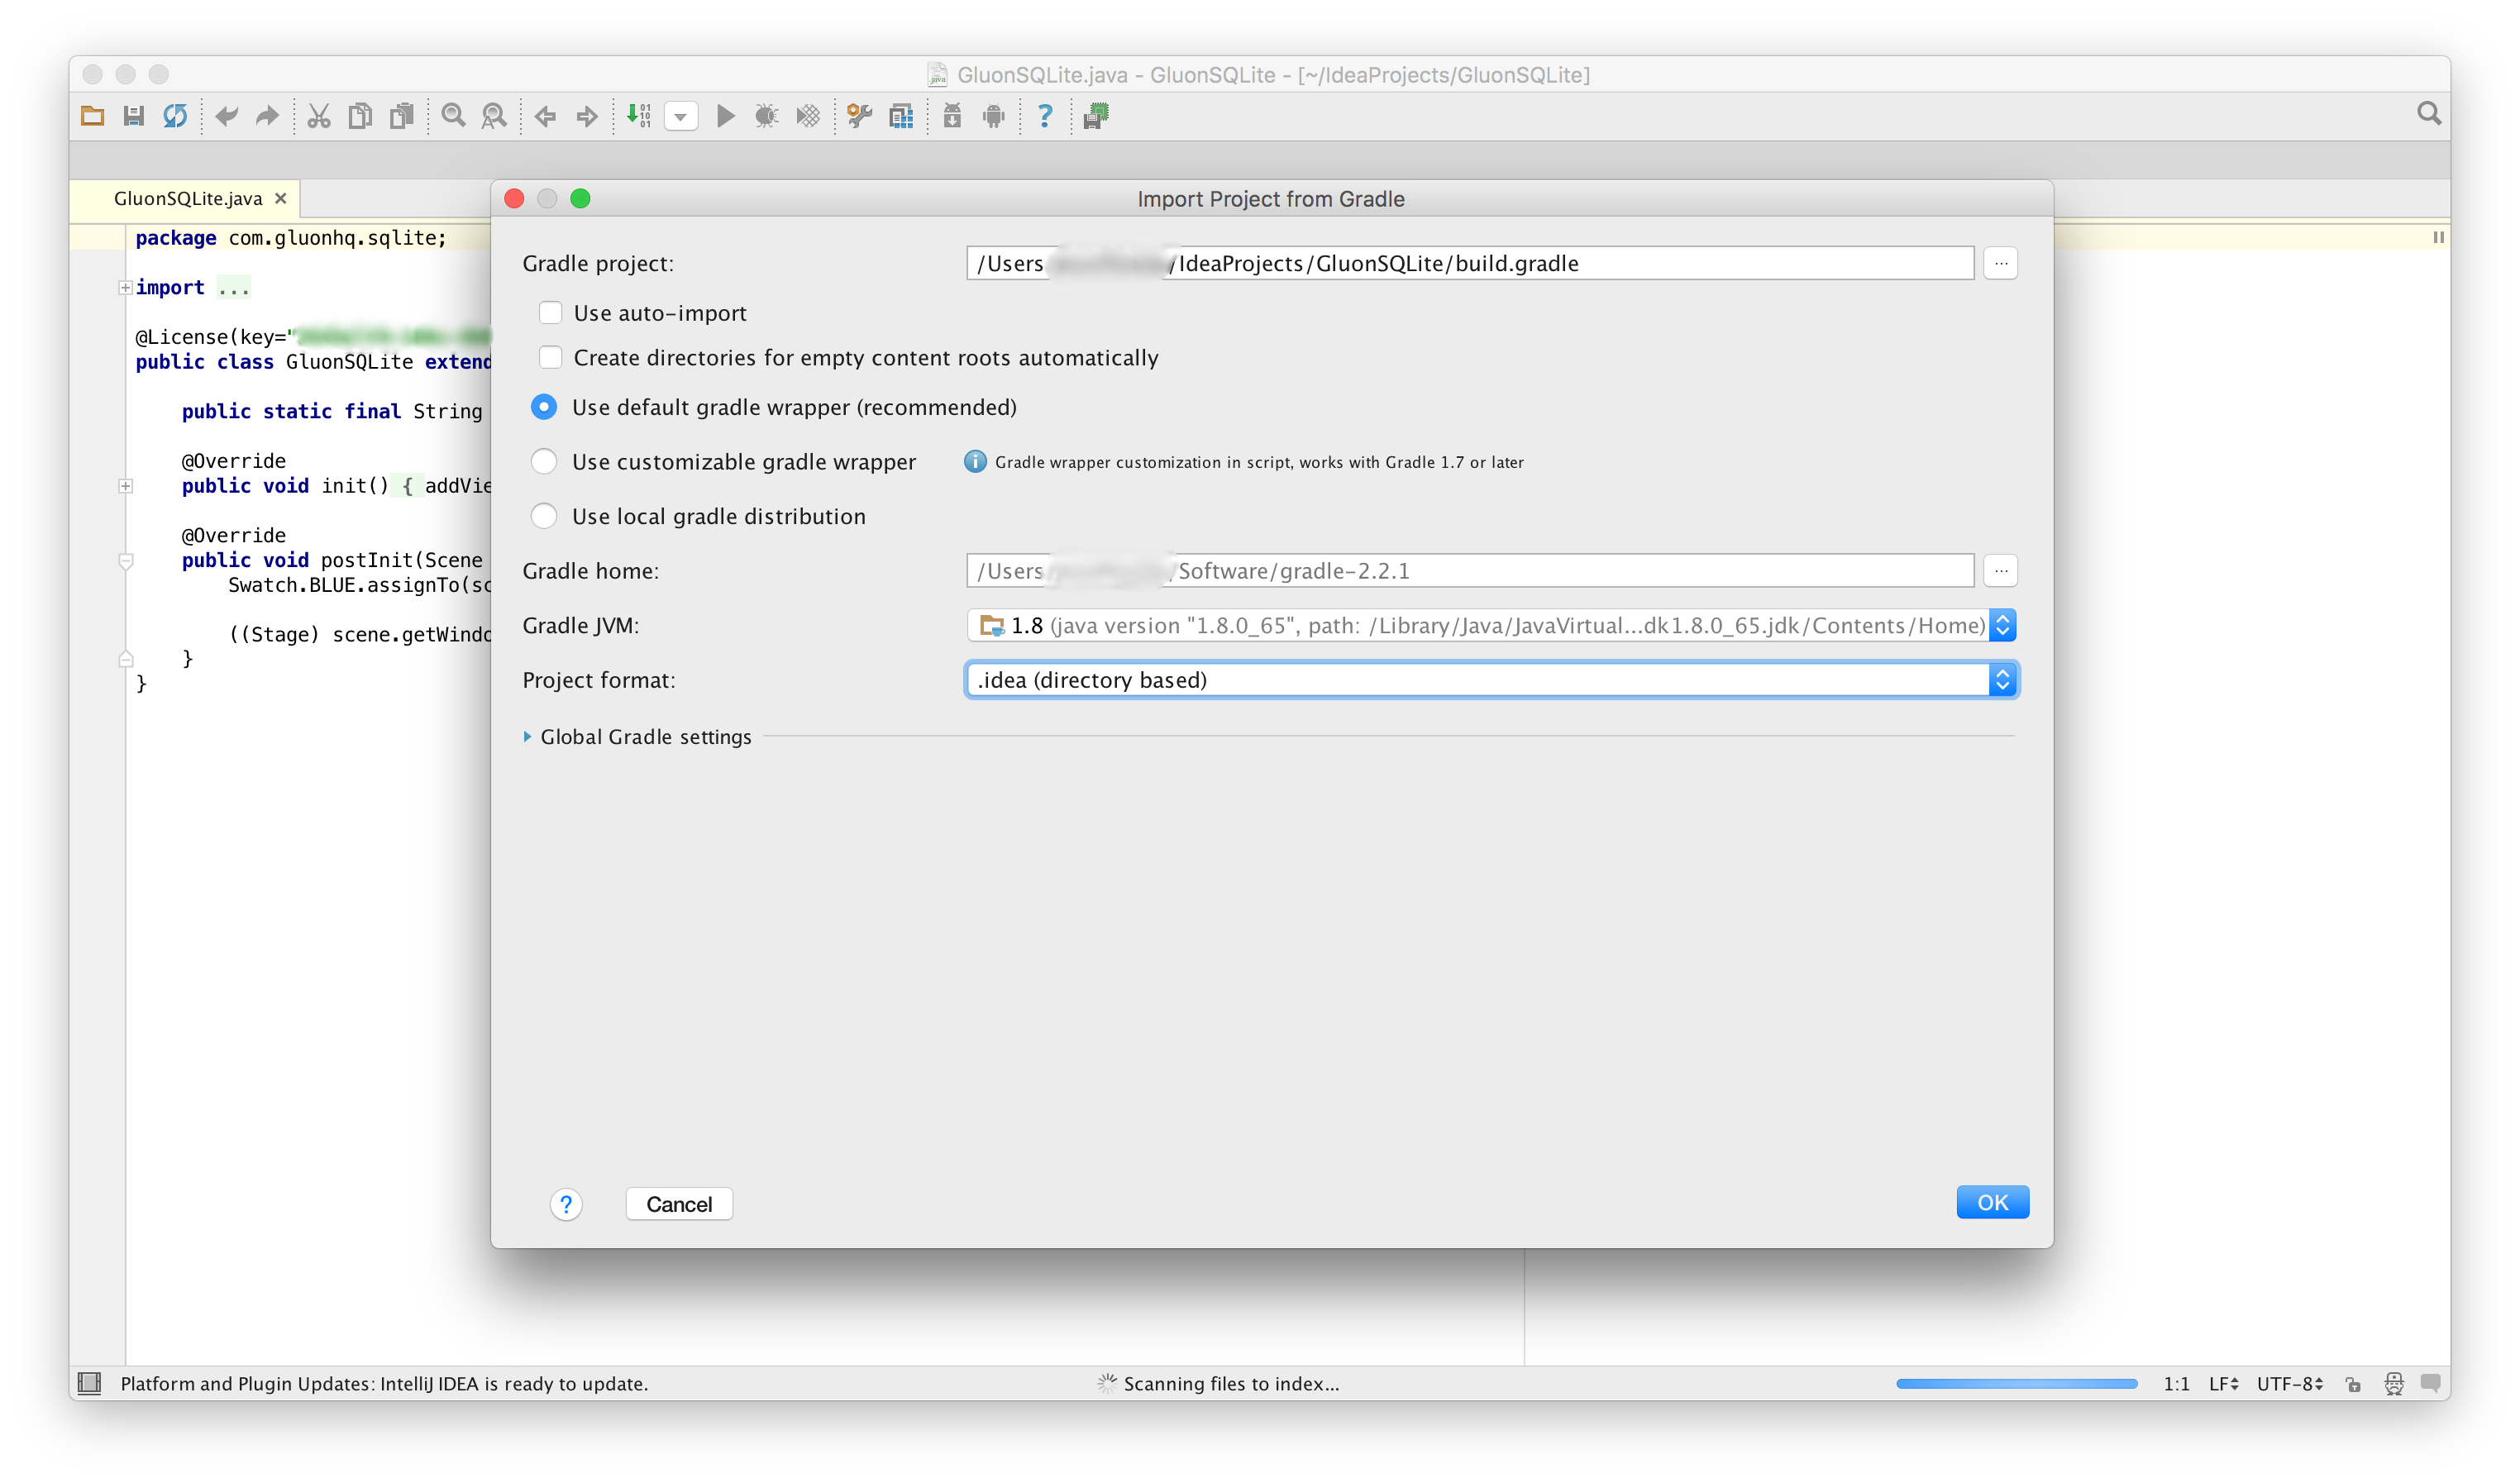
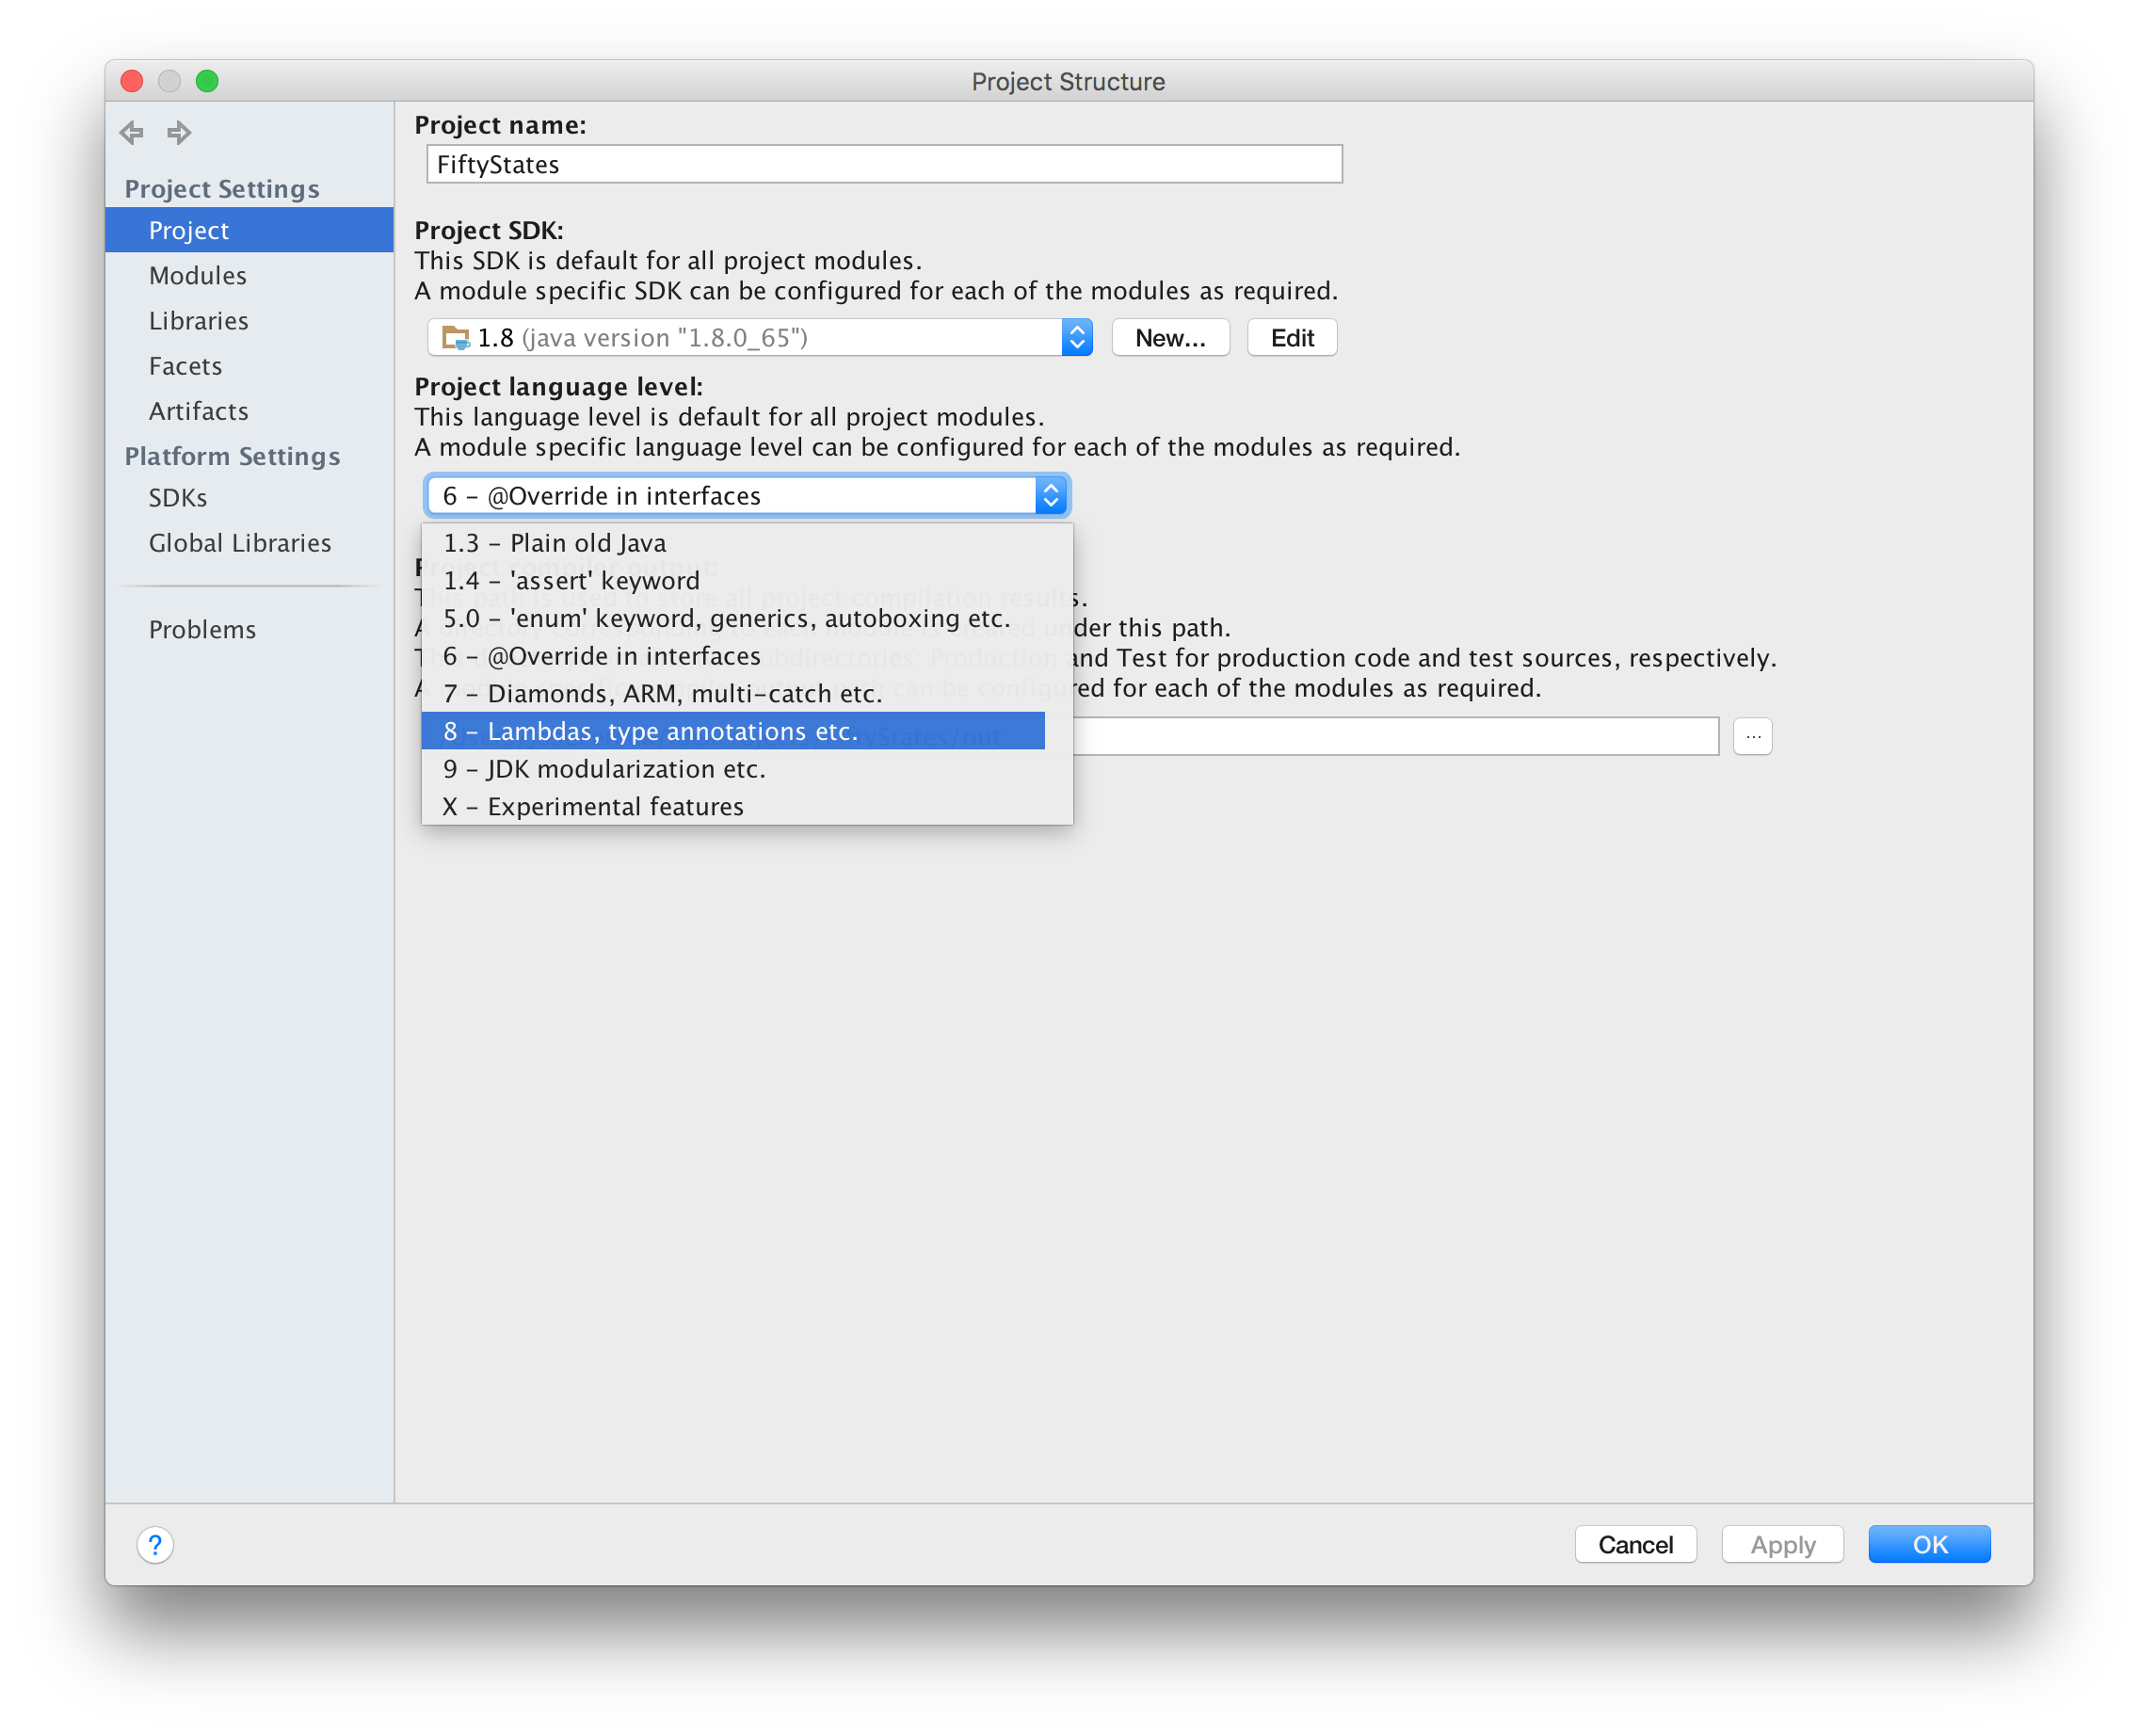
The project will be created and opened. If necessary, go to File→Project Structure and switch the project language level to level 8:
The main class GluonSQLite is shown, containing the code to instantiate the view BasicView.

Modifying the project
Let’s start modifying the default project to create our GluonSQLite application. Our purpose is adding a ListView control to the main view where we’ll display records of an embedded database.
The Model
We’ll use a simple Person POJO like this:
public class Person {

    private String firstName;
    private String lastName;

    public Person(String firstName, String lastName) {
        this.firstName = firstName;
        this.lastName = lastName;
    }

    // setters and getters
}
The build script
As we have mentioned above, we’ll have to add the SQLite drivers as dependencies. This is the build.gradle file:
buildscript {
    repositories {
        jcenter()
    }
    dependencies {
        classpath 'org.javafxports:jfxmobile-plugin:1.3.4'
    }
}

apply plugin: 'org.javafxports.jfxmobile'

repositories {
    jcenter()
    maven {
        url 'https://nexus.gluonhq.com/nexus/content/repositories/releases'
    }
}

mainClassName = 'com.gluonhq.sqlite.GluonSQLite'

dependencies {
    compile 'com.gluonhq:charm:5.0.0'

    // Desktop SQL -> https://github.com/xerial/sqlite-jdbc
    desktopRuntime 'org.xerial:sqlite-jdbc:3.8.11.2'

    // Embedded SQL -> https://github.com/xerial/sqlite-jdbc
    embeddedRuntime 'org.xerial:sqlite-jdbc:3.7.2'

    // Android SQL -> https://github.com/SQLDroid/SQLDroid
    androidRuntime 'org.sqldroid:sqldroid:1.0.3'

    // ios SQL -> https://github.com/robovm/robovm 1.8
}

jfxmobile {
    downConfig {
        version = '3.8.0'
        plugins 'display', 'lifecycle', 'statusbar', 'storage'
    }
    android {
        manifest = 'src/android/AndroidManifest.xml'
    }
    ios {
        infoPList = file('src/ios/Default-Info.plist')
        forceLinkClasses = [
                'com.gluonhq.**.*',
                'javax.annotations.**.*',
                'javax.inject.**.*',
                'javax.json.**.*',
                'org.glassfish.json.**.*',
                'SQLite.**.*'
        ]
    }
    embedded {
        remotePlatforms {
            raspberry {
                host = '192.168.1.10'
                username = 'pi'
                password = 'raspberry'
                workingDir = '/home/pi/Gluon'
                jreLocation = '/usr/lib/jvm/jdk-8-oracle-arm32-vfp-hflt'
                execPrefix = 'sudo'
            }
        }
    }
}
In our main class, we’ll set fullscreen dimensions if running on embedded.
public class GluonSQLite extends MobileApplication {

    @Override
    public void postInit(Scene scene) {
        ...
        if (System.getProperty("os.arch").toUpperCase().contains("ARM") &&
                !Platform.isIOS()  && !Platform.isAndroid()) {
            ((Stage) scene.getWindow()).setFullScreen(true);
            ((Stage) scene.getWindow()).setFullScreenExitHint("");
        }
    }
}
Loading the driver
In our single view, we’ll load the driver, depending the platform we are running on. We’ll set two lists, one for the database, and one to log all the sql messages.
public class BasicView extends View {

    public BasicView() {

        try {
            Class c = null;
            if (Platform.isAndroid()) {
                c = Class.forName("org.sqldroid.SQLDroidDriver");
            } else if (Platform.isIOS()) {
                c = Class.forName("SQLite.JDBCDriver");
            } else if (Platform.isDesktop()) {
                c = Class.forName("org.sqlite.JDBC");
            } else if (System.getProperty("os.arch").toUpperCase().contains("ARM")) {
                c = Class.forName("org.sqlite.JDBC");
            }
        } catch (ClassNotFoundException e) {
            System.out.println("Error class not found " + e);
        }

        final Label labelDB = new Label("DB Items");
        labelDB.setStyle("-fx-text-fill: gray");
        VBox vListDB = new VBox(10, labelDB, listView);
        vListDB.setAlignment(Pos.CENTER_LEFT);

        status = new ListView<>();

        final Label labelStatus = new Label("Log");
        labelStatus.setStyle("-fx-text-fill: gray");
        VBox vListStatus = new VBox(10, labelStatus, status);
        vListStatus.setAlignment(Pos.CENTER_LEFT);

        VBox controls = new VBox(20, vListDB, vListStatus);
        controls.setPadding(new Insets(10));
        controls.setAlignment(Pos.CENTER);

        setCenter(controls);
    }

    @Override
    protected void updateAppBar(AppBar appBar) {
        appBar.setNavIcon(MaterialDesignIcon.PERSON_PIN.button());
        appBar.setTitleText("SQLite");
        appBar.getActionItems().addAll(
                MaterialDesignIcon.CREATE_NEW_FOLDER.button(e -> createDB()),
                MaterialDesignIcon.ATTACH_FILE.button(e -> readDB()),
                MaterialDesignIcon.REMOVE.button(e -> {
                    listView.getItems().clear();
                    status.getItems().clear();
                }));
    }

    private void createDB() {

    }

    private void readDB() {

    }
}
Creating an embedded database
In the first place, let’s add a method to: create a database, add a table to it, insert some records, and then read those records to the list view. We’ll use the storage service to access the private storage of each platform.
public class BasicView extends View {
private final static String DB_NAME = "sample.db";
private Connection connection = null;
private Statement stmt;
private ResultSet rs;
private void createDB() {
status.getItems().add("Creating a Database with SQLite");
File dir;
String dbUrl = "jdbc:sqlite:";
try {
dir = Services.get(StorageService.class)
.map(s -> s.getPrivateStorage().get())
.orElseThrow(() -> new IOException("Error: PrivateStorage not available"));
File db = new File (dir, DB_NAME);
dbUrl = dbUrl + db.getAbsolutePath();
} catch (IOException ex) {
status.getItems().add("Error " + ex.getMessage());
return;
}
try {
connection = DriverManager.getConnection(dbUrl);
status.getItems().add("Connection established: " + dbUrl);
} catch (SQLException ex) {
status.getItems().add("Error establishing connection " + ex.getSQLState());
return;
}
List<Person> list = new ArrayList<>();
try {
if (connection != null) {
stmt = connection.createStatement();
stmt.setQueryTimeout(30);
status.getItems().add("Creating table 'person'...");
stmt.executeUpdate("drop table if exists person");
stmt.executeUpdate("create table person (id integer, firstname string, lastname string)");
stmt.executeUpdate("insert into person values(1, 'Johan', 'Vos')");
stmt.executeUpdate("insert into person values(2, 'Eugene', 'Ryzhikov')");
stmt.executeUpdate("insert into person values(3, 'Joeri', 'Sykora')");
stmt.executeUpdate("insert into person values(4, 'Erwin', 'Morrhey')");
status.getItems().add("Retrieving records from table 'person'...");
rs = stmt.executeQuery("select * from person");
while (rs.next()) {
String firstname = rs.getString("firstname");
String lastname = rs.getString("lastname");
list.add(new Person(firstname, lastname));
}
status.getItems().add("End creating table and retrieving records");
}
} catch (SQLException ex) {
status.getItems().add("SQL error " + ex.getMessage());
} finally {
try {
if (rs != null) {
rs.close();
}
} catch (SQLException ex) {
status.getItems().add("SQL error " + ex.getSQLState());
}
try {
if (stmt != null) {
stmt.close();
}
} catch (SQLException ex) {
status.getItems().add("SQL error " + ex.getSQLState());
}
}
listView.getItems().setAll(list);
}
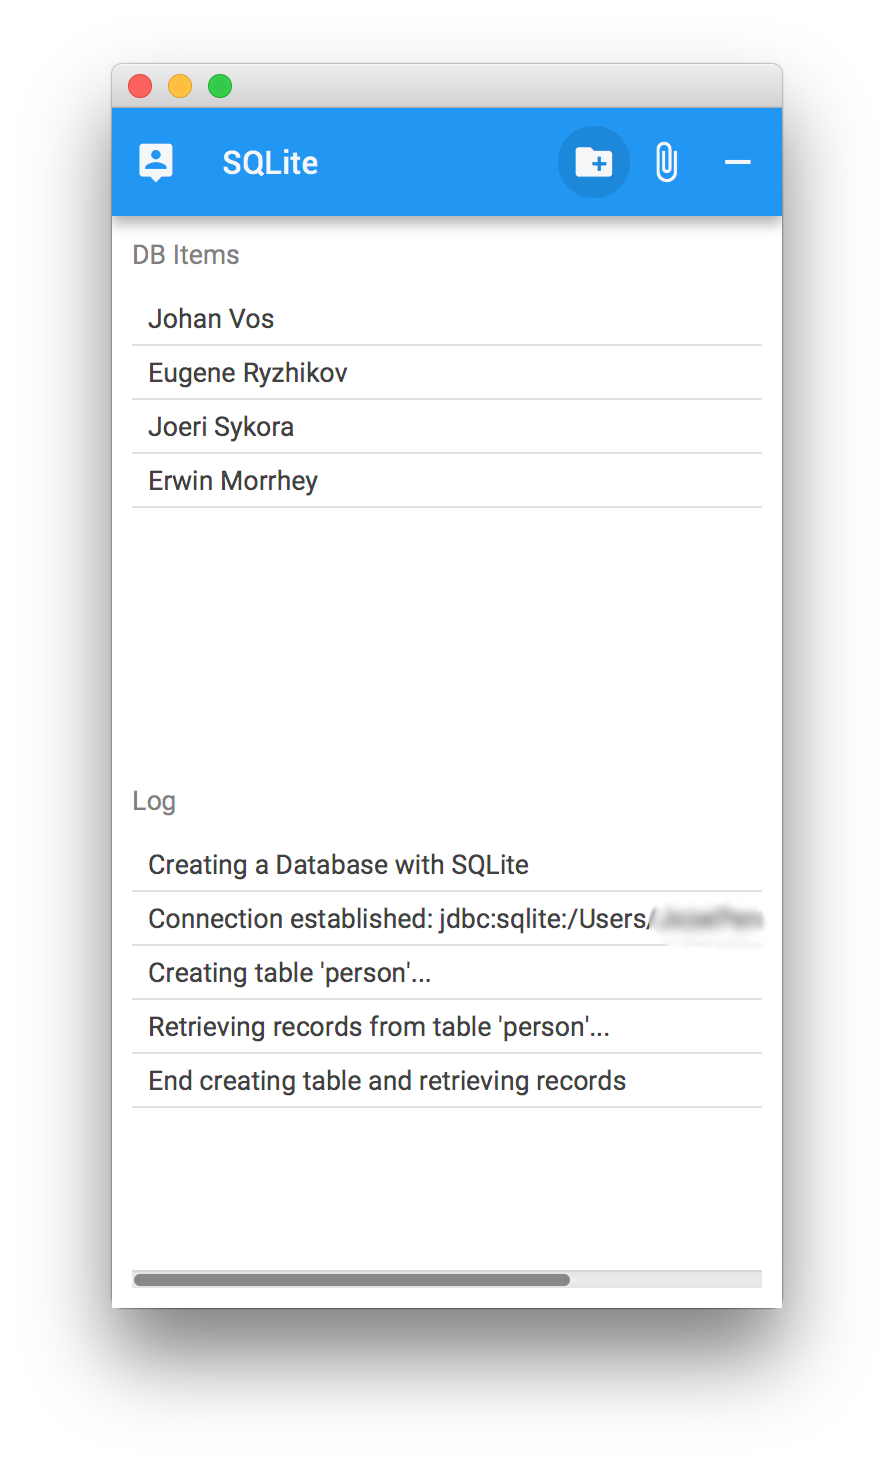
}We can run the application on our desktop to check that everything is working.
Reading a database
Sometimes you may want to provide an existing database to the project, avoiding the need to create it all over again. This can be achieved by adding the database file to the resources folder that is bundled inside the JAR/APK/IPA file.
So the problem now is how to extract the file and move it to the proper folder of the app?
This can be easily done in all the platforms with this utility method:
public class DBUtils {

    public static void copyDatabase(String pathIni, String pathEnd, String name)  {

        try (InputStream myInput = GluonSQLite.class.getResourceAsStream(pathIni+name)) {
            String outFileName =  pathEnd + "/" + name;
            try (OutputStream myOutput = new FileOutputStream(outFileName)) {
                byte[] buffer = new byte[1024];
                int length;
                while ((length = myInput.read(buffer)) > 0) {
                    myOutput.write(buffer, 0, length);
                }
                myOutput.flush();

            } catch (IOException ex) {
                System.out.println("Error " + ex);
            }
        } catch (IOException ex) {
            System.out.println("Error " + ex);
        }
    }
}
If you have cloned the project from the repository, there’s already a database file available, sample.db under resources/databases.
Now, all we need to do is just copy this db file to the app private location using PlatformFactory.getPlatform().getPrivateStorage().
public class BasicView extends View {
private void readDB() {
status.getItems().add("Reading an existing Database with SQLite");
String dbUrl = "jdbc:sqlite:";
if (JavaFXPlatform.isDesktop()) {
dbUrl= dbUrl + ":resource:" + GluonSQLite.class.getResource("/databases/" + DB_NAME).toExternalForm();
} else {
File dir;
try {
dir = Services.get(StorageService.class)
.map(s -> s.getPrivateStorage().get())
.orElseThrow(() -> new IOException("Error: PrivateStorage not available"));
File db = new File (dir, DB_NAME);
status.getItems().add("Copying database " + DB_NAME + " to private storage");
DBUtils.copyDatabase("/databases/", dir.getAbsolutePath(), DB_NAME);
dbUrl = dbUrl + db.getAbsolutePath();
} catch (IOException ex) {
status.getItems().add("IO error " + ex.getMessage());
return;
}
}
try {
connection = DriverManager.getConnection(dbUrl);
status.getItems().add("Connection established: " + dbUrl);
} catch (SQLException ex) {
status.getItems().add("Error establishing connection " +ex.getSQLState());
return;
}
List<Person> list = new ArrayList<>();
try {
DatabaseMetaData md = connection.getMetaData();
rs = md.getTables(null, null, "%", null);
status.getItems().add("Tables in Database " + DB_NAME);
while (rs.next()) {
status.getItems().add(" * " + rs.getString(3));
}
status.getItems().add("Reading table 'person'");
stmt = connection.createStatement();
rs = stmt.executeQuery("select * from person");
while (rs.next()) {
String firstname = rs.getString("firstname");
String lastname = rs.getString("lastname");
list.add(new Person(firstname, lastname));
}
status.getItems().add("End reading table and retrieving records");
} catch (SQLException ex) {
status.getItems().add("SQL error " + ex.getSQLState());
} finally {
try {
if (rs != null) {
rs.close();
}
} catch (SQLException ex) {
status.getItems().add("SQL error " + ex.getSQLState());
}
try {
if (stmt != null) {
stmt.close();
}
} catch (SQLException ex) {
status.getItems().add("SQL error " + ex.getSQLState());
}
}
listView.getItems().setAll(list);
}
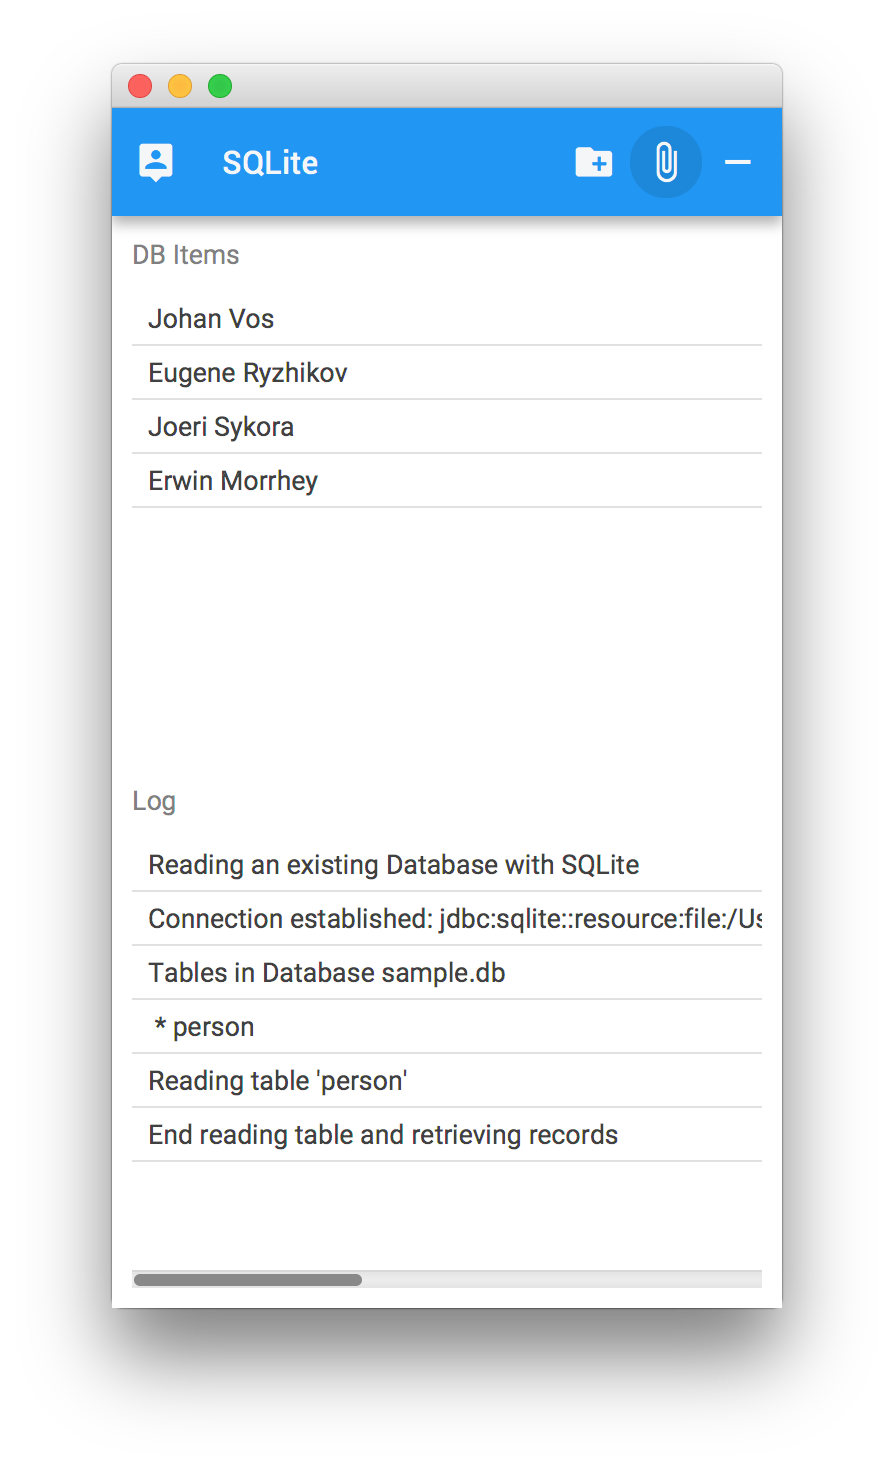
}Again, we can run the application on our desktop to check that everything is working.
Deploy to mobile
Once we have accomplished all the previous steps, it is time to build the application and deploy it on your mobile, to test it and check about performance.
Open the Gradle window, select Tasks→other→androidInstall or Tasks→other→launchIOSDevice to deploy on Android or iOS devices.

Deploy to embedded
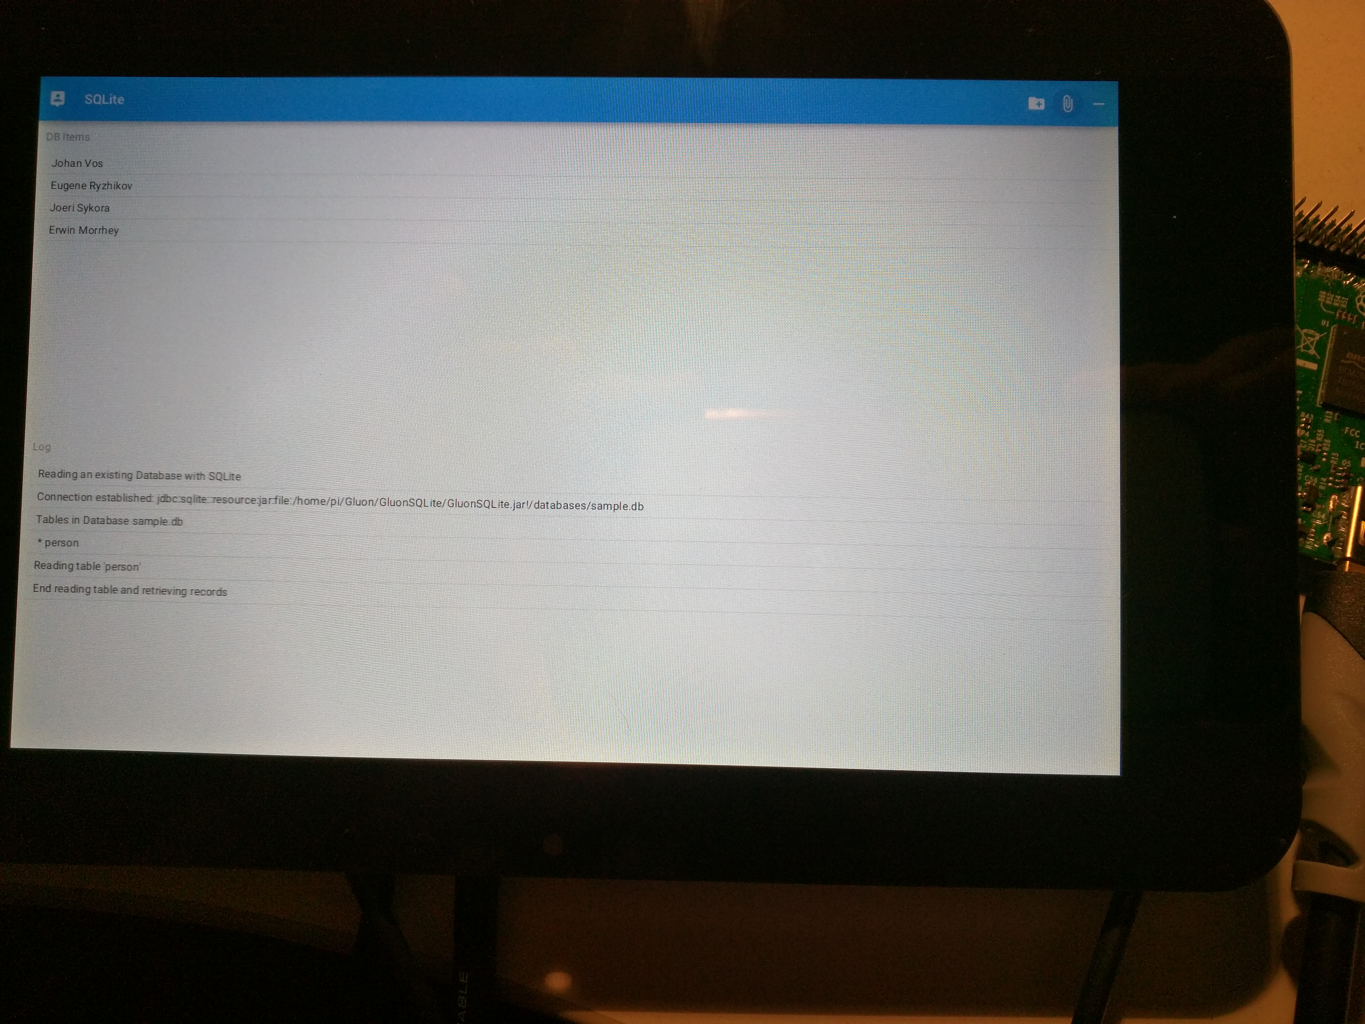
If we have a Raspberry Pi, and we have previosly configured the JDK8 for ARM and the build.gradle script, now we can also build the application and deploy it on it, to test it and check about performance.
Check that the Pi is connected to the network, so it can be reached via ssh. Open the Gradle window, select Tasks→other→runEmbedded to deploy on the embedded device.
Conclusion
Throughout this post we’ve covered in detail the basic steps to use an SQLite driver within a Single View project to create or read an existing database. While this is clearly a very minimal use of the SQLite possibilities, with this sample we have shown how it can be easily added to your cross-platform project to embed and use a database.
If you have made it this far, congratulations, we hope this sample, and the documentation was helpful to you! In case you have any questions, your first stop should be the Gluon support page, where you can access the latest documentation and the Gluon knowledge base. Gluon also recommends the community to support each other over at the Gluon StackOverflow page. Finally, Gluon offers commercial support as well, to kick start your projects.