1. Gluon Connect Overview
Gluon Connect is a client-side library that simplifies binding your data from any source and format to your JavaFX UI controls. It works by retrieving data from a DataSource and converting that data from a specific format with a Converter into JavaFX observable lists and observable objects that can be used directly in JavaFX UI controls. Gluon Connect is designed to allow developers to easily add support for custom data sources and data formats.
By default, Gluon Connect already provides easy-to-use implementations for the most commonly used data sources:
-
Gluon CloudLink
-
File provider
-
REST provider
2. Gluon CloudLink
The Gluon Connect library is the client-side counterpart of the Gluon CloudLink service. In case your application needs to make data persistent or shared across different devices or users, you can use the Gluon Connect library in combination with Gluon CloudLink. Gluon Connect communicates with the Gluon CloudLink service in two directions:
-
your data is stored in the cloud when you want to, and
-
your data is updated locally when it is updated in the cloud.
In addition, Gluon CloudLink provides the ability to link your Gluon Application with another back end infrastructure by activating and configuring a Connector. You can read more about this in the section on integrating with enterprise and cloud systems at the Gluon CloudLink documentation website.
2.1. Application Registration
Before you can start using the Gluon Connect library in combination with Gluon CloudLink, you will need to register your application on the Gluon CloudLink Portal. If you don’t have an account yet, go to the Gluon CloudLink Product page and click on "Sign up" under "Free". Once you are successfully logged in, you are able to create a Gluon Application by providing a name in the form on the Dashboard page. An application key and secret will be generated for you when the application is created. You will need that key and secret later on.
2.2. Storage and Synchronization
Gluon CloudLink makes sure your data is consistent across the different devices. Depending on your preferences, changes on one device propagate immediately to other devices. Or they might only be stored in Gluon CloudLink and the devices will manually request the latest version whenever they want.
2.2.1. Gluon CloudLink Access Point
The GluonClient class is the access point from Gluon Connect to the Gluon CloudLink service. You can get a reference to a GluonClient
instance by using the GluonClientBuilder:
GluonClient gluonClient = GluonClientBuilder.create()
        .credentials(new GluonCredentials(applicationKey, applicationSecret))
        .build();
The credentials are the key/secret pair of your application which you obtained from the dashboard on the Gluon CloudLink Portal. Gluon Connect will use these credentials to sign all requests that are made to the Gluon CloudLink service. This is required in order to let the Gluon CloudLink service know on whose behalf a request is made.
2.2.2. Operation Mode
When working with Gluon CloudLink, there are currently two operation modes you can choose from:
-
CLOUD_FIRST: data will be persisted on and retrieved from the Gluon CloudLink service -
LOCAL_ONLY: data will only be persisted on and retrieved from the local file system of the device where the application is running on
The default operation mode is CLOUD_FIRST, but can be explicitly specified when creating the GluonClient instance:
// specify LOCAL_ONLY operation mode
GluonClient gluonClient = GluonClientBuilder.create()
        .credentials(new GluonCredentials(applicationKey, applicationSecret))
        .operationMode(OperationMode.LOCAL_ONLY)
        .build();
2.2.3. Working with Data
Once you have a GluonClient reference, you can start storing and retrieving data. There are two different types of
data that can be managed in Gluon CloudLink:
-
single objects, and
-
lists of objects
Because these objects and lists are maintained remotely, we will call them remote entities. Every remote entity is identified by a unique string identifier.
Retrieving lists
For example, retrieving a remote list with the identifier notes can be done with the following code:
GluonObservableList<Note> notes = DataProvider.retrieveList(gluonClient.createListDataReader("notes", Note.class));
ListView<Note> notesListView = new ListView<>(notes);
In its simplest form the createListDataReader
method returns an instance of GluonObservableList
without any synchronization flags.
You may have noticed that GluonClient doesn’t provide a method for creating a new list. That is because a
Gluon CloudLink list always exists. When a list is retrieved the first time, an empty list will automatically be
created for you.
Retrieving objects
A remote object works a bit differently than a list, because in contrast to a list, an object does have the notion of existence.
This explains why we have three methods for managing remote objects:
createObjectDataReader, createObjectDataWriter and createObjectDataRemover.
// store the object
Note note = new Note();
note.setContent("This is the content for the note.");
GluonObservableObject<Note> gluonNote = DataProvider.storeObject(note, gluonClient.createObjectDataWriter("a-single-note", Note.class));

// retrieve the object
GluonObservableObject<Note> gluonNote = DataProvider.retrieveObject(gluonClient.createObjectDataReader("a-single-note", Note.class));

// remove the object
DataProvider.removeObject(gluonNote, gluonClient.createObjectDataRemover());
GluonObservable ConnectState
All the operations on the DataProvider are asynchronous in nature and are executed in a separate background thread.
You can listen for changes on the stateProperty
of the returned GluonObservable object to monitor the progress of the background operation. To know when your object
or list is ready to be used, you can also listen for the initializedProperty instead.
Listed below you’ll find a number of common use cases when working with remote entities.
Create a remote object when it does not yet exist
When retrieving an object from Gluon CloudLink, you can detect if this object was already stored previously by using the following pattern:
GluonObservableObject<Note> gluonNote = DataProvider.retrieveObject(gluonClient.createObjectDataReader("a-single-note", Note.class));
gluonNote.initializedProperty().addListener((observable, ov, nv) -> {
    if (nv) {
        if (gluonNote.get() == null) {
            // object not yet stored, initiate it now with a new object and store it
            gluonNote.set(new Note("This is some text for the note"));
            gluonClient.push(gluonNote);
        } else {
            // object already stored previously
            Note note = gluonNote.get();
            System.out.println("Stored note: " + note.getContent());
        }
    }
});
Initialize an empty list with default objects
When you retrieve a list for the first time, an empty list will be created for you by the Gluon CloudLink service. Sometimes you wish to populate this empty list with default objects. You can do that with the following pattern:
GluonObservableList<Note> gluonNotes = DataProvider.retrieveList(gluonClient.createListDataReader("notes", Note.class));
gluonNotes.initializedProperty().addListener((observable, ov, nv) -> {
    if (nv && gluonNotes.isEmpty()) {
        // initialize the list with some default notes
        gluonNotes.addAll(
                new Note("Text for note number 1."),
                new Note("Text for note number 2.")
        );
        gluonClient.push(gluonNotes);
    }
});
Detecting failures when working with remote entities
If you notice that data isn’t stored or retrieved correctly, it might be that an exception occurred during the process.
You can check the exceptionProperty
on the GluonObservable object to see what exactly went wrong.
GluonObservableObject<Note> gluonNote = DataProvider.retrieveObject(gluonClient.createObjectDataReader("a-single-note", Note.class));
gluonNote.stateProperty().addListener((observable, oldState, newState) -> {
    if (newState == ConnectState.FAILED) {
        if (gluonNote.getException() != null) {
            gluonNote.getException().printStackTrace();
        }
    }
});
2.2.4. Supported Data Types
The second parameter of the createListDataReader, createObjectDataReader and createObjectDataWriter methods on
GluonClient specifies the type of data that is stored in the remote entity. Gluon CloudLink supports three different
data types: String, Map and custom classes. Inside a Map and for the fields of a custom class, the following field
types can be used:
-
boolean and BooleanProperty
-
int and IntegerProperty
-
long and LongProperty
-
float and FloatProperty
-
double and DoubleProperty
-
String and StringProperty
The Property types are a requirement when a remote entity is retrieved in combination with the OBJECT_WRITE_THROUGH
synchronization flag. See the Synchronizing data section for more information on these
synchronization flags.
String
The String data type is the most basic of the three supported types. It simply stores and retrieves instances of string.
Map
The Map represents a convenient key/value store in which you can store arbitrary data. It is the most flexible data type, but is less type safe. The keys of the Map must be strings, while the value can be any of the supported field types that are listed above. If the Map contains a value that is not supported, those values will be ignored when storing or retrieving data.
Custom Class
As a final option, you can define your data structure inside a Custom Class. Gluon Connect will inspect the provided class for all declared fields of which the type matches any of the supported field types. Note that only non-static fields and non-final primitive fields will be considered. All other field declarations will be ignored when storing or retrieving data.
2.2.5. Synchronizing data
By default, no synchronization flags are configured when calling any of the methods we mentioned above. To enable
synchronization, you can pass any of the SyncFlag
enum constants to the method. There are four different types of SyncFlag:
-
OBJECT_READ_THROUGH: changes that occur on an object in Gluon CloudLink will be reflected to the fields on the local object
-
OBJECT_WRITE_THROUGH: changes on Observable fields will be automatically written to the object in Gluon CloudLink
-
LIST_READ_THROUGH: adding and removing objects on a list in Gluon CloudLink will be reflected to the local list
-
LIST_WRITE_THROUGH: adding and removing objects locally will automatically add and remove them to the list in Gluon CloudLink
Note that the OBJECT_READ_THROUGH and LIST_READ_THROUGH flags don’t have any effect when used in combination with the
LOCAL_ONLY operation mode.
Also note that the OBJECT_WRITE_THROUGH flag will only work on non-static Observable fields of a Custom Class.
As an example, the code snippet below retrieves an instance of GluonObservableList
that is configured to be list read and list write through. This means that any changes that are done on the client,
either adding or removing items, are propagated back to the Gluon CloudLink service. The reverse is true as well: all
changes that occur in Gluon CloudLink will be reflected back to the local list. Changes that occur on the objects inside
the list won’t be propagated.
GluonObservableList<Note> notes = DataProvider.retrieveList(gluonClient.createListDataReader("notes", Note.class, SyncFlag.LIST_READ_THROUGH, SyncFlag.LIST_WRITE_THROUGH));2.3. User Authentication
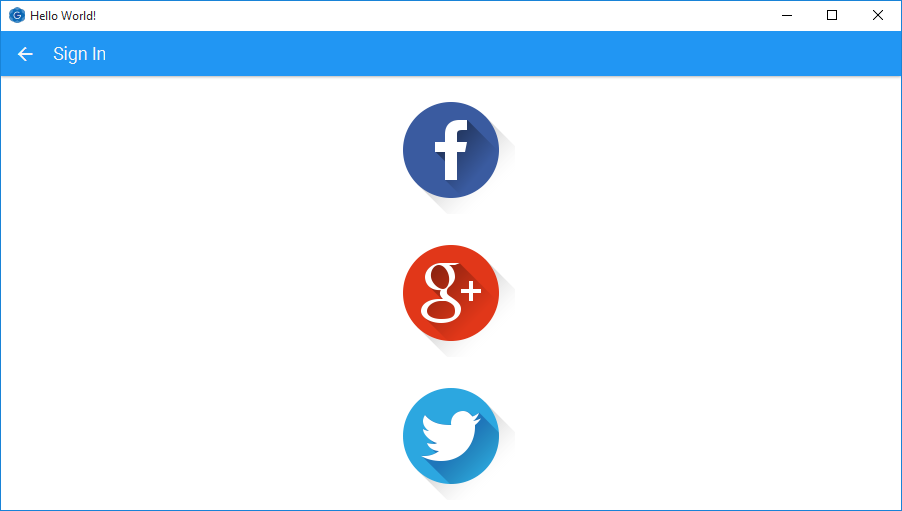
Gluon Connect allows you to link your data to an authenticated user. The following authentication methods are available out of the box:
-
Facebook: authenticate users with Facebook
-
Google+: authenticate users with Google+
-
Twitter: authenticate users with Twitter
-
Password: authenticate users by letting them sign up and sign in with their personally chosen username and password
To enable user authentication, you need to set the correct AuthenticationMode
value when building a GluonClient instance. The default authentication mode is PUBLIC, which allows everyone that
uses your application to read and write all of your data in Gluon CloudLink. Using authentication mode USER will
show an authentication view the first time the application tries to interact with Gluon CloudLink.
// enable user authentication
GluonClient gluonClient = GluonClientBuilder.create()
        .credentials(new GluonCredentials(applicationKey, applicationSecret))
        .authenticationMode(AuthenticationMode.USER)
        .build();

// the next statement will trigger the authentication view
GluonObservableList<Note> notes = DataProvider.retrieveList(gluonClient.createListDataReader("notes", Note.class));
2.3.1. Configuring Login Methods
Configuring the authentication methods that should be enabled for your application can be done from the dashboard page on Gluon CloudLink Portal. If you don’t have an account yet, go to the Gluon CloudLink Product page and click on "Sign up" under "Free".
-
Click the link
login methodsdisplayed at the right side of the application you want to configure -
At the bottom, choose the desired login method. For Twitter, Facebook or Google+, add the application key and secret that you obtained from the respective social network
-
Click the
Addbutton to add the login method to your application
The next time you run your application with USER authentication mode enabled, you will see the authentication view
with a list of buttons for all the login methods that are configured for your application.
2.3.2. Twitter Authentication
To get started with Twitter authentication, you first need to create a new Twitter application.
Click the Create New App button at the top right of that page and fill in the application details. Use the following
link for the Callback URL: http://cloud.gluonhq.com/2/connect/callback/TWITTER.
When your application is created, you can add a login method to your application on the Gluon CloudLink Portal. You can find
the correct application credentials in the Keys and Access Tokens tab on the dashboard of your Twitter application.
Copy the Consumer Key and Consumer Secret into the appropriate input fields in the login method form.
2.3.3. Facebook Authentication
To get started with Facebook authentication, you first need to create a new Facebook application.
Click the Add a New App button at the top right of that page and select the Website platform. Provide the App ID and
click Create New Facebook App ID. Select your application’s category and click Create App ID. Click Skip Quick Start at the
top right of the page to skip the quickstart configuration wizard. On the application’s dashboard, click the Settings button
from the menu on the left. Insert cloud.gluonhq.com in the App Domains and set the Website URL to http://gluonhq.com/.
Click Save Changes to apply the configuration settings.
When your application is created, you can add a login method to your application on the Gluon CloudLink Portal. You can find
the correct application credentials in the same Settings page mentioned previously, from the dashboard of your Facebook
application. Copy the App-ID and App Secret into the appropriate input fields in the login method form.
2.3.4. Google Authentication
To get started with Google authentication, you first need to create a new Google application.
Click the Create Project button on that page and fill in a name for your application. Once your application is created, choose
APIs & auth → Credentials from the menu on the left-hand side. Click the Add credentials button and choose OAuth 2.0 client ID.
Google asks you to first fill in your application details in the Consent Screen. After you have provided your application
details there, you will be redirected back to this page. Choose Web application as the Application type. Enter http://cloud.gluonhq.com
in the Authorized JavaScript origins field and http://cloud.gluonhq.com/2/connect/callback/GOOGLE_PLUS in the Authorized redirect URIs field.
For Gluon CloudLink, you also need to add the Google+ API. From the menu on the left, choose APIs & auth → APIs. Click on Google+ API
under the Social APIs category and click the Enable API button at the top of the new page.
When your application is correctly configured, you can add a login method to your application on the Gluon CloudLink Portal. You can find
the correct application credentials from the same APIs & auth → Credentials page mentioned previously, from the dashboard
of your Google application. Click on the Client ID and copy the Client ID and Client secret into the appropriate input
fields in the login method form.
2.3.5. Step-by-step guide
A step-by-step guide on how to setup and configure your Gluon CloudLink application can be found here.
3. File provider
The File provider enables reading from and writing to a file that is located on the file system of the device. You can find the complete sample from our Samples repository on bitbucket: https://bitbucket.org/gluon-oss/samples and then in the project called GluonConnectFileProvider.
3.1. Retrieving a list
Let’s assume that we have a file on the local file system with the following JSON content:
[
  {"name":"Java","ratings":20.956},
  {"name":"C","ratings":13.223},
  {"name":"C++","ratings":6.698},
  {"name":"C#","ratings":4.481},
  {"name":"Python","ratings":3.789}
]
And the following POJO that will map the JSON objects from the file above to a Java object:
public class Language {
    private String name;
    private double ratings;

    public String getName() {
        return name;
    }

    public void setName(String name) {
        this.name = name;
    }

    public double getRatings() {
        return ratings;
    }

    public void setRatings(double ratings) {
        this.ratings = ratings;
    }
}
We can then assign a list of programming language objects to a JavaFX ListView control with the following code:
// create a FileClient to the specified File
FileClient fileClient = FileClient.create(new File("languages.json"));

// create a JSON converter that converts the nodes from a JSON array into language objects
InputStreamIterableInputConverter<Language> converter = new JsonIterableInputConverter<>(Language.class);

// retrieve a list from a ListDataReader created from the FileClient
GluonObservableList<Language> languages = DataProvider.retrieveList(fileClient.createListDataReader(converter));
3.2. Retrieving an object
Retrieving a single object from a file resource looks similar to retrieving a list. Assume that we have a user.json
file with the following JSON content:
{"name":"Duke","subscribed":true}And the following POJO for mapping the JSON object to a Java object:
public class User {
    private String name;
    private boolean subscribed;

    public String getName() {
        return name;
    }

    public void setName(String name) {
        this.name = name;
    }

    public boolean isSubscribed() {
        return subscribed;
    }

    public void setSubscribed(boolean subscribed) {
        this.subscribed = subscribed;
    }
}
The user object can then be retrieved from the JSON file with the following code:
// create a FileClient to the specified File
FileClient fileClient = FileClient.create(new File("user.json"));

// create a JSON converter that converts a JSON object into a user object
InputStreamInputConverter<User> converter = new JsonInputConverter<>(User.class);

// retrieve an object from an ObjectDataReader created from the FileClient
GluonObservableObject<User> user = DataProvider.retrieveObject(fileClient.createObjectDataReader(converter));
3.3. Storing an object
We can use the same file and POJO again to show you how to store an object into a file:
// create an instance of a User to store
User user = new User();
user.setName("Duchess");
user.setSubscribed(false);

// create a FileClient to the specified File
FileClient fileClient = FileClient.create(new File("user.json"));

// create a JSON converter that converts the user object into a JSON object
OutputStreamOutputConverter<User> outputConverter = new JsonOutputConverter<>(User.class);

// store an object with an ObjectDataWriter created from the FileClient
GluonObservableObject<User> gluonUser = DataProvider.storeObject(user, fileClient.createObjectDataWriter(converter));
4. REST provider
The REST provider enables reading from and writing to an HTTP URL resource. For demonstrating this we will make use of the public StackExchange API. You can find the complete sample from our Samples repository on bitbucket: https://bitbucket.org/gluon-oss/samples and then in the project called GluonConnectRestProvider.
4.1. Retrieving a list
The URL we are going to use for retrieving a list, is the error REST endpoint. Here is how you would retrieve a list from a URL with Gluon Connect:
// create a RestClient to the specific URL
RestClient restClient = RestClient.create()
        .requestMethod(RestClient.Method.GET)
        .host("https://api.stackexchange.com")
        .path("/2.2/errors");

// retrieve a list from the DataProvider
GluonObservableList<Error> errors = DataProvider.retrieveList(restClient.buildListDataReader(Error.class));

// create a JavaFX ListView and populate it with the retrieved list
ListView<Error> lvErrors = new ListView<>(errors);
As you can see, we didn’t specify any Converter. That is because the RestClient will try to find a suitable Converter
based on the Content-Type response header. If the response header is not specified, it assumes that the response will
be formatted in JSON. Sometimes, the automatic detection of the Converter fails or you need to use a custom Converter.
In that case, you use the second method for creating a ListDataReader where you provide the converter that you want to
use.
// create a RestClient to the specific URL
RestClient restClient = RestClient.create()
        .requestMethod(RestClient.Method.GET)
        .host("https://api.stackexchange.com")
        .path("/2.2/errors");

// create a custom converter
InputStreamIterableInputConverter<Error> converter = new ItemsIterableInputConverter<>(Error.class);

// retrieve a list from the DataProvider using the custom converter
GluonObservableList<Error> errors = DataProvider.retrieveList(restClient.createListDataReader(converter));
4.2. Retrieving an object
For retrieving a single object, we will use the questions REST endpoint.
// create a RestClient to the specific URL
RestClient restClient = RestClient.create()
        .requestMethod(RestClient.Method.GET)
        .host("https://api.stackexchange.com")
        .path("/2.2/questions/36243147")
        .queryParam("order", "desc")
        .queryParam("sort", "activity")
        .queryParam("site", "stackoverflow");

// retrieve an object from the DataProvider
GluonObservableObject<Question> question = DataProvider.retrieveObject(restClient.createObjectDataReader(Question.class));

// show information on the retrieved object
Label lbTitle = new Label();
question.initializedProperty().addListener((obs, ov, nv) -> {
    if (nv && question.get() != null) {
        lbTitle.textProperty().bind(question.get().titleProperty());
    }
});
5. Deep Dive
In the following section we will dive deeper into the concepts of Gluon Connect and what the relation is between these concepts. The three implementations that we talked about above also make use of the same concepts, but they hide them for the user in the internal implementation. If you want to know a bit more about the inner workings of these providers or if you are interested in adding support for a custom DataSource, you should continue reading the following sections.
5.1. Concepts
Gluon Connect consists of the following basic concepts:
-
DataSource: specifies where the data is read from and/or written to
-
Converter: converts the read data into objects and vice versa converts objects into data to be written
-
DataProvider: takes care of mapping the data into usable observable lists and objects
5.1.1. DataSource
The DataSource defines where Gluon Connect should read and/or store the data. The DataSource makes use of the
standard java.io.InputStream and java.io.OutputStream classes. It is split up into two parts: the
InputDataSource
that provides an InputStream to read the data from; the OutputDataSource
that provides an OutputStream to write the data into. For convenience purposes, there is also an
IODataSource
that has access to both the InputStream and the OutputStream.
Gluon Connect includes by default two DataSource implementations:
-
FileDataSource: reads and writes data from a File that is accessible from the local system -
RestDataSource: reads and writes data from an HTTP URL resource
The implementation for Gluon CloudLink makes use of both the FileDataSource and RestDataSource and as such doesn’t provide a DataSource itself. It only exposes the DataProvider part as could be seen in the Gluon CloudLink section above.
5.1.2. Converter
The Converter is able to convert data from an Object into a specific data format or convert data from a certain data format back into an Object. The Converter is split up into three different parts:
-
InputConverter: converts data into an object -
OutputConverter: converts an object into data -
IterableInputConverter: provides anIteratorthat converts data into a list of objects
All three interfaces don’t specify where the data is coming from. This allows for maximum extensibility. Gluon Connect
provides an abstract implementation for these Converters. The InputConverter and IterableInputConverter both have an
implementation where the data to convert is taken from an InputStream. The OutputConverter has an analogous
implementation that converts the object by writing into an OutputStream.
Gluon Connect provides Converter implementations for JSON and String out of the box.
5.1.3. DataProvider
The DataProvider
is the class that will ultimately provide the observable lists or objects that you can use with your JavaFX UI controls.
Gluon Connect provides a custom observable list and observable object called
GluonObservableList
and GluonObservableObject
respectively.
The DataProvider itself has four methods:
-
retrieveList: this retrieves aGluonObservableListusing aListDataReader -
storeObject: this stores an object using anObjectDataWriterand responds with aGluonObservableObject -
retrieveObject: this retrieves an existing Object using an ObjectDataReader and responds with aGluonObservableObject -
removeObject: this removes theGluonObservableObjectusing anObjectDataRemover
All these methods will return the GluonObservableList or GluonObservableObject instances immediately. The actual
process of retrieving, storing or removing the list or object happens asynchronously in a background thread. For
example, when retrieving a list or object you can listen for the initialized property
to know when the list or object is fully initialized by the provided reader.
If we look at for instance the retrieveObject method, we see that it has an ObjectDataReader as parameter. The
ObjectDataReader is an interface that is able to create a new instance of GluonObservableObject and read an object
of a certain type. The source where the object is read from and the format of the data is completely left open to the
actual implementing classes. Usually though, you will combine a DataSource with a Converter to implement this
functionality. The most basic DataProvider that you can use as an ObjectDataReader is the InputStreamObjectDataReader.
This class takes an InputSource as the DataSource and an InputStreamConverter as the Converter. When an instance of
InputStreamObjectDataReader is passed into the Dataprovider.retrieveObject method, the object will be retrieved by
getting the InputStream from the InputSource and then pass the InputStream to the InputStreamConverter, which will
read the data from the InputStream and convert it into the desired object.
5.2. Sample
The following sample will use the three concepts by providing a DataSource that reads from a classpath resource, a Converter that converts JSON into objects and a DataProvider that combines the DataSource with the Converter to get access to GluonObservable objects. The complete sample for this can be found in our Samples repository on bitbucket: https://bitbucket.org/gluon-oss/samples and then in the project called GluonConnectBasicUsage.
5.2.1. Retrieving a list
Let’s presume we have the following simple languages.json file that is accessible from the root of the classpath.
[
  {"name":"Java","ratings":20.956},
  {"name":"C","ratings":13.223},
  {"name":"C++","ratings":6.698},
  {"name":"C#","ratings":4.481},
  {"name":"Python","ratings":3.789}
]
And the following POJO that will map the JSON objects from the list above to a Java object:
public class Language {
    private String name;
    private double ratings;

    public String getName() {
        return name;
    }

    public void setName(String name) {
        this.name = name;
    }

    public double getRatings() {
        return ratings;
    }

    public void setRatings(double ratings) {
        this.ratings = ratings;
    }
}
We can then assign a list of programming language objects to a JavaFX ListView control with the following code:
// create a DataSource that loads data from a classpath resource
InputDataSource dataSource = new BasicInputDataSource(Main.class.getResourceAsStream("/languages.json"));

// create a Converter that converts a json array into a list
InputStreamIterableInputConverter<ProgrammingLanguage> converter = new JsonIterableInputConverter<>(ProgrammingLanguage.class);

// create a ListDataReader that will read the data from the DataSource and converts
// it from json into a list of objects
ListDataReader<ProgrammingLanguage> listDataReader = new InputStreamListDataReader<>(dataSource, converter);

// retrieve a list from the DataProvider
GluonObservableList<ProgrammingLanguage> programmingLanguages = DataProvider.retrieveList(listDataReader);

// create a JavaFX ListView and populate it with the retrieved list
ListView<ProgrammingLanguage> lvProgrammingLanguages = new ListView<>(programmingLanguages);
5.2.2. Retrieving an object
Retrieving an object looks somewhat similar to retrieving a list. However, instead of converting a JSON array into a
list, we will convert a JSON object directly into a Java object. Below we have the user.json file and the POJO that
will hold the information in the JSON object:
{"name":"Duke","subscribed":true}public class User {
private StringProperty name = new SimpleStringProperty();
private BooleanProperty subscribed = new BooleanProperty();
public String getName() {
return name.get();
}
public void setName(String name) {
this.name.set(name);
}
public StringProperty nameProperty() {
return name;
}
public boolean isSubscribed() {
return subscribed.get();
}
public void setSubscribed(boolean subscribed) {
this.subscribed.set(subscribed);
}
public BooleanProperty subscribedProperty() {
return subscribed;
}
}As you can see, we use JavaFX properties here instead of native Java types. This allows us to bind the properties to a JavaFX UI control, e.g. a Label. To retrieve the object from the JSON file, we use the following code:
// create a DataSource that loads data from a classpath resource
InputDataSource dataSource = new BasicInputDataSource(Main.class.getResourceAsStream("/user.json"));

// create a Converter that converts a json object into a java object
InputStreamInputConverter<User> converter = new JsonInputConverter<>(User.class);

// create an ObjectDataReader that will read the data from the DataSource and converts
// it from json into an object
ObjectDataReader<User> objectDataReader = new InputStreamObjectDataReader<>(dataSource, converter);

// retrieve an object from the DataProvider
GluonObservableObject<User> user = DataProvider.retrieveObject(objectDataReader);

// when the object is initialized, bind its properties to the JavaFX UI controls
Label lbName = new Label();
CheckBox cbSubscribed = new CheckBox("Subscribed?");
user.initializedProperty().addListener((obs, oldValue, newValue) -> {
    if (newValue) {
        lbName.textProperty().bind(user.get().nameProperty());
        cbSubscribed.selectedProperty().bindBidirectional(user.get().subscribedProperty());
    }
});
6. Gluon Connect JavaDoc
The Gluon Connect JavaDoc can be found here.