1. Introduction
Gluon provides an easy and modern approach for developing Java Client applications. These applications can run on the JVM or can be converted to a platform specific native-images which have lighting fast startup and takes a fraction of space. Moreover, applications can also be targeted to Android, iOS, and embedded apart from all the desktop environments.
Gluon provides all the tools necessary to build these applications including, but not limited to, build tools, IDE plugins, UI library, cloud connectivity, data-binding etc.
2. Getting Started
Java application as native application
Any Java application can be converted to a native application for a specific platform using Gluon technology. This platform specific application has much faster startup time, since the JVM no longer needs to be started. The resulting application will be entirely integrated into the native operating system.
An easy way to get started is just by adding the GluonFX plugin to your Java application. GluonFX plugin leverages GraalVM and OpenJDK by compiling the Java client application and all its required dependencies into native code, so that it can be directly executed as a native application on the target platform.
At this moment, Gluon has support for the following target platforms and architectures:
-
Linux (x86_64 and AArch64)
-
macOS (x86_64 and AArch64)
-
Windows (x86_64)
-
iOS (x86_64 and arm64)
-
Android (AArch64)
Java library as native static library
In a similar way, Java libraries can be converted to native static libraries, that can be used by third party projects. Currently, Gluon has support for the following target platforms and architectures:
-
Linux (x86_64 and AArch64)
-
macOS (x86_64 and AArch64)
-
iOS (x86_64 and arm64)
-
Android (AArch64)
2.1. Requirements
Gluon applications can be developed, run, and tested on any desktop and embedded platform using JDK 11 or greater.
The platform specific requirements for the creation and deployment of native images are discussed in depth in the platforms section.
2.2. Gluon Start
Gluon Start is a website which enables you to generate the structure and skeleton of your Java client application. You can configure the following properties of the application:
-
Name, groupId and artifactId to use for the generated Maven project
-
JavaFX version and modules required by the project
-
Gluon Mobile stack to include in the project. For example, Glisten (for the UI toolkit) and Gluon Maps can be selected to be used in the same project
-
Gluon Attach services required in the project
-
If the application needs a flexible and secure way to connect to an existing or new backend or cloud service, Gluon CloudLink can be selected as well
All options are easily selectable and Gluon Start will generate the project with correct dependencies for you.
Unzip the project and run it via the terminal. Or, import it directly into your favorite IDE.
2.3. IDE Plugins
Another way to get started quickly is using one of our IDE plugins. The plugin aids in creating a Gluon application project inside your IDE. Although, the IDE plugins are not required to develop Gluon applications in your IDE. At present, we offer IDE plugins to bootstrap your Gluon applications for NetBeans and IntelliJ IDEA.
You can read more about the IDE plugins in the IDE Support section of the documentation.
| You can still use other IDEs to develop your Gluon application, projects can be created from Gluon Start and directly opened in your favorite IDE. |
2.4. Maven Archetype
A simple Gluon application can be created by using the GluonFX Maven Archetype for simple Gluon Mobile application.
For example:
mvn archetype:generate \
        -DarchetypeGroupId=com.gluonhq \
        -DarchetypeArtifactId=gluonfx-archetype-mobile \
        -DarchetypeVersion=0.0.3 \
        -DgroupId=com.gluonhq  \
        -DartifactId=gluon-mobile-sample \
        -Dversion=1.0.0-SNAPSHOT \
        -Djavafx-version=15
2.5. Adding your license
|
Some Gluon components require a license in certain circumstances. Check https://gluonhq.com/pricing/ for more information |
After you have created the project or downloaded an existing one, in order to include your license, you need to add a file called gluonmobile.license to your resources and paste your valid license key as the content:
src/main/resources/gluonmobile.license
XXXXXXXX-XXXX-XXXX-XXXX-XXXXXXXXXXXXThis method allows you to keep your license private as long as you exclude it from your source version control system.
Licenses are validated online once per application install.
If for some reason the license service can’t be contacted, your end-users won’t be annoyed by the popup, but the license check will be retried each time the application starts until successful.
2.6. IDE Live templates
A live template specifies an abbreviation which auto-completes a large chunk of code for you. Live templates for IntelliJ IDEA IDE has been defined to create JavaFX properties, including getters, setters, and the property method. It supports all property types, and both read-only and read/write properties.
The template can be downloaded from here. Once the file has been downloaded, simply do the following steps to import them into your IntelliJ IDEA:
-
Unzip the file and save
settings.jaron the file system -
In IntelliJ IDEA, click on the ‘File’ → ‘Import Settings…’
-
Locate
settings.jarfile on your file system -
Restart IntelliJ IDEA, when prompted
Once the IDE has been restarted, from within your editor, you may simply type ‘fxprop‘, and a popup lets you choose the type of property you want. Once you press tab (or enter), the code for property is generated inside the editor. You can then immediately start typing the property name, and this will automatically update all the method names. Once you’ve done this, all you need to do is import the relevant classes.
2.7. What is New
Below are the most relevant changes in the last releases of Gluon Substrate, and the GluonFX Maven and Gradle plugins.
For a complete list of changes, please check Substrate releases, GluonFX Maven plugin releases and GluonFX Gradle plugin releases.
Date: July 17, 2025
Release: 1.0.27
Major changes
-
Update snapshots sonatype repository
-
Android: Bump Android SDK to 35, and NDK to 28
-
Android: Consider system bars insets to deal with edge to edge display
-
Attach: new version 4.0.23 with new implementation for BarcodeScanner service on Android, removing the Zxing dependency
Date: March 27, 2025
Release: 1.0.26
Major changes
-
Rollback main changes from versions 1.0.24 and 1.0.25, which are considered as experimental
-
Android: Fix issue with Samsung keyboard
Date: January 17, 2025
Release: 1.0.25
Major changes
-
Bump Java static version to 24-2.1
-
Add
*.zipextension to default list -
Fixed issue that prevented the use of Maven 3.9+
-
macOS: Filter out static libraries with wrong architecture
-
iOS: New path for provisioning profiles, increase timeout for codesign
-
Android: bump Gradle wrapper version to work with JDK 23.
-
Attach: new version 4.0.22
Date: September 18, 2024
Release: 1.0.24
Major changes
-
Bump Java static version to 24-2
-
Bump JavaFX static version to 24-ea+7.1
-
New Gluon build of GraalVM, version 23+25.1-dev, with JDK 23.
-
Static libraries can be built for other platforms, not only iOS.
-
Shared libraries are deprecated in favour of static libraries
-
Windows and Linux AArch64: not supported the for the new Java static version yet (use 1.0.23).
-
Android: build.gradle file can be modified by users
-
Bug fixes
Date: July 19, 2024
Release: 1.0.23
Major changes
-
Bump JavaFX static version to 21-ea+11.2
-
Bump Android SDK to 34
-
Add privacy manifest file required by iOS builds
-
Make ie4uinit.exe execution optional on Windows builds
-
Release Attach 4.0.21
-
Bug fixes
Date: Dec 6, 2023
Release: 1.0.22
Major changes
-
Add support for shared libraries on Windows
-
Add support to JDK 21 for desktop, using the official GraalVM builds with their new versioning system
-
Bug fixes
Date: Sep 14, 2023
Release: 1.0.21
Major changes
-
Bump Java SDK static version
-
Bump Android SDK to 33
-
Release Attach 4.0.19
-
Use Gradle’s built-in Java Module System support
-
Bug fixes
Date: Jun 26, 2023
Release: 1.0.19
Major changes
-
Bump JavaFX static version to 21-ea+11.1
-
Allow running with the official GraalVM builds with new versioning system
-
Fix missing CAP cache files for iOS-Simulator
Date: Mar 21, 2023
Release: 1.0.18
Major changes
-
JavaFX 20 is released. Note that starting with JavaFX 20, JDK 17+ is required
-
Bump JavaFX static version to 21-ea+9.1
-
Android SDK/NDK are installed from latest Android SDK manager
Date: Mar 21, 2023
Release: 1.0.17
Major changes
-
Bump JavaFX version to 21-ea+5. Note that starting with JavaFX 20, JDK 17+ is required
-
Maven plugin: Maven runtime 3.9.0 is not supported yet (an error will be thrown asking to downgrade to 3.8.8 or lower, in that case)
-
Maven plugin: new goal allows building static libraries for iOS, via
gluonfx:staticlib -
iOS: update ios-deploy to 1.12.1
-
Android/iOS: Update CAP cache files, which allows using JDK 19
-
Android: OS handles volume buttons
-
Release Attach 4.0.17 with the Audio service implementation for iOS, and improvements for Android.
-
Bug fixes
Date: Nov 16, 2022
Release: 1.0.16
Major changes
-
Bump JavaFX version to 20-ea+7. Note that starting with JavaFX 20, JDK 17+ is required
-
iOS simulator: default to iPhone 14
-
Android: Use of Android API level 31, added support for long press gestures
-
Release Attach 4.0.16
-
Bug fixes
Date: Aug 8, 2022
Release: 1.0.15
Major changes
-
Added support for shared libraries, via the new
gluonfx:sharedlibgoal -
Android: Added support of Android NDK 23+
-
Release Attach 4.0.15
-
Bug fixes
Date: Jun 13, 2022
Release: 1.0.14
Major changes
-
Released Gluon’s GraalVM builds 22.1.0.1 for JDK 11 and JDK 17, with support for Apple Silicon chip
-
Android fixes: the temp dir folder issue with JDK 17, and the black screen after resuming the app and changing orientation have been fixed
-
Bump JavaFX version to 19-ea+8
-
Add support for Attach' StoreReview service.
-
Bug fixes
Date: Apr 4, 2022
Release: 1.0.13
Major changes
-
Add support for Apple Silicon (MACOS_AARCH64 profile). In order to run GraalVM for macOS AArch64, a recent GraalVM dev build is needed.
-
Add
linkerArgsoption to configuration, allowing custom linker arguments -
Android: Allow predictive text and swipe text
-
Bump JavaFX version to 19-ea+4
-
Bump clibs version to 27
-
Bug fixes
Date: Feb 3, 2022
Release: 1.0.12
Major changes
-
Released Gluon’s GraalVM builds 22.0.0.3 for JDK 11 and JDK 17
-
Add full support for iOS Simulator
-
Set LIR backend by default on iOS, instead of LLVM
-
Add icon to Windows native binary
-
Update Android SDK manager dependencies to run with JDK 17
-
Add defaults to ReleaseConfiguration
-
Bump JavaFX version to 18-ea+10
-
Bug fixes
Date: Jan 10, 2022
Release: 1.0.11
Major changes
-
Add Windows package support: .exe and .msi bundles can be created
-
Improve MacOS package support: .dmg bundles can be created
-
Update ReleaseConfiguration (Maven only)
-
Improved support for JDK17
-
Allow building for iOS without LLVM backend
-
Fix the filter for the native agent on Windows
-
Improve support for old Xcode versions
-
Bug fixes
Date: Dec 9, 2021
Release: 1.0.10
Major changes
-
Update ios-deploy formula to work with macOS 12.0
-
Bump JavaFX version to 18-ea+8
-
Fix missing cryptographic libraries to link on Windows
-
Add MacOS package support: .app and .pkg bundles can be created
-
Update ReleaseConfiguration (Maven only)
-
Allow custom entitlements on iOS
-
Bug fixes
Date: Nov 9, 2021
Release: 1.0.9
Major changes
-
Allow using GraalVM built with JDK 11 or JDK 17
-
Add support for Android .aab bundle
-
Bump JavaFX version to 18-ea+6
-
Bug fixes
Date: Oct 25, 2021
Release: 1.0.8
Major changes
-
Bump targetSDKVersion to 30 on Android
-
Use appId as bundleID on iOS
-
Bump JavaFX version to 18-ea+3
-
Bug fixes
3. IDE Support
The ideal way to create a Gluon application is via Gluon Start and importing it directly into your favorite IDE.
Gluon also provides basic IDE support via plugins for IntelliJ IDEA and Netbeans. These plugins can be used to create a basic Gluon project, with all the required dependencies to natively build the project, and ultimately run the native image.
We will briefly discuss on how to install these plugins, create a new project and build a native image using GluonFX plugin in the following section.
3.1. IntelliJ IDEA
In this section, we’ll explain briefly how to install the plugin on IntelliJ IDEA and how to use it to create a sample application that can be deployed on desktop, Android and iOS devices. Before we start, make sure to check the Platforms section for a list of prerequisites for each platform.
3.1.1. Plugin Installation
You can get it from here,
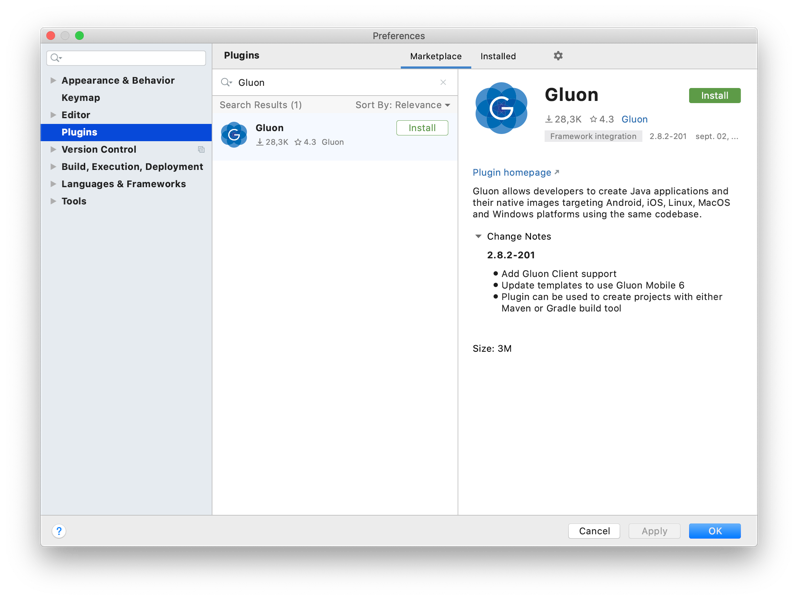
or you can directly install it from IntelliJ IDEA: click File → Settings… (or IntelliJ IDEA → Preferences…) and select Plugins on the left. You will see the installed plugins on your system.
Now click Marketplace, type Gluon, select the result and click Install.
The Gluon Plugin will be downloaded and installed. Then press Restart IDE or simply press OK to close the plugins dialog, and restart the IDE when asked.
3.1.2. Create a new Gluon project
Once the plugin is installed, we can use it to create a sample application.
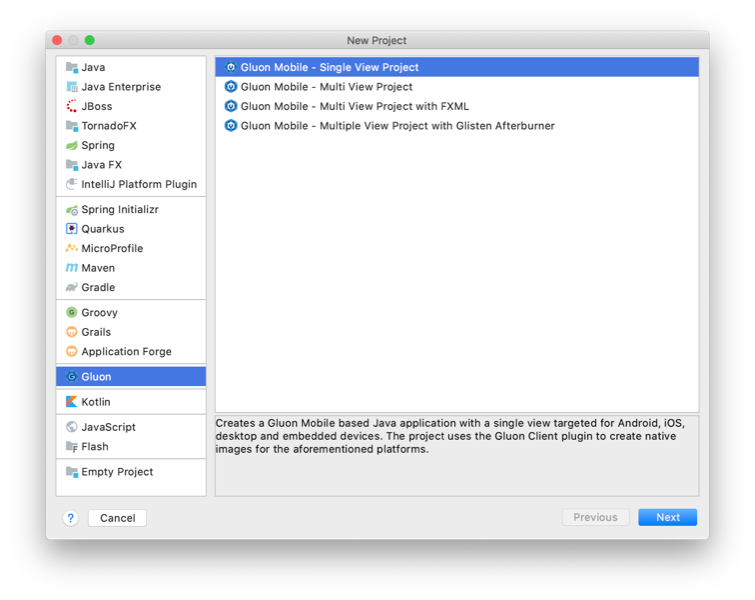
In IntelliJ IDEA, click File → New → Project… and select Gluon on the left, and one of the available projects on the right.
For instance, Gluon Mobile - Single View Project. Press Next.
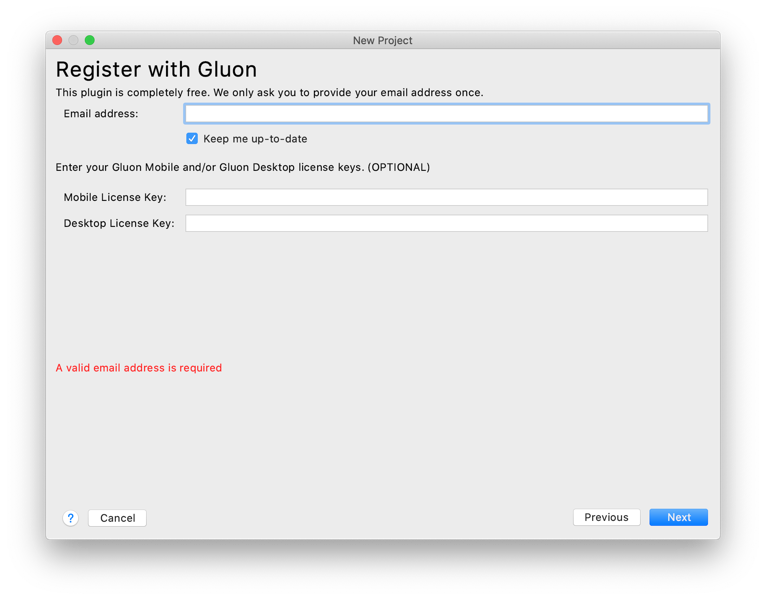
The first time you use the plugin, you will be asked to enter your email address.
If you already have a Gluon Mobile key for your projects, you can insert it here as well, so it will be added by default to your new projects. If you don’t, you will be using the free (trial) version. Please find more about Gluon Mobile licenses.
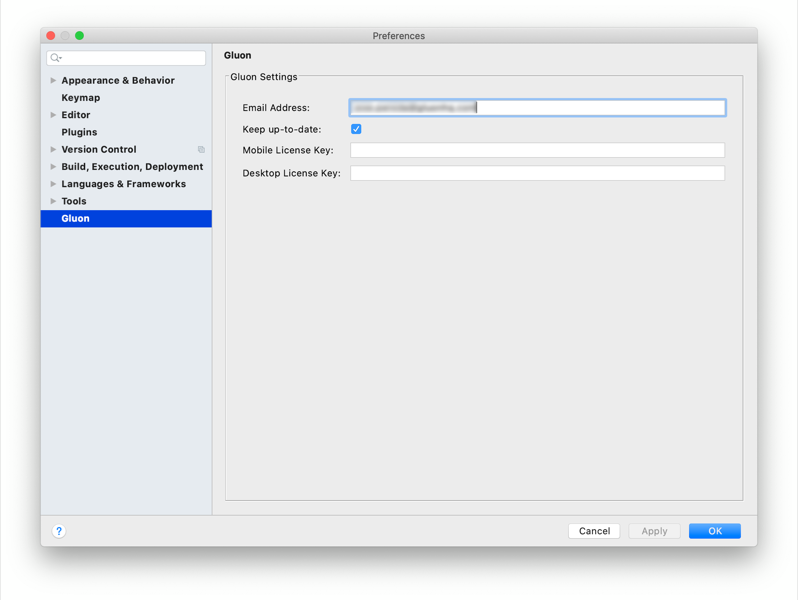
You can access these settings later on from File→Settings→Gluon (or IntelliJ IDEA→Preferences…→Gluon):
Once you have completed this first-time-only form, click Next.
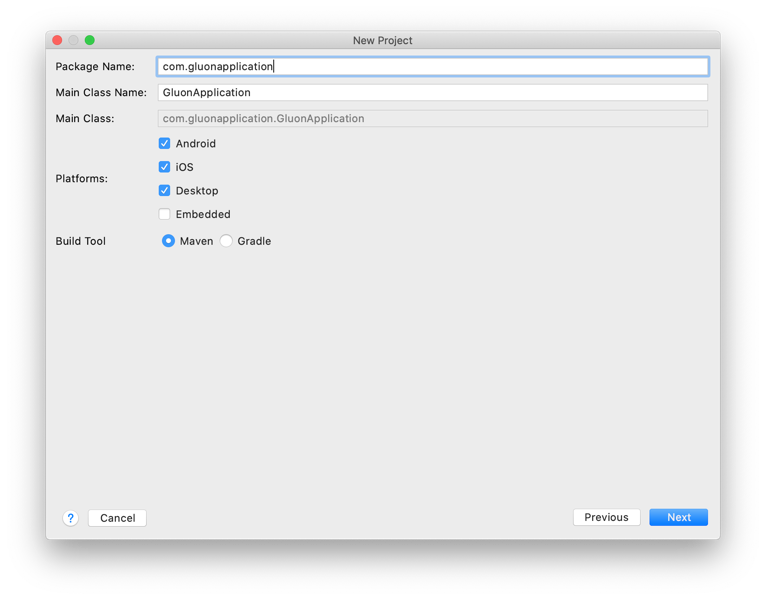
Type the package name and the main class name.
Select the platforms to deploy the application, and the build tool of your choice.
For this tutorial, we will use the Maven build tool. Press Next.
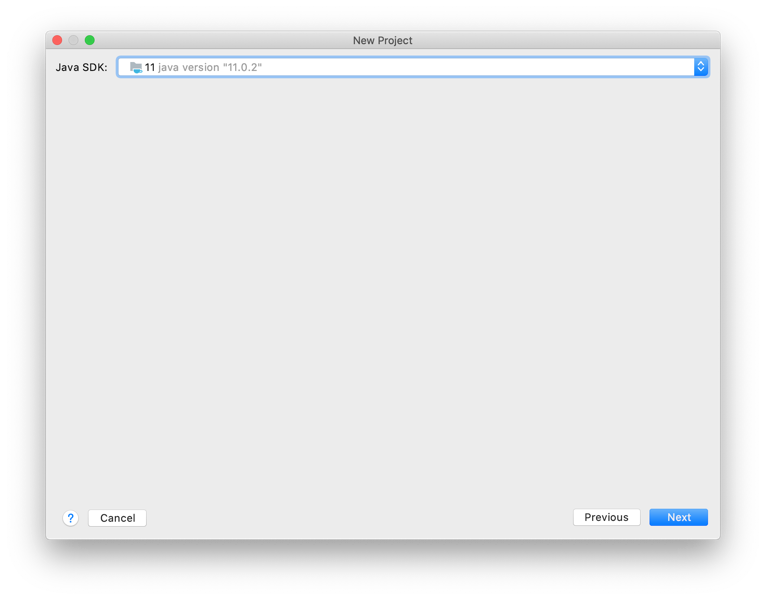
From the list, select a valid Java JDK (11+) and press Next.
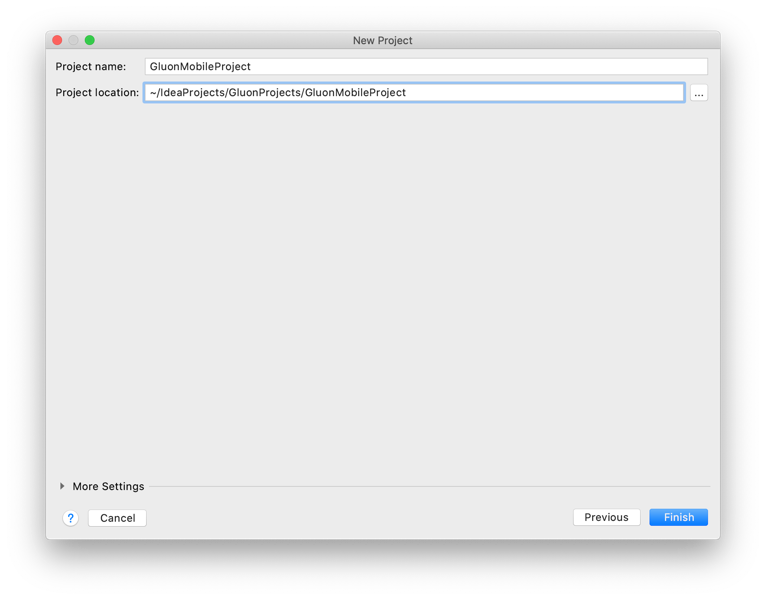
Now add a name and a location for the project and press Finish.
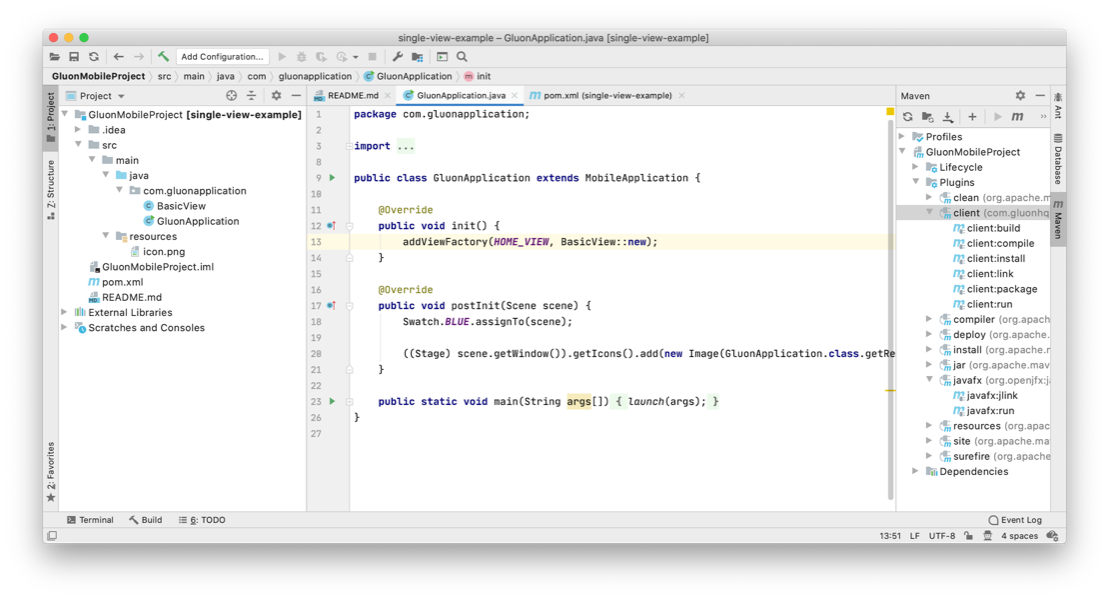
The project will be imported and opened.
3.1.3. The Gluon Mobile project
The plugin already adds some default code in the main folder, so we’ll be able to run it without adding a single line of code.
The Maven project has a dependency on the OpenJFX Maven Plugin and the GluonFX Maven plugin to the project.
These plugins add a series of goals and to access them we just need to open Maven tool window in IntelliJ IDEA. The Maven tool window shows all the available Maven plugins along with their respective goals.
3.1.4. Run the application
|
Make sure |
Before creating a native image, it’s easier to run the application first and verify that there are no errors.
Select Plugins → javafx → javafx:run from the Maven tool window. Verify that all the tasks are executed without errors, and the project runs fine on your desktop. Alternatively you can open the terminal (View→Tool Windows→Terminal) and run mvn javafx:run.
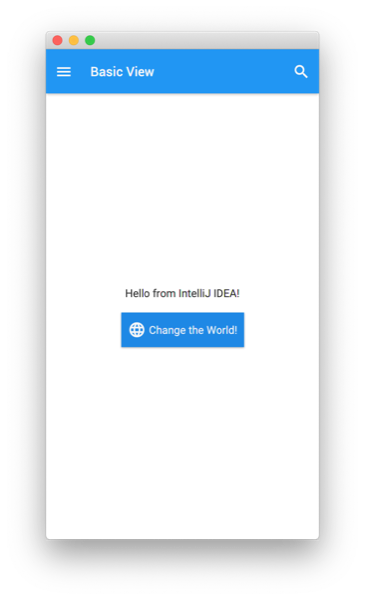
Now let’s make a slight change to the code. In the BasicView class, update the text of the label on line 20 to the following:
button.setOnAction(e -> label.setText("Hello from IntelliJ IDEA!"));Run it again to see that the new message shows up on your desktop when you click the button.
3.1.5. Create & run a native image of the application
In order to run the native image steps it is better to use a system terminal or the embedded terminal from your IDE. However, it is still possible to use the IDE’s Maven window for this.
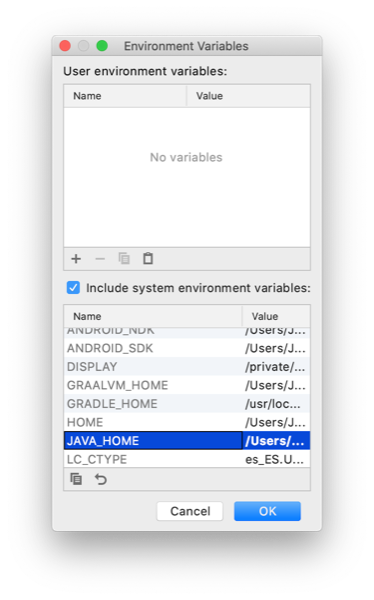
|
Make sure you set the environment variable |
|
If you are running on Windows, you need to run all the gluonfx goals from an x64 terminal. Please check the prerequisites for Windows deployment. However, you can use the terminal from IntelliJ for this. Go to |
|
If you are running from IDE, make sure that the mvn executable under |
GluonFX plugin provides us various goals which are explained in detail earlier in the documentation.
For this tutorial, we will be using the gluonfx:build goal to create a native image of the application.
Execute mvn gluonfx:build from the terminal, or, select Plugins → gluonfx → gluonfx:build goal from the Maven tool window.
This goal typically takes a couple of minutes to complete and may vary depending on the system.
Once the goal is executed successfully, the native image can be run by executing gluonfx:nativerun goal.
3.1.6. Create & install an Android native image
|
This part is only applicable for Linux. Please check the prerequisites for Android deployment. |
Now we are ready to deploy the same application on an Android device.
Go to Maven tool window, expand Profiles and check android. Make sure that all other profiles are unchecked.
This will activate the pre-existing android profile.
Run mvn -Pandroid gluonfx:build from the terminal, or alternatively, execute the gluonfx:build goal from the Maven plugins section.
Once the native image is created, we need to package it into an apk before we can install it on a physical Android device.
Execute mvn -Pandroid gluonfx:package to create an apk. Once the goal is executed successfully, connect a physical device and
install the native image by executing the mvn -Pandroid gluonfx:install goal.
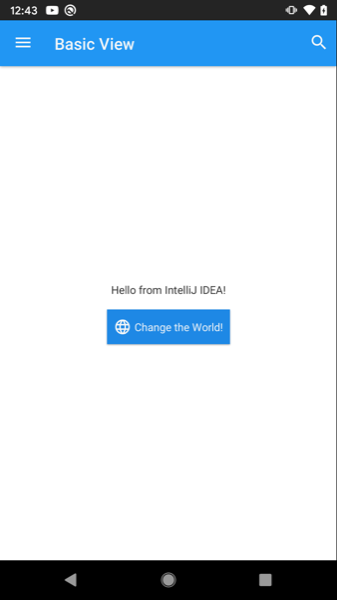
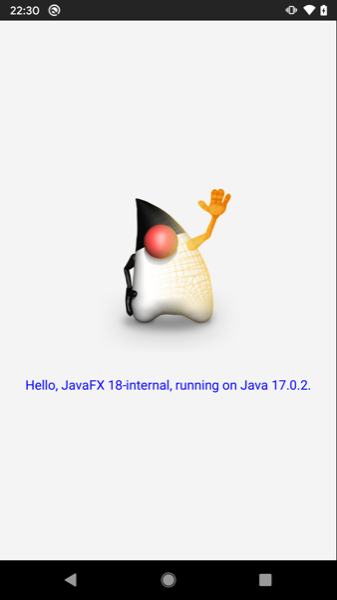
When the installation ends successfully, run mvn -Pandroid gluonfx:nativerun or find the application on your device and open it up:
3.1.7. Create & install an iOS native image
|
This part is only applicable for MacOS. Please check the prerequisites for iOS deployment. |
Now we are ready for deploying the same application on an iOS device.
Go to Maven tool window, expand Profiles and check ios. Make sure that all other profiles are unchecked.
This will activate the pre-existing ios profile.
All gluonfx goals will now target iOS platform.
Run mvn -Pios gluonfx:build from the terminal, or alternatively, execute the gluonfx:build goal from the Maven plugins section.
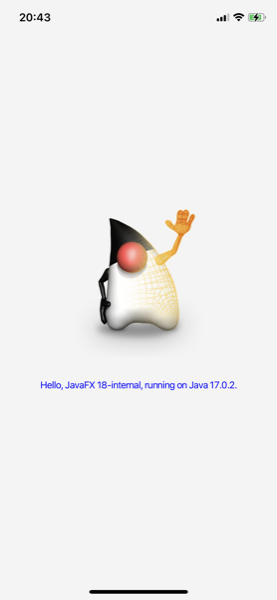
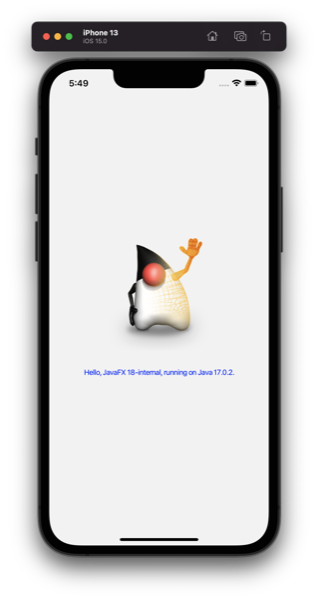
Once the goal is executed successfully, connect a physical device and run the native image on it by executing mvn -Pios gluonfx:nativerun.
3.2. NetBeans
In this section, we’ll explain briefly how to install the Gluon plugin on Apache NetBeans and how to use it to create a sample application that can be deployed on desktop, Android and iOS devices. Before we start, make sure to check the Platforms section for a list of prerequisites for each platform.
3.2.1. Plugin Installation
You can get it from the Apache NetBeans plugin portal,
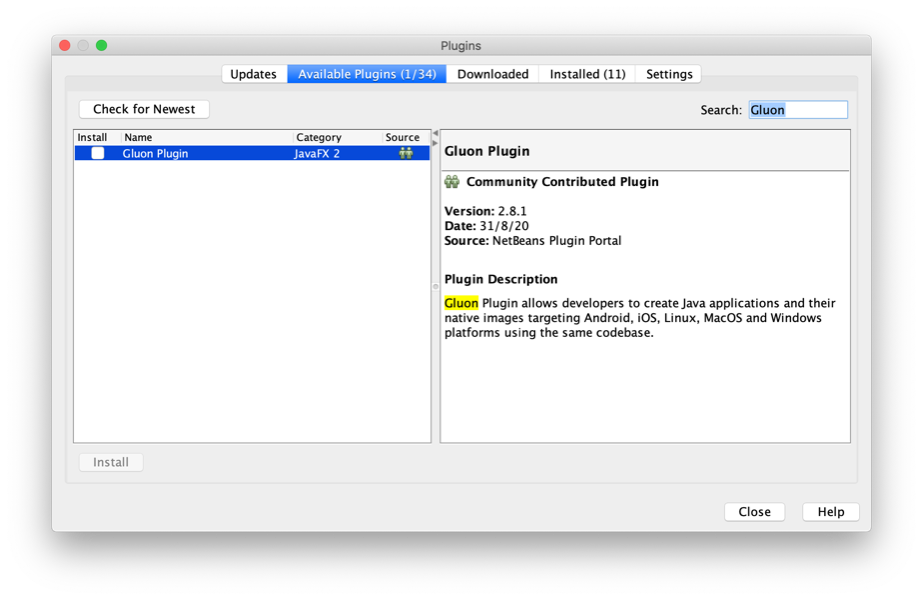
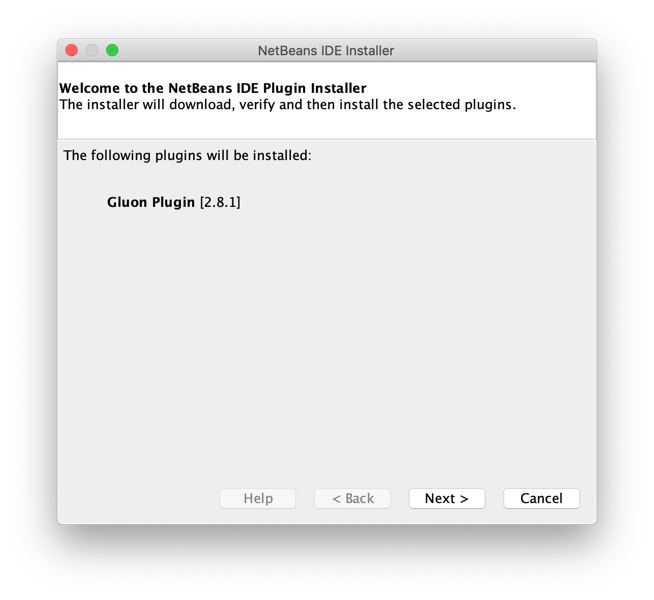
or you can directly install it from NetBeans: click Tools → Plugins. Now select Available Plugins… and find Gluon Plugin.
Select the plugin, click Install and follow the steps:
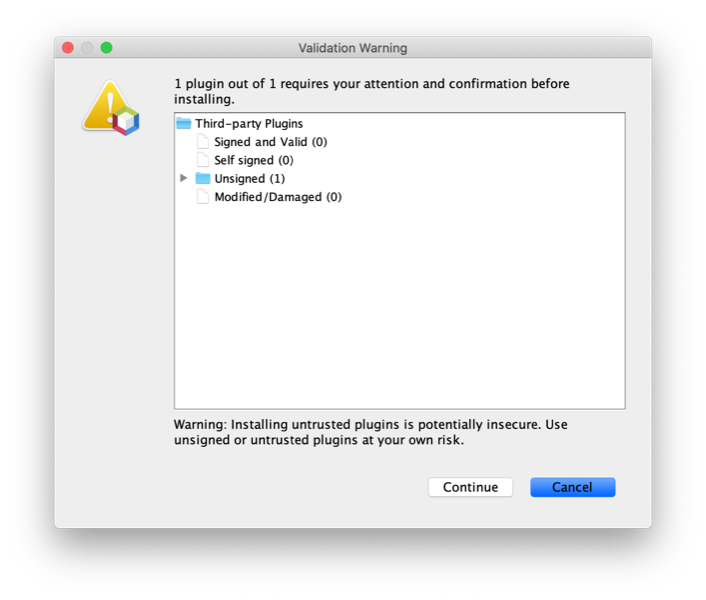
Accept the license and click Install. Click Continue when prompted:
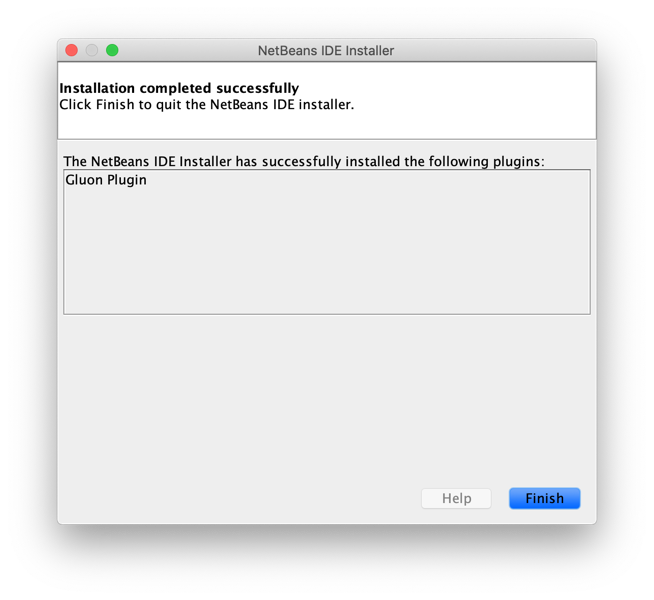
Wait until the Gluon Plugin is installed and click Finish.
You will find the plugin under the Installed tab in the Plugins window.
3.2.2. Create a new Gluon project
Once the plugin is installed, we can use it to create a sample application.
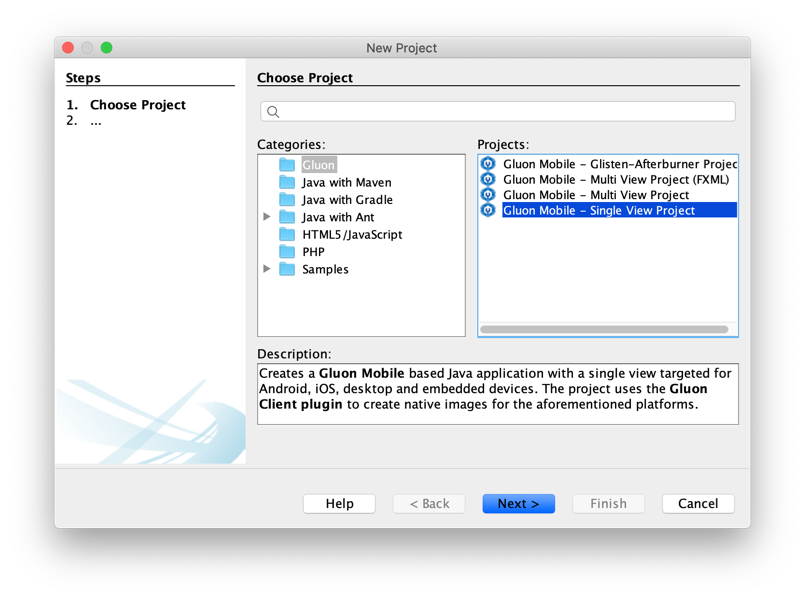
In NetBeans, click File → New → Project… and select Gluon on the left, and one of the available projects on the right.
For instance, Gluon Mobile - Single View Project. Press Next.
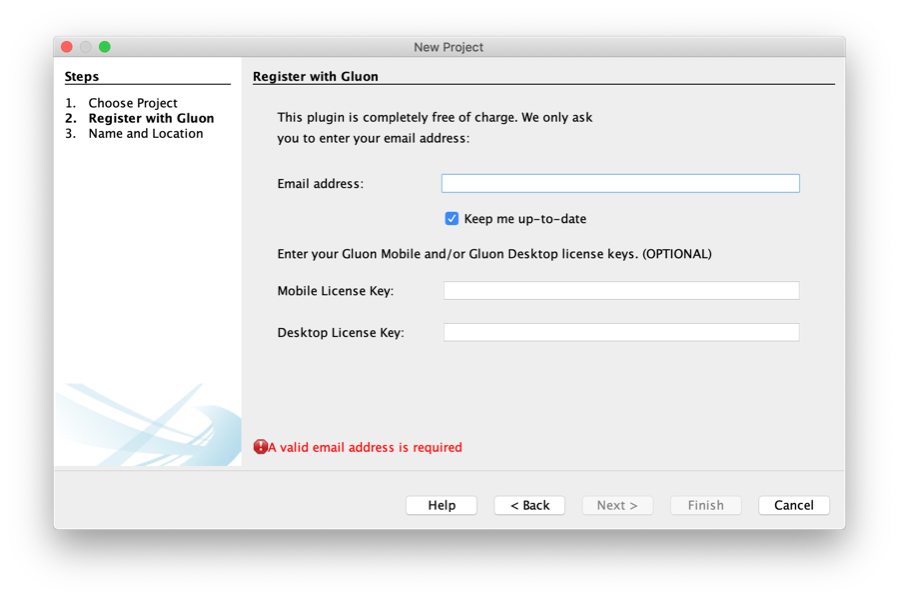
The first time you use the plugin, you will be asked to enter your email address.
If you already have a Gluon Mobile license key for your projects, you can insert them here as well, so they will be added by default to your new projects. If you don’t, you will be using the free (trial) version. Please find more about Gluon Mobile licenses.
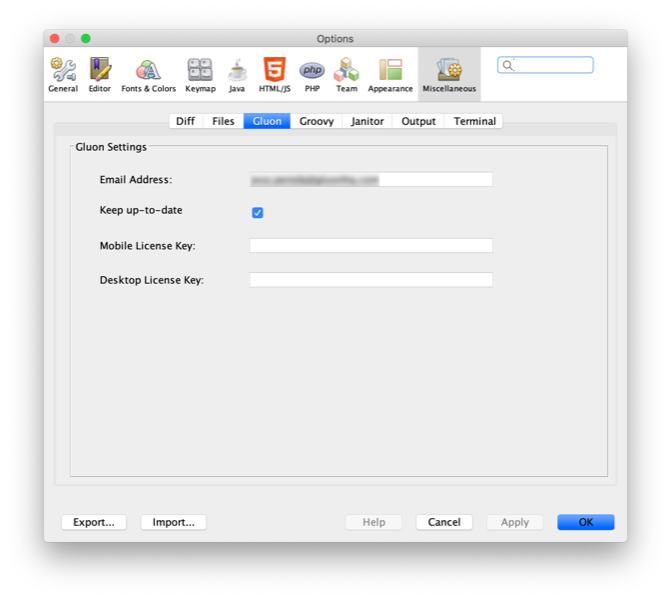
You can access these settings later on from Tools→Options→Miscellaneous→Gluon (or NetBeans→Preferences…→Miscellaneous→Gluon):
Once you have completed this first-time-only form, click Next.
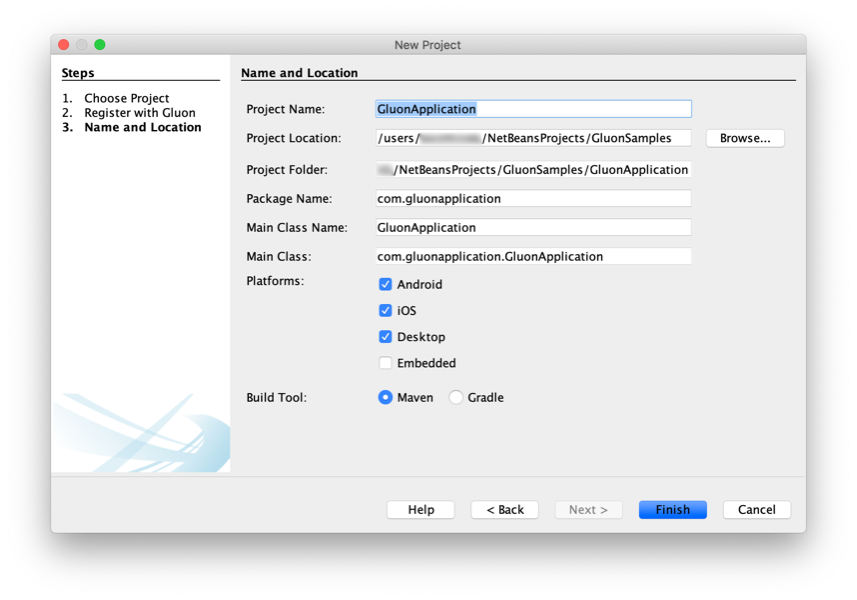
Type the name of the project, find a proper location, add the package name and change the main class name if required. Select the platforms to deploy the application, and the build tool of your choice. For this tutorial, we will use the Maven build tool.
Press Finish and the project will be created and opened.
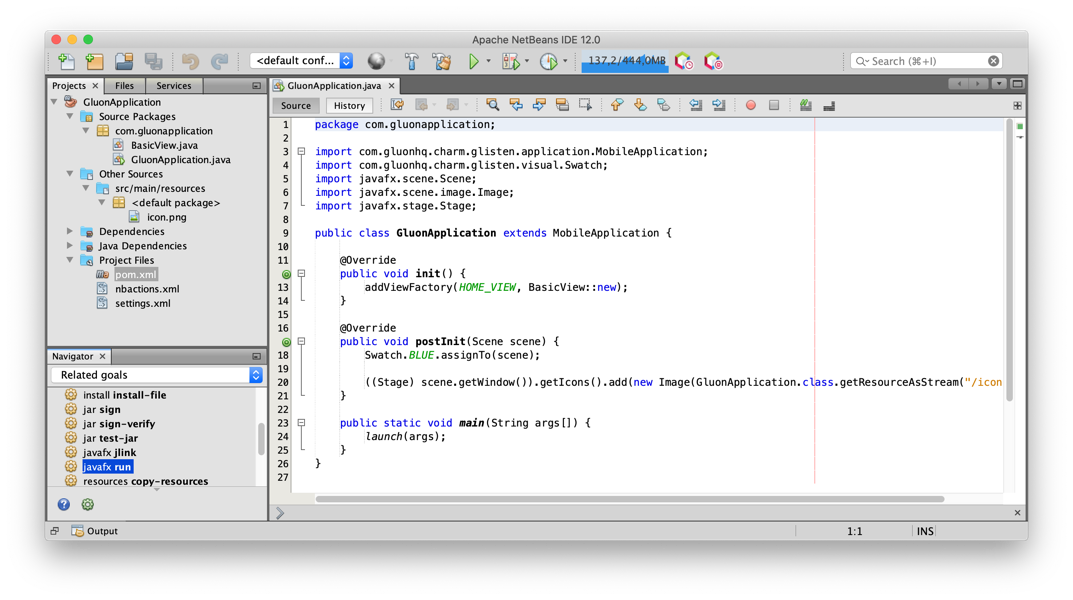
You will notice that a Maven project has been created with the pom containing profiles for the platforms you selected. These profiles make it easier to create native images targeted to each of these platforms.
3.2.3. The Gluon Mobile project
The plugin already adds some default code in the main folders, so we’ll be able to run it without adding a single line of code.
The Maven project has a dependency on the OpenJFX Maven Plugin and the GluonFX Maven plugin to the project.
These plugins add a series of goals and to access them we just need to switch to the Navigator panel in NetBeans. The Navigator panel shows all the available Maven goals.
3.2.4. Run the application
|
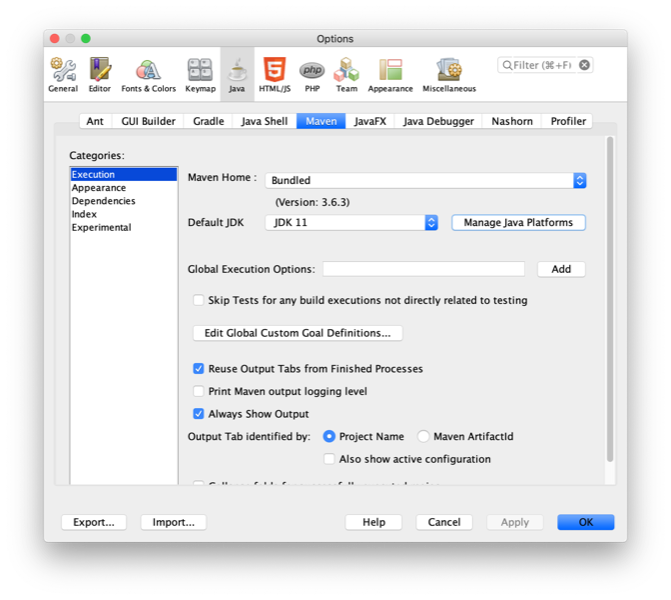
Make sure the Maven default JDK is properly set to 11+. |
Before creating a native image, it’s easier to run the application first and verify that there are no errors.
Select Run project (F6) or select javafx:run from the Navigator. Verify that all the tasks are executed without errors, and the project runs fine on your desktop. Alternatively you can open the terminal (Tools→Open in Terminal) and run mvn javafx:run.
Let’s make a slight change to the code. In the BasicView class, update the text of the label on line 21 to the following:
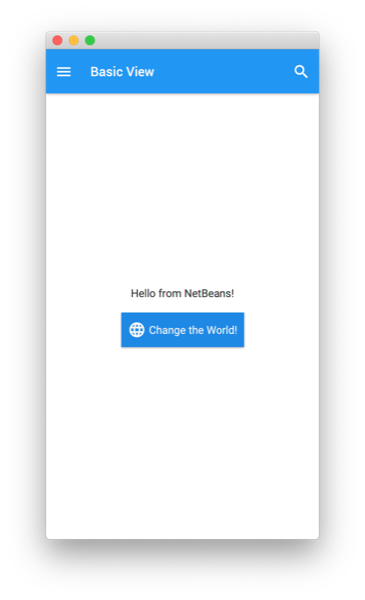
button.setOnAction(e -> label.setText("Hello from NetBeans!"));Run it again to see that the new message shows up on your desktop when you click the button.
3.2.5. Create & run a native image of the application
In order to run the native image steps it is better to use a system terminal or the embedded terminal from your IDE. However, it is still possible to use the IDE’s Navigator window for this.
|
Make sure you set the environment variable |
|
If you are running on Windows, you need to run all the gluonfx goals from a x64 terminal. Please check the prerequisites for Windows deployment. However, you can use the terminal from NetBeans for this (it requires Cygwin installed). On the terminal, run once |
GluonFX plugin provides us various goals which are explained in details, earlier in the documentation.
For this tutorial, we will be using the gluonfx:build goal to create a native image of the application.
Execute mvn gluonfx:build from the terminal, or, run the gluonfx:build goal from the Navigator with modifiers, and add Env.GRAALVM_HOME=/path/to/GraalVM.
This goal typically takes a couple of minutes to complete and may vary depending on the system.
Once the goal is executed successfully, the native image can be run by executing gluonfx:nativerun goal.
3.2.6. Create & install an Android native image
|
This part is only applicable for Linux. Please check the prerequisites for Android deployment. |
Now we are ready for deploying the same application on an Android device.
Right-click on the project and select Set Configuration and select android. This will activate the pre-existing android profile.
Run mvn -Pandroid gluonfx:build from the terminal, or, execute the gluonfx:build goal from the Navigator with modifiers, adding profile android, and Env.GRAALVM_HOME=/path/to/GraalVM.
Once the native image is created, we need to package it into an apk before we can install it on a physical Android device.
Execute mvn -Pandroid gluonfx:package to create an apk. Once the goal is executed successfully, connect a physical device and
install the native image by executing the mvn -Pandroid gluonfx:install goal.
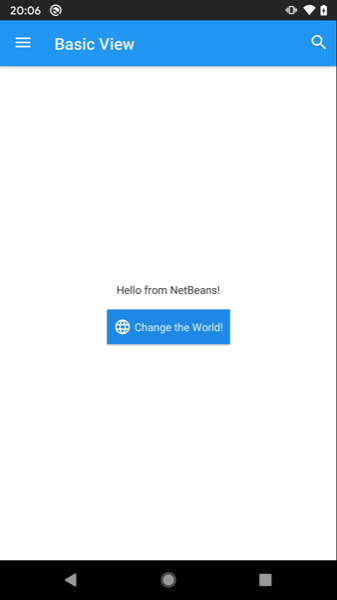
When the installation ends successfully, run mvn -Pandroid gluonfx:nativerun or find the application on your device and open it up:
3.2.7. Create & install an iOS native image
|
This part is only applicable for MacOS. Please check the prerequisites for iOS. |
Now we are ready for deploying the same application on an iOS device.
Right-click on the project and select Set Configuration and select ios. This will activate the pre-existing ios profile.
Run mvn -Pios gluonfx:build from the terminal, or, execute the gluonfx:build goal from the Navigator with modifiers, adding profile ios, and Env.GRAALVM_HOME=/path/to/GraalVM.
Once the goal is executed successfully, connect a physical device and run the native image on it by executing mvn -Pios gluonfx:nativerun.
3.3. Eclipse
In this section, we’ll explain briefly how to create and download a project from Gluon Start, open it in the Eclipse IDE and deployed on desktop, Android and iOS devices. Before we start, make sure to check the Platforms section for a list of prerequisites for each platform.
3.3.1. Project creation via Gluon Start
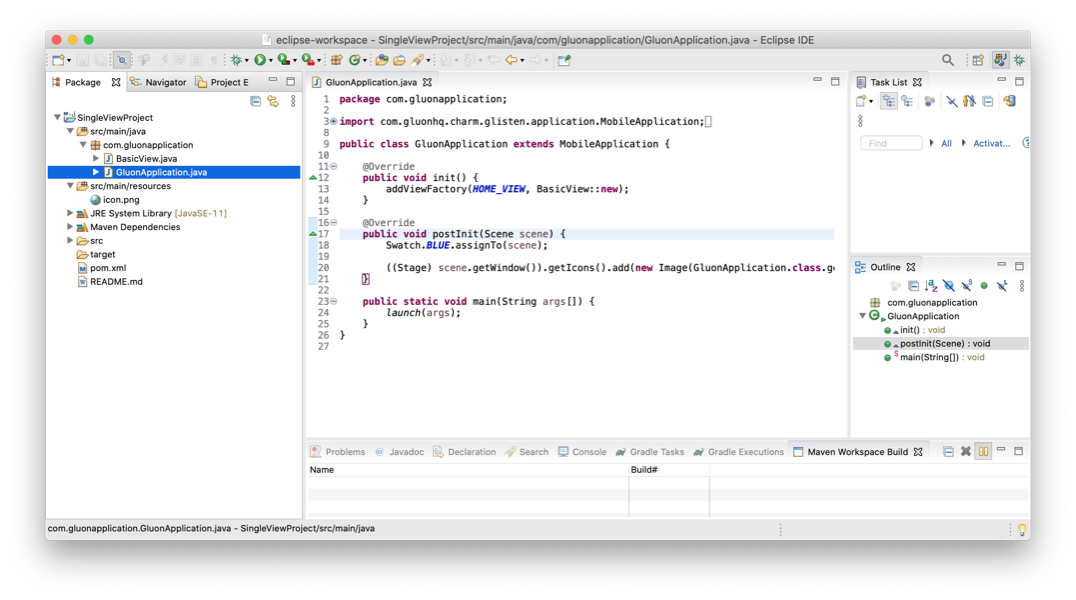
Create a Maven project from Gluon Start and open it in Eclipse IDE.
3.3.2. The Gluon Mobile project
The project already has some default code in the main folders, so we’ll be able to run it without adding a single line of code.
The Maven project has a dependency on the OpenJFX Maven Plugin and the GluonFX Maven plugin to the project. These plugins add a series of goals which will be used to run and create native images of the application.
3.3.3. Run the application
Before creating a native image, it’s easier to run the application first and verify that there are no errors.
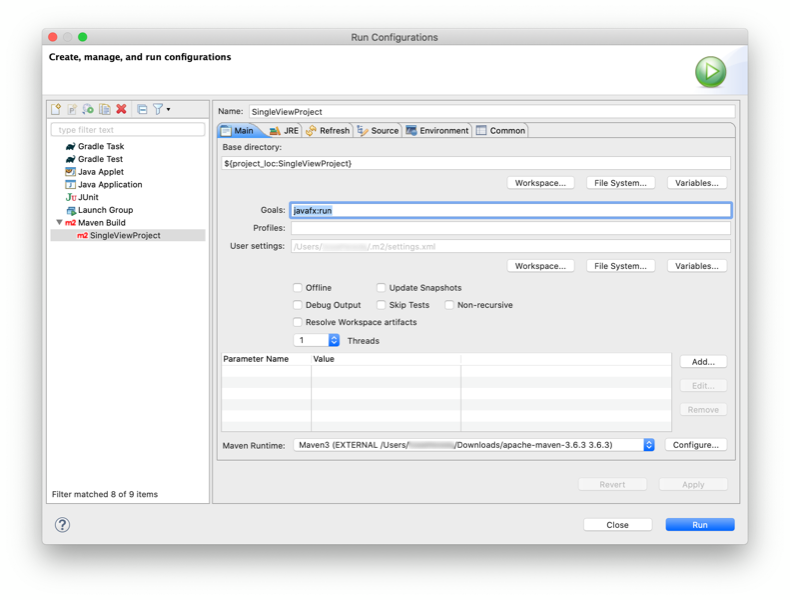
Right-click on the project, select Run As → Maven Build…. An "Edit Configuration" window opens.
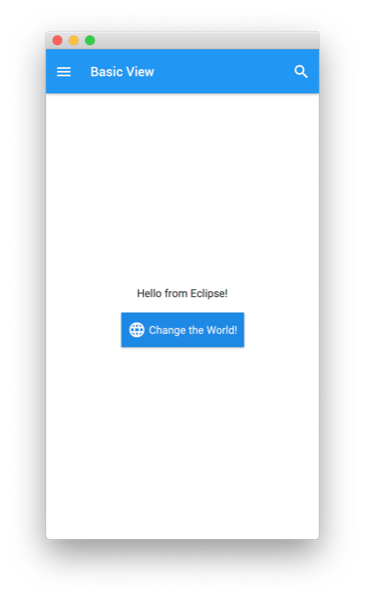
In the Goals textfield, type javafx:run and click Run. Verify that all the tasks are executed without errors, and the project runs fine on your desktop.
Let’s make a slight change to the code. In the BasicView class, update the text of the label on line 20 to the following:
button.setOnAction(e -> label.setText("Hello from Eclipse!"));Run the application again to verify that the text inside the label has changed.
3.3.4. Create & run a native image of the application
In order to run the native image steps it is better to use a system terminal or the embedded terminal from your IDE. However, it is still possible to use the IDE’s Run Configurations dialog for this.
|
Make sure you set the environment variable |
|
If you are running on Windows, you need to run all the GluonFX goals from a x64 terminal. Please check the prerequisites for Windows deployment. However, you can use the terminal from Eclipse for this (it can be installed from the Eclipse Marketplace). On the terminal, run once |
GluonFX plugin has various goals which are explained in details earlier in the documentation.
For this tutorial, we will be using the gluonfx:build goal to create a native image of the application.
Execute mvn gluonfx:build from the terminal, or, open the Run Configurations… window and update the Goal to gluonfx:build and click Run.
This goal typically takes a couple of minutes to complete and may vary depending on the system.
Once the goal is executed successfully, the native image can be run by executing gluonfx:nativerun goal.
3.3.5. Create & install an Android native image
|
This part is only applicable for Linux. Please check the prerequisites for Android deployment. |
Now we are ready for deploying the same application on an Android device.
Right-click on the project and open Maven → Select Maven Profiles… window. Check android checkbox and uncheck all others.
This will activate the pre-existing android profile. All goals will now target android platform instead of desktop.
Run mvn -Pandroid gluonfx:build from the terminal, or alternatively, execute the gluonfx:build goal again, this time the android profile should be selected by default, else add it to the profiles field.
Once the native image is created, we need to package it into an apk before we can install it on a physical Android device.
Execute mvn -Pandroid gluonfx:package goal to create an apk. Once the goal is executed successfully, connect a physical device and
install the native image by executing gluonfx:install goal.
Once the goal is executed successfully, connect a physical device and
install the native image by executing the mvn -Pandroid gluonfx:install goal.
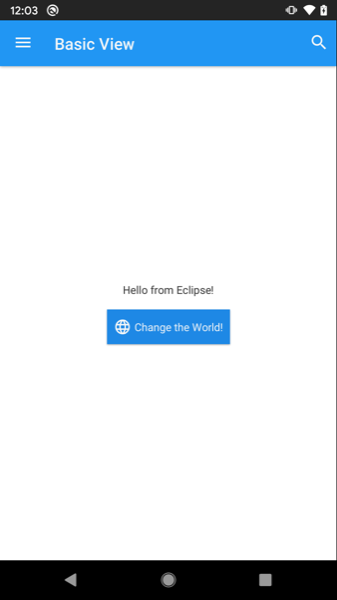
When the installation ends successfully, run mvn -Pandroid gluonfx:nativerun or find the application on your device and open it up:
3.3.6. Create & install an iOS native image
|
This part is only applicable for MacOS. Please check the prerequisites for iOS. |
Now we are ready for deploying the same application on an iOS device.
Right-click on the project and open Maven → Select Maven Profiles… window. Check ios checkbox and uncheck all others.
This will activate the pre-existing ios profile. All gluonfx goals will now target iOS platform.
Run mvn -Pios gluonfx:build from the terminal, or alternatively, execute the gluonfx:build goal again, this time the ios profile should be selected by default, else add it to the profiles field.
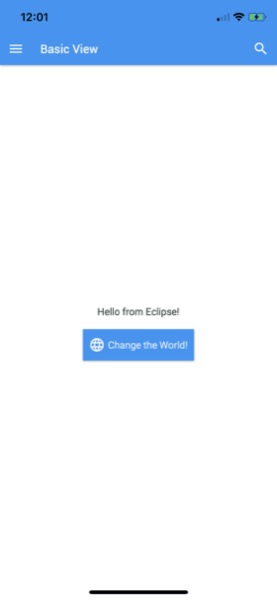
Once the goal is executed successfully, connect a physical device and run the native image on it by executing mvn -Pios gluonfx:nativerun.
3.4. Visual Studio Code
For VSCode, we recommend downloading a Maven project from Gluon Start and directly importing it into the IDE.
| Make sure you have the Extension Pack for Java installed, which includes the required extensions to support Maven projects. |
4. GluonFX plugin for Maven
Any Java(FX) project can be easily integrated with Gluon. This section details the specifics of the GluonFX Maven plugin and shows how to add it to your project, to create native applications or native shared libraries.
4.1. Apply the plugin
Edit your pom file and add the plugin:
<plugin>
    <groupId>com.gluonhq</groupId>
    <artifactId>gluonfx-maven-plugin</artifactId>
    <version>1.0.27</version>
    <configuration>
        <mainClass>your.mainClass</mainClass>
    </configuration>
</plugin>
The plugin allows some options that can be set in <configuration> to override the default settings.
|
At the moment, the plugin doesn’t support Maven 3.9.0+. Therefore, Maven runtime must be 3.8.8 or lower. |
|
Version 1.0.27 is the latest stable version of the plugin. Versions 1.0.24 and 1.0.25 are still available but not supported. |
4.2. Goals
4.2.1. Native applications
To create a native application, GluonFX plugin introduces the following goals:
-
gluonfx:run
-
gluonfx:runagent
-
gluonfx:compile
-
gluonfx:link
-
gluonfx:build
-
gluonfx:package
-
gluonfx:install
-
gluonfx:nativerun
The following image shows a flow diagram of what the goals produce and the expected order.
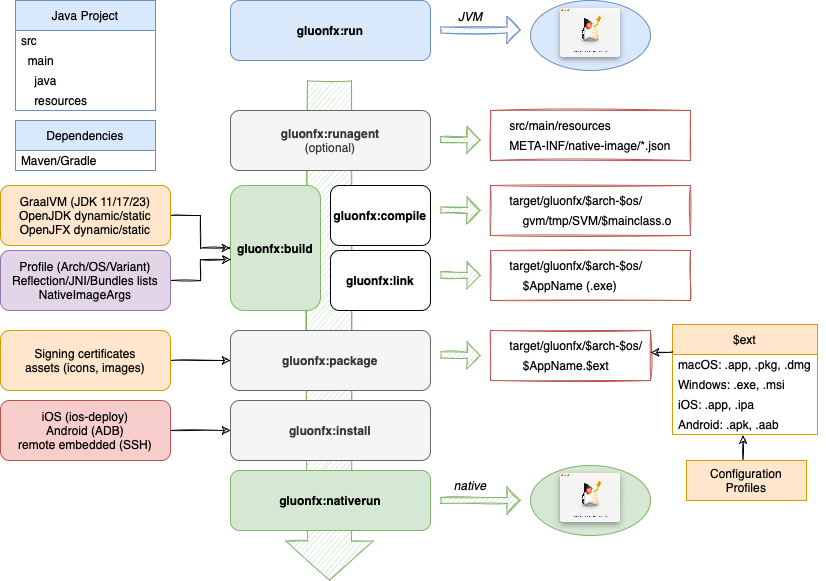
gluonfx:run
Since: 1.0.0
Run the application on the JVM by resolving the appropriate Attach libraries required.
This goal requires the javafx-maven-plugin.
gluonfx:runagent
Since: 0.1.37
Runs the project on desktop, in combination with the javafx-maven-plugin, with GraalVM’s JVM (HotSpot) and with the native-image-agent to record the behavior of the Java application.
It generates the configuration files for reflection, JNI, resource, proxy and serialization, that will be used by the native image generation with the above goals.
If needed, this goal should be executed before the others, and requires the user intervention to discover all reachable classes, by going through all possible scenes, views, dialogs, menus…
This goal is not strictly needed, as the GluonFX plugin already provides a basic set of configuration files that can be modified manually. In any case, the configuration files generated by the tracing agent will be picked and merged with those generated by the plugin (as in most cases the content of both will be duplicated).
|
Using the agent might have some impact in the native compilation time and the binary size. |
gluonfx:compile
This goal performs AOT compilation by executing the native-image command and builds the shared object file.
It is a very intensive and lengthy task (several minutes, depending on your project and CPU), so it should be called
only when the project is ready and runs fine on a VM.
The results will be available at target/gluonfx/$arch-$os/gvm.
gluonfx:link
Links the object file to create a native executable file or shared library.
The results will be available at target/gluonfx/$arch-$os/$AppName.
gluonfx:build
This goal simply combines gluonfx:compile and gluonfx:link.
gluonfx:package
Packages the executable or shared library into a target specific package that includes all the necessary dependencies.
The list of platform specific packages are as follows:
-
Linux - deb, rpm
-
macOS - app, pkg, dmg
-
Windows - exe, msi
-
iOS - app, ipa
-
Android - apk, aab
|
At the moment, Linux support is WIP. |
gluonfx:install
Installs the package on the host system or attached device.
|
At the moment, this goal is only intended for iOS, iOS-sim, Android and Linux-AArch64. |
gluonfx:nativerun
Since: 1.0.0
Runs either the executable generated by gluonfx:link on the host system
or runs the application that was installed on the connected device (iOS, Android or Linux-AARch64).
4.2.2. Native shared libraries
Deprecated: See Native static libraries
To create a native shared library, GluonFX plugin has the following goal:
-
gluonfx:sharedlib
The following image shows a flow diagram of what the goal produce.
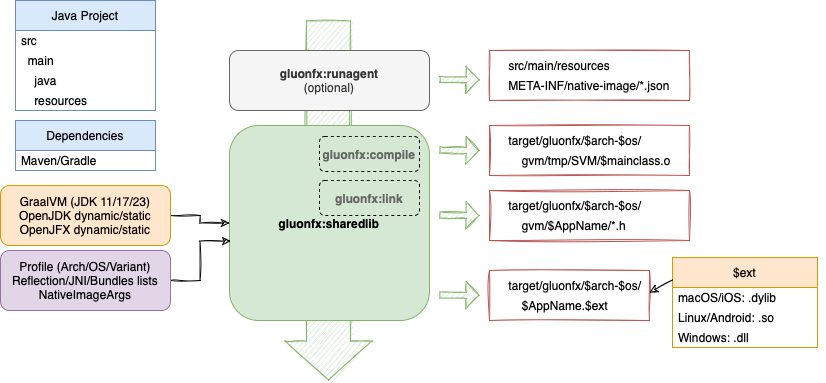
gluonfx:sharedlib
Deprecated: See gluonfx:staticlib
This goal runs internally gluonfx:compile gluonfx:link, but this time, the outcome is a native shared library and not an executable.
Intended to be added to third party projects, this goal should be applied only to pure Java libraries, that doesn’t have any UI/JavaFX code.
The created shared library will have the main method of the main Java class as its entrypoint method, if any.
At least, one static entry point method is required. You can use the @CEntryPoint annotation to specify entry point methods that should be exported and callable from C.
No object types are permitted for parameters or return types; only primitive Java values, word values, and enum values are allowed.
To provide the current thread’s execution context for the call, one of the parameters of the entry point method has to be of type IsolateThread or Isolate.
The results will be available at target/gluonfx/$arch-$os/$AppName.$ext.
The list of platform specific library extensions are as follows:
-
Linux - so
-
macOS - dylib
-
Windows - dll
-
iOS - so
-
Android - dylib
Optionally, you can run up front gluonfx:runagent to generate configuration files.
4.2.3. Native static libraries
To create a native static library, GluonFX plugin has the following goal:
-
gluonfx:staticlib
The following image shows a flow diagram of what the goal produce.
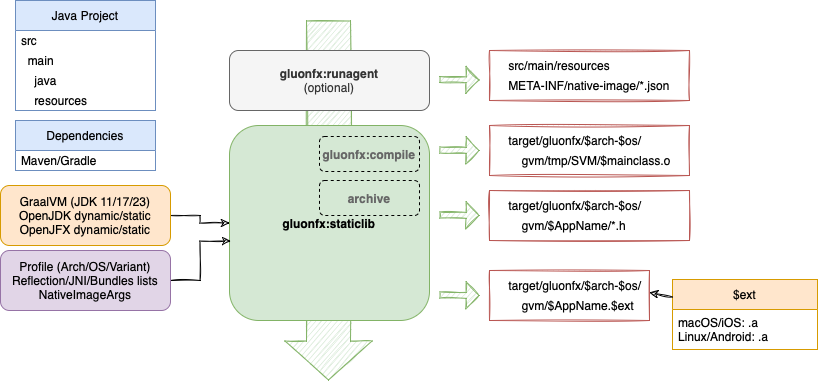
gluonfx:staticlib
Since: 1.0.17
This goal runs internally gluonfx:compile, and as a result, the generated object files are archived into a single file, the native static library, which is not an executable.
At least one entry point is needed. If your java code has a main class with a main method, that method will automatically be an entrypoint.
Alternatively, you can use the @CEntryPoint annotation to specify entry point methods that should be exported and callable from C.
In this case, no object types are permitted for parameters or return types; only primitive Java values, word values, and enum values are allowed. To provide the current thread’s execution context for the call, one of the parameters of the entry point method has to be of type IsolateThread or Isolate.
The results will be available at target/gluonfx/$arch-$os/gvm/$AppName.$ext.
The list of platform specific library extensions are as follows:
-
Linux: .a
-
macOS: .a
-
iOS: .a
-
Android: .a
Optionally, you can run up front gluonfx:runagent to generate configuration files.
4.3. Configuration
|
This is for advanced users. |
The plugin allows some customization to modify the default settings, which are:
<plugin>
    <groupId>com.gluonhq</groupId>
    <artifactId>gluonfx-maven-plugin</artifactId>
    <version>1.0.27</version>
    <configuration>
        <target>host</target>
        <mainClass>your.mainClass</mainClass>
        <bundlesList></bundlesList>
        <resourcesList></resourcesList>
        <reflectionList></reflectionList>
        <jniList></jniList>
        <attachList></attachList>
        <nativeImageArgs></nativeImageArgs>
        <linkerArgs></linkerArgs>
        <runtimeArgs></runtimeArgs>
        <verbose>false</verbose>
        <graalvmHome></graalvmHome>
        <javaStaticSdkVersion>11-ea+10</javaStaticSdkVersion>
        <javafxStaticSdkVersion>21-ea+11.1</javafxStaticSdkVersion>
        <enableSWRendering>false</enableSWRendering>
        <remoteHostName></remoteHostName>
        <remoteDir></remoteDir>
        <appIdentifier></appIdentifier>
        <releaseConfiguration>
            <!-- all targets -->
            <packageType></packageType>
            <description></description>
            <vendor></vendor>
            <!-- macOS -->
            <macAppStore></macAppStore>
            <macSigningUserName></macSigningUserName>
            <macAppCategory></macAppCategory>
            <!-- macOS/iOS -->
            <bundleName></bundleName>
            <bundleVersion>1.0</bundleVersion>
            <bundleShortVersion>1.0</bundleShortVersion>
            <providedSigningIdentity></providedSigningIdentity>
            <providedProvisioningProfile></providedProvisioningProfile>
            <skipSigning>false</skipSigning>
            <!-- iOS Simulator -->
            <simulatorDevice></simulatorDevice>
            <!-- Android -->
            <appLabel></appLabel>
            <versionCode>1</versionCode>
            <versionName>1.0</versionName>
            <providedKeyStorePath>${android-keystore-path}</providedKeyStorePath>
            <providedKeyStorePassword>${android-keystore-password}</providedKeyStorePassword>
            <providedKeyAlias>${android-key-alias}</providedKeyAlias>
            <providedKeyAliasPassword>${android-key-password}</providedKeyAliasPassword>
        </releaseConfiguration>
    </configuration>
</plugin>
4.3.1. target
A string that defines the target platform. The default is host, which refers to the platform that currently hosts the process.
It can be set also to ios to create native images for iOS devices (Aarch64), or android to create native images for Android devices (Aarch64).
Default: host
4.3.2. bundlesList
List of fully qualified resource bundles that will be added to the default list of resource bundles. By default, the list already includes the JavaFX bundles:
-
com.sun.javafx.tk.quantum.QuantumMessagesBundle -
com/sun/javafx/scene/control/skin/resources/controls -
com/sun/javafx/scene/control/skin/resources/controls-nt -
com.sun.media.jfxmedia.MediaErrors -
com.sun.webkit.graphics.Images -
com.sun.webkit.LocalizedStrings -
javafx.scene.web.HTMLEditorSkin -
com.sun.org.apache.xerces.internal.impl.msg.XMLMessages
And on Windows only:
-
com/sun/glass/ui/win/themes
For more advanced usage, read the Resource bundles section.
4.3.3. resourcesList
List of additional resource patterns or extensions that will be added to the default resource list that already includes:
-
png,jpg,jpeg,gif,bmp,ttf,raw -
xml,fxml,css,gls,json,dat, -
license,frag,vert,obj,zip
We keep adding extensions to this list. Please check the source code for the latest list.
For more advanced usage, read the Resources section.
4.3.4. reflectionList
List of additional full qualified classes that will be added to the default reflection list, that already includes most of the JavaFX classes.
Note: The current list is added to a file that can be found under target/gluonfx/$arch-$os/gvm/reflectionconfig-$arch-$os.json.
For more advanced usage, read the JNI and Reflection section.
4.3.5. jniList
List of additional full qualified classes that will be added to the default jni list, that already includes most of the JavaFX classes.
Note: The current list is added to a file that can be found under target/gluonfx/$arch-$os/gvm/jniconfig-$arch-$os.json.
For more advanced usage, read the JNI and Reflection section.
4.3.6. attachList
If you want to include Gluon Attach services to your project, you can use attachList to including the name of the services, like:
<!-- dependencies -->
<dependency>
    <groupId>com.gluonhq.attach</groupId>
    <artifactId>display</artifactId>
    <version>4.0.23</version>
</dependency>

<!-- plugin -->
<configuration>
    <attachList>
        <list>display</list>
    </attachList>
</configuration>
By default the attachVersion is 4.0.23.
After saving the changes, the dependencies for the defined services will be resolved to include those for defined target, and when the native compile goal is executed, the native services implementations will be added to the reflection and JNI lists.
Note: Attach platform implementations will be added only to the goals of the GluonFX plugin, but not to the JavaFX plugin. It is convenient to use Maven profiles to overcome this issue.
4.3.7. nativeImageArgs
List of additional arguments that will be added to the native image creation.
4.3.8. linkerArgs
List of additional arguments that will be added to the linker command to provide additional linker flags.
Since: 1.0.13
4.3.9. runtimeArgs
List of additional arguments that will be added as runtime arguments to the native image executable.
Note: These arguments are usually added to the command line when executing the image, the arguments in this list can be complementary.
4.3.10. verbose
Set to true will generate a more verbose output to the console, useful when having errors, to identify possible issues.
Also, you can get a more verbose output for these goals running with -X:
mvn -X gluonfx:compile
Default: false
Note: Regardless the verbose value, the full logs can be found under target/gluonfx/$arch-$os/gmv/log.
4.3.11. graalvmHome
Path to GraalVM installation directory. This is only required when GRAALVM_HOME is not set.
Since: 0.1.3
4.3.12. javaStaticSdkVersion
The version of the Java static libraries. These will be located under: ~/.gluon/substrate/javaStaticSdk/$javaStaticSdkVersion/$target-$arch/labs-staticjdk/lib.
Default: 11-ea+10
4.3.13. javafxStaticSdkVersion
The version of the JavaFX SDK and its static libraries. These will be located under: ~/.gluon/substrate/javafxStaticSdk/$javaStaticSdkVersion/$target-$arch/sdk/lib.
Default: 21-ea+11.1
4.3.14. Software Rendering
JavaFX applications can use software rendering when the graphics hardware on a system is insufficient to support hardware accelerated rendering.
To enable software rendering set the enableSWRendering parameter to true in plugin configuration.
Note: Enabling software rendering will result in a longer compile time and larger native image.
Default: false
Since: 0.1.14
4.3.15. remoteHostName
Set the host name for remote deployment, typically to an embedded system, providing it is reachable and SSH is enabled.
Note: Useful for Linux-AArch64 target. See the embedded section.
4.3.16. remoteDir
Sets the directory where the native image will be deployed on the remote system, providing the remote host is reachable and SSH is enabled.
Note: Useful for Linux-AArch64 target. See the embedded section.
4.3.17. appIdentifier
By default, the application unique identifier is defined from the groupId and artifactId coordinates, but it can be set to something different if needed.
Note: Useful to set the package name on an Android app or the bundleId of an iOS app.
Since: 1.0.7
4.4. Config files
Some configuration options can alternatively be defined in configuration files instead of the configuration section of the plugin.
There are two non-exlusive options to create these configuration files.
4.4.1. Files from tracing agent
Running the gluonfx:runagent goal, the following files will be created automatically by a tracing agent under src/main/resources/META-INF/native-image folder:
-
jni-config.json
-
proxy-config.json
-
reflect-config.json
-
resource-config.json
-
serialization-config.json
-
predefined-classes-config.json
The files can be edited and modified to include or exclude content if needed.
|
The agent runs only on desktop, therefore only the classes for that host are discovered and added to the above config files. However, running on other platforms these might not be available. For that reason, the agent already filters out some of them (which are provided with the Substrate configuration files mentioned below). If needed, these files can be edited and modified manually before running the GluonFX goals. |
4.4.2. Substrate config files
Alternatively, or in combination with the above, the configuration files detailed below can be used, and should be placed in a folder named src/main/resources/META-INF/substrate/config.
When building the application, the plugin will also inspect every jar dependency for the existence of these configuration files. The
files in the jar should be placed in the same folder: META-INF/substrate/config.
JNI and Reflection
For every class that is defined in jniList or reflectionList, it is included in the configuration files
target/gluonfx/$arch-$os/gvm/jniconfig-$arch-$os.json and target/gluonfx/$arch-$os/gvm/reflectionconfig-$arch-$os.json respectively,
with a definition like the following:
[
  {
    "name" : "package.name.ClassName",
    "allDeclaredConstructors" : true,
    "allPublicConstructors" : true,
    "allDeclaredFields" : true,
    "allPublicFields" : true,
    "allDeclaredMethods" : true,
    "allPublicMethods" : true
  }
]
This has an impact on both compilation time and memory footprint, because all methods and fields are opened. Ideally, it is better to open only the minimal list of fields and methods that are required for your application to run.
You can create the following files:
-
jniconfig.jsonand/orreflectionconfig.json: these are applied to all targets -
jniconfig-$arch-$os.jsonand/orreflectionconfig-$arch-$os.json: these are only applied to targets that match both the architecture and operating system. For example, specifying reflection configuration for linux 64bit can be achieved by creating a file calledreflectionconfig-x86_64-linux.json.
The files must contain the fully qualified name of classes, together with some attributes (like allDeclaredFields), methods and/or fields that will be invoked via reflection and that are not already part of the list.
For instance, the configuration below only adds the method named
valueOf of the MaterialDesignIcon class to the final reflection configuration:
[
  {
    "name":"com.gluonhq.charm.glisten.visual.MaterialDesignIcon",
    "methods":[
      {"name":"valueOf","parameterTypes":["java.lang.String"] }
    ]
  }
]
For more information, see Reflection use in Native Images.
Resources
The resourcesList configuration option can also be defined in a configuration file:
-
resourceconfig.json: applied to all targets -
resourceconfig-$arch-$os.json: only applied to targets that match the given architecture and operating system
For more information, see Accessing resources in Native Images.
For instance, the configuration below includes a pattern to load all *.txt files found:
[
  {
  "resources": [
    {"pattern": ".*\\.txt$"}
  ]
  }
]
Resource bundles
The bundlesList configuration option can also be defined in a configuration file:
-
resourcebundles: applied to all targets -
resourcebundles-$arch-$os: only applied to targets that match the given architecture and operating system
For instance, below are the fully qualified name of two given resource bundles that will be included:
com.mycompany.myproject.mybundle1
com.mycompany.myproject.mybundle2
Build time initialization
If you need to set a class or list of classed to be initialized at build time, you can add their fully qualified name to the following configuration files:
-
initbuildtime: applied to all targets -
initbuildtime-$arch-$os: only applied to targets that match the given architecture and operating system
This can be especially convenient for enums that have a large list of values.
For more information, see Class initialization in Native Image.
4.5. Release Configuration
These options allow setting release parameters for building installers and releasing them to stores across different platforms.
4.5.1. Common
These properties are common across various platforms:
packageType
Type of package bundle that can be generated.
On macOS, 'pkg' or 'dmg' can be selected. Note that 'app' is generated by default.
On Windows, exe and msi are generated by default.
On iOS 'app' and 'ipa' are generated by default.
On Android 'apk' and 'aab' are generated by default.
description
A short description about the application.
Since: 1.0.12
vendor
Vendor of the application. Ideally, name of the company or individual developing the application.
Since: 1.0.11
version
Version of the application.
Since: 1.0.12
4.5.2. macOS
Only for macOS:
macAppStore
Boolean that indicates if the macOS bundle is intended for the Mac App Store.
macSigningUserName
Team or user name portion in Apple signing identities
macAppCategory
The category that best describes the app for the Mac App Store. By default it is set to public.app-category.utilities.
See LSApplicationCategoryType for the full list of categories.
4.5.3. macOS/iOS
For both macOS and iOS:
bundleName
A user-visible short name for the bundle. If not set, the Maven project’s name will be used.
bundleVersion
The version of the build that identifies an iteration of the bundle. A string composed of one to three period-separated integers, containing numeric characters (0-9) and periods only. Default 1.0.
bundleShortVersion
A user-visible string for the release or version number of the bundle. A string composed of one to three period-separated integers, containing numeric characters (0-9) and periods only. Default 1.0.
Signing for development or distribution
-
providedSigningIdentity: String that identifies a valid certificate that will be used for macOS/iOS development or macOS/iOS distribution. -
providedProvisioningProfile: String with the name of the provisioning profile created for macOS/iOS. When not provided, the plugin will be selected from all the valid identities found installed on the machine from any of these types:macOS: Apple Development|Apple Distribution|Mac Developer|3rd Party Mac Developer Application|Developer ID Application iOS: iPhone Developer|Apple Development|iOS Development|iPhone Distribution
and that were used by the provisioning profile development or distribution of the given app. When not provided, the plugin will try to find a valid installed provisioning profile that can be used to sign the app, including wildcards.
skipSigning
Boolean that can be used to skip signing macOS/iOS apps. This will prevent any deployment, but can be useful to run tests without an actual device.
4.5.4. iOS Simulator
Only for the iOS Simulator.
simulatorDevice
A string with a valid name of an iOS simulator device. It can be found from Xcode → Window → Devices and Simulators. If not provided or invalid, a default simulator device will be used.
4.5.5. Android
appLabel
A user-visible short name for the app, if not set, the Maven project’s name will be used.
versionCode
A positive integer used as an internal version number, by default is set to 1.
versionName
A string used as the version number shown to users, like <major>.<minor>.<point>. By default is 1.0.
Signing for release:
If these 4 parameters are not set, the app will be signed for debug only.
-
providedKeyStorePath: A string with the path to a keystore file that can be used to sign the Android apk/aab bundles -
providedKeyStorePassword: A string with the password of the provide keystore file -
providedKeyAlias: A string with an identifying name for the key -
providedKeyAliasPassword: A string with a password for the key
Note that it can be convenient to define the values for these options in the ~/.m2/settings.xml file, using Maven profiles.
4.6. Upgrading from previous versions
4.6.1. Upgrading from 0.1.x to 1.x.x
Client Maven plugin was renamed to GluonFX Maven plugin in v1.0.0. If you have been using the former, there are a few changes that you need to know:
-
Prefix for all goals has been renamed from
client:*togluonfx:*. For example: to build a native image, usemvn gluonfx:buildinstead ofmvn client:build -
gluonfx:nativerunreplacesclient:runto execute native application -
A new goal
gluonfx:runcan be used to run the application on JVM/hotspot. It simplifies resolution of Attach libraries for Desktop. For more information, check the issue: Simplify resolution of Attach artifacts on JVM
5. Platforms
Gluon applications can run on various platforms. These applications can run directly on the JVM on all desktop and embedded platforms without any additional requirement.
| Architecture | Platform | controls/fxml | media | web |
|---|---|---|---|---|
|
|
|||
|
|
|||
|
||||
|
||||
|
|
|||
|
|
|||
|
||||
|
Gluon applications can also be converted to a native image (a binary or an executable) that can target a specific platform. Some native image targets have a dependency on the platform on which they can be built. For example, iOS images can currently be only produced on a MacOS.
In this section, we will discuss the requirements, procedure, and restrictions for development and deployment of Gluon applications across platforms. We will also try to build HelloFX, a simple JavaFX application, on each platform.
Native image builds for a specific target platform have to be created from a specific host platform (e.g. Windows native build has to be done on Windows, an iOS native build on macOS). This hurdle can be overcome by using a build automation tool like Github Actions, which provides build 'runners' for every major OS. Each platform section below contains an example of a Github Actions Workflow. You can also have a look at the Hello Gluon CI Sample which combines a workflow for all supported platforms.
|
Native image is only supported on 64-bit platforms. |
The following matrix tables will help to list features and platforms supported across native-image using Gluon:
| Platform | x64 | AArch64 |
|---|---|---|
|
||
|
||
|
||
|
||
|
| Platform | controls/fxml | media | web |
|---|---|---|---|
|
|||
|
|||
|
|||
|
|||
|
- Supported via Attach
5.1. Linux
5.1.1. Pre-requisites
-
GraalVM
-
Additional packages (more information on this later)
GraalVM
Gluon applications can run on JVM without any additional requirement. However, to create native images for your Gluon application, you will need the latest version of the Gluon built version of GraalVM.
The latest version of Gluon’s GraalVM for Linux can be found at https://github.com/gluonhq/graal/releases/tag/gluon-22.1.0.1-Final.
Download the graalvm-svm-java17-linux-gluon-22.1.0.1-Final.zip file, unzip and extract to a proper location, and finally set the GRAALVM_HOME environment variable to point to the GraalVM directory:
export GRAALVM_HOME=/path/to/graalvm-svm-java17-linux-gluon-22.1.0.1-FinalFor convenience, you can add the above to your .bashrc file.
If needed, there is also a GraalVM build based on Java 11.
Additional packages
In addition to GraalVM, the following packages are also required:
-
gcc version 10 or higher
-
ld version 2.26 or higher
5.1.2. CentOS
Required packages
Execute the following command to install the required yum packages:
sudo yum install pkgconfig gtk3-devel libXtst-devel
CentOS 6/7: Developer Toolset
By default, CentOS 6 and 7 bundle gcc version 4.4.x and 4.8.x respectively. The easiest way to install a more recent version is to install Developer Toolset 6 or higher using Software Collections. The installation process is described in detail at: https://www.softwarecollections.org/en/scls/rhscl/devtoolset-8/
5.1.3. HelloFX Sample
Clone HelloFX on your system and run the mvn gluonfx:compile goal.
It produces the following output:
[INFO] --- gluonfx-maven-plugin:1.0.27:compile (default-cli) @ hellofx ---
[INFO] ==================== COMPILE TASK ====================
[INFO] We will now compile your code for x86_64-linux-linux. This may take some time.
[INFO] [SUB] Warning: Ignoring server-mode native-image argument --no-server.
[INFO] [SUB] ===========================================================================================================
[INFO] [SUB] GraalVM Native Image: Generating 'hellofx.hellofx' (shared library)...
[INFO] [SUB] ===========================================================================================================
[INFO] [SUB] [GluonFeature] enabled for config com.oracle.svm.hosted.FeatureImpl$IsInConfigurationAccessImpl@14dda234
[INFO] [SUB] GluonFeature enabled in setup com.oracle.svm.hosted.FeatureImpl$DuringSetupAccessImpl@d176a31
[INFO] [SUB] [1/8] Initializing...                                                                       (6.1s @ 0.12GB)
[INFO] [SUB]  Java version: 23+25, vendor version: GraalVM CE 23-dev+25.1
[INFO] [SUB]  Graal compiler: optimization level: 2, target machine: x86-64-v3
[INFO] [SUB]  C compiler: gcc (linux, x86_64, 11.4.0)
[INFO] [SUB]  Garbage collector: Serial GC (max heap size: 80% of RAM)
[INFO] [SUB]  2 user-specific feature(s):
[INFO] [SUB]  - com.gluonhq.substrate.feature.GluonFeature
[INFO] [SUB]  - com.oracle.svm.thirdparty.gson.GsonFeature
[INFO] [SUB] -----------------------------------------------------------------------------------------------------------
[INFO] [SUB] Build resources:
[INFO] [SUB]  - 11.70GB of memory (75.6% of 15.49GB system memory, determined at start)
[INFO] [SUB]  - 12 thread(s) (100.0% of 12 available processor(s), determined at start)
[INFO] [SUB] [2/8] Performing analysis...  [******]                                                     (37.6s @ 1.18GB)
[INFO] [SUB]    11,957 reachable types   (87.1% of   13,722 total)
[INFO] [SUB]    19,403 reachable fields  (56.6% of   34,297 total)
[INFO] [SUB]    57,961 reachable methods (61.9% of   93,651 total)
[INFO] [SUB]     3,456 types,    93 fields, and 2,480 methods registered for reflection
[INFO] [SUB]       114 types,   134 fields, and   189 methods registered for JNI access
[INFO] [SUB]         4 native libraries: dl, pthread, rt, z
[INFO] [SUB] [3/8] Building universe...                                                                  (5.4s @ 1.34GB)
[INFO] [SUB] [4/8] Parsing methods...      [**]                                                          (3.9s @ 1.44GB)
[INFO] [SUB] [5/8] Inlining methods...     [****]                                                        (2.8s @ 1.60GB)
[INFO] [SUB] [6/8] Compiling methods...    [******]                                                     (36.4s @ 1.27GB)
[INFO] [SUB] [7/8] Laying out methods...   [***]                                                         (6.0s @ 1.67GB)
[INFO] [SUB]
[INFO] [SUB] -----------------------------------------------------------------------------------------------------------
[INFO] [SUB]                        9.2s (8.4% of total time) in 1275 GCs | Peak RSS: 2.60GB | CPU load: 9.14
[INFO] [SUB] -----------------------------------------------------------------------------------------------------------
[INFO] [SUB] ===========================================================================================================
[INFO] [SUB] Finished generating 'hellofx.hellofx' in 1m 48s.
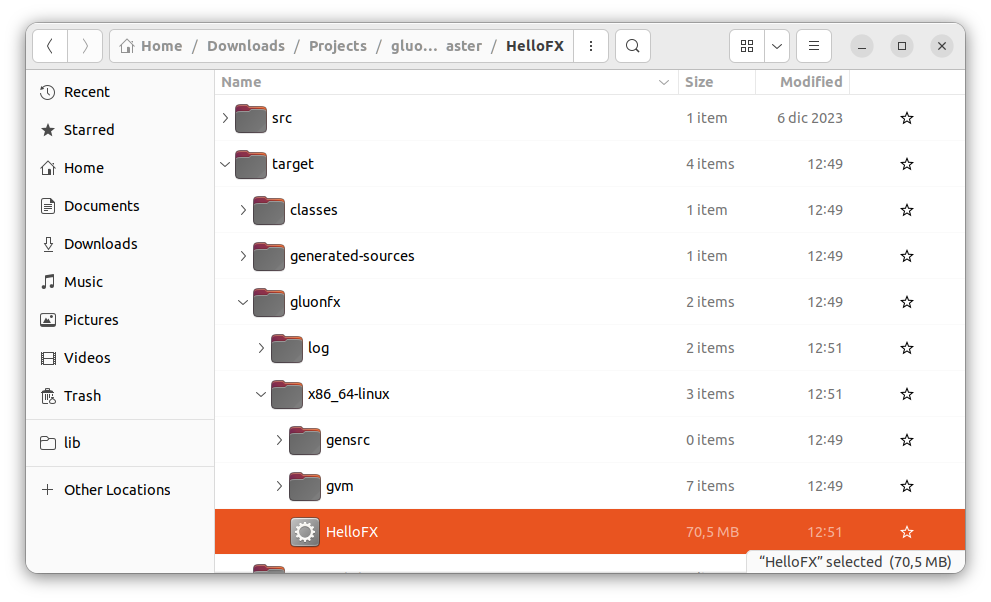
And as a result, hellofx.hellofx.o is created and can be found under target/gluonfx/x86_64-linux/gvm/tmp/SVM-*/hellofx.hellofx.o.
Run the mvn gluonfx:link goal to produce the native image. As a result, target/gluonfx/x86_64-linux/hellofx is created.
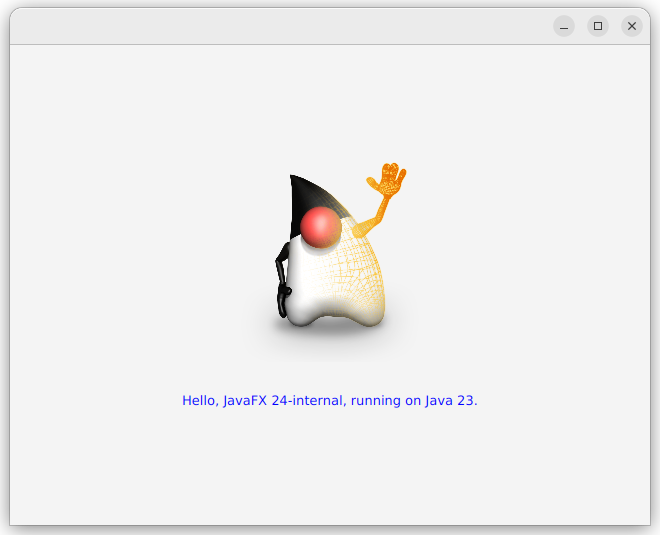
It can be executed directly or with mvn gluonfx:nativerun.
5.1.4. Linux native builds using Github Actions
Using this Github workflow, you can checkout, build, and upload the native binary as a build artifact. The steps are described in code comments:
jobs:
build:
    runs-on: ubuntu-latest
    steps:
      # Checkout your code
      - uses: actions/checkout@v4

      # Make sure the latest GraalVM is installed.
      # after this step env.JAVA_HOME and env.GRAALVM_HOME will point to the GraalVM location
      - name: Setup GraalVM built by Gluon
        uses: gluonhq/setup-graalvm@master
        # set GITHUB_TOKEN to avoid exceeding GitHub's API rate limit
        env:
          GITHUB_TOKEN: ${{ secrets.GITHUB_TOKEN }}

      # Install extra required packaged on top of ubuntu-latest
      - name: Install libraries
        run: sudo apt install libasound2-dev libavcodec-dev libavformat-dev libavutil-dev libgl-dev libgtk-3-dev libpango1.0-dev libxtst-dev

      # Create a staging directory where the binary will be copied into
      - name: Make staging directory
        run: mkdir staging

      # Install the Gluon License (optional)
      # Using this step requires you to set a GLUON_LICENSE secret in the secret configuration of your repo. Have a look at https://gluonhq.com/products/mobile/buy for more information about obtaining a license.
      - name: Gluon License
        uses: gluonhq/gluon-build-license@v1
        with:
          gluon-license: ${{ secrets.GLUON_LICENSE }}


      # Build your project using Maven
      # The desktop profile is used, which means a native build will be created for the host platform (in this case Linux) itself.
      - name: Gluon Build
        run: mvn -Pdesktop gluonfx:build gluonfx:package

      # Copy the native binary to the staging directory
      - name: Copy native image to staging
        run: cp -r target/gluonfx/x86_64-linux/HelloGluon staging

      # Upload the staging directory as a build artifact. You will be able to download this after the build finishes.
      - name: Upload
        uses: actions/upload-artifact@v2
        with:
          name: Package
          path: staging
You can see this workflow in action in the Hello Gluon CI Sample.
5.1.5. HelloStaticLib Sample
Clone HelloStaticLib on your system and run the mvn gluonfx:staticlib goal.
It produces the following output:
[INFO] --- gluonfx-maven-plugin:1.0.27:staticlib (default-cli) @ hellostaticlib ---
[INFO] ==================== STATIC LIBRARY TASK ====================
[INFO] [SUB] ===========================================================================================================
[INFO] [SUB] GraalVM Native Image: Generating 'hello.hellostaticlib' (shared library)...
[INFO] [SUB] ===========================================================================================================
[INFO] [SUB] [GluonFeature] enabled for config com.oracle.svm.hosted.FeatureImpl$IsInConfigurationAccessImpl@76012793
[INFO] [SUB] GluonFeature enabled in setup com.oracle.svm.hosted.FeatureImpl$DuringSetupAccessImpl@2f6bcf87
[INFO] [SUB] [1/8] Initializing...                                                                       (5.3s @ 0.13GB)
[INFO] [SUB]  Java version: 23+25, vendor version: GraalVM CE 23-dev+25.1
[INFO] [SUB]  Graal compiler: optimization level: 2, target machine: x86-64-v3
[INFO] [SUB]  C compiler: gcc (linux, x86_64, 11.4.0)
[INFO] [SUB]  Garbage collector: Serial GC (max heap size: 80% of RAM)
[INFO] [SUB]  2 user-specific feature(s):
[INFO] [SUB]  - com.gluonhq.substrate.feature.GluonFeature
[INFO] [SUB]  - com.oracle.svm.thirdparty.gson.GsonFeature
[INFO] [SUB] -----------------------------------------------------------------------------------------------------------
[INFO] [SUB] Build resources:
[INFO] [SUB]  - 11.70GB of memory (75.6% of 15.49GB system memory, determined at start)
[INFO] [SUB]  - 12 thread(s) (100.0% of 12 available processor(s), determined at start)
[INFO] [SUB] [2/8] Performing analysis...  [******]                                                     (21.6s @ 0.77GB)
[INFO] [SUB]     6,749 reachable types   (82.3% of    8,201 total)
[INFO] [SUB]     8,409 reachable fields  (45.9% of   18,333 total)
[INFO] [SUB]    30,827 reachable methods (55.3% of   55,790 total)
[INFO] [SUB]     2,070 types,    79 fields, and 1,558 methods registered for reflection
[INFO] [SUB]        84 types,    67 fields, and   106 methods registered for JNI access
[INFO] [SUB]         4 native libraries: dl, pthread, rt, z
[INFO] [SUB] [3/8] Building universe...                                                                  (3.2s @ 0.89GB)
[INFO] [SUB] [4/8] Parsing methods...      [**]                                                          (2.9s @ 0.52GB)
[INFO] [SUB] [5/8] Inlining methods...     [***]                                                         (1.6s @ 0.60GB)
[INFO] [SUB] [6/8] Compiling methods...    [*****]                                                      (22.5s @ 0.95GB)
[INFO] [SUB] [7/8] Laying out methods...   [**]                                                          (4.3s @ 1.17GB)
[INFO] [SUB]
[INFO] [SUB] -----------------------------------------------------------------------------------------------------------
[INFO] [SUB]                         4.8s (6.8% of total time) in 869 GCs | Peak RSS: 1.89GB | CPU load: 9.13
[INFO] [SUB] -----------------------------------------------------------------------------------------------------------
[INFO] [SUB] Build artifacts:
[INFO] [SUB]  HelloStaticLib/target/gluonfx/x86_64-linux/gvm/HelloStaticLib/graal_isolate.h (c_header)
[INFO] [SUB]  HelloStaticLib/target/gluonfx/x86_64-linux/gvm/HelloStaticLib/graal_isolate_dynamic.h (c_header)
[INFO] [SUB]  HelloStaticLib/target/gluonfx/x86_64-linux/gvm/HelloStaticLib/hello.hellostaticlib.h (c_header)
[INFO] [SUB]  HelloStaticLib/target/gluonfx/x86_64-linux/gvm/HelloStaticLib/hello.hellostaticlib_dynamic.h (c_header)
[INFO] [SUB] ========================================================================================================================
[INFO] [SUB] Finished generating 'hello.hellostaticlib' in 1m 8s.
[INFO] Static library libHelloStaticLib.a and static libraries [vmone]
were successfully added to HelloStaticLib/target/gluonfx/x86_64-linux/gvm.
And as a result, HelloStaticLib.a is created and can be found under target/gluonfx/x86_64-linux/gvm.
To test the static library, from the HelloStaticLib’s root, run ./run.sh to compile and run the sample sample/example.c that makes use of the library:
The expected output is:
Sum: 3.0
Diff: -1.0
Text: Hello from Java
5.2. macOS
Gluon applications can run on JVM and as native image on macOS with Intel chip (x86_64) and with Apple Silicon chip (AArch64).
5.2.1. Pre-requisites
-
GraalVM
-
Xcode
GraalVM
Gluon applications can run on JVM without any additional requirement. However, to create native-images for your Gluon application, you will need the latest version of the Gluon built version of GraalVM.
The latest version of Gluon’s GraalVM for macOS can be found at https://github.com/gluonhq/graal/releases/tag/gluon-22.1.0.1-Final.
x86_64
For Intel, download the graalvm-svm-java17-darwin-gluon-22.1.0.1-Final.zip file, unzip and extract to a proper location, and finally set the GRAALVM_HOME environment variable to point to the GraalVM directory:
export GRAALVM_HOME=/path/to/graalvm-svm-java17-darwin-gluon-22.1.0.1-Final/Contents/HomeAArch64
For Apple Silicon, Download the graalvm-svm-java17-darwin-m1-gluon-22.1.0.1-Final.zip file, unzip and extract to a proper location, and finally set the GRAALVM_HOME environment variable to point to the GraalVM directory:
export GRAALVM_HOME=/path/to/graalvm-svm-java17-darwin-m1-gluon-22.1.0.1-Final/Contents/HomeFor convenience, you can add the above to your .bash_profile file.
If needed, in both cases there is also a GraalVM build based on Java 11.
Xcode
Xcode version 11 or higher is required and can be installed from the Mac App Store. Once installed, open it and accept the license terms.
5.2.2. HelloFX Sample
Clone HelloFX on your system and run the mvn gluonfx:compile goal.
It produces the following output:
[INFO] --- gluonfx-maven-plugin:1.0.27:compile (default-cli) @ hellofx ---
[INFO] ==================== COMPILE TASK ====================
[INFO] We will now compile your code for aarch64-apple-darwin. This may take some time.
[INFO] [SUB] ===========================================================================================================
[INFO] [SUB] GraalVM Native Image: Generating 'hellofx.hellofx'...
[INFO] [SUB] ===========================================================================================================
[INFO] [SUB] [1/8] Initializing...                                                                       (5.8s @ 0.15GB)
[INFO] [SUB]  Java version: 23+25, vendor version: GraalVM CE 23-dev+25.1
[INFO] [SUB]  Graal compiler: optimization level: 2, target machine: armv8-a
[INFO] [SUB]  C compiler: cc (apple, arm64, 15.0.0)
[INFO] [SUB]  Garbage collector: Serial GC (max heap size: 80% of RAM)
[INFO] [SUB]  1 user-specific feature(s):
[INFO] [SUB]  - com.oracle.svm.thirdparty.gson.GsonFeature
[INFO] [SUB] -----------------------------------------------------------------------------------------------------------
[INFO] [SUB] Build resources:
[INFO] [SUB]  - 12.09GB of memory (75.6% of 16.00GB system memory, determined at start)
[INFO] [SUB]  - 10 thread(s) (100.0% of 10 available processor(s), determined at start)
[INFO] [SUB] [2/8] Performing analysis...  [*****]                                                      (17.7s @ 1.17GB)
[INFO] [SUB]    12,161 reachable types   (87.4% of   13,912 total)
[INFO] [SUB]    19,827 reachable fields  (56.9% of   34,815 total)
[INFO] [SUB]    58,764 reachable methods (62.4% of   94,187 total)
[INFO] [SUB]     3,520 types,    93 fields, and 2,488 methods registered for reflection
[INFO] [SUB]       127 types,   123 fields, and   226 methods registered for JNI access
[INFO] [SUB]         5 native libraries: -framework CoreServices, -framework Foundation, dl, pthread, z
[INFO] [SUB] [3/8] Building universe...                                                                  (2.1s @ 1.36GB)
[INFO] [SUB] [4/8] Parsing methods...      [*]                                                           (1.7s @ 1.50GB)
[INFO] [SUB] [5/8] Inlining methods...     [****]                                                        (1.2s @ 1.63GB)
[INFO] [SUB] [6/8] Compiling methods...    [****]                                                       (14.4s @ 1.32GB)
[INFO] [SUB] [7/8] Laying out methods...   [**]                                                          (3.0s @ 1.68GB)
[INFO] [SUB]
[INFO] [SUB] -----------------------------------------------------------------------------------------------------------
[INFO] [SUB]                        3.7s (7.2% of total time) in 1000 GCs | Peak RSS: 2.19GB | CPU load: 5.97
[INFO] [SUB] -----------------------------------------------------------------------------------------------------------
[INFO] [SUB] Build artifacts:
[INFO] [SUB]  HelloFX/target/gluonfx/aarch64-darwin/gvm/HelloFX/graal_isolate.h (c_header)
[INFO] [SUB]  HelloFX/target/gluonfx/aarch64-darwin/gvm/HelloFX/graal_isolate_dynamic.h (c_header)
[INFO] [SUB]  HelloFX/target/gluonfx/aarch64-darwin/gvm/HelloFX/hellofx.hellofx.h (c_header)
[INFO] [SUB]  HelloFX/target/gluonfx/aarch64-darwin/gvm/HelloFX/hellofx.hellofx_dynamic.h (c_header)
[INFO] [SUB] ========================================================================================================================
[INFO] [SUB] Finished generating 'hellofx.hellofx' in 51.3s.
And as a result, hellofx.hellofx.o is created and can be found under target/gluonfx/x86_64-darwin/gvm/tmp/SVM-*/hellofx.hellofx.o.
Run the mvn gluonfx:link goal to produce the native image. As a result, target/gluonfx/x86_64-darwin/hellofx is created.
It can be executed directly or with mvn gluonfx:nativerun.
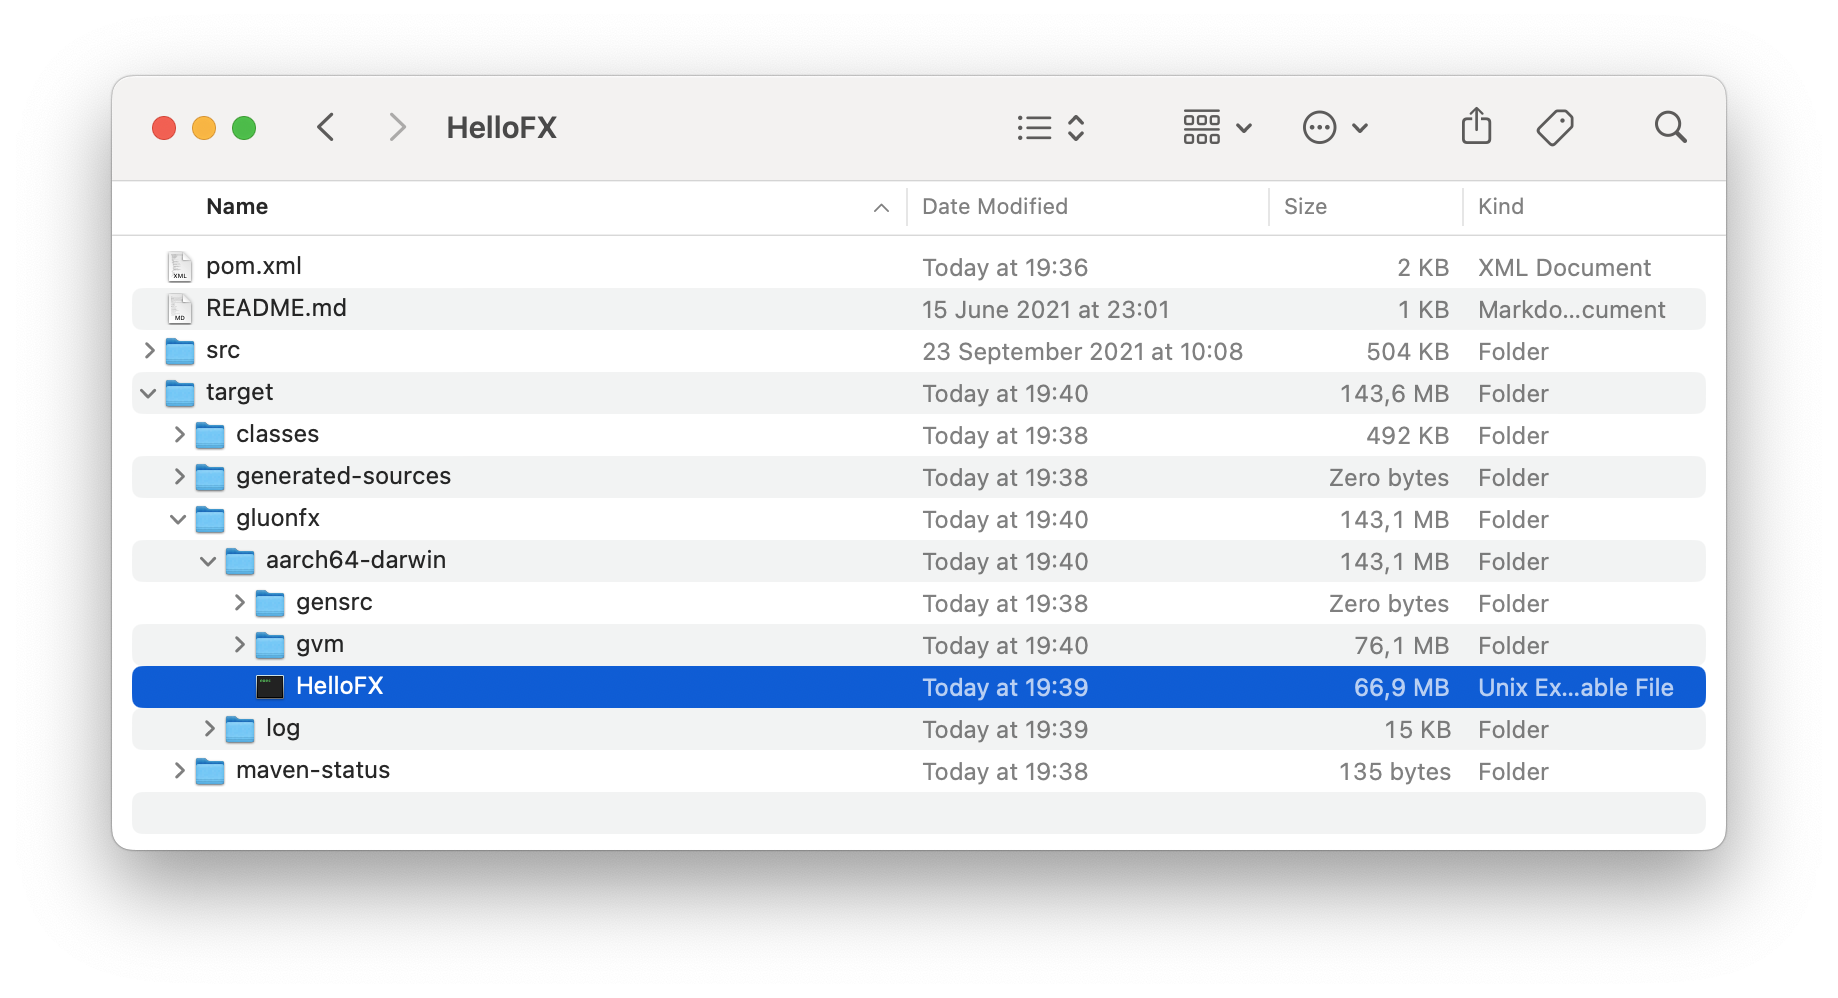
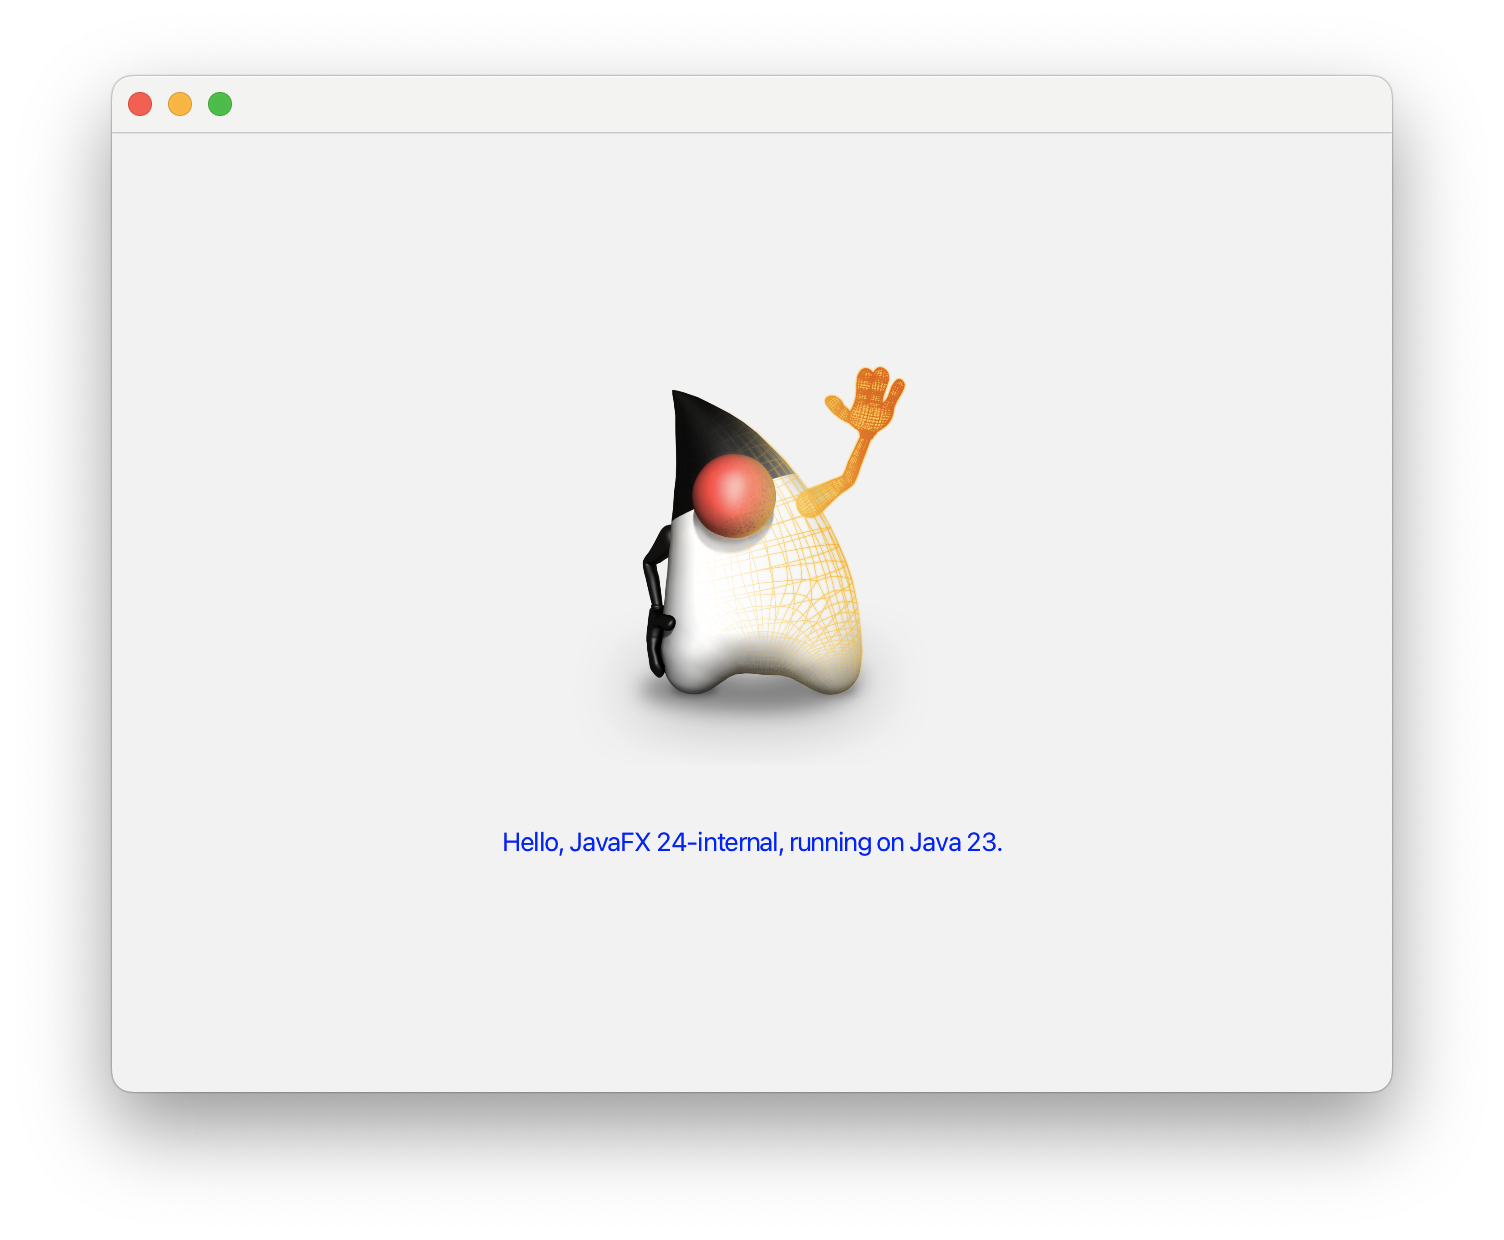
Note that the same procedure applies when building a native image on Intel.
Optionally, you can create an app bundle and a pkg or dmg bundle (after setting the packageType accordingly in the releaseConfiguration block of the sample’s pom), by running mvn gluonfx:package:
[INFO] --- gluonfx-maven-plugin:1.0.27:package (default-cli) @ hellofx ---
[INFO] ==================== PACKAGE TASK ====================
[INFO] Building app bundle: HelloFX/target/gluonfx/aarch64-darwin/HelloFX.app
[INFO] Default macOS plist generated in HelloFX/target/gluonfx/aarch64-darwin/gensrc/darwin/Info.plist.
Consider copying it to HelloFX/src/darwin before performing any modification
[INFO] Default macOS resources generated in HelloFX/target/gluonfx/aarch64-darwin/gensrc/darwin.
Consider copying them to HelloFX/src/darwin before performing any modification
[INFO] App bundle built successfully at: HelloFX/target/gluonfx/aarch64-darwin/HelloFX.app
[INFO] Building pkg for HelloFX/target/gluonfx/aarch64-darwin/HelloFX.app
[INFO] Pkg built successfully at HelloFX/target/gluonfx/aarch64-darwin/HelloFX-1.0.0.pkg
[INFO] ------------------------------------------------------------------------
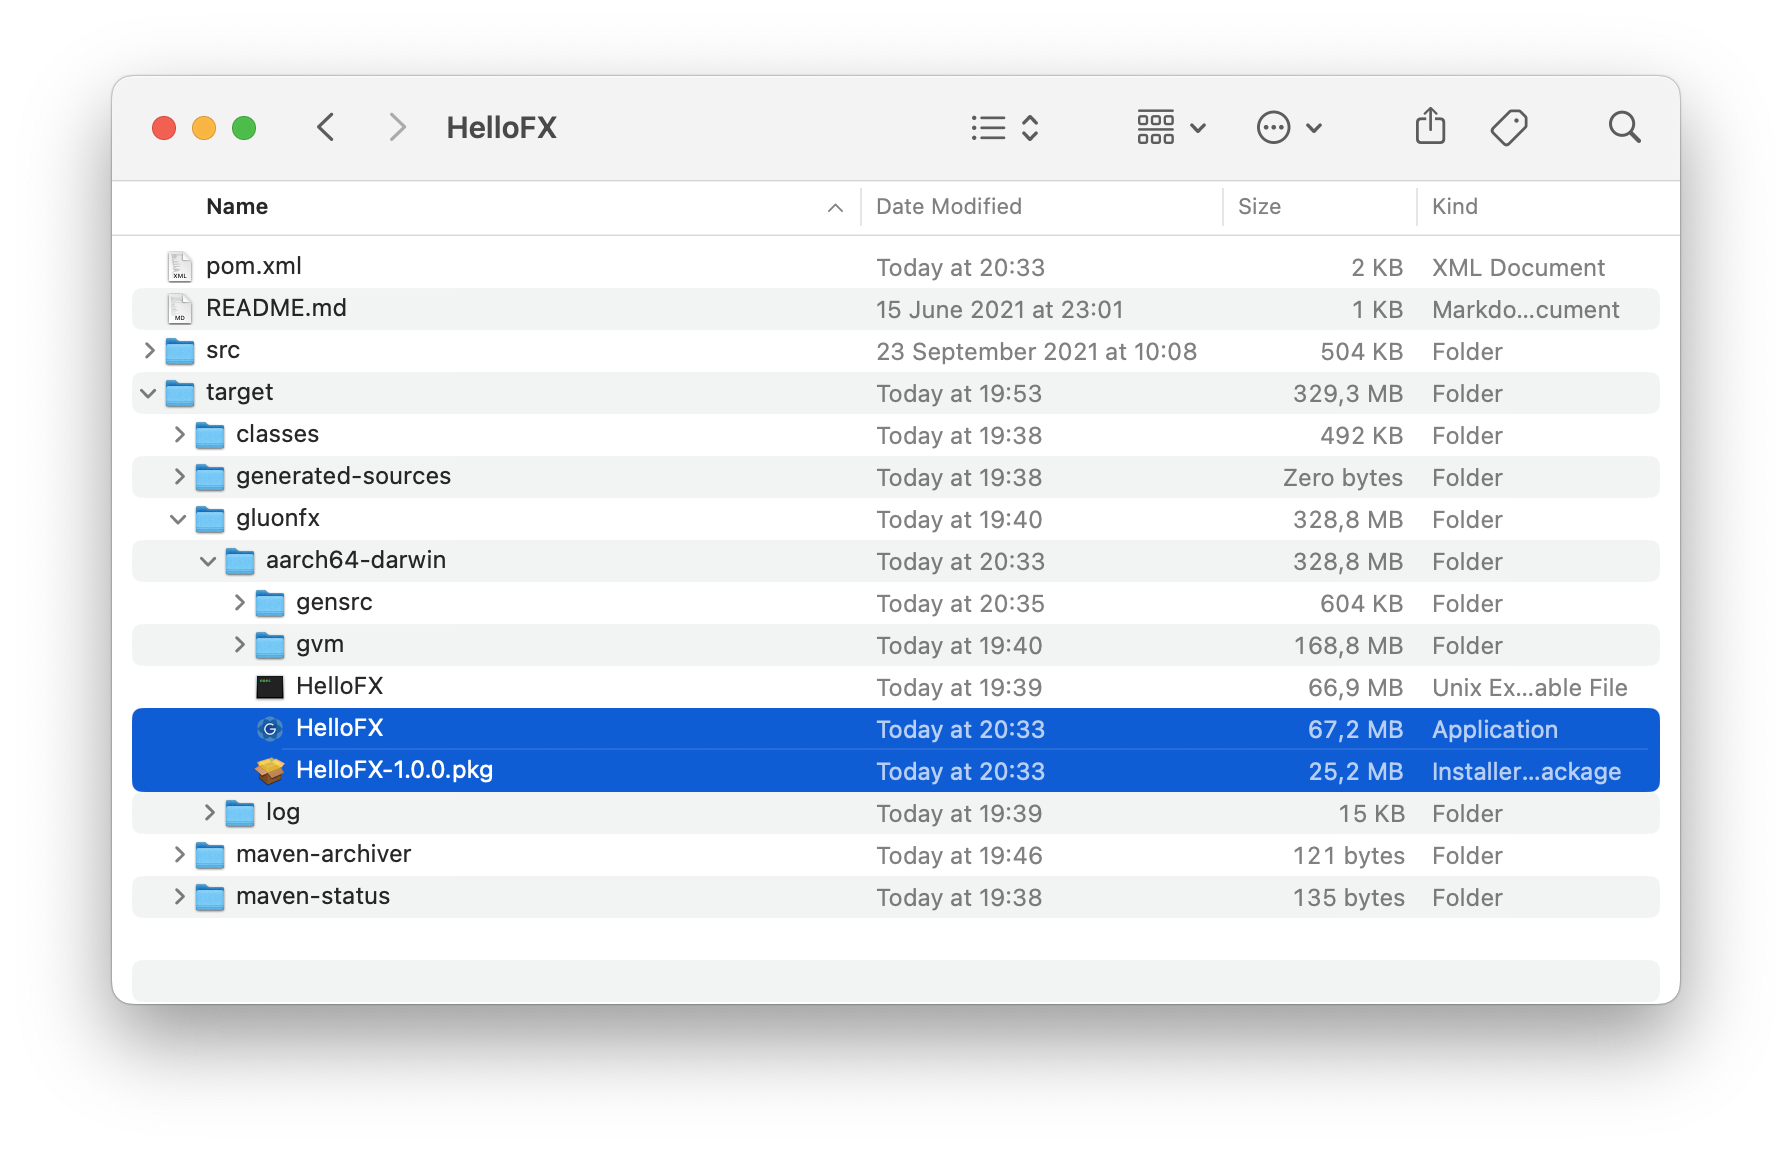
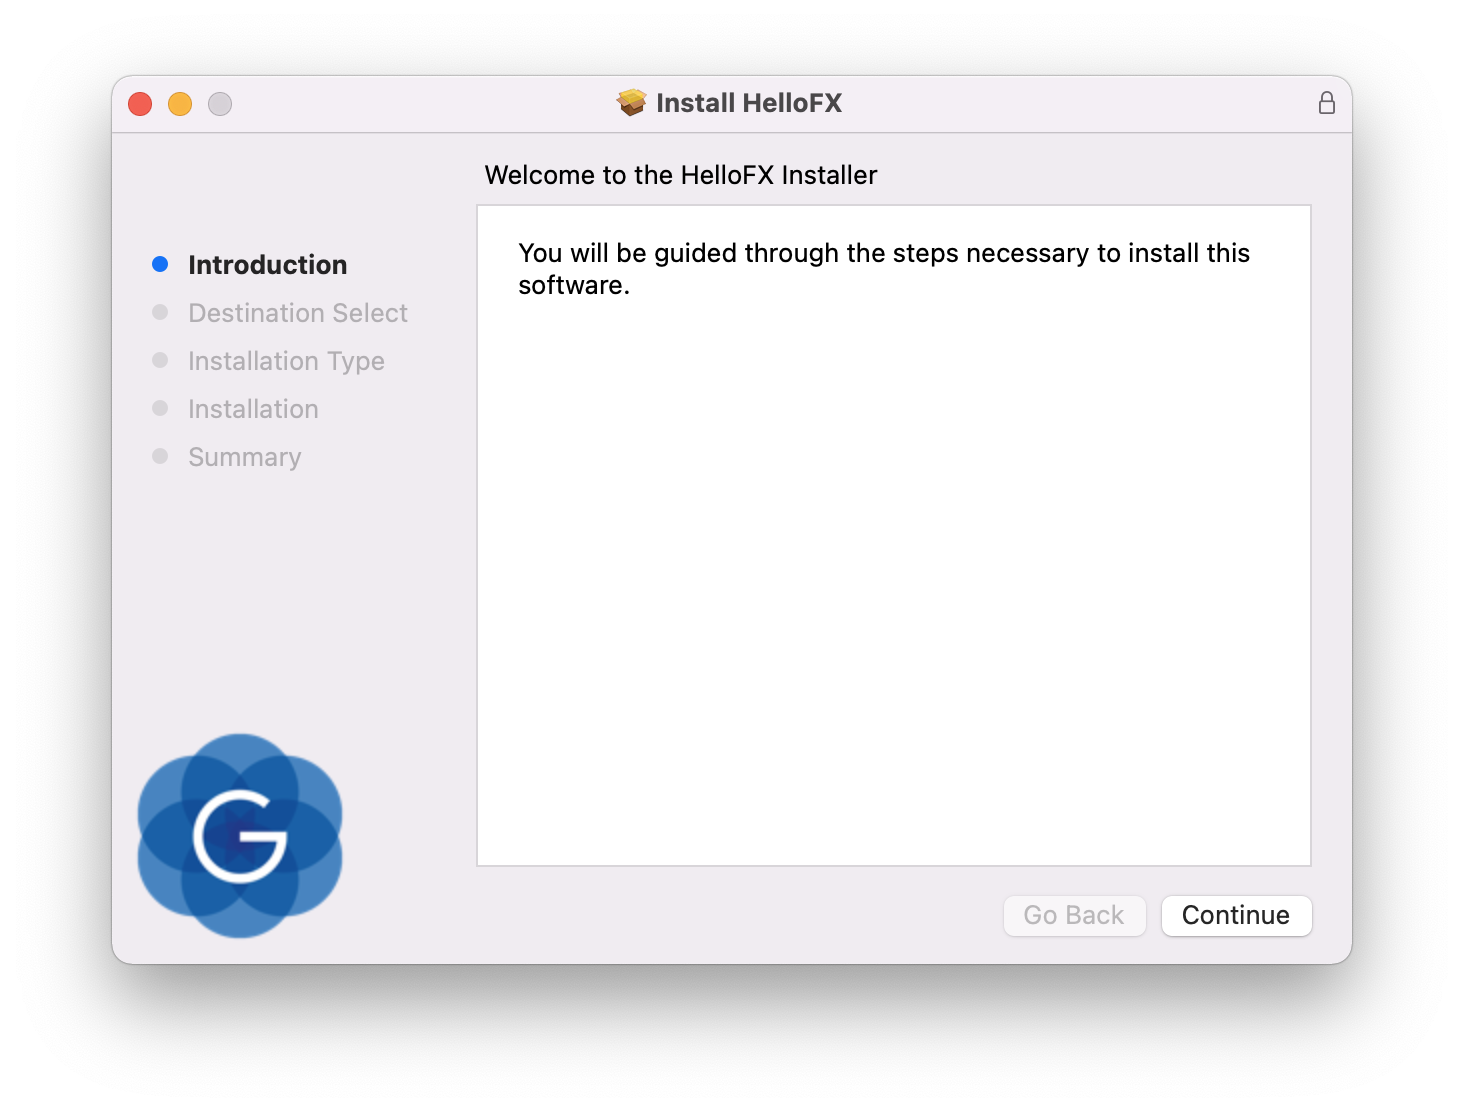
The bundles can be signed or not, and the pkg can be signed for distribution through the Mac App Store, or not, based on the release configuration settings.
5.2.3. macOS native builds using Github Actions
Using this Github workflow, you can checkout, build, and upload the native binary as a build artifact. The steps are described in code comments:
jobs:
  build:
    runs-on: macos-latest
    steps:
      # Checkout your code
      - uses: actions/checkout@v4

      # Make sure the latest GraalVM is installed.
      # after this step env.JAVA_HOME and env.GRAALVM_HOME will point to the GraalVM location
      - name: Setup GraalVM built by Gluon
        uses: gluonhq/setup-graalvm@master
        # set GITHUB_TOKEN to avoid exceeding GitHub's API rate limit
        env:
          GITHUB_TOKEN: ${{ secrets.GITHUB_TOKEN }}

      # Create a staging directory where the binary will be copied into
      - name: Make staging directory
        run: mkdir staging

      # Install the Gluon License (optional)
      # Using this step requires you to set a GLUON_LICENSE secret in the secret configuration of your repo. Have a look at https://gluonhq.com/products/mobile/buy for more information about obtaining a license.
      - name: Gluon License
        uses: gluonhq/gluon-build-license@v1
        with:
          gluon-license: ${{ secrets.GLUON_LICENSE }}

      # Build your project using Maven
      # The desktop profile is used, which means a native build will be created for the host platform (in this case macOS) itself.
      - name: Gluon Build
        run: mvn -Pdesktop gluonfx:build gluonfx:package

      # Copy the native binary to the staging directory
      - name: Copy native image to staging
        run: cp -r target/gluonfx/aarch64-darwin/HelloGluon* staging

      # Upload the staging directory as a build artifact. You will be able to download this after the build finishes.
      - name: Upload
        uses: actions/upload-artifact@v2
        with:
          name: Package
          path: staging
You can see this workflow in action in the Hello Gluon CI Sample.
Note that using macos-latest or macos-14 uses an Apple Silicon runner (see macos-aarch64.yml), while macos-13 uses an Intel runner (see macos-x86_64.yml).
5.2.4. HelloStaticLib Sample
Clone HelloStaticLib on your system and run the mvn gluonfx:staticlib goal.
It produces the following output:
[INFO] --- gluonfx-maven-plugin:1.0.27:staticlib (default-cli) @ hellostaticlib ---
[INFO] ==================== STATIC LIBRARY TASK ====================
[INFO] [SUB] ===========================================================================================================
[INFO] [SUB] GraalVM Native Image: Generating 'hello.hellostaticlib' (shared library)...
[INFO] [SUB] ===========================================================================================================
[INFO] [SUB] [1/8] Initializing...                                                                       (9.2s @ 0.12GB)
[INFO] [SUB]  Java version: 23+25, vendor version: GraalVM CE 23-dev+25.1
[INFO] [SUB]  Graal compiler: optimization level: 2, target machine: armv8-a
[INFO] [SUB]  C compiler: cc (apple, arm64, 15.0.0)
[INFO] [SUB]  Garbage collector: Serial GC (max heap size: 80% of RAM)
[INFO] [SUB]  1 user-specific feature(s):
[INFO] [SUB]  - com.oracle.svm.thirdparty.gson.GsonFeature
[INFO] [SUB] -----------------------------------------------------------------------------------------------------------
[INFO] [SUB] Build resources:
[INFO] [SUB]  - 12.09GB of memory (75.6% of 16.00GB system memory, determined at start)
[INFO] [SUB]  - 10 thread(s) (100.0% of 10 available processor(s), determined at start)
[INFO] [SUB] [2/8] Performing analysis...  [*****]                                                      (12.6s @ 0.60GB)
[INFO] [SUB]     6,734 reachable types   (82.3% of    8,183 total)
[INFO] [SUB]     8,380 reachable fields  (46.1% of   18,159 total)
[INFO] [SUB]    30,751 reachable methods (55.4% of   55,503 total)
[INFO] [SUB]     2,091 types,    71 fields, and 1,569 methods registered for reflection
[INFO] [SUB]        84 types,    66 fields, and   106 methods registered for JNI access
[INFO] [SUB]         5 native libraries: -framework CoreServices, -framework Foundation, dl, pthread, z
[INFO] [SUB] [3/8] Building universe...                                                                  (1.6s @ 0.69GB)
[INFO] [SUB] [4/8] Parsing methods...      [*]                                                           (1.1s @ 0.76GB)
[INFO] [SUB] [5/8] Inlining methods...     [***]                                                         (0.8s @ 0.88GB)
[INFO] [SUB] [6/8] Compiling methods...    [***]                                                        (10.8s @ 0.64GB)
[INFO] [SUB] [7/8] Laying out methods...   [*]                                                           (2.0s @ 0.85GB)
[INFO] [SUB]
[INFO] [SUB] -----------------------------------------------------------------------------------------------------------
[INFO] [SUB]                         2.8s (6.6% of total time) in 812 GCs | Peak RSS: 1.53GB | CPU load: 4.87
[INFO] [SUB] -----------------------------------------------------------------------------------------------------------
[INFO] [SUB] Build artifacts:
[INFO] [SUB]  HelloStaticLib/target/gluonfx/aarch64-darwin/gvm/HelloStaticLib/graal_isolate.h (c_header)
[INFO] [SUB]  HelloStaticLib/target/gluonfx/aarch64-darwin/gvm/HelloStaticLib/graal_isolate_dynamic.h (c_header)
[INFO] [SUB]  HelloStaticLib/target/gluonfx/aarch64-darwin/gvm/HelloStaticLib/hello.hellostaticlib.h (c_header)
[INFO] [SUB]  HelloStaticLib/target/gluonfx/aarch64-darwin/gvm/HelloStaticLib/hello.hellostaticlib_dynamic.h (c_header)
[INFO] [SUB] ===========================================================================================================
[INFO] [SUB] Finished generating 'hello.hellostaticlib' in 42.1s.
[INFO] Static library libHelloStaticLib.a and static libraries [vmone]
were successfully added to HelloStaticLib/target/gluonfx/aarch64-darwin/gvm.
And as a result, HelloStaticLib.a is created and can be found under target/gluonfx/$os-darwin/gvm.
To test the static library, from the HelloStaticLib’s root, run ./run.sh to compile and run the sample sample/example.c that makes use of the library:
The expected output is:
Sum: 3.0
Diff: -1.0
Text: Hello from Java
5.3. Windows
5.3.1. Pre-requisites
-
GraalVM
-
Microsoft Visual Studio
-
WiX Toolset (optional)
GraalVM
Gluon applications can run on JVM without any additional requirement. However, to create native-images for your Gluon application, you will need the latest version of the Gluon built version of GraalVM.
The latest version of Gluon’s GraalVM for Windows can be found at https://github.com/gluonhq/graal/releases/tag/gluon-22.1.0.1-Final.
Download the graalvm-svm-java17-windows-gluon-22.1.0.1-Final.zip file, unzip and extract to a proper location, and finally set the GRAALVM_HOME environment variable to point to the GraalVM directory:
set GRAALVM_HOME=C:\path\to\graalvm-svm-java17-windows-gluon-22.1.0.1-FinalFor convenience, you can add GRAALVM_HOME to the Environment Variables list (Advanced system settings).
If needed, there is also a GraalVM build based on Java 11.
Microsoft Visual Studio
In addition to GraalVM, Microsoft Visual Studio 2019 is also required. The Community Edition is sufficient and can be downloaded from https://visualstudio.microsoft.com/downloads/.
|
Please make sure to choose the English Language Pack. GraalVM might not be able to detect the installed compiler version in other languages. |
During the installation process, make sure to select at least the following individual components:
-
Choose the English Language Pack
-
C++/CLI support for v142 build tools (14.25 or later)
-
MSVC v142 - VS 2019 C++ x64/x86 build tools (v14.25 or later)
-
Windows Universal CRT SDK
-
Windows 10 SDK (10.0.19041.0 or later)
|
All build commands, be it with Maven or Gradle, must be executed in a Visual Studio 2019 Command Prompt called Alternatively, you can run |
Wix
In order to create a MSI installer for the native application, WiX 3.0 or later is required.
5.3.2. HelloFX Sample
Clone HelloFX on your system and run the mvn gluonfx:compile goal.
It produces the following output:
On a Windows machine, run the gluonfx:compile goal. It produces the following output:
[INFO] --- gluonfx-maven-plugin:1.0.27:compile (default-cli) @ hellofx ---
[INFO] ==================== COMPILE TASK ====================
[INFO] [SUB] ===========================================================================================================
[INFO] [SUB] GraalVM Native Image: Generating 'hellofx.hellofx'...
[INFO] [SUB] ===========================================================================================================
[INFO] [SUB] [1/7] Initializing...                                                                      (18,9s @ 0,14GB)
[INFO] [SUB]  Version info: 'GraalVM 22.1.0.1 Java 17 CE'
[INFO] [SUB] [2/7] Performing analysis...  [************]                                               (46,4s @ 4,11GB)
[INFO] [SUB]   11.120 (89,19%) of 12.468 classes reachable
[INFO] [SUB]   19.946 (73,05%) of 27.303 fields reachable
[INFO] [SUB]   54.372 (61,51%) of 88.393 methods reachable
[INFO] [SUB]      651 classes,   106 fields, and 1.310 methods registered for reflection
[INFO] [SUB]      134 classes,   150 fields, and   206 methods registered for JNI access
[INFO] [SUB] [3/7] Building universe...                                                                  (2,6s @ 2,23GB)
[INFO] [SUB] [4/7] Parsing methods...      [*]                                                           (1,8s @ 3,35GB)
[INFO] [SUB] [5/7] Inlining methods...     [*****]                                                       (5,0s @ 1,13GB)
[INFO] [SUB] [6/7] Compiling methods...    [*****]                                                      (23,2s @ 1,75GB)
[INFO] [SUB] [7/7] Creating image...
[INFO] [SUB] -----------------------------------------------------------------------------------------------------------
[INFO] [SUB]              8,7s (8,3% of total time) in 36 GCs | Peak RSS: 6,71GB | CPU load: 7,76
[INFO] [SUB] -----------------------------------------------------------------------------------------------------------
[INFO] [SUB] ===========================================================================================================
[INFO] [SUB] Finished generating 'hellofx.hellofx' in 1m 44s.
And as a result, hellofx.hellofx.obj is created and can be found under target\gluonfx\x86_64-windows\gvm\tmp\SVM-*\hellofx.hellofx.obj.
Run the mvn gluonfx:link goal to produce the native image. target\gluonfx\x86_64-windows\hellofx.exe is created.
It can be executed directly or with mvn gluonfx:nativerun.
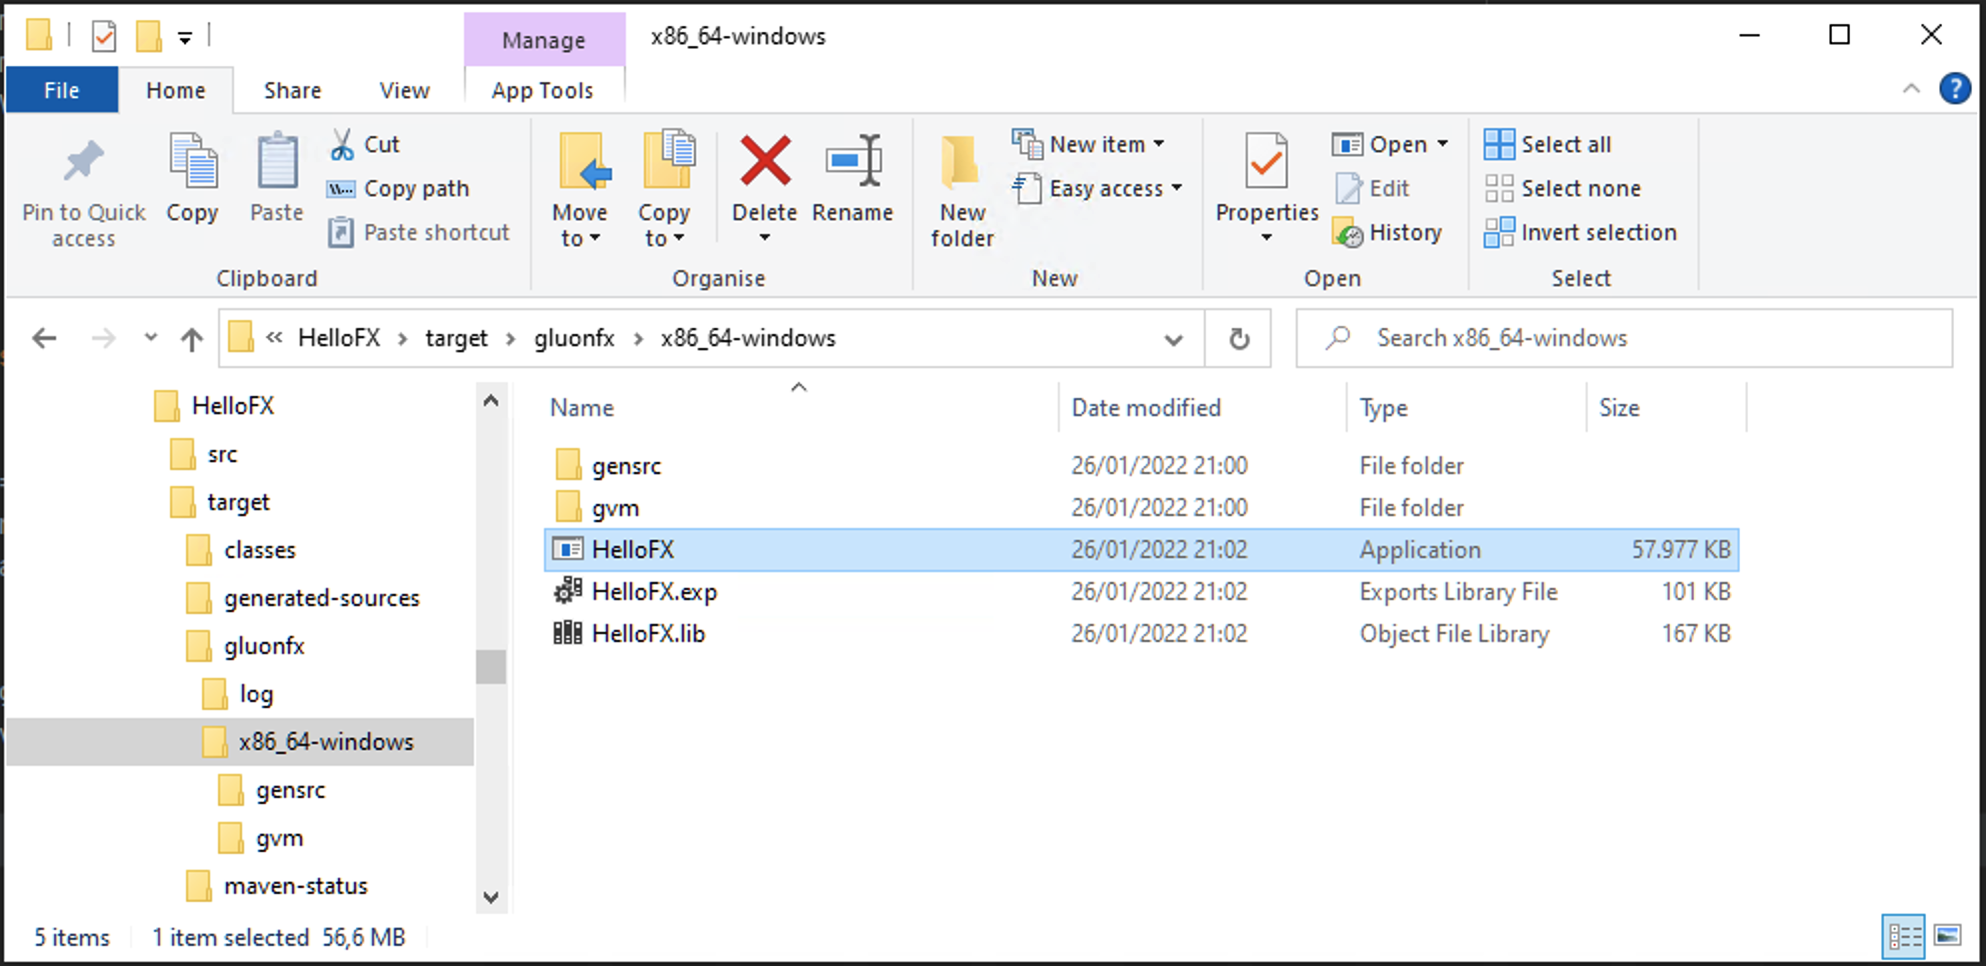
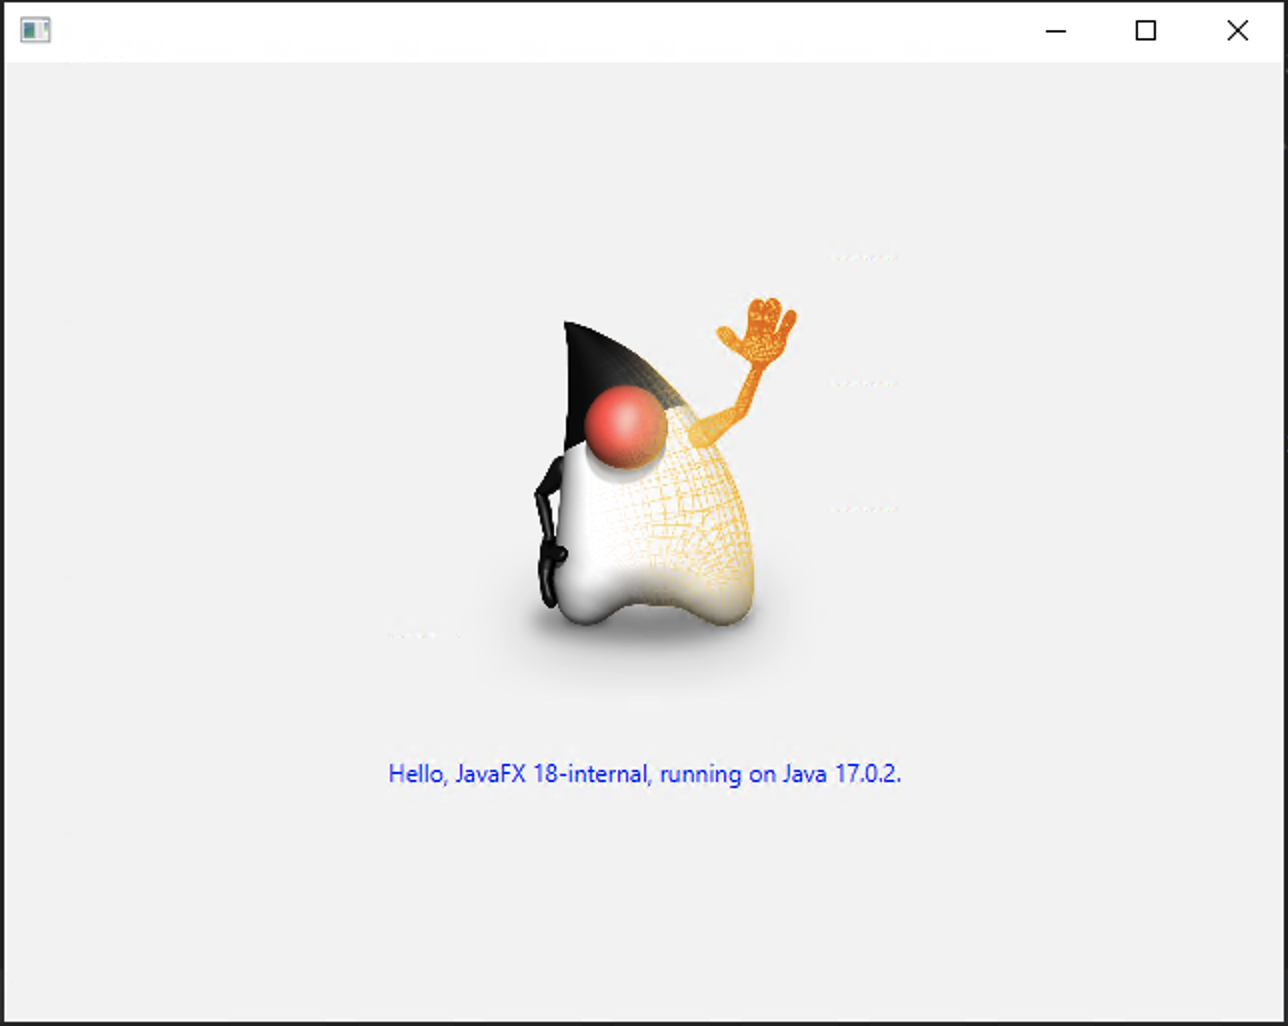
Optionally, you can create a MSI installer, by running mvn gluonfx:package:
[INFO] --- gluonfx-maven-plugin:1.0.27:package (default-cli) @ hellofx ---
[INFO] ==================== PACKAGE TASK ====================
[INFO] Building exe for HelloFX\target\gluonfx\x86_64-windows\HelloFX.exe
[INFO] Default icon.ico image generated in HelloFX\target\gluonfx\x86_64-windows\gensrc\windows\assets.
Consider copying it to HelloFX\src\windows before performing any modification
[INFO] MSI created successfully at HelloFX\target\gluonfx\x86_64-windows\HelloFX-1.0.0.msi
[INFO] ------------------------------------------------------------------------
[INFO] BUILD SUCCESS
[INFO] ------------------------------------------------------------------------
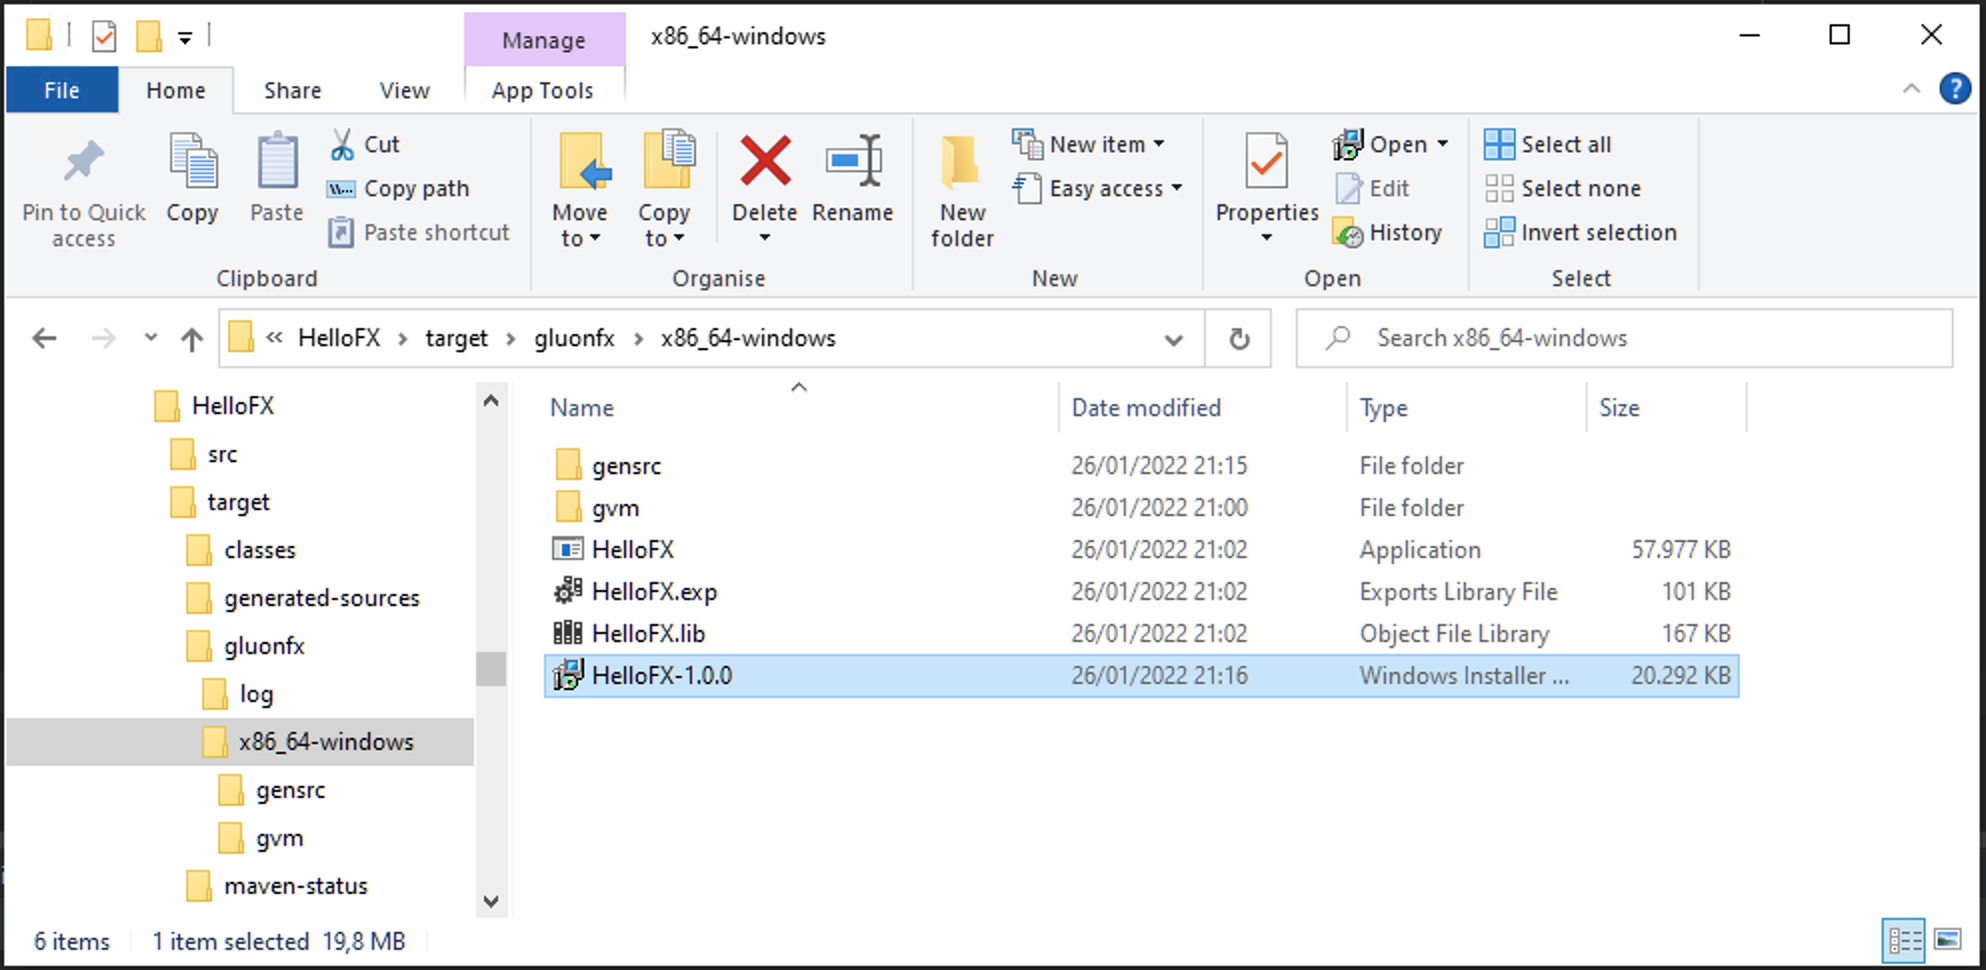
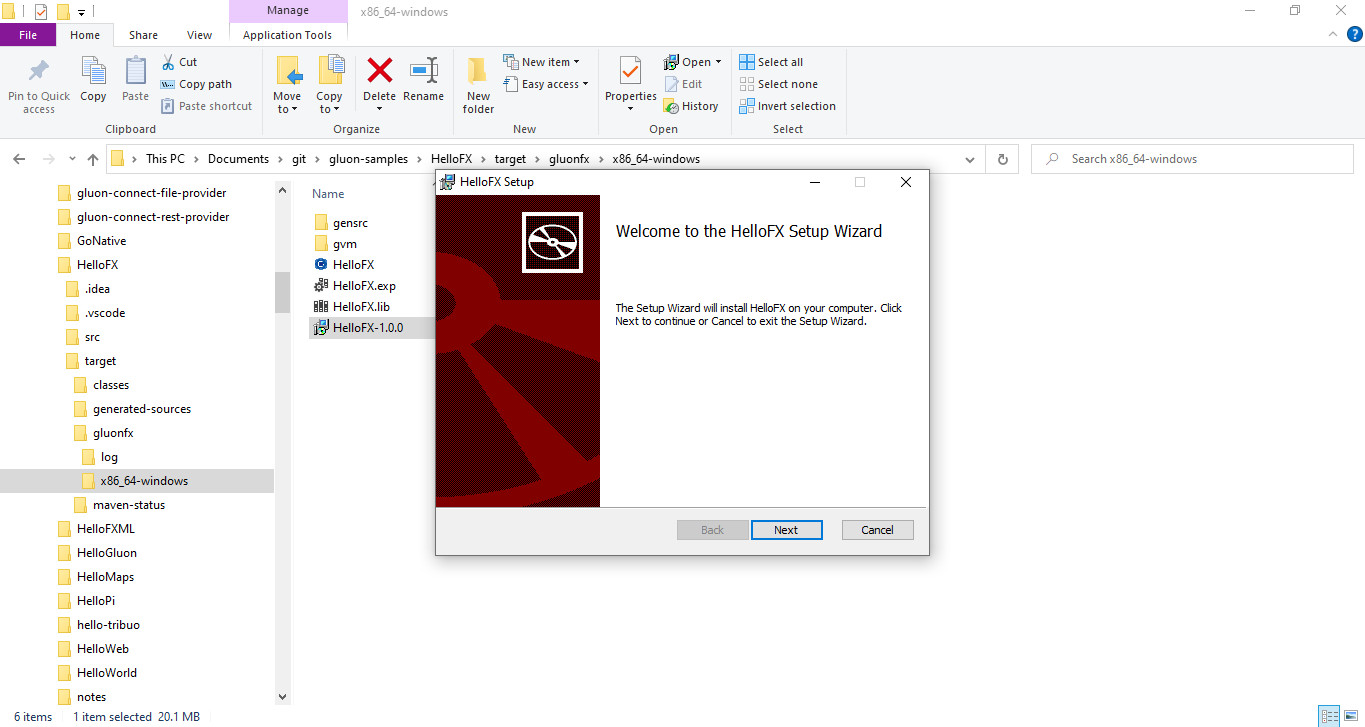
5.3.3. Windows native builds using Github Actions
Using this Github workflow, you can checkout, build, and upload the native binary as a build artifact. The steps are described in code comments:
  build:
    runs-on: windows-latest
    steps:
      # Checkout your code
      - uses: actions/checkout@v4

      # Setup the Windows build environment
      - name: Add msbuild to PATH
        uses: microsoft/setup-msbuild@v1.0.2

      - name: Visual Studio shell
        uses: egor-tensin/vs-shell@v1

      # Make sure the latest GraalVM is installed.
      # after this step env.JAVA_HOME and env.GRAALVM_HOME will point to the GraalVM location
      - name: Setup GraalVM built by Gluon
        uses: gluonhq/setup-graalvm@master
        # set GITHUB_TOKEN to avoid exceeding GitHub's API rate limit
        env:
          GITHUB_TOKEN: ${{ secrets.GITHUB_TOKEN }}

      # Create a staging directory where the binary will be copied into
      - name: Make staging directory
        run: mkdir staging

      # Install the Gluon License (optional)
      # Using this step requires you to set a GLUON_LICENSE secret in the secret configuration of your repo. Have a look at https://gluonhq.com/products/mobile/buy for more information about obtaining a license.
      - name: Gluon License
        uses: gluonhq/gluon-build-license@v1
        with:
          gluon-license: ${{ secrets.GLUON_LICENSE }}

      # Build your project using Maven
      # The desktop profile is used, which means a native build will be created for the host platform (in this case Windows) itself.
      - name: Gluon Build
        run: mvn -Pdesktop gluonfx:build gluonfx:package

      # Copy the native binary to the staging directory
      - name: Copy native image to staging
        run: cp -r target/gluonfx/x86_64-windows/HelloGluon.exe staging

      # Upload the staging directory as a build artifact. You will be able to download this after the build finishes.
      - name: Upload
        uses: actions/upload-artifact@v2
        with:
          name: Package
          path: staging
You can see this workflow in action in the Hello Gluon CI Sample.
5.3.4. HelloSharedLib Sample
Clone HelloSharedLib on your system and run the mvn gluonfx:sharedlib goal.
It produces the following output:
[INFO] --- gluonfx-maven-plugin:1.0.27:sharedlib (default-cli) @ hellosharedlib ---
[INFO] ==================== SHARED LIBRARY TASK ====================
[INFO] [SUB] ========================================================================================================================
[INFO] [SUB] GraalVM Native Image: Generating 'hello.hellosharedlib' (shared library)...
[INFO] [SUB] ========================================================================================================================
[INFO] [SUB] [1/7] Initializing...                                                                                    (5,8s @ 0,18GB)
[INFO] [SUB]  Version info: 'GraalVM 22.1.0.1 Java 17 CE'
[INFO] [SUB]  C compiler: cl.exe (microsoft, x64, 19.27.29111)
[INFO] [SUB]  Garbage collector: Serial GC
[INFO] [SUB] [2/7] Performing analysis...  [**************]                                                          (24,4s @ 1,24GB)
[INFO] [SUB]    6.005 (87,35%) of  6.875 classes reachable
[INFO] [SUB]    7.602 (52,97%) of 14.351 fields reachable
[INFO] [SUB]   27.415 (55,88%) of 49.060 methods reachable
[INFO] [SUB]      398 classes,   102 fields, and 1.038 methods registered for reflection
[INFO] [SUB]       99 classes,    81 fields, and   108 methods registered for JNI access
[INFO] [SUB] [3/7] Building universe...                                                                               (1,5s @ 1,65GB)
[INFO] [SUB] [4/7] Parsing methods...      [*]                                                                        (1,3s @ 2,22GB)
[INFO] [SUB] [5/7] Inlining methods...     [****]                                                                     (2,2s @ 1,22GB)
[INFO] [SUB] [6/7] Compiling methods...    [****]                                                                    (15,8s @ 2,61GB)
[INFO] [SUB] [7/7] Creating image...                                                                                  (2,8s @ 3,22GB)
[INFO] [SUB]   12,84MB (36,28%) for code area:   17.914 compilation units
[INFO] [SUB]   20,44MB (57,74%) for image heap:   4.042 classes and 188.995 objects
[INFO] [SUB]    2,11MB ( 5,97%) for other data
[INFO] [SUB]   35,39MB in total
[INFO] [SUB] ------------------------------------------------------------------------------------------------------------------------
[INFO] [SUB]                         4,7s (8,2% of total time) in 25 GCs | Peak RSS: 4,62GB | CPU load: 7,10
[INFO] [SUB] ------------------------------------------------------------------------------------------------------------------------
[INFO] [SUB] Produced artifacts:
[INFO] [SUB]  \gluon-samples\HelloSharedLib\target\gluonfx\x86_64-windows\gvm\HelloSharedLib\hello.hellosharedlib.dll (shared_lib)
[INFO] [SUB]  \gluon-samples\HelloSharedLib\target\gluonfx\x86_64-windows\gvm\HelloSharedLib\graal_isolate.h (header)
[INFO] [SUB]  \gluon-samples\HelloSharedLib\target\gluonfx\x86_64-windows\gvm\HelloSharedLib\hello.hellosharedlib.h (header)
[INFO] [SUB]  \gluon-samples\HelloSharedLib\target\gluonfx\x86_64-windows\gvm\HelloSharedLib\hello.hellosharedlib.lib (import_lib)
[INFO] [SUB] ===========================================================================================================
[INFO] [SUB] Finished generating 'hello.hellosharedlib' in 56.3s.
And as a result, HelloSharedLib.dll is created and can be found under target/gluonfx/x86_64-windows/.
To test the shared library, from the HelloSharedLib’s root, run run.bat to compile and run the sample sample/example.cpp that makes use of the library:
The expected output is:
/out:example.exe
target\gluonfx\x86_64-windows\HelloSharedLib.lib
/out:target\gluonfx\x86_64-windows\example.exe
Sum: 3
Diff: -1
Text: Hello from Java
5.4. Android
5.4.1. Pre-requisites
-
Pre-requisites of Linux Platform
-
Android SDK and NDK (optional, more information on this later)
Currently, Android can be built only on Linux OS or from Windows WSL2. Alternatively you can use a GitHub Actions workflow.
5.4.2. Android development
In addition to GraalVM for Linux OS, Android SDK/NDK is required to build applications for the android platform.
| Both SDK/NDK will be downloaded automatically by the "GluonFX plugin" and configured with the required packages. |
But if you already have a local installation of the Android SDK/NDK, you can override this behaviour by defining environment variables:
-
ANDROID_SDK: points to the Android SDK folder on your system -
ANDROID_NDK: points to the Android NDK folder on your system
Please make sure you have installed the following required packages:
-
platform-tools
-
platforms;android-35
-
build-tools;35.0.0
-
ndk-bundle
-
extras;android;m2repository
-
extras;google;m2repository
To target android devices, <target>android</target> needs to be added to the GluonFX plugin configuration:
<plugin>
    <groupId>com.gluonhq</groupId>
    <artifactId>gluonfx-maven-plugin</artifactId>
    <version>1.0.27</version>
    <configuration>
        <target>android</target>
        <mainClass>${mainClassName}</mainClass>
    </configuration>
</plugin>
Alternatively, a Maven profile can be used:
<plugin>
    <groupId>com.gluonhq</groupId>
    <artifactId>gluonfx-maven-plugin</artifactId>
    <version>1.0.27</version>
    <configuration>
        <target>${gluonfx.target}</target>
        <mainClass>${mainClassName}</mainClass>
    </configuration>
</plugin>
<profiles>
    <profile>
        <id>android</id>
        <properties>
            <gluonfx.target>android</gluonfx.target>
        </properties>
    </profile>
</profiles>
The project can be built using mvn -Pandroid gluonfx:build.
This will run the compilation phase and link the compiled objects into an android executable.
5.4.3. Android packaging and distribution
Build your application
Run mvn -Pandroid gluonfx:package to generate an Android Application Package (APK) that can be installed on any Android device, and also the Android Application Bundle (AAB) that can be submitted to Google Play.
By default, the debug profile will be used to sign the APK/AAB bundles. This allows testing the APK bundle on a local device (see run on device) but not publishing the AAB bundle to a store, which requires a release profile.
To sign the AAB bundle with the correct signing key and keystore, use the releaseConfiguration settings:
<plugin>
    <groupId>com.gluonhq</groupId>
    <artifactId>gluonfx-maven-plugin</artifactId>
    ...
    <configuration>
        ...
        <releaseConfiguration>
            <versionCode>1</versionCode>
            <providedKeyStorePath>${android-keystore-path}</providedKeyStorePath>
            <providedKeyStorePassword>${android-keystore-password}</providedKeyStorePassword>
            <providedKeyAlias>${android-key-alias}</providedKeyAlias>
            <providedKeyAliasPassword>${android-key-password}</providedKeyAliasPassword>
        </releaseConfiguration>
...
   </configuration>
</plugin>
versionCode is the unique build number of your app. You need to increase it for every upload to the Play Store.
|
Please follow these steps in the Android documentation to create a keystore.
Override default Android setting
If you need to set specific Android settings in AndroidManifest.xml, copy the file from target/gluonfx/aarch64-android/gensrc/android/AndroidManifest.xml to
src/android/AndroidManifest.xml
Override the default icon
By default, an icon is generated in target/gluonfx/aarch64-android/gensrc/android/rest/. If you’re distributing your app, you most certainly will want to use a custom icon.
Please refer to the Android docs for more information.
However, if you would just like to override the icon, there are nice online generators as well (e.g. https://appicon.co/)
To use the generated icon follow these steps:
-
then remove
src/android/res -
then copy the generated Android icon files (starting with mipmap-) to
src/android/res
Run on device
| "USB debugging" must be enabled on the connected device. To enable USB debugging follow the steps listed here. |
To install the application to a connected android device, run mvn -Pandroid gluonfx:install.
Finally, you can call mvn -Pandroid gluonfx:nativerun to launch the application on the device.
GluonFX plugin will also start adb logcat to print out debugging information from the device to the console.
5.4.4. HelloFX Sample
|
This requires an Android device that has to be plugged in at the run phase. |
Clone HelloFX on a Linux system.
Use the android profile, and run mvn -Pandroid gluonfx:compile. It produces the following output:
[INFO] --- gluonfx-maven-plugin:1.0.27:compile (default-cli) @ hellofx ---
[INFO] ==================== COMPILE TASK ====================
[INFO] We will now compile your code for aarch64-linux-android. This may take some time.
[INFO] [SUB] ===========================================================================================================
[INFO] [SUB] GraalVM Native Image: Generating 'hellofx.hellofx'...
[INFO] [SUB] ===========================================================================================================
[INFO] [SUB] [1/8] Initializing...                                                                       (5.3s @ 0.16GB)
[INFO] [SUB]  Java version: 23+25, vendor version: GraalVM CE 23-dev+25.1
[INFO] [SUB]  Graal compiler: optimization level: 2, target machine: armv8-a
[INFO] [SUB]  Garbage collector: Serial GC (max heap size: 80% of RAM)
[INFO] [SUB]  1 user-specific feature(s):
[INFO] [SUB]  - com.oracle.svm.thirdparty.gson.GsonFeature
[INFO] [SUB] Build resources:
[INFO] [SUB]  - 11.70GB of memory (75.6% of 15.49GB system memory, determined at start)
[INFO] [SUB]  - 12 thread(s) (100.0% of 12 available processor(s), determined at start)
[INFO] [SUB] [2/8] Performing analysis...  [******]                                                     (37.0s @ 1.16GB)
[INFO] [SUB]    12,048 reachable types   (87.3% of   13,806 total)
[INFO] [SUB]    19,779 reachable fields  (57.0% of   34,678 total)
[INFO] [SUB]    58,372 reachable methods (62.1% of   93,953 total)
[INFO] [SUB]     3,459 types,    93 fields, and 2,481 methods registered for reflection
[INFO] [SUB]       111 types,   123 fields, and   190 methods registered for JNI access
[INFO] [SUB]         4 native libraries: dl, pthread, rt, z
[INFO] [SUB] [3/8] Building universe...                                                                  (4.8s @ 1.33GB)
[INFO] [SUB] [4/8] Parsing methods...      [**]                                                          (4.0s @ 1.46GB)
[INFO] [SUB] [5/8] Inlining methods...     [****]                                                        (3.5s @ 1.62GB)
[INFO] [SUB] [6/8] Compiling methods...    [******]                                                     (42.0s @ 1.16GB)
[INFO] [SUB] [7/8] Laying out methods...   [***]                                                         (8.0s @ 1.50GB)
[INFO] [SUB]
[INFO] [SUB] -----------------------------------------------------------------------------------------------------------
[INFO] [SUB]                        10.0s (8.4% of total time) in 1345 GCs | Peak RSS: 3.03GB | CPU load: 9.14
[INFO] [SUB] -----------------------------------------------------------------------------------------------------------
[INFO] [SUB] Build artifacts:
[INFO] [SUB]  HelloFX/target/gluonfx/aarch64-android/gvm/HelloFX/graal_isolate.h (c_header)
[INFO] [SUB]  HelloFX/target/gluonfx/aarch64-android/gvm/HelloFX/graal_isolate_dynamic.h (c_header)
[INFO] [SUB]  HelloFX/target/gluonfx/aarch64-android/gvm/HelloFX/hellofx.hellofx.h (c_header)
[INFO] [SUB]  HelloFX/target/gluonfx/aarch64-android/gvm/HelloFX/hellofx.hellofx_dynamic.h (c_header)
[INFO] [SUB] ========================================================================================================================
[INFO] [SUB] Finished generating 'hellofx.hellofx' in 1m 57s.
And as a result, hellofx.hellofx.o is created and can be found under target/gluonfx/aarch64-android/gvm/tmp/SVM-*/hellofx.hellofx.o.
Note that the process takes some time, so it is convenient to test first on desktop (and with HotSpot) as much as possible (i.e. with mvn gluonfx:run), so gluonfx:compile doesn’t have to be repeated due to avoidable errors.
Run mvn -Pandroid gluonfx:link to produce the native image. As a result, target/gluonfx/aarch64-android/libhellofx.so is created.
Finally, run mvn -Pandroid gluonfx:package to bundle the application into an Android APK that can be installed on a device and also to an Android App Bundle (AAB) that can be submitted to Google Play.
It produces the following output:
[INFO] --- gluonfx-maven-plugin:1.0.27:package (default-cli) @ hellofx ---
[INFO] ==================== PACKAGE TASK ====================
[INFO] Default build.gradle file generated in HelloFX/target/gluonfx/aarch64-android/gensrc/android/build.gradle.
Consider copying it to HelloFX/src/android/build.gradle before performing any modification
[INFO] Default Android manifest generated in HelloFX/target/gluonfx/aarch64-android/gensrc/android/AndroidManifest.xml.
Consider copying it to HelloFX/src/android/AndroidManifest.xml before performing any modification
[INFO] Default Android resources generated in HelloFX/target/gluonfx/aarch64-android/gensrc/android/res.
Consider copying them to HelloFX/src/android/res before performing any modification
[INFO] ------------------------------------------------------------------------
[INFO] BUILD SUCCESS
[INFO] ------------------------------------------------------------------------
This creates the hellofx.apk and hellofx.aab bundles which are available at target/gluonfx/aarch64-android/gvm/.
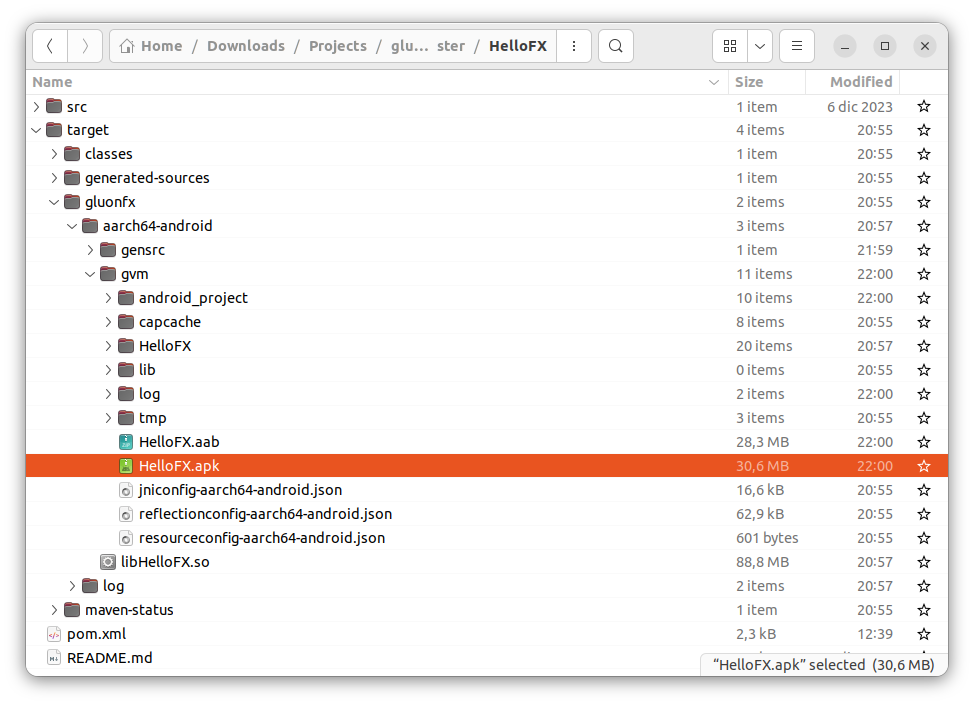
Now we are ready to install and run the application on a plugged-in Android device. Run mvn -Pandroid gluonfx:install gluonfx:nativerun to
install and launch the application on the device.
5.4.5. Android builds using Github Actions
The following sections show how to use Github Actions to build and release your app automatically using Github infrastructure. Using this Github workflow, you can develop your JavaFX application anywhere you like and the Github workflow will make your application available for testing in the Play Store on push.
5.4.6. Github Workflow File
Using this Github workflow, you can checkout, build, and upload the native binary to the Play Store. The steps are described in code comments and more details information can be found in the next sections.
jobs:
  build:
    runs-on: ubuntu-latest
    steps:
      # Checkout your project
      - uses: actions/checkout@v4

      # Make sure the latest GraalVM is installed.
      # after this step env.JAVA_HOME and env.GRAALVM_HOME will point to the GraalVM location
      - name: Setup GraalVM built by Gluon
        uses: gluonhq/setup-graalvm@master
        # set GITHUB_TOKEN to avoid exceeding GitHub's API rate limit
        env:
          GITHUB_TOKEN: ${{ secrets.GITHUB_TOKEN }}

      # Install extra requirements on top of ubuntu-latest
      - name: Install libraries
        run: |
          sudo apt-get update
          sudo apt install libasound2-dev libavcodec-dev libavformat-dev libavutil-dev libgl-dev libgtk-3-dev libpango1.0-dev libxtst-dev

      # Setup the Android keystore, based on a repo secret. See the section 'Setup Android Keystore' below.
      - name: Setup Android Keystore
        id: android_keystore_file
        uses: timheuer/base64-to-file@v1
        with:
          fileName: 'my.keystore'
          encodedString: ${{ secrets.GLUON_ANDROID_KEYSTORE_BASE64 }}

      # Install the Gluon License (optional)
      # Using this step requires you to set a GLUON_LICENSE secret in the secret configuration of your repo. Have a look at https://gluonhq.com/products/mobile/buy for more information about obtaining a license.
      - name: Gluon License
        uses: gluonhq/gluon-build-license@v1
        with:
          gluon-license: ${{ secrets.GLUON_LICENSE }}

      # Build your project using Maven
      # The android profile is used, which means a native build will be created for the gluonfx target android.
      # This step also uses some env variables taken from the repo secrets. See the section 'Setup Android Keystore' below.
      - name: Gluon Build
        run: mvn -Pandroid gluonfx:build gluonfx:package
        env:
          GLUON_ANDROID_KEYSTOREPATH: ${{ steps.android_keystore_file.outputs.filePath }}
          GLUON_ANDROID_KEYSTORE_PASSWORD: ${{ secrets.GLUON_ANDROID_KEYSTORE_PASSWORD }}
          GLUON_ANDROID_KEYALIAS: ${{ secrets.GLUON_ANDROID_KEYALIAS }}
          GLUON_ANDROID_KEYALIAS_PASSWORD: ${{ secrets.GLUON_ANDROID_KEYALIAS_PASSWORD }}

      # Create staging directory in which the apk will be copied
      - name: Make staging directory
        run: mkdir staging

      # Copy the apk to the staging directory
      - name: Copy native images to staging
        run: cp -r target/gluonfx/aarch64-android/gvm/*.apk staging

      # Upload the staging directoy as a build artifact
      - name: Upload
        uses: actions/upload-artifact@v2
        with:
          name: Package
          path: staging

      # Upload the aab to the Google Play Store. See the section below.
      - name: Upload to Google Play
        uses: r0adkll/upload-google-play@v1.0.15
        with:
          serviceAccountJsonPlainText: ${{ secrets.GLUON_ANDROID_SERVICE_ACCOUNT_JSON }}
          packageName: com.gluonhq.samples.hellogluon
          releaseFiles: target/gluonfx/aarch64-android/gvm/HelloGluon.aab
          track: beta
You can see this workflow in action in the Hello Gluon CI Sample.
Changes to your build
Since this workflow uploads the build to the Play Store, it needs a unique buildnumber each time. If you have overriden the AndroidManifest.xml, you must increment the android:versionCode attribute.
If you didn’t override AndroidManifest.xml, you can use this gluonfx configuration:
<plugin>
    <groupId>com.gluonhq</groupId>
    <artifactId>gluonfx-maven-plugin</artifactId>
...
    <configuration>
...
        <releaseConfiguration>
            <versionCode>${env.GITHUB_RUN_NUMBER}</versionCode>
            ...
        </releaseConfiguration>
...
   </configuration>
</plugin>
Using env.GITHUB_RUN_NUMBER, Github Actions will set the versionCode to an incremental build number.
Setup Android Keystore
Before you can upload your .aab file to the Google Play Store, you need to sign it. Please follow these steps in the Android documentation.
The result of those steps should be:
-
a keystore file: you need to base64 encode that file and configure it in the repo secret
GLUON_ANDROID_KEYSTORE_BASE64 -
the keystore will have a password, configure that in the repo secret
GLUON_ANDROID_KEYSTORE_PASSWORD -
a key alias: configure that in the repo secret
GLUON_ANDROID_KEYALIAS -
that key will have a password, configure that in the repo secret
GLUON_ANDROID_KEYALIAS_PASSWORD
Upload the AAB to the Google Play Store
The actual upload to the Google Play store is performed by the Github Action r0adkll/upload-google-play. Have a look at its documentation.
The most important part to configure in this case is the GLUON_ANDROID_SERVICE_ACCOUNT_JSON. To configure a service account for upload to the Play Store, follow these steps in the Android documentation.
5.4.7. HelloStaticLib Sample
Clone HelloStaticLib on your system and run the mvn -Pandroid gluonfx:staticlib goal.
It produces the following output:
[INFO] --- gluonfx-maven-plugin:1.0.27:staticlib (default-cli) @ hellostaticlib ---
[INFO] ==================== Static LIBRARY TASK ====================
[INFO] [SUB] ===========================================================================================================
[INFO] [SUB] GraalVM Native Image: Generating 'hello.hellostaticlib' (shared library)...
[INFO] [SUB] ===========================================================================================================
[INFO] [SUB] For detailed information and explanations on the build output, visit:
[INFO] [SUB] https://github.com/oracle/graal/blob/master/docs/reference-manual/native-image/BuildOutput.md
[INFO] [SUB] -----------------------------------------------------------------------------------------------------------
[INFO] [SUB] [1/8] Initializing...                                                                       (4.5s @ 0.12GB)
[INFO] [SUB]  Java version: 23+25, vendor version: GraalVM CE 23-dev+25.1
[INFO] [SUB]  Graal compiler: optimization level: 2, target machine: armv8-a
[INFO] [SUB]  Garbage collector: Serial GC (max heap size: 80% of RAM)
[INFO] [SUB]  1 user-specific feature(s):
[INFO] [SUB]  - com.oracle.svm.thirdparty.gson.GsonFeature
[INFO] [SUB] -----------------------------------------------------------------------------------------------------------
[INFO] [SUB] Build resources:
[INFO] [SUB]  - 11.70GB of memory (75.6% of 15.49GB system memory, determined at start)
[INFO] [SUB]  - 12 thread(s) (100.0% of 12 available processor(s), determined at start)
[INFO] [SUB] [2/8] Performing analysis...  [******]                                                     (22.7s @ 0.78GB)
[INFO] [SUB]     6,748 reachable types   (82.4% of    8,190 total)
[INFO] [SUB]     8,403 reachable fields  (46.2% of   18,193 total)
[INFO] [SUB]    30,808 reachable methods (55.3% of   55,747 total)
[INFO] [SUB]     2,067 types,    79 fields, and 1,558 methods registered for reflection
[INFO] [SUB]        84 types,    67 fields, and   106 methods registered for JNI access
[INFO] [SUB]         4 native libraries: dl, pthread, rt, z
[INFO] [SUB] [3/8] Building universe...                                                                  (3.2s @ 0.86GB)
[INFO] [SUB] [4/8] Parsing methods...      [**]                                                          (3.1s @ 0.51GB)
[INFO] [SUB] [5/8] Inlining methods...     [***]                                                         (1.7s @ 0.65GB)
[INFO] [SUB] [6/8] Compiling methods...    [*****]                                                      (25.2s @ 1.06GB)
[INFO] [SUB] [7/8] Laying out methods...   [**]                                                          (4.4s @ 1.24GB)
[INFO] [SUB]
[INFO] [SUB] -----------------------------------------------------------------------------------------------------------
[INFO] [SUB]                         5.2s (7.0% of total time) in 896 GCs | Peak RSS: 2.12GB | CPU load: 8.98
[INFO] [SUB] -----------------------------------------------------------------------------------------------------------
[INFO] [SUB] Build artifacts:
[INFO] [SUB]  HelloStaticLib/target/gluonfx/aarch64-android/gvm/HelloStaticLib/graal_isolate.h (c_header)
[INFO] [SUB]  HelloStaticLib/target/gluonfx/aarch64-android/gvm/HelloStaticLib/graal_isolate_dynamic.h (c_header)
[INFO] [SUB]  HelloStaticLib/target/gluonfx/aarch64-android/gvm/HelloStaticLib/hello.hellostaticlib.h (c_header)
[INFO] [SUB]  HelloStaticLib/target/gluonfx/aarch64-android/gvm/HelloStaticLib/hello.hellostaticlib_dynamic.h (c_header)
[INFO] [SUB] ========================================================================================================================
[INFO] [SUB] Finished generating 'hello.hellostaticlib' in 1m 13s.
[INFO] Static library libHelloStaticLib.a and static libraries [vmone]
were successfully added to HelloStaticLib/target/gluonfx/aarch64-android/gvm.
And as a result, HelloStaticLib.a is created and can be found under target/gluonfx/aarch64-android/gvm.
To test the static library on a regular Android project, that has some C++ code that is called via shared native library, add the headers:
-
target/gluonfx/aarch64-android/gvm/HelloStaticLib/graal_isolate.h
-
target/gluonfx/aarch64-android/gvm/HelloStaticLib/hello.hellostaticlib.h
and the libraries:
-
target/gluonfx/aarch64-android/gvm/HelloStaticLib.a
-
target/gluonfx/aarch64-android/gvm/libvmone.a
to the project.
In the C file with the JNI implementations, import the header:
#include <hello.hellostaticlib.h>
and then add the calls to the static methods, like:
static jboolean initialized;
static graal_isolatethread_t *thread;

extern "C" JNIEXPORT jdouble JNICALL
Java_com_gluonhq_hellostaticandroidworld_MainActivity_sum(JNIEnv *env, jobject activity, jdouble a, jdouble b) {
    if (!initialized) {
        if (graal_create_isolate(NULL, NULL, &thread) != 0) {
            fprintf(stderr, "graal_create_isolate error\n");
            return -1;
        }
        initialized = true;
    }
    return staticSum(thread, a, b);
}
assuming the MainActivity class loads the native library and calls the native method:
package com.gluonhq.hellostaticandroidworld;

public class MainActivity extends AppCompatActivity {

    static {
        System.loadLibrary("hellosharedandroidworld");
    }

    @Override
    protected void onCreate(Bundle savedInstanceState) {
        super.onCreate(savedInstanceState);
        ...
        Log.v(TAG, "Sum: " + sum(1, 3));
   }

    private native double sum(double a, double b);
}
Build the shared library with these arguments:
-lHelloStaticLib -lvmone -lz -L${PROJECT_SOURCE_DIR}/shared/lib/${ANDROID_ABI}
Then build the application, making sure the shared library is added to the APK, and deploy to your device and test.
The logcat should contain these lines:
09-06 14:48:33.830 29469 29469 V GraalActivity: Sum: 3.0
09-06 14:48:33.831 29469 29469 V GraalActivity: Difference: -1.0
09-06 14:48:33.831 29469 29469 V GraalActivity: Text: Hello from Java
5.5. iOS
5.5.1. Pre-requisites
-
Pre-requisites of macOS Platform
-
Additional packages (more information on this later)
Currently, iOS packages can be built only on macOS. Alternatively you can use a GitHub Actions workflow.
iOS applications can be locally deployed to a physical device (iPhone and iPad), or distributed via App Store.
While developing, it might also help building native images that can be deployed to the iOS Simulator.
In addition to GraalVM for macOS, the following packages are required and can be installed using Homebrew:
-
brew install libusbmuxd
-
brew install libimobiledevice
5.5.2. iOS Development
If you want to test and deploy your app on a local iOS device, you’ll need to enroll in the Apple Developer Program. If you’re not ready for that or just want to test our your personal device, you can also use a "free provisioning profile".
Either way, first of all you will need a unique Apple ID.
Creating an Apple ID
In case you don’t have it yet, create an Apple ID.
You will need a valid email account, and you will receive and email to validate and activate the Apple ID.
In case you are going to use free provisioning, this Apple ID must not be connected to the Apple Developer Program.
Once you have your Apple ID verified and activated, open Xcode, go to Preferences → Accounts. Press the + button at the bottom left to add an account, select `Apple ID, and include the email address used to create the Apple ID.
Xcode project
The first time you start deploying to an iOS device, you need to follow these steps, so Xcode configures your device properly for future iOS deployment.
Note: If you are using free provisioning, you will have to follow this procedure every time you create a new project.
Create an empty Xcode project
Open Xcode and go to File → New → Project…, and select a simple template for iOS, like Single View App.
Provide a name and a bundle ID to the project.
Note: if you are using free provisioning, the bundle ID must match the one defined in your Java project (or the other way around).
Press next, provide a location and create the project.
Once the project is created, it will be opened and you will have access to the General tab with the identity and signing information.
At this point you should plug your iOS device, and select it from the top drop-down list of build schemes that list your iOS device and iOS simulators.
Make sure you have selected Automatically manage signing, and select a valid Team from the drop-down list.
If you get the error like: The app ID "hellofx.HelloFX" cannot be registered to your develoment team, this means that the proposed app ID is already in use or has already been registered by the Apple servers, and cannot longer be used. The only solution is to change the app ID until you get a valid one:
Note that the provisioning profile generated by Xcode for that app ID can be found in your ~/Library/MobileDevice/Provisioning Profiles folder.
For free provisioning, this profile will expire after one week.
Once everything is in place (there are no visible errors in the General screen), press the Play button that will build and run the current scheme.
Note: Using free provisioning it is possible that the run fails with a message like: Could not launch "HelloFX", that prompts you to verify the Developer App certificate is trusted on your device, as by default the certificate is untrusted. Go to your iPhone, Settings → General → Device Management, and select the certificate to trust it. Then go back to Xcode and run again. This time, the app will launch and you will get a white screen.
Press stop to finish and quit Xcode.
Create your application with GluonFX plugin
These are the required steps to build and deploy your iOS application from your Java project.
Build your application
Back to your Java project, run mvn -Pios gluonfx:build to build and link your native binary.
Package your application
Then you need to run mvn -Pios gluonfx:package to create both .app and .ipa bundles. Signing is required for both.
In this process, default resources are generated under target/gluonfx/arm64-ios/gensrc/ios, including the Default-Info.plist file and the assets folder with a default iconset.
If needed, you can modify these default values and the iconset, by copying them to src/ios, doing the required changes, and running mvn gluonfx:package again.
Note that if you are using free provisioning or an explicit provisioning profile, you need to set the exact same bundle ID as the one in the profile (note it is case sensitive).
If you are using a wildcard, make sure the domain (if any) matches.
This can be done by setting the <appIdentifier/> in the configuration of the GluonFX plugin. Alternatively, it can be done as well by modifying the default plist.
Note: the bundle identifier key doesn’t need to match your main class.
Checking the logs under target/gluonfx/arm64-ios/gvm/logs or using <verbose>true</verbose> in the GluonFX plugin can be of help to trace which provisioning profile is used, and to check that a valid one was found:
[FINE] Mobile provision asked with bundleId = hello.fx.* (initial bundleId: hello.fx.HelloFX)
[FINE] Checking mobile provision Xcode iOS Wildcard App ID
[FINE] AllInOne matches SigningIdentity{name='Apple Development: ************', sha1='05F2BD84A3************B234CEBC'}
[FINE] Got provisioning profile: AllInOne
Install your application
If the package task finishes successfully, you can deploy the .app bundle to a connected device, running mvn -Pios gluonfx:install.
Note: If you are using free provisioning, this will deploy your Java app replacing the Xcode app.
Run your application
Once the install task has finished successfully, and with your iOS device plugged in, run: mvn -Pios gluonfx:nativerun.
You should get your app running on your iOS device and the output of the process will be displayed to the terminal.
5.5.3. iOS Distribution
To distribute your app using the App Store, you (as individual or as a company) must enroll in the Apple Developer Program.
For iOS distribution, you need to generate:
-
A valid signing identity
-
A valid provisioning profile
The following steps describe how these can be generated.
iOS Distribution Certificate
Go to the Developer portal, and access Certificates, Identifiers & Profiles. Select Certificates from the left, and press +, to create a Development certificate (for testing). Later on you will need a Distribution certificate for distribution through the App Store.
To generate a certificate, you need a Certificate Signing Request (CSR) file from your Mac.
Certificate Signing Request
According to Apple Help, these are the steps to generate the CSR:
-
Launch the
Keychain Accessapplication, located in /Applications/Utilities. -
Choose
Keychain Access → Certificate Assistant → Request a Certificate from a Certificate Authority. -
Enter an email address in the
User Email Addressfield. -
Enter a name for the key.
-
Leave the
CA Email Addressfield empty. -
Choose
Saved to disk, and click Continue. -
Save the CSR file.
Identifiers
Go to the Developer portal, and access Certificates, Identifiers & Profiles. Select Identifiers from the left, and press +, to create a new app identifier.
You can enable app services when you create the App ID or modify these settings later on.
Provide a name and make sure you use the exact Bundle ID from your app, the one listed in your Default-Info.plist file under the CFBundleIdentifier key.
Alternatively, you can use a wildcard that will let you use a single App ID to match multiple apps. It is recommended to use your domain name, to filter out other apps.
Select any of the required services (if you are using an explicit Bundle ID), and click continue to create the App ID.
Devices
To create a provisioning profile for development, the devices that are allowed to run the application have to be identified.
To add your testing devices, you need to provide their UDID.It can be found from Xcode → Window → Devices and Simulators. Plug your device, select it from Connected devices, and then select its identifier and copy it.
Go to the Developer portal, and access Certificates, Identifiers & Profiles. Select Devices from the left, and press +, to add a new device.
Add a name and paste the device’s identifier.
Profiles
Go to the Developer portal, and access Certificates, Identifiers & Profiles. Select Profiles from the left, and press +, to add a new provisioning profile.
To add a Development profile (later on you will need a Distribution one), select iOS App Development, and press continue.
From the drop down list, select a valid App ID:
-
If you plan to use services such as Game Center, In-App Purchase, and Push Notifications, or want a Bundle ID unique to a single app, use an explicit App ID.
-
If you want to create one provisioning profile for multiple apps or don’t need a specific Bundle ID, select a wildcard App ID.
Press continue and select one or more certificates that should be included in this provisioning profile.
Press continue and select one or more devices that should be include in this provisioning profile.
Press continue and finally, give a name to the provisioning profile, it will be used to identify the profile in the portal. Then press Generate.
When finished, download it and install it by double clicking on the file.
Build your application
You can run mvn gluonfx:build gluonfx:package to build and package your native application.
To make sure you’re using the correct signing identify and provisioning profile, you can set these using the releaseConfiguration settings:
<plugin>
    <groupId>com.gluonhq</groupId>
    <artifactId>gluonfx-maven-plugin</artifactId>
...
    <configuration>
...
        <releaseConfiguration>
            <bundleVersion>1</bundleVersion>
            <bundleShortVersion>1.0</bundleShortVersion>
            <providedSigningIdentity>iPhone Distribution: Gluon Software BVBA (**********)</providedSigningIdentity>
            <providedProvisioningProfile>my-provisioning-profile</providedProvisioningProfile>
        </releaseConfiguration>
...
   </configuration>
</plugin>
bundleVersion is the unique build number of your app. You need to increase it for every upload to TestFlight.
|
Note that you can omit providedSigningIdentity and providedProvisioningProfile when running in a Github Actions workflow, since there will be only 1 valid identity, that one will be used be default.
|
Override default iOS settings
Run at least once the link goal for iOS (mvn gluonfx:link) and the Default-Info.plist file will be created at target/gluonfx/arm64-ios/gensrc/ios/Default-Info.plist.
If you need to set specific iOS settings, copy that file into:
src/ios/Default-Info.plist
and perform the necessary changes. Running again the link goal will now use this plist file.
Override the default icon set
By default, during the link goal an icon set is generated in target/gluonfx/arm64-ios/gensrc/ios/assets/Assets.xcassets/AppIcon.appiconset. If you’re distributing your app, you most certainly will want to use a custom icon.
Please refer to the Apple docs for more information.
However, if you would like to override the AppIcon, there are nice online generators as well (e.g. https://appicon.co/)
To use the generated icon follow these steps:
-
copy
target/gluonfx/arm64-ios/gensrc/ios/assets/Assets.xcassetstosrc/ios/assets -
then remove
src/ios/assets/Assets.xcassets/AppIcon.appiconset -
then copy the generated
AppIcon.appiconsettosrc/ios/assets/Assets.xcassets
The next time you run the link goal, this icon set will be used.
Override the default storyboards
By default, during the link goal, a pair of blank storyboards are generated in target/gluonfx/arm64-ios/gensrc/ios/assets/Base.lproj. Once the app is launched, these will be used briefly before the JavaFX stage is shown, preventing a black screen.
If you want to customize the storyboards, copy them to:
src/ios/assets/Base.lproj
and perform the necessary changes. Running again the link goal will now use these storyboards.
Adding capabilities to your app
If you need to add capabilities to your app, you will need to add the required entitlements to sign it.
For that purpose, you can add the following file:
src/ios/Entitlements.plist
and include the necessary entitlements.
For instance, if your app includes the App Group capability, the file should contain something like:
<?xml version="1.0" encoding="UTF-8"?>
<!DOCTYPE plist PUBLIC "-//Apple//DTD PLIST 1.0//EN" "http://www.apple.com/DTDs/PropertyList-1.0.dtd">
<plist version="1.0">
<dict>
    <key>com.apple.security.application-groups</key>
    <array>
        <string>${your.team.id}.${your.bundle.id}</string>
    </array>
</dict>
</plist>
Note that you should replace ${your.team.id} with your Apple Developer account’s Team ID and ${your.bundle.id} with the App ID of the app.
Running the link goal will include the changes.
5.5.4. HelloFX Sample
|
This requires an iOS device that has to be plugged in at the run phase. A valid provisioning profile is required as well, either by enrolling to the Apple Developer program or by using free provisioning. See iOS Deployment. |
Clone HelloFX On a macOS system.
Use the ios profile and run mvn -Pios gluonfx:compile. It produces the following output:
[INFO] --- gluonfx-maven-plugin:1.0.27:compile (default-cli) @ hellofx ---
[INFO] ==================== COMPILE TASK ====================
[INFO] We will now compile your code for arm64-apple-ios. This may take some time.
[INFO] [SUB] ===========================================================================================================
[INFO] [SUB] GraalVM Native Image: Generating 'hellofx.hellofx'...
[INFO] [SUB] ===========================================================================================================
[INFO] [SUB] [1/8] Initializing...                                                                       (2.5s @ 0.14GB)
[INFO] [SUB]  Java version: 23+25, vendor version: GraalVM CE 23-dev+25.1
[INFO] [SUB]  Graal compiler: optimization level: 2, target machine: armv8-a
[INFO] [SUB]  Garbage collector: Serial GC (max heap size: 80% of RAM)
[INFO] [SUB]  1 user-specific feature(s):
[INFO] [SUB]  - com.oracle.svm.thirdparty.gson.GsonFeature
[INFO] [SUB] -----------------------------------------------------------------------------------------------------------
[INFO] [SUB] Build resources:
[INFO] [SUB]  - 12.09GB of memory (75.6% of 16.00GB system memory, determined at start)
[INFO] [SUB]  - 10 thread(s) (100.0% of 10 available processor(s), determined at start)
[INFO] [SUB] [2/8] Performing analysis...  [*****]                                                      (15.9s @ 1.21GB)
[INFO] [SUB]    12,014 reachable types   (87.3% of   13,765 total)
[INFO] [SUB]    19,705 reachable fields  (57.3% of   34,395 total)
[INFO] [SUB]    58,296 reachable methods (62.3% of   93,615 total)
[INFO] [SUB]     3,500 types,    93 fields, and 2,484 methods registered for reflection
[INFO] [SUB]       117 types,    99 fields, and   201 methods registered for JNI access
[INFO] [SUB]         5 native libraries: -framework CoreServices, -framework Foundation, dl, pthread, z
[INFO] [SUB] [3/8] Building universe...                                                                  (2.4s @ 1.32GB)
[INFO] [SUB] [4/8] Parsing methods...      [*]                                                           (1.9s @ 1.44GB)
[INFO] [SUB] [5/8] Inlining methods...     [****]                                                        (1.2s @ 1.67GB)
[INFO] [SUB] [6/8] Compiling methods...    [****]                                                       (14.6s @ 1.35GB)
[INFO] [SUB] [7/8] Laying out methods...   [**]                                                          (3.2s @ 1.63GB)
[INFO] [SUB]
[INFO] [SUB] -----------------------------------------------------------------------------------------------------------
[INFO] [SUB]                         3.7s (7.7% of total time) in 984 GCs | Peak RSS: 2.28GB | CPU load: 6.67
[INFO] [SUB] -----------------------------------------------------------------------------------------------------------
[INFO] [SUB] Build artifacts:
[INFO] [SUB]  HelloFX/target/gluonfx/arm64-ios/gvm/HelloFX/graal_isolate.h (c_header)
[INFO] [SUB]  HelloFX/target/gluonfx/arm64-ios/gvm/HelloFX/graal_isolate_dynamic.h (c_header)
[INFO] [SUB]  HelloFX/target/gluonfx/arm64-ios/gvm/HelloFX/hellofx.hellofx.h (c_header)
[INFO] [SUB]  HelloFX/target/gluonfx/arm64-ios/gvm/HelloFX/hellofx.hellofx_dynamic.h (c_header)
[INFO] [SUB] ===========================================================================================================
[INFO] [SUB] Finished generating 'hellofx.hellofx' in 47.0s.
And as a result, hellofx.hellofx.o is created and can be found under target/gluonfx/arm64-ios/gvm/tmp/SVM-*/hellofx.hellofx.o.
Run mvn -Pios gluonfx:link to produce the native image. As a result, the binary target/gluonfx/arm64-ios/hellofx.app/hellofx is created.
Run mvn -Pios gluonfx:package to sign and produce the application bundles. As a result, target/gluonfx/arm64-ios/hellofx.app and target/gluonfx/arm64-ios/hellofx.ipa are created.
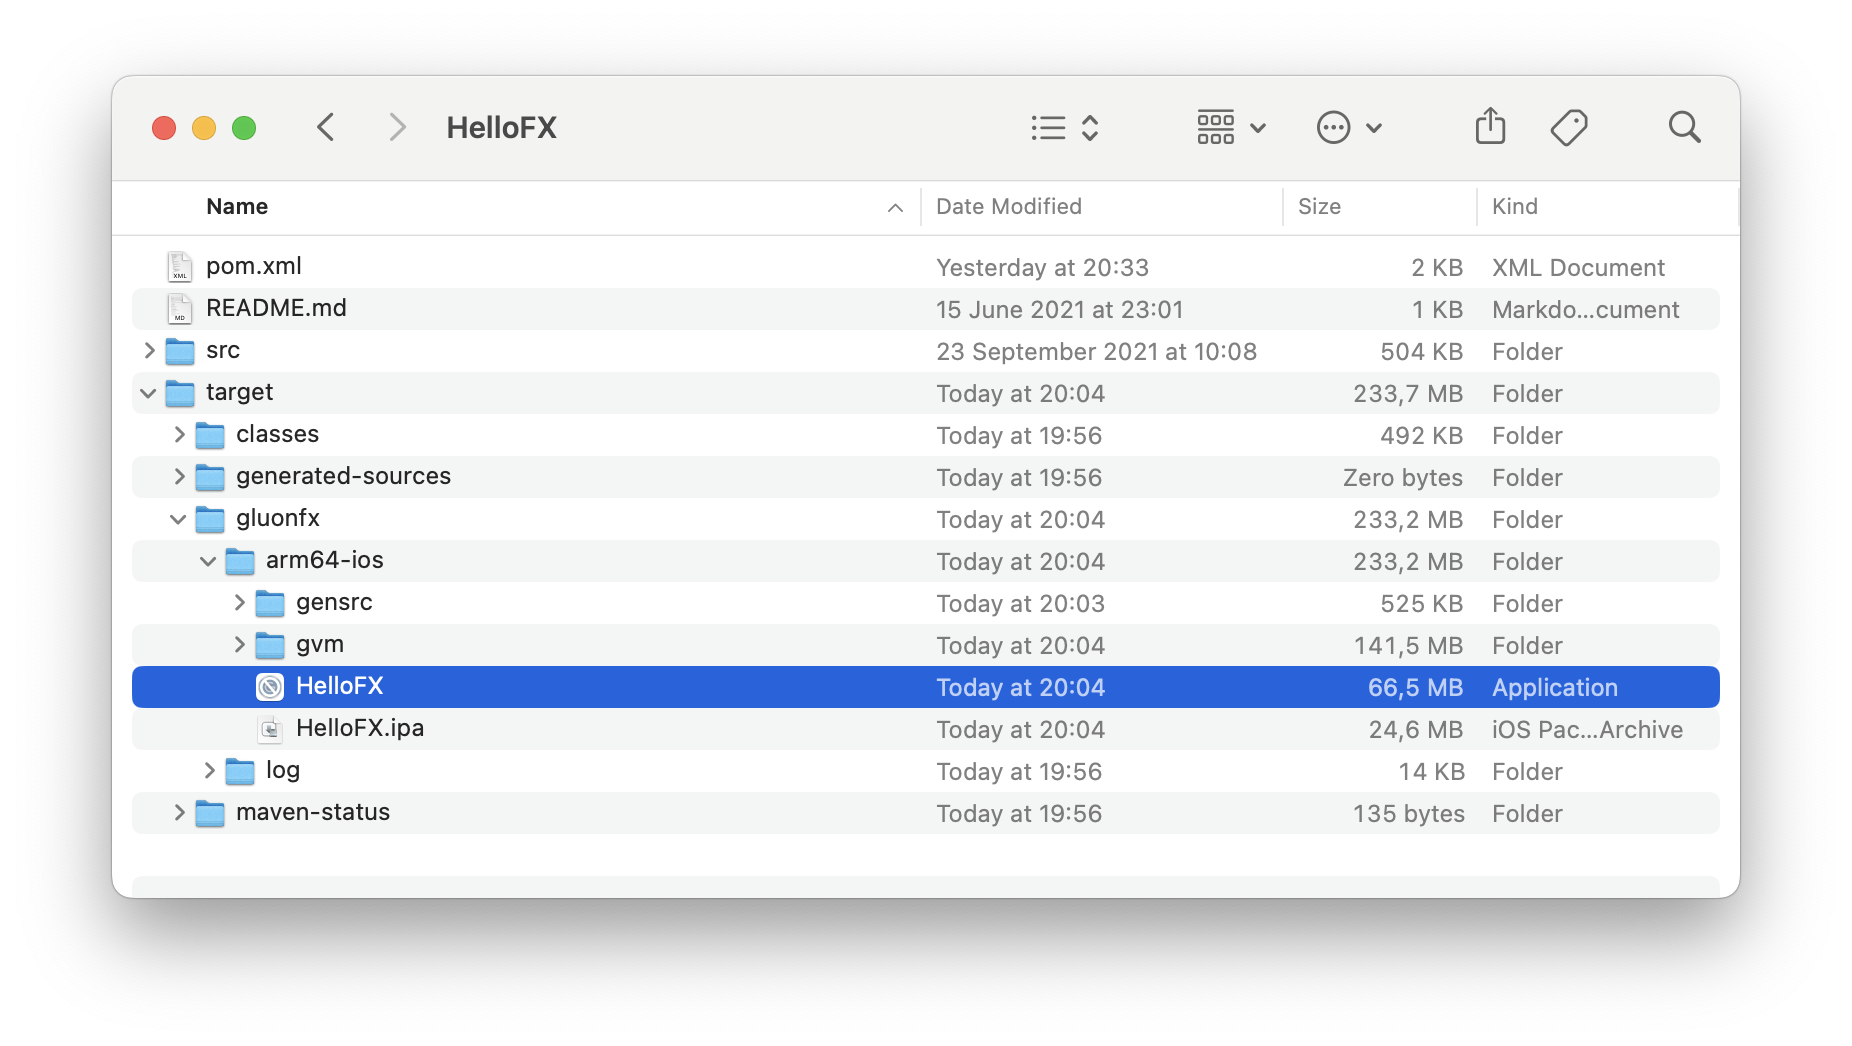
While the .ipa bundle could be submitted to the App Store, the .app bundle can be deployed to a plugged iOS device with mvn -Pios gluonfx:install.
And then the app can be launched with mvn -Pios gluonfx:nativerun.
5.5.5. iOS builds using Github Actions
The following sections show how to use Github Actions to build and release your app automatically using Github infrastructure. You don’t need a Mac, except for a one-time config step to setup the distribution certificate for the App Store. Using this Github workflow, you can develop your JavaFX application anywhere you like and the Github workflow will make your application available for testing in TestFlight on push.
Github Workflow File
Using this Github workflow, you can checkout, build, and upload the native binary to TestFlight. The steps are described in code comments and more details information can be found in the next sections.
jobs:
  build:
    runs-on: macos-latest
    steps:
      # Checkout your code
      - uses: actions/checkout@v4

      # Make sure the latest GraalVM is installed.
      # after this step env.JAVA_HOME and env.GRAALVM_HOME will point to the GraalVM location
      - name: Setup GraalVM built by Gluon
        uses: gluonhq/setup-graalvm@master
        # set GITHUB_TOKEN to avoid exceeding GitHub's API rate limit
        env:
          GITHUB_TOKEN: ${{ secrets.GITHUB_TOKEN }}

      # Setup the signing identify. See the section 'Configuring the signing identity'
      - uses: Apple-Actions/import-codesign-certs@v1
        with:
          p12-file-base64: ${{ secrets.GLUON_IOS_CERTIFICATES_FILE_BASE64 }}
          p12-password: ${{ secrets.GLUON_IOS_CERTIFICATES_PASSWORD }}

      # Download the appropriate provisining profile using Apple's Appstore Connect API.  See the section 'Using the Appstore Connect API' below
      - uses: Apple-Actions/download-provisioning-profiles@v1
        with:
          bundle-id: com.gluonhq.hello.HelloGluonApp
          issuer-id: ${{ secrets.GLUON_IOS_APPSTORE_ISSUER_ID }}
          api-key-id: ${{ secrets.GLUON_IOS_APPSTORE_KEY_ID }}
          api-private-key: ${{ secrets.GLUON_IOS_APPSTORE_PRIVATE_KEY }}

      # Install the Gluon License (optional)
      # Using this step requires you to set a GLUON_LICENSE secret in the secret configuration of your repo. Have a look at https://gluonhq.com/products/mobile/buy for more information about obtaining a license.
      - name: Gluon License
        uses: gluonhq/gluon-build-license@v1
        with:
          gluon-license: ${{ secrets.GLUON_LICENSE }}

      # Build your project using Maven
      # The ios profile is used, which means a native build will be created for the gluonfx target ios.
      - name: Gluon Build
        run: mvn -Pios gluonfx:build gluonfx:package

      # Upload the build .ipa file to TestFlight using the Appstore Connect API.
      - uses: Apple-Actions/upload-testflight-build@master
        with:
          app-path: target/gluonfx/arm64-ios/HelloGluon.ipa
          issuer-id: ${{ secrets.GLUON_IOS_APPSTORE_ISSUER_ID }}
          api-key-id: ${{ secrets.GLUON_IOS_APPSTORE_KEY_ID }}
          api-private-key: ${{ secrets.GLUON_IOS_APPSTORE_PRIVATE_KEY }}
You can see this workflow in action in the Hello Gluon CI Sample.
Changes to your build
Since this workflow uploads the build to TestFlight, it needs a unique build number each time. If you have overriden the Default-Info.plist settings you must make sure to increment the CFBundleVersion.
If you didn’t override the Default-Info.plist, you can use this gluonfx configuration:
<plugin>
    <groupId>com.gluonhq</groupId>
    <artifactId>gluonfx-maven-plugin</artifactId>
...
    <configuration>
...
        <releaseConfiguration>
            <bundleVersion>${env.GITHUB_RUN_NUMBER}</bundleVersion>
            ...
        </releaseConfiguration>
...
   </configuration>
</plugin>
Using env.GITHUB_RUN_NUMBER, Github Actions will set the bundleVersion to an incremental build number.
Configuring the signing identity
The workflow step Apple-Actions/import-codesign-certs above uses 2 configurations from your repo’s secrets configuration:
-
GLUON_IOS_CERTIFICATES_FILE_BASE64 -
GLUON_IOS_CERTIFICATES_PASSWORD
Please refer to the Github Actions docs for more information on how to set them.
To generate the values for these secrets, you’ll need a Mac for this one time configuration and follow the steps described in the iOS Distribution Certificate section.
Once you imported the certificate in Keychain Access, follow these steps:
-
Make sure to expand the certificate so you can also see the private key that was used to sign it.
-
Select both the certificate and private key and choose File→Export items
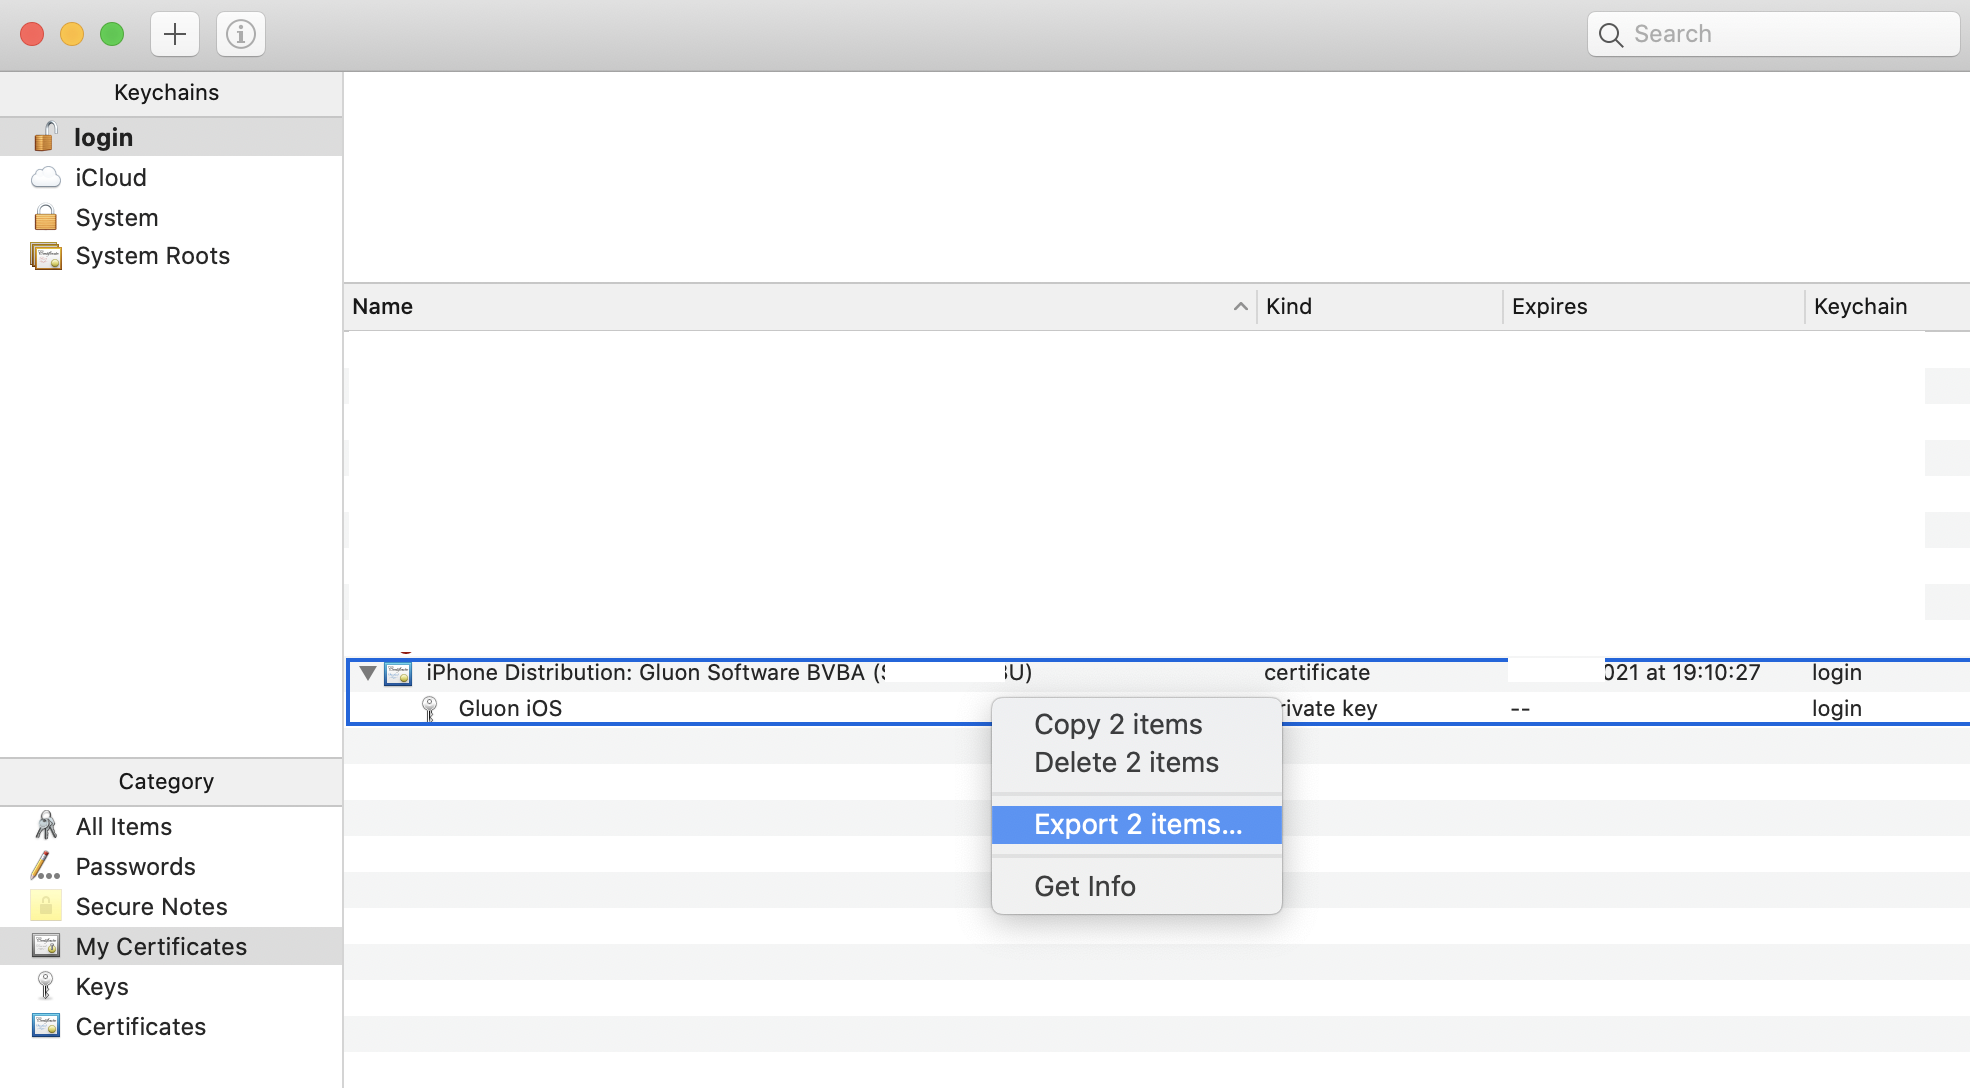
-
Export it to a .p12 file and choose a password. Set this password as GLUON_IOS_CERTIFICATES_PASSWORD
-
Base64 encode the .p12 file. Set this value as GLUON_IOS_CERTIFICATES_FILE_BASE64
Next to the signing identify, you will also need to create a provisining profile that can be used for distribution. However, it does not have to be downloaded. A workflow step will download it using the Appstore Connect API. (see next section)
Using the Appstore Connect API
The above workflow uses the Appstore Connect API to automate these 2 steps:
-
Download the provisioning profile
-
Upload the .ipa file to TestFlight, from where it can be tested and moved to production.
To generate an Appstore Connect API key, follow these steps as described by Apple.
Following that, you can set these repo secrets:
-
GLUON_IOS_APPSTORE_ISSUER_ID: see image arrow 1 -
GLUON_IOS_APPSTORE_KEY_ID: see image arrow 2 -
GLUON_IOS_APPSTORE_PRIVATE_KEY: the text contents of the file you downloaded while creating the API key.

5.5.6. iOS Simulator
Since: 1.0.12
Using the iOS simulator prevents the need of having a physical device for testing an iOS application. It is also a way to create screenshots for the multiple formats and resolutions that the App store requires for distribution.
While the iOS app that is deployed to an iPhone or distributed via the Apple Store is exactly the same as the one that runs locally on the simulator, there is an important difference: the former has AArch64 architecture, while the latter has x86_64.
This means that the native image created with target ios can’t run on the iOS simulator, and a new native image has to be created, with target ios-sim.
Pre-requisites
-
Pre-requisites of macOS Platform
-
GraalVM build based on JDK17
In this case, an Apple ID is not needed.
Configuration
To target the iOS Simulator, <target>ios-sim</target> needs to be added to the GluonFX plugin configuration:
<plugin>
    <groupId>com.gluonhq</groupId>
    <artifactId>gluonfx-maven-plugin</artifactId>
    <version>1.0.27</version>
    <configuration>
        <target>ios-sim</target>
        <mainClass>${mainClassName}</mainClass>
    </configuration>
</plugin>
Alternatively, a Maven profile can be used:
<plugin>
    <groupId>com.gluonhq</groupId>
    <artifactId>gluonfx-maven-plugin</artifactId>
    <version>1.0.27</version>
    <configuration>
        <target>${gluonfx.target}</target>
        <mainClass>${mainClassName}</mainClass>
    </configuration>
</plugin>
<profiles>
    <profile>
        <id>ios-sim</id>
        <properties>
            <gluonfx.target>ios-sim</gluonfx.target>
        </properties>
    </profile>
</profiles>
To target a given simulator device, use simulatorDevice. For instance:
<plugin>
    <groupId>com.gluonhq</groupId>
    <artifactId>gluonfx-maven-plugin</artifactId>
    <version>1.0.27</version>
    <configuration>
        <target>ios-sim</target>
        <mainClass>${mainClassName}</mainClass>
        <releaseConfiguration>
            <simulatorDevice>iPhone 13 Pro Max</simulatorDevice>
        </releaseConfiguration>
    </configuration>
</plugin>
If not set, iPhone 13 is used by default.
HelloFX sample
Clone HelloFX On a macOS system.
Use the ios-sim profile and run mvn -Pios-sim gluonfx:compile. It produces the following output:
[INFO] --- gluonfx-maven-plugin:1.0.27:compile (default-cli) @ hellofx ---
[INFO] ==================== COMPILE TASK ====================
[INFO] We will now compile your code for x86_64-apple-darwin. This may take some time.
[INFO] [SUB] Warning: Ignoring server-mode native-image argument --no-server.
[INFO] [SUB] ===========================================================================================================
[INFO] [SUB] GraalVM Native Image: Generating 'hellofx.hellofx'...
[INFO] [SUB] ===========================================================================================================
[INFO] [SUB] [1/7] Initializing...                                                                       (6.0s @ 0.14GB)
[INFO] [SUB]  Version info: 'GraalVM 22.1.0.1 Java 17 CE'
[INFO] [SUB] [2/7] Performing analysis...  [***********]                                                (77.5s @ 4.43GB)
[INFO] [SUB]   11,220 (89.14%) of 12,587 classes reachable
[INFO] [SUB]   20,083 (73.02%) of 27,504 fields reachable
[INFO] [SUB]   54,373 (61.35%) of 88,632 methods reachable
[INFO] [SUB]      651 classes,   109 fields, and 1,316 methods registered for reflection
[INFO] [SUB]      115 classes,   105 fields, and   192 methods registered for JNI access
[INFO] [SUB] [3/7] Building universe...                                                                  (3.9s @ 1.84GB)
[INFO] [SUB] [4/7] Parsing methods...      [**]                                                          (3.4s @ 3.12GB)
[INFO] [SUB] [5/7] Inlining methods...     [*****]                                                      (11.6s @ 3.72GB)
[INFO] [SUB] [6/7] Compiling methods...    [******]                                                     (40.7s @ 2.61GB)
[INFO] [SUB] [7/7] Creating image...
[INFO] [SUB] -----------------------------------------------------------------------------------------------------------
[INFO] [SUB]                         15.3s (9.7% of total time) in 33 GCs | Peak RSS: 6.41GB | CPU load: 5.55
[INFO] [SUB] -----------------------------------------------------------------------------------------------------------
[INFO] [SUB] ===========================================================================================================
[INFO] [SUB] Finished generating 'hellofx.hellofx' in 2m 36s.
And as a result, hellofx.hellofx.o is created and can be found under target/gluonfx/x86_64-ios/gvm/tmp/SVM-*/hellofx.hellofx.o.
Run mvn -Pios-sim gluonfx:link to produce the native image. As a result, the binary target/gluonfx/x86_64-ios/hellofx.app/hellofx is created.
Run mvn -Pios-sim gluonfx:package to produce the application bundles. As a result, target/gluonfx/x86_64-ios/hellofx.app is created.
Run mvn -Pios-sim gluonfx:install to install that app into the iOS simulator. A valid simulator device is required. If simulatorDevice is not specified, iPhone 13 will be booted as simulator device.
Finally, the app can be launched with mvn -Pios-sim gluonfx:nativerun.
5.5.7. HelloStaticLib Sample
Clone HelloStaticLib on a macOS system.
Use the ios profile and run mvn -Pios gluonfx:staticlib. It produces the following output:
[INFO] --- gluonfx-maven-plugin:1.0.27:staticlib (default-cli) @ hellostaticlib ---
[INFO] ==================== Static LIBRARY TASK ====================
[INFO] [SUB] ===========================================================================================================
[INFO] [SUB] GraalVM Native Image: Generating 'hello.hellostaticlib' (shared library)...
[INFO] [SUB] ===========================================================================================================
[INFO] [SUB] [1/8] Initializing...                                                                       (2.3s @ 0.14GB)
[INFO] [SUB]  Java version: 23+25, vendor version: GraalVM CE 23-dev+25.1
[INFO] [SUB]  Graal compiler: optimization level: 2, target machine: armv8-a
[INFO] [SUB]  Garbage collector: Serial GC (max heap size: 80% of RAM)
[INFO] [SUB]  1 user-specific feature(s):
[INFO] [SUB]  - com.oracle.svm.thirdparty.gson.GsonFeature
[INFO] [SUB] -----------------------------------------------------------------------------------------------------------
[INFO] [SUB] Build resources:
[INFO] [SUB]  - 12.09GB of memory (75.6% of 16.00GB system memory, determined at start)
[INFO] [SUB]  - 10 thread(s) (100.0% of 10 available processor(s), determined at start)
[INFO] [SUB] [2/8] Performing analysis...  [*****]                                                      (15.6s @ 1.24GB)
[INFO] [SUB]    12,014 reachable types   (87.3% of   13,765 total)
[INFO] [SUB]    19,705 reachable fields  (57.3% of   34,396 total)
[INFO] [SUB]    58,296 reachable methods (62.3% of   93,615 total)
[INFO] [SUB]     3,500 types,    93 fields, and 2,484 methods registered for reflection
[INFO] [SUB]       117 types,    99 fields, and   201 methods registered for JNI access
[INFO] [SUB]         5 native libraries: -framework CoreServices, -framework Foundation, dl, pthread, z
[INFO] [SUB] [3/8] Building universe...                                                                  (2.2s @ 1.30GB)
[INFO] [SUB] [4/8] Parsing methods...      [*]                                                           (1.6s @ 1.47GB)
[INFO] [SUB] [5/8] Inlining methods...     [****]                                                        (1.1s @ 1.65GB)
[INFO] [SUB] [6/8] Compiling methods...    [****]                                                       (13.2s @ 1.27GB)
[INFO] [SUB] [7/8] Laying out methods...   [**]                                                          (3.0s @ 1.67GB)
[INFO] [SUB]
[INFO] [SUB] -----------------------------------------------------------------------------------------------------------
[INFO] [SUB]                         3.5s (7.8% of total time) in 966 GCs | Peak RSS: 2.26GB | CPU load: 7.13
[INFO] [SUB] -----------------------------------------------------------------------------------------------------------
[INFO] [SUB] Build artifacts:
[INFO] [SUB]  HelloFX/target/gluonfx/arm64-ios/gvm/HelloFX/graal_isolate.h (c_header)
[INFO] [SUB]  HelloFX/target/gluonfx/arm64-ios/gvm/HelloFX/graal_isolate_dynamic.h (c_header)
[INFO] [SUB]  HelloFX/target/gluonfx/arm64-ios/gvm/HelloFX/hellofx.hellofx.h (c_header)
[INFO] [SUB]  HelloFX/target/gluonfx/arm64-ios/gvm/HelloFX/hellofx.hellofx_dynamic.h (c_header)
[INFO] [SUB] ===========================================================================================================
[INFO] [SUB] Finished generating 'hellofx.hellofx' in 43.9s.
[INFO] Static library libHelloFX.a and static libraries [vmone]
were successfully added to HelloFX/target/gluonfx/arm64-ios/gvm.
And as a result, HelloStaticLib.a is created and can be found under target/gluonfx/arm64-ios/gvm.
To test the static library on a regular iOS project, add the headers:
-
target/gluonfx/arm64-ios/gvm/HelloStaticLib/graal_isolate.h
-
target/gluonfx/arm64-ios/gvm/HelloStaticLib/hello.hellostaticlib.h
and the libraries:
-
target/gluonfx/arm64-ios/gvm/HelloStaticLib.a
-
target/gluonfx/arm64-ios/gvm/libvmone.a
to the iOS project.
In graal_isolate.h, change:
#include <graal_isolate.h>
into
#include "graal_isolate.h"
Add the required import to the project, for instance to ViewController.h:
#import "hello.hellostaticlib.h"
Add some code that makes use of the static methods to your controller, like:
-(void) runFromStaticLib:(UIButton*)sender
{
  graal_isolatethread_t *thread = NULL;
  if (graal_create_isolate(NULL, NULL, &thread) != 0) {
      fprintf(stderr, "graal_create_isolate error\n");
      return;
  }

  double resultSum = staticSum(thread, 1.0, 2.0);
  double resultDiff = staticDiff(thread, 1.0, 2.0);
  char* resultText = staticText(thread);

  NSLog(@"Static sum: %.1f", resultSum);
  NSLog(@"Static diff: %.1f", resultDiff);
  NSLog(@"Static text: %s", resultText);

  if (graal_detach_thread(thread) != 0) {
       fprintf(stderr, "graal_detach_thread error\n");
       return;
  }
}
Before building the project, drag and drop the libraries to the Xcode project, link the binary with these two libraries, and the Apple library libz.tbd.
Build, and deploy to your device and test.
The output of the given call should look like:
2022-07-20 19:59:18.762690+0200 HelloStaticLib[51489:9848288] Static sum: 3.0
2022-07-20 19:59:18.762903+0200 HelloStaticLib[51489:9848288] Static diff: -1.0
2022-07-20 19:59:18.763037+0200 HelloStaticLib[51489:9848288] Static text: Hello from Java
HelloFX as static library
Clone HelloFX on a macOS system.
Use the ios profile and run mvn -Pios gluonfx:staticlib.
As as a result, libHelloFX.a is created and can be found under target/gluonfx/arm64-ios/gvm.
Create a new Xcode iOS project, add the libraries:
-
target/gluonfx/arm64-ios/gvm/libHelloFX.a
-
target/gluonfx/arm64-ios/gvm/libvmone.a
to the iOS project.
Add the following code to the AppDelegate.m class:
#import "AppDelegate.h"

int startGVM(const char* userHome, const char* userTimeZone);
extern int __svm_vm_is_static_binary __attribute__((weak)) = 1;
extern int *run_main(int argc, const char* argv[]);

@interface AppDelegate ()
@end

@implementation AppDelegate

-(void)startVM:(NSDictionary *)launchOptions {
    NSLog(@"Starting vm...");
    NSArray *documentPaths = NSSearchPathForDirectoriesInDomains(NSLibraryDirectory, NSUserDomainMask, YES);
    NSString *documentsDir = [documentPaths objectAtIndex:0];
    NSString *folder = @"gluon";
    NSString *folderPath = [documentsDir stringByAppendingPathComponent:folder];
    if (!folderPath) {
        NSLog(@"Could not create user.home dir");
    }
    NSString *prop = @"-Duser.home=";
    NSString *userhomeProp = [prop stringByAppendingString: folderPath];

    NSFileManager *manager = [NSFileManager defaultManager];
    [manager createDirectoryAtPath: folderPath withIntermediateDirectories: NO attributes: nil error: nil];

    NSLog(@"Done creating user.home at %@", folderPath);
    const char *userHome = [userhomeProp UTF8String];

    NSTimeZone *timeZone = [NSTimeZone localTimeZone];
    NSString *tzName = [@"-Duser.timezone=" stringByAppendingString: [timeZone name]];
    const char *userTimeZone = [tzName UTF8String];

    startGVM(userHome, userTimeZone);
}

- (BOOL)application:(UIApplication *)application didFinishLaunchingWithOptions:(NSDictionary *)launchOptions {
    [self performSelectorInBackground:@selector(startVM:) withObject:launchOptions];
    return YES;
}


#pragma mark - UISceneSession lifecycle
- (UISceneConfiguration *)application:(UIApplication *)application configurationForConnectingSceneSession:(UISceneSession *)connectingSceneSession options:(UISceneConnectionOptions *)options {
    return [[UISceneConfiguration alloc] initWithName:@"Default Configuration" sessionRole:connectingSceneSession.role];
}

- (void)application:(UIApplication *)application didDiscardSceneSessions:(NSSet<UISceneSession *> *)sceneSessions {
}

int startGVM(const char* userHome, const char* userTimeZone) {
    NSLog(@"Starting GVM for ios");

    const char* args[] = {"myapp",
          "-Dcom.sun.javafx.isEmbedded=true",
          "-Djavafx.platform=ios",
          userHome, userTimeZone};
    int argsSize = sizeof(args) / sizeof(char *);
    char **graalArgs = (char **)malloc(argsSize * sizeof(char *));
    for (int i = 0; i < argsSize; i++)
    {
         graalArgs[i] = (char *)args[i];
    }
    (*run_main)(argsSize, graalArgs);
    free(graalArgs);

    NSLog(@"Finished running GVM, done with isolatehread");
    return 0;
}

@end
Before building the project, drag and drop the libraries to the Xcode project, link the binary with these two libraries, and the Apple library libz.tbd and the CoreServices.framework.
Copy the JavaFX static (*.a) libraries from ~/.gluon/substrate/javafxStaticSdk/21-ea+11.1/ios-arm64/sdk/lib into a libs folder inside the Xcode project.
Add the following line to Build Settings → Linking - General → Other Linking Flags:
-force_load libs/libglass.a -force_load libs/libjavafx_font.a -force_load libs/libjavafx_iio.a -force_load libs/libprism_common.a -force_load libs/libprism_es2.a -force_load libs/libprism_sw.a
From Xcode, plug your phone, build and run the app. You should see the logs in the Xcode terminal:
Starting vm...
Done creating user.home at /var/mobile/Containers/Data/Application/697AA764-7592-43F3-94C9-1BB0856CF00B/Library/gluon
Starting GVM for ios
SCENECONNECT for <UIWindow: 0x109f09470; frame = (0 0; 428 926); hidden = YES; gestureRecognizers = <NSArray: 0x30397b000>; layer = <UIWindowLayer: 0x30397af70>> and scene = <UIWindowScene: 0x109f07bb0; role: UIWindowSceneSessionRoleApplication; persistentIdentifier: E70404A4-4B3E-41B9-B38C-92894EB4A3DD; activationState: UISceneActivationStateUnattached>
Sept 06, 2024 10:05:47 PM com.sun.javafx.application.PlatformImpl startup
WARNING: Unsupported JavaFX configuration: classes were loaded from 'unnamed module @358ab600'
GL_VERSION string = OpenGL ES 2.0 Metal - 100
GL_VERSION (major.minor) = 0.0
  initialize() returns 4461805632
IOSWindowSystemInterface : share 3712fc0 view 0 pf otready
...
5.6. JavaFX on Embedded
Gluon applications can run on JVM for ARM devices (32/64 bits) and, additionally, native images can be created for AArch64.
The following section describes the necessary steps to create and run JavaFX applications on a Raspberry Pi (both 32 and 64 bits), using a JDK for ARM, while the next section describes the steps to create a native image for AArch64.
Of course, JavaFX is capable of running on a large number of other hardware and operating systems. Please contact us if you want more information about a specific configuration.
5.6.1. Setting up the Raspberry Pi 4
There are plenty of configurations with different hardware and operating systems that require different versions of binaries, linked to different libraries.
The distribution of JavaFX 22-ea for embedded is tested on a Raspberry Pi 4, using the Raspberry Pi OS distribution.
The Raspberry Pi site contains clear documentation about the product itself. Installing an operating system for the Raspberry Pi is described at https://www.raspberrypi.org/documentation/installation/installing-images/README.md.
The following documentation has been tested to work with Raspberry Pi OS (both 32-bit and 64-bit) with desktop and recommended software, with images that can be downloaded from https://www.raspberrypi.com/software/operating-systems/. However, it is highly recommended to use the Raspberry Pi Imager (available for Windows, macOS and Linux), to download and install the image to the SDCard.
Once the image is installed, the first boot will be on X11, and a configuration dialog will show up. Follow the instructions to configure your language, keyboard settings and WiFi. Apply the changes and reboot.
Once you boot again, from the top menu, select Preferences → Raspberry Pi Configuration
-
From the System tab, select Boot to CLI. Note that the hostname is set to
raspberrypi(change it if needed). -
From Interfaces tab, enable SSH.
-
From Performance tab, it is recommended to set 512 MB for GPU Memory, depending of course on how graphics-intensive versus how cpu-intensive your application is.
Click OK and reboot.
Once the Pi is back online, it is convenient to check the SSH access from your machine:
ssh pi@raspberrrypi.localIf you encounter any issues, check these instructions.
5.6.2. Java
The Raspberry Pi OS might contain an up-to-date JDK 17 distribution for ARM. You can verify that by running java -version.
If you run on a distribution without Java installed (like Raspberry Pi OS Lite), you can easily install it with:
pi@raspberrypi:~ $ sudo apt update
$ sudo apt-get install openjdk-17-jdk
$ java -version
openjdk version "17.0.4" 2022-07-19
OpenJDK Runtime Environment (build 17.0.4+8-Debian-1deb11u1)
OpenJDK 64-Bit Server VM (build 17.0.4+8-Debian-1deb11u1, mixed mode, sharing)|
You can still use JDK 11, but you will need to use a JavaFX version lower than 20. If needed, install it with: |
5.6.3. JavaFX
A reference implementation of JavaFX 22-ea for embedded devices, with support for DRM, can be downloaded for the Raspberry Pi 4 from https://gluonhq.com/products/javafx/#ea.
You can choose the JavaFX SDK for 32 or 64 bits, based on the OS installed on your device.
|
This SDK should work on other similar systems. If you have an embedded system that you want to be supported or if you need specific builds, contact us. |
|
In order to support hardware-accelerated rendering, JavaFX relies on a number of low-level drivers and libraries that are not always installed by default on all embedded systems. That is the case of the Raspberry Pi OS Lite distribution, for instance, and you can install additional required libraries with: |
Install JavaFX for 32 bits
Browse for Linux OS, arm32 architecture and SDK type, download the SDK to your machine and then copy it to the Pi, like:
scp ~/Downloads/openjfx-21-ea+11.1_linux-arm32_bin-sdk.zip pi@raspberrypi.local:/home/pi/DownloadsNow back to your Pi (via SSH or directly), move the SDK to /opt and unzip it:
pi@raspberrypi:~ $ sudo mv ~/Downloads/openjfx-21-ea+11.1_linux-arm32_bin-sdk.zip /opt
$ cd /opt
$ sudo unzip openjfx-21-ea+11.1_linux-arm32_bin-sdk.zip
$ sudo rm openjfx-21-ea+11.1_linux-arm32_bin-sdk.zip
Note that you should find the SDK under the folder /opt/javafx-sdk-21.
Install JavaFX for 64 bits
Browse for Linux OS, aarch64 architecture and Monocle SDK type, download the SDK to your machine and then copy it to the Pi, like:
scp ~/Downloads/openjfx-21-ea+11.1_monocle-linux-aarch64_bin-sdk.zip pi@raspberrypi.local:/home/pi/DownloadsNow back to your Pi (via SSH or directly), move the SDK to /opt and unzip it:
pi@raspberrypi:~ $ sudo mv ~/Downloads/openjfx-21-ea+11.1_monocle-linux-aarch64_bin-sdk.zip /opt
$ cd /opt
$ sudo unzip openjfx-21-ea+11.1_monocle-linux-aarch64_bin-sdk.zip
$ sudo rm openjfx-21-ea+11.1_monocle-linux-aarch64_bin-sdk.zip
Note that you should find the SDK under the folder /opt/javafx-sdk-21.
DRM library
JavaFX requires the DRM library to work without a windows manager.
This library is already bundled within the JavaFX SDK (for the ea versions), and it can be used without limitations for non-commercial applications. After installing JavaFX, check that you have it:
$ ls -l /opt/javafx-sdk-21/lib/libgluon_drm*
-rwxr-xr-x 1 root root 34208 Dec 12 20:42 javafx-sdk-21/lib/libgluon_drm-1.1.7.so
-rwxr-xr-x 1 root root 67448 Dec 12 20:42 javafx-sdk-21/lib/libgluon_drm_debug-1.1.7.so
In any case, you can download it from here:
And copy the file libgluon_drm-1.1.7.so to any location, but it can be convenient to have it under /opt/javafx-sdk-21/lib.
Legal notice
JavaFX support for DRM is a commercial extension from Gluon. See license file.
You can enable it by setting the environment variable ENABLE_GLUON_COMMERCIAL_EXTENSIONS, either if your application is non-commercial or if you obtained a valid license from Gluon.
To enable it on your current session, run:
pi@raspberrypi:~ $ export ENABLE_GLUON_COMMERCIAL_EXTENSIONS=trueAnd if you want to export it permanently, you can add the following line to your .bashrc file:
ENABLE_GLUON_COMMERCIAL_EXTENSIONS=trueTesting JavaFX
| JavaFX on embedded works with X11 as well, but first we want to demonstrate it works using the DRM driver to manage the framebuffer, without X. |
Create a JavaFX sample, or clone the OpenJFX samples.
Compile:
pi@raspberrypi:~ $ cd ~/Downloads/samples/CommandLine/Modular/CLI/hellofx
$ javac --module-path /opt/javafx-sdk-21/lib --add-modules=javafx.controls src/hellofx/HelloFX.java -d dist
And finally run:
pi@raspberrypi:~ $ sudo -E java -Dmonocle.platform=EGL -Dembedded=monocle -Dglass.platform=Monocle -Duse.egl=true -Degl.displayid=/dev/dri/card1 -Dmonocle.egl.lib=/opt/javafx-sdk-21/lib/libgluon_drm-1.1.7.so --module-path /opt/javafx-sdk-21/lib --add-modules javafx.controls -cp dist/. hellofx.HelloFXYou should see on your display something like:
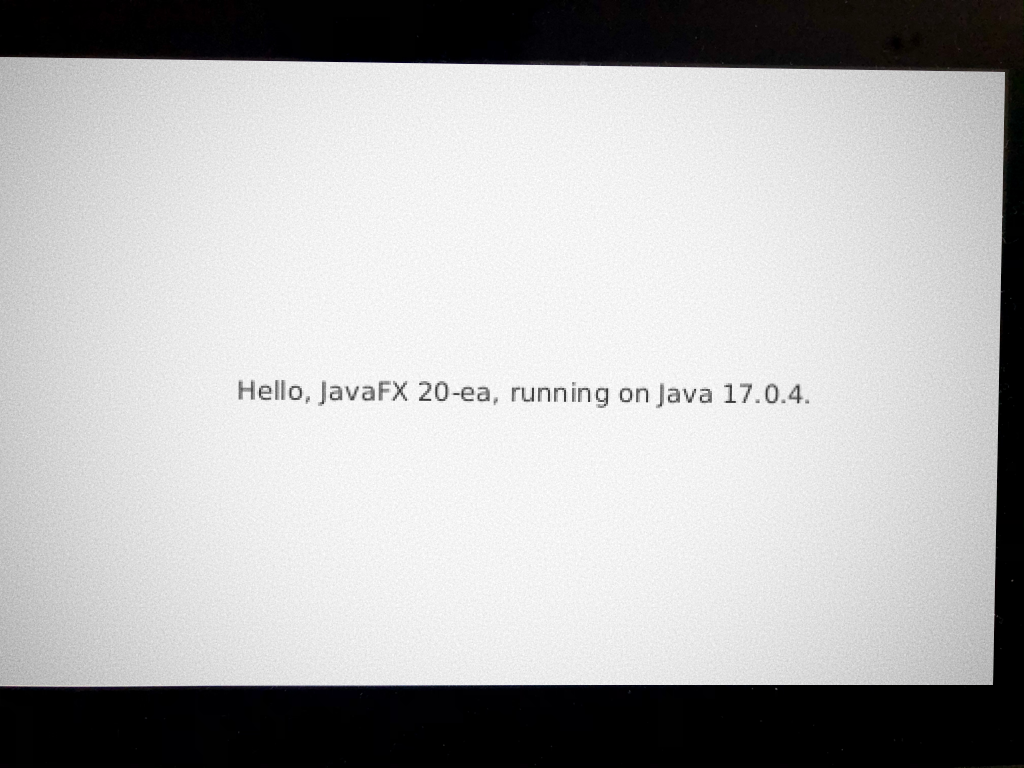
while your SSH session shows:
[GluonDRM] use GPU at /dev/dri/card1 and display id -1
[GluonDRM] We have 1 connectors
[GluonDRM] ID for connector[0] = 89, width = 1920 and height = 1080
[GluonDRM] Height was 0 and is now 1080
eglinit ok
eglbind ok
eglCreateWindowSurface called
...|
If running the sample works but shows a black screen, you need to use save, and reboot. |
|
If you get this error: you can try with |
From your SSH session, you can click Ctrl+C to finish the process.
X11
If you are running with X11, the command line should be now:
pi@raspberrypi:~ $ sudo -E java --module-path /opt/javafx-sdk-21/lib --add-modules javafx.controls -cp dist/. hellofx.HelloFX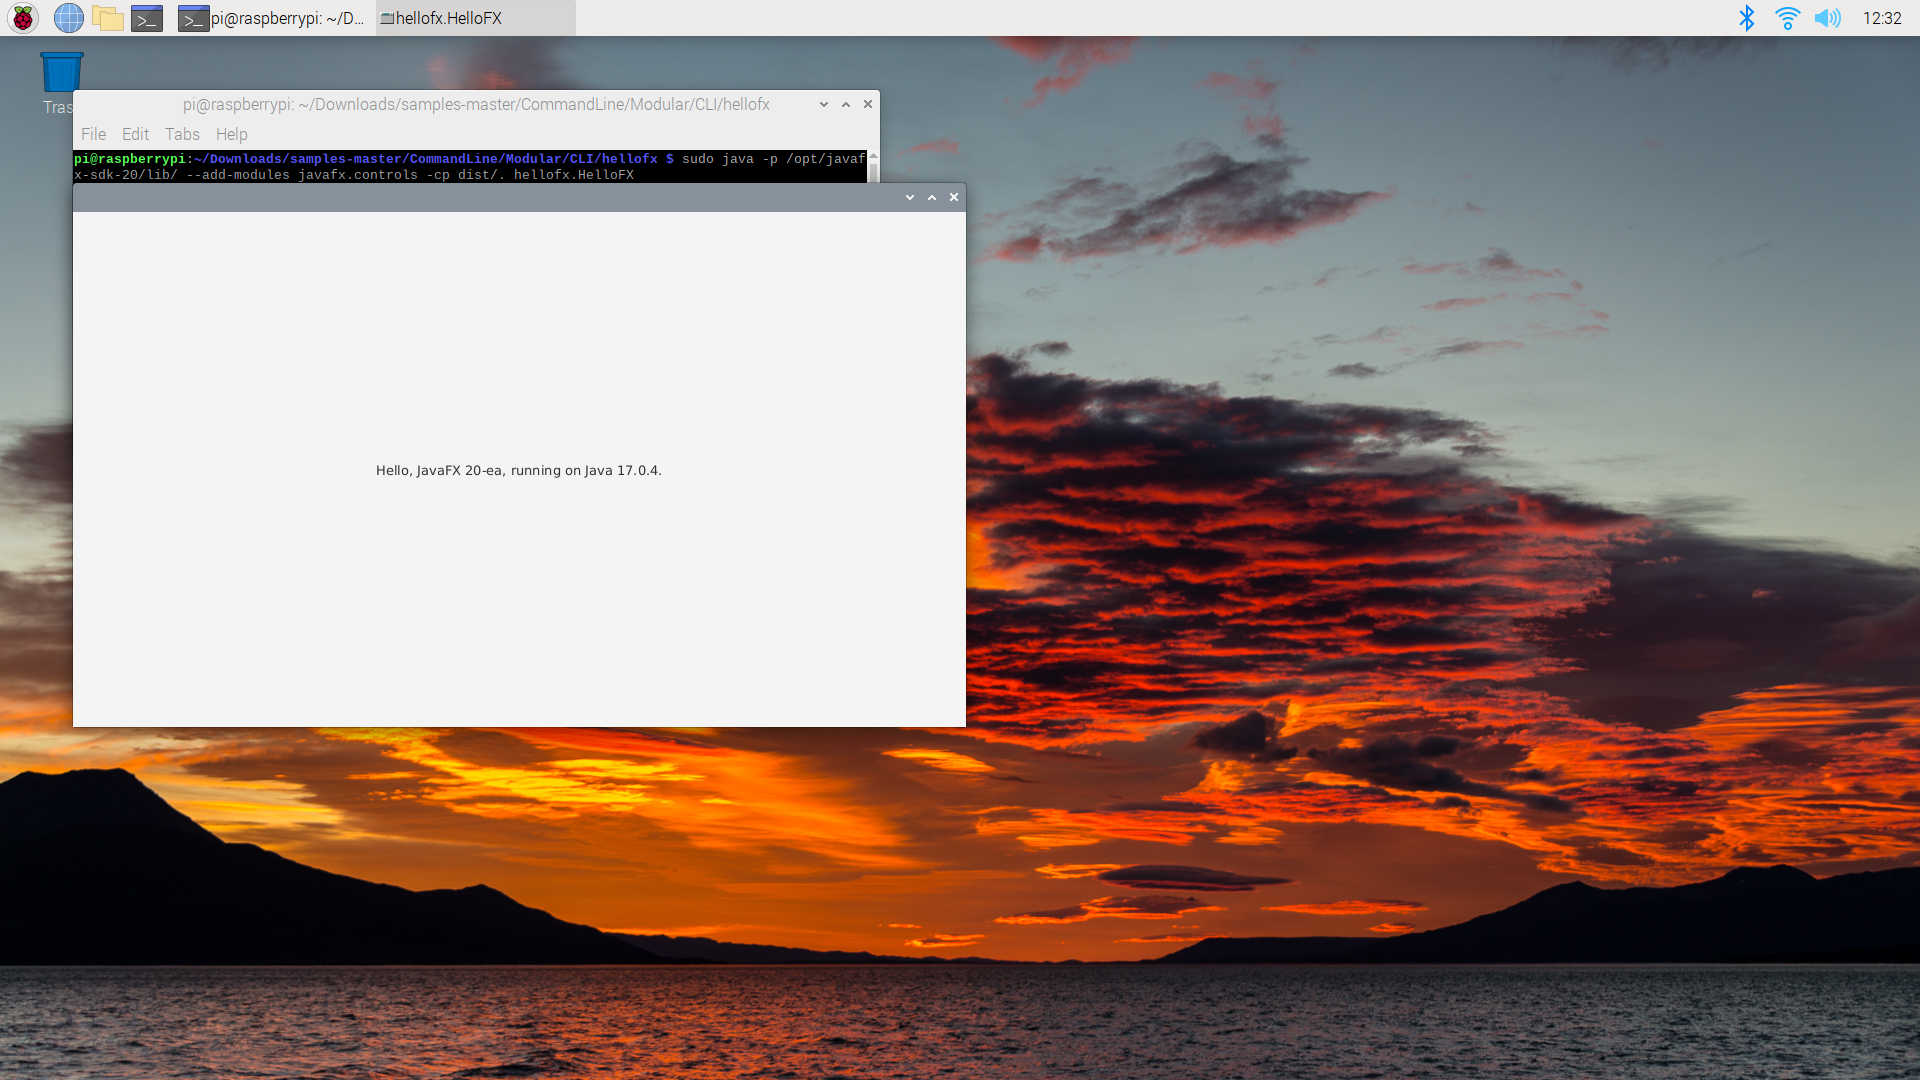
5.6.4. Run demo app
As a very first demo, we will show how you can run the MaryHadALittleLambda application on a recent Pi, with Java 11 and JavaFX 22-ea.
This application was created in 2014, in order to demonstrate the use of lambda’s. The author, Stephen Chin, wrote a blogpost about this. The application was demonstrated on embedded devices as well.
The original code of the application is at https://github.com/steveonjava/MaryHadALittleLambda. We forked it and made some minor modifications in order to make it work with the JavaFX 11+ and Java 11+ APIs. The new code is at https://github.com/gluonhq/MaryHadALittleLambda.
It is important to mention that you would typically do all your development on your development system (desktop or laptop). You can use your IDE and common tools to create, compile and test applications. Once you are happy with the result, you can transfer your class files over to the embedded device, and run them there.
Download code
The first step is to get the code to your development system and to compile the application.
| it is highly recommended doing this on your desktop/laptop, and not on your Raspberry Pi, as it requires much more resources than typically available on embedded devices. However, the Raspberry Pi 4 is a much more powerful device than its predecesors, and it can run the same desktop tasks. |
git clone https://github.com/gluonhq/MaryHadALittleLambda.git
cd MaryHadALittleLambda
mvn clean compile
It is good practice to test your application on desktop or laptop before transfering the class files to your device. You can run the application on desktop using:
mvn javafx:run
You should see the application running now.
Quit the application, and check if the class files are in the target/classes directory. There should be about 3 class files in the sample package.
5.6.5. Install the class files on the device
You can now copy the classes from your development system to the Raspberry Pi, e.g.
cd target
scp -r classes pi@raspberrypi.local:/home/pi/Downloads
Run the application on the device
Now, log in via SSH to your Raspberry Pi and run the application.
cd ~/Downloads
sudo -E java -Dmonocle.platform=EGL -Dmonocle.egl.lib=/opt/javafx-sdk-21/lib/libgluon_drm-1.1.7.so --module-path /opt/javafx-sdk-21/lib --add-modules javafx.controls -cp classes/ sample.Main
X11
If you use X11, then the demo can be run with:
cd ~/Downloads
sudo -E java --module-path /opt/javafx-sdk-sample.Main/lib --add-modules javafx.controls -cp classes/ sample.Main
5.6.6. Native image for AArch64
We can create native images of Gluon application that run on embedded devices such as the Raspberry Pi, with the only requirement that a 64 bits architecture is currently needed.
In theory, you could install GraalVM for Linux-AArch64 from https://github.com/graalvm/graalvm-ce-builds/releases/, and then run the GluonFX plugin directly on the Pi. However, given its hardware limitation, and the high CPU/memory requirements of the native-image process, the recommended way is building the image from a Linux machine (x86-64).
| Ubuntu is the recommended OS to build native images for AArch64 Linux. |
In addition to the Linux requirements, "g++ crosscompiler" needs to be installed on the host machine:
sudo apt-get install g++-aarch64-linux-gnuYou also need to install the static version of the DRM library to work without a windows manager. Download it from here:
and copy the file libgluon_drm.a to ~/.gluon/substrate/javafxStaticSdk/21-ea+11.1/linux-aarch64/sdk/lib/.
Finally, add the following profile to the Maven project:
<plugin>
    <groupId>com.gluonhq</groupId>
    <artifactId>gluonfx-maven-plugin</artifactId>
    <version>1.0.27</version>
    <configuration>
        <target>${gluonfx.target}</target>
        <mainClass>${mainClassName}</mainClass>
        <remoteHostName>pi@raspberrypi.local</remoteHostName>
        <remoteDir>/home/pi/Downloads/native/</remoteDir>
        <runtimeArgs>
            <arg>-Dmonocle.platform=EGL</arg>
            <arg>-Dembedded=monocle</arg>
            <arg>-Dglass.platform=Monocle</arg>
            <arg>-Degl.displayid=/dev/dri/card1</arg>
        </runtimeArgs>
    </configuration>
</plugin>
<profiles>
    <profile>
        <id>pi</id>
        <properties>
            <gluonfx.target>linux-aarch64</gluonfx.target>
        </properties>
    </profile>
</profiles>
The native image can be built using mvn -Ppi gluonfx:build.
This will run the compilation phase and link the compiled objects into an executable.
Once the process is finished, you can deploy the binary to your Pi, providing you have correctly defined remoteHostName and remoteDir:
mvn -Ppi gluonfx:install|
The |
You can run from your machine, via SSH, using:
mvn -Ppi gluonfx:nativerunmaking sure the runtime arguments are properly defined in the pom’s configuration as shown above. To finish the process, press Ctrl+C.
Or alternatively, you can you can run the native image directly on your Pi from command line with:
pi@raspberrypi:~ $ export ENABLE_GLUON_COMMERCIAL_EXTENSIONS=true
pi@raspberrypi:~ $ cd ~/Downloads/native
pi@raspberrypi:~ $ sudo -E ./HelloFX -Dmonocle.platform=EGL -Dembedded=monocle -Dglass.platform=Monocle -Degl.displayid=/dev/dri/card1
The UI output will be directly sent to the framebuffer, leveraging the KMS/DRM components in the Linux kernel and low-level graphical drivers.
Or if you run from a terminal in X11:
pi@raspberrypi:~ $ export ENABLE_GLUON_COMMERCIAL_EXTENSIONS=true
pi@raspberrypi:~ $ cd ~/Downloads/native
pi@raspberrypi:~ $ sudo -E ./HelloFX
In this case, the UI will be attached to the running X server.
5.7. Web
Gluon applications can be compiled to run on the browser. Cross compilation is supported on Linux, Mac and Windows.
5.7.1. HelloFX Sample
Clone HelloFX on your system.
|
CSS is currently not supported. Any instance of adding stylesheets needs to be removed/commented out from the source. |
The main method in HelloFX needs to be updated to pass Application class to the launch method:
public static void main(String[] args) {
    launch(HelloFX.class, args);
}
Add the target to web via a new maven profile web:
<profiles>
   ...
    <profile>
        <id>web</id>
        <properties>
            <gluonfx.target>web</gluonfx.target>
        </properties>
    </profile>
</profiles>
Once the profile is in place, cross-compilation can be initiated using:
mvn -Pweb gluonfx:buildIt produces the index.html and a number of required javascript files under target/gluonfx/x86_64-web/gvm/web.
|
Gluon web port currently supports Chrome, Chromium or Firefox. |
mvn -Pweb gluonfx:nativerun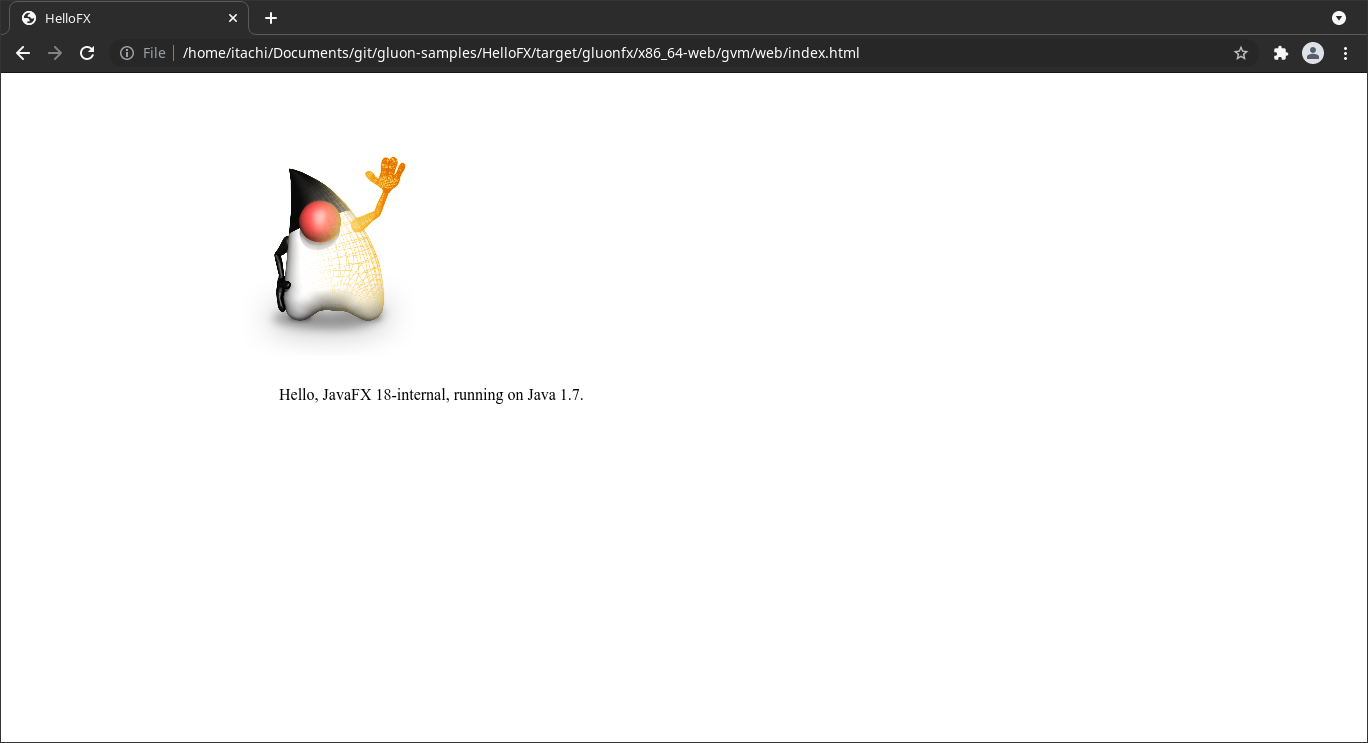
5.7.2. HelloWeb Sample
HelloWeb is another sample which shows JavaFX animation on web. The samples run a series of animation on different nodes.
Clone HelloWeb on your system.
The web profile along with changes required for main method are already in place.
To run the sample in web, execute:
mvn -Pweb gluonfx:build gluonfx:nativerun6. User Interface (UI)
Glisten is the UI toolkit of Gluon framework. It contains base APIs for the UI toolkit, including APIs for controls and animation. It offers cross-platform behavior with a platform specific look and feel, based on Material design specification.
6.1. Glisten APIs
6.1.1. MobileApplication
MobileApplication class extends from Application, hence for Glisten-based applications it will be considered the base class.
Let’s have a look at the hierarchy of components added to generate the user interface.
GlassPane
GlassPane is the root node added automatically by Glisten to the primary scene.
It can be seen as the invisible container for all the nodes that will be added: views, layers, dialogs or toolbars.
Usually, there won’t be any need to access this container directly. But it can be retrieved with MobileApplication.getInstance().getGlassPane(), if needed.
The first children of the GlassPane container will always be a View and the AppBar.
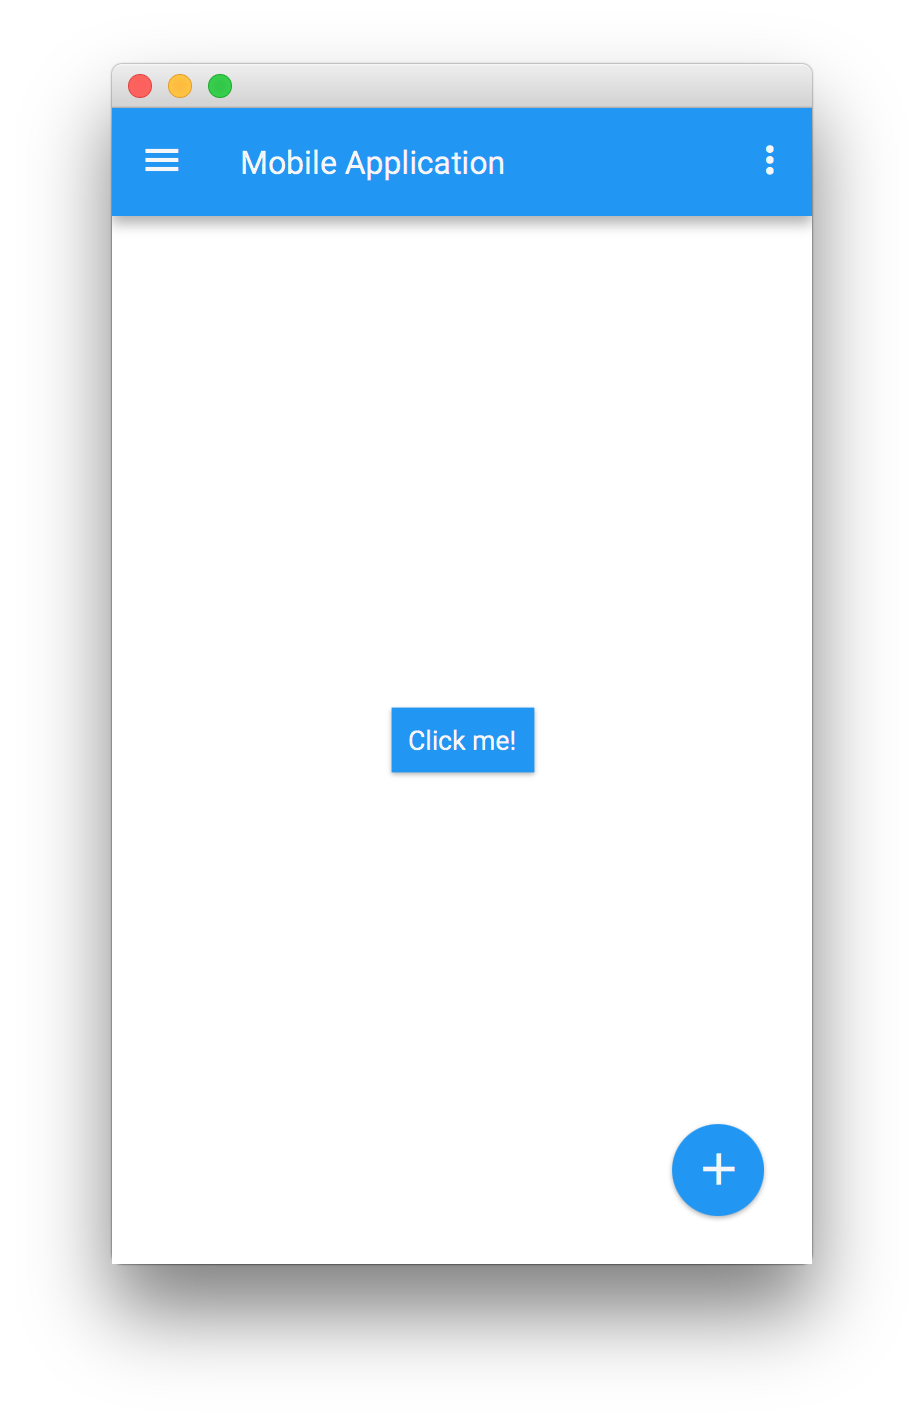
The nodes on top will be layers (like a side menu), popups or dialogs.
In between, there is a semi-transparent node that will ensure that the node on top appears distinct from the content beneath it, whenever this is shown. Otherwise it won’t be visible.
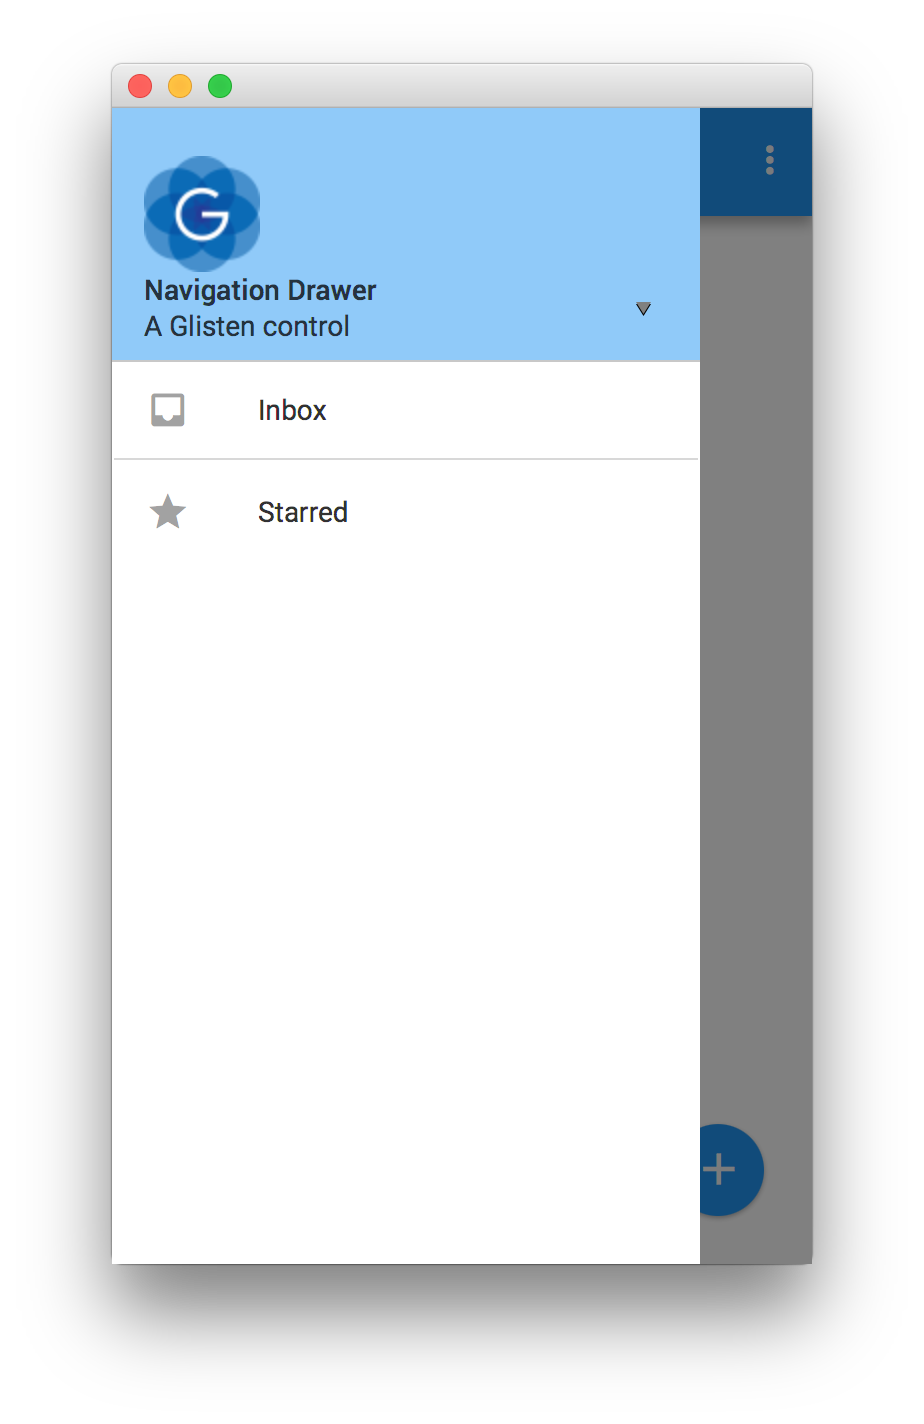
AppBar
AppBar is a special node acting as a toolbar for branding, navigation, search and other actions.
It is placed at the top of the layout and is generally made up of some buttons (nav icon and action items), a title and a menu.
The content (in terms of nodes and their respective actions) will be managed directly by each of the different views,
so the AppBar will be like a toolbar placeholder for each one of them.
Typically, the developer sets up the AppBar for a given View by overriding its updateAppBar method:
public class HomeView extends View {

    public HomeView() {
        FloatingActionButton fab = new FloatingActionButton();
        fab.showOn(this);
    }

    @Override
    protected void updateAppBar(AppBar appBar) {
        appBar.setNavIcon(MaterialDesignIcon.MENU.button(e -> System.out.println("nav icon")));
        appBar.setTitleText("The AppBar");
        appBar.getActionItems().addAll(
            MaterialDesignIcon.SEARCH.button(e -> System.out.println("search")),
            MaterialDesignIcon.FAVORITE.button(e -> System.out.println("fav")));
        appBar.getMenuItems().addAll(new MenuItem("Settings"));
    }
}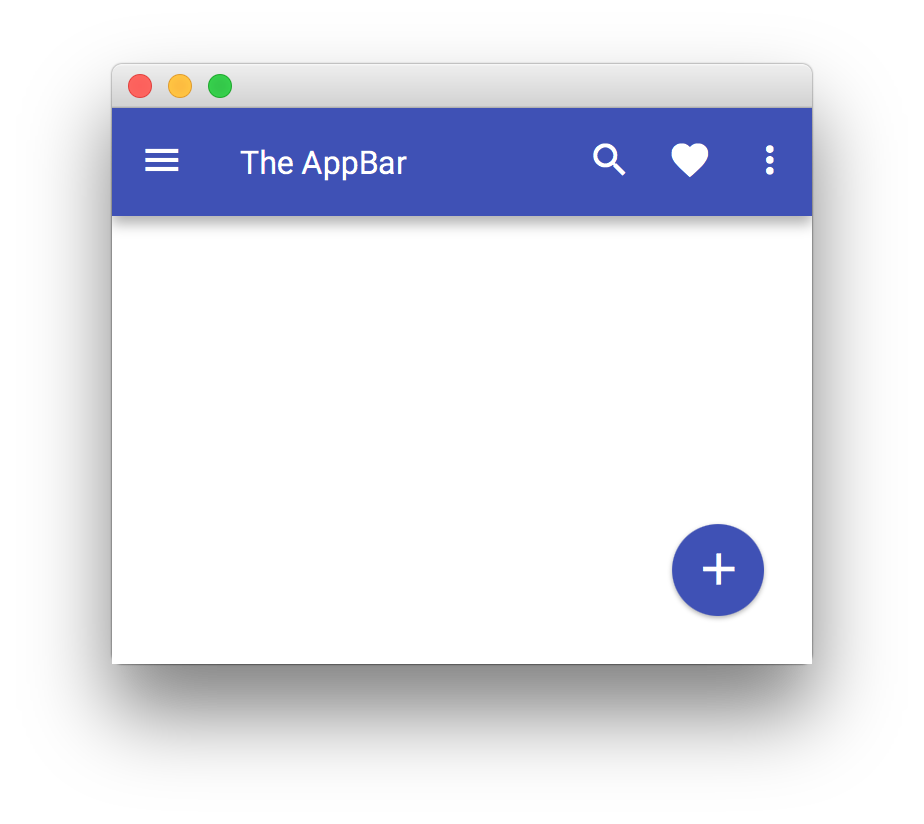
If the developer doesn’t require the AppBar for a given view, it can be hidden by setting its visibility to false: appBar.setVisible(false).
Another way to update the AppBar will be adding a listener to each view’s showingProperty:
public class MyApp extends MobileApplication {

    @Override
    public void init() {
        addViewFactory(HOME_VIEW, () -> {
            View view = new View(new Label("Hello Glisten!"));
            view.showingProperty().addListener((obs, oldValue, newValue) -> {
                if (newValue) {
                    AppBar appBar = MobileApplication.getInstance().getAppBar();
                    appBar.setNavIcon(MaterialDesignIcon.MENU.button(e -> System.out.println("nav icon")));
                }
            });
            return view;
        });
    }
}
View
View is a Glisten container that will allow adding nodes in its top, left, right, bottom, and center positions.
Usually a View instance is created by providing a node for its content.
This instance is added to a factory of views with a name, so the Glisten UI can load and unload them on demand.
Home View
By default, the home view will be the first view displayed when the stage is shown.
It has no predefined content, so this view has to be designed by the developer, but its name is already assigned: MobileApplication.HOME_VIEW.
This short snippet will create a very simple mobile application with a single view:
public class MyApp extends MobileApplication {

    @Override
    public void init() {
        addViewFactory(HOME_VIEW, () -> new View(new Label("Hello Glisten!")));
    }

}
6.1.2. How it works
In order to understand how Glisten works, let’s have a look at the initial JavaFX application lifecycle. Whenever an application is launched, the JavaFX runtime does the following:
-
Constructs an instance of the specified
Applicationclass -
Calls the
init()method -
Calls the
start(javafx.stage.Stage)method
Typically, the developer of a Glisten application will only override the init() method, in order to add one or more View objects,
and provide them as factories that can be called on-demand. The MobileApplication implementation will take care of the rest:
when start() is called, it will create a Scene, adding a root node to it. Finally, it will put the scene in the primary stage and show it.
When the runtime calls init(), we just provide a Supplier<View> for HOME_VIEW, but the view is not instantiated at this point yet.
Then start(Stage) is called. At this moment, MobileApplication creates an instance of Scene, sets the root an empty instance of a GlassPane and adds the scene to the primary stage.
After some internal settings, like adding the default Swatch, it calls switchView("HOME_VIEW"). This is the moment when an instance of the home view is created and added to the pane.
Finally, the stage is shown.
Changing the default Swatch
What if we want to modify some scene settings before it is shown?
Before showing the stage, there’s a call to the postInit(Scene) method, that can be used by the developer for one time initialization.
public class MyApp extends MobileApplication {

    @Override
    public void init() {
        addViewFactory(HOME_VIEW, () -> new View(new CheckBox("I like Glisten")));
    }

    @Override
    public void postInit(Scene scene) {
        Swatch.GREEN.assignTo(scene);
    }

}
In case the developer wants to change the swatch for each view, this can be done by listening to the changes in the
viewProperty of a MobileApplication instance, and assigning the corresponding Swatch:
public class MyApp extends MobileApplication {

    private static final String OTHER_VIEW = "other";

    @Override
    public void init() {
        addViewFactory(HOME_VIEW, () -> new View(new Label("Hello Glisten!")) {
            {
                FloatingActionButton fab = new FloatingActionButton(MaterialDesignIcon.ADD_BOX.text, e -> switchView(OTHER_VIEW));
                fab.showOn(this);
            }
        });
        addViewFactory(OTHER_VIEW, () -> new View(new CheckBox("I like Glisten")) {
            {
                FloatingActionButton fab = new FloatingActionButton(MaterialDesignIcon.ADD_CIRCLE_OUTLINE.text, e -> switchView(HOME_VIEW));
                fab.showOn(this);
            }
        });

        viewProperty().addListener((obs, oldView, newView) -> {
            switch(newView.getName()) {
                case HOME_VIEW:
                    Swatch.INDIGO.assignTo(newView.getScene());
                    break;
                case OTHER_VIEW:
                    Swatch.GREEN.assignTo(newView.getScene());
                    break;
                default:
                    Swatch.getDefault().assignTo(newView.getScene());
            }
        });
    }
}
Another way to accomplish the same will be by adding a listener to each view’s showingProperty:
public class MyApp extends MobileApplication {

    private static final String OTHER_VIEW = "other";

    @Override
    public void init() {
        addViewFactory(HOME_VIEW, () -> {
            View view = new View(new RadioButton("Glisten style"));
            FloatingActionButton fab = new FloatingActionButton(MaterialDesignIcon.ADD_BOX.text, e -> switchView(OTHER_VIEW));
            fab.showOn(view);
            view.showingProperty().addListener((obs, oldValue, newValue) -> {
                if (newValue) {
                    Swatch.RED.assignTo(view.getScene());
                }
            });
            return view;
        });
        addViewFactory(OTHER_VIEW, () -> {
            View view = new View(new CheckBox("I like Glisten"));
            FloatingActionButton fab = new FloatingActionButton(MaterialDesignIcon.ADD_CIRCLE_OUTLINE.text, e -> switchView(HOME_VIEW));
            fab.showOn(view);
            view.showingProperty().addListener((obs, oldValue, newValue) -> {
                if (newValue) {
                    Swatch.TEAL.assignTo(view.getScene());
                }
            });
            return view;
        });
    }
}
Creating a View
As we have already seen in the previous code snippets, there are several possible ways to create a View.
Extending View
A custom view can be created by extending View. This allows for more complex views, for adding a view transition, customizing the AppBar…
public class MyApp extends MobileApplication {

    private static final String OTHER_VIEW = "other";

    @Override
    public void init() {
        addViewFactory(HOME_VIEW, () -> new HomeView());
        addViewFactory(OTHER_VIEW, () -> new View(new CheckBox("I like Glisten")));
    }

    @Override
    public void postInit(Scene scene) {
        Swatch.LIGHT_GREEN.assignTo(scene);
    }

    class HomeView extends View {

        public HomeView() {
            setCenter(new Label("Hello Glisten!"));
        }

        @Override
        protected void updateAppBar(AppBar appBar) {
            appBar.setNavIcon(MaterialDesignIcon.MENU.button(e -> switchView(OTHER_VIEW)));
            appBar.setTitleText("Home View");
        }
    }
}
Adding content
A View can be created by using one of its constructors, where the content is set. Any Node will work as content for the View.
public class MyApp extends MobileApplication {

    private static final String OTHER_VIEW = "other";

    @Override
    public void init() {
        addViewFactory(HOME_VIEW, () -> new View(new Home()) {
            @Override protected void updateAppBar(AppBar appBar) {
                appBar.setNavIcon(MaterialDesignIcon.MENU.button(e -> switchView(OTHER_VIEW)));
                appBar.setTitleText("Home View");
            }
        });
    }

    class Home extends VBox {

        public Home() {
            setSpacing(30);
            setAlignment(Pos.CENTER);
            getChildren().addAll(new Label("Hello Glisten!"), new Button("Click me"));
        }
    }
}
Creating Views with FXML
View can be used within FXML, by adding the proper import.
<?xml version="1.0" encoding="UTF-8"?>

<?import com.gluonhq.charm.glisten.mvc.View?>
<?import javafx.scene.control.Button?>

<View fx:id="home" prefHeight="400.0" prefWidth="600.0" styleClass="mainFxmlClass" xmlns="http://javafx.com/javafx/11" xmlns:fx="http://javafx.com/fxml/1">
   <center>
      <Button fx:id="button" onAction="#onClick" text="Click me!" />
   </center>
</View>
Load the fxml file using the FXMLLoader. Assuming the home.fxml file is under the same package as the application,
but in the 'resources' directory:
public class MyApp extends MobileApplication {

    private static final String OTHER_VIEW = "other";

    @Override
    public void init() {
        addViewFactory(HOME_VIEW, () -> {
            try {
                return (View)FXMLLoader.load(getClass().getResource("views/home_1.fxml"));
            } catch (Exception ex) { }
            return null;
        });
        addViewFactory(OTHER_VIEW, () -> new View(new CheckBox("I like Glisten")));
        viewProperty().addListener((obs, ov, nv) -> {
            AppBar appBar = MobileApplication.getInstance().getAppBar();
            switch(nv.getName()) {
                case HOME_VIEW:
                    appBar.setNavIcon(MaterialDesignIcon.MENU.button(e -> switchView(OTHER_VIEW)));
                    appBar.setTitleText("Home View");
                    Swatch.TEAL.assignTo(appBar.getScene());
                    break;
                case OTHER_VIEW:
                    appBar.setVisible(false);
                    break;
            }
        });
    }
}
Using Gluon’s Scene Builder
View is available under the Gluon titled pane on the top left of Scene Builder.
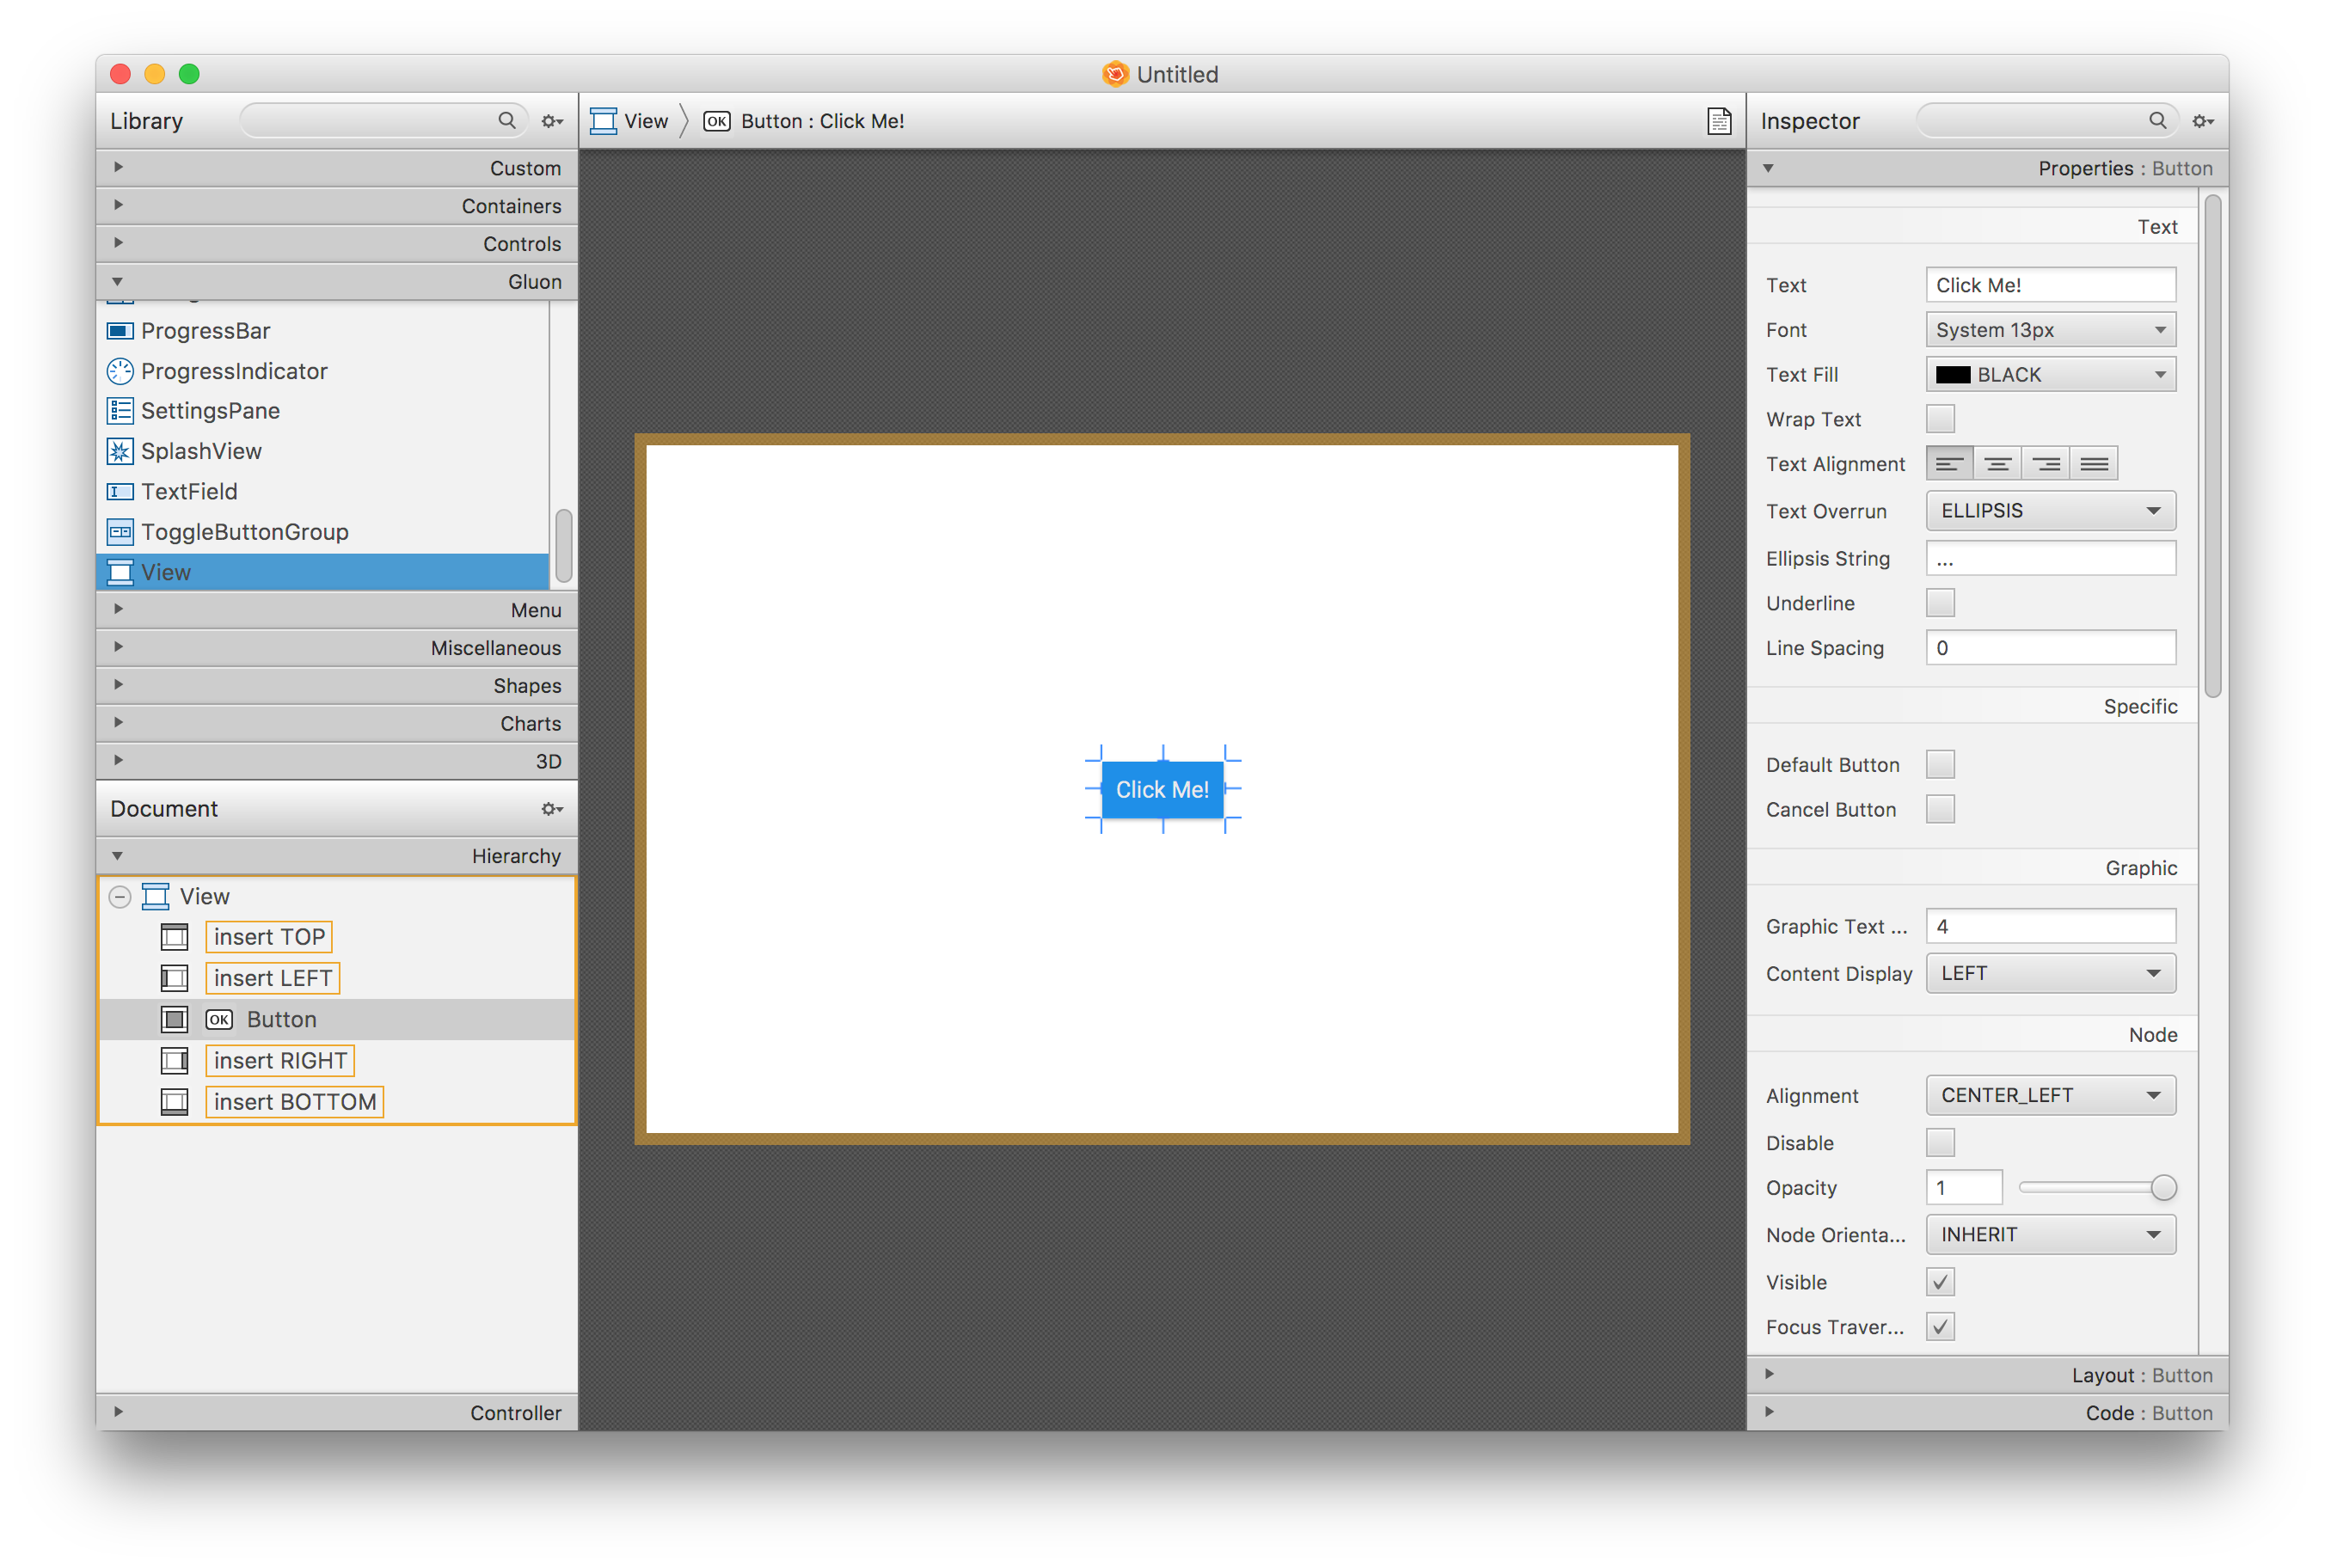
Note: Prior to Scene Builder 8.3.0, charm-glisten-6.2.3.jar should be imported into the Scene Builder.
Afterburner framework
Adding the dependency to the build.gradle script, allows using this MVP framework from Adam Bien.
dependencies {
    compile 'com.airhacks:afterburner.mfx:1.6.3'
}
For every view, these files are required:
In the code folder:
-
The view i.e.
HomeView. An empty class that just extendsFXMLView. -
The presenter. I.e.
HomePresenter. -
A service (optional), i.e.
HomeService.
And in the resources folder:
-
The fxml, i.e.
home.fxml -
The css (optional), i.e.
home.css.
In the presenter, controls can be added to the view, like a Button to trigger some action when the user clicks on it.
A transition can be set for switching views from a large list of available transitions (see the Charm JavaDoc).
In case no transition is desired, the developer can select NoTransition().
<View fx:id="home" xmlns="http://javafx.com/javafx/11" xmlns:fx="http://javafx.com/fxml/1" fx:controller="HomePresenter">
    <center>
        <StackPane>
            <Button text="Click!" onAction="#onClick"/>
        </StackPane>
    </center>
</View>
The presenter can be created to directly interact with the nodes in the FXML.
public class HomePresenter implements Initializable {

    @FXML
    private View home;

    @Override
    public void initialize(URL url, ResourceBundle rb) {
        FloatingActionButton fab = new FloatingActionButton();
        fab.setOnAction(e -> {
            System.out.println("FAB click");
        });
        fab.showOn(home);

        home.setShowTransitionFactory(v -> new FadeInLeftBigTransition(v));

        home.showingProperty().addListener((obs, ov, nv) -> {
            if (nv) {
                final AppBar appBar = MobileApplication.getInstance().getAppBar();
                appBar.setNavIcon(MaterialDesignIcon.MENU.button(e -> System.out.println("menu")));
                appBar.setTitleText("The Home View");
                appBar.getActionItems().addAll(
                        MaterialDesignIcon.SEARCH.button(),
                        MaterialDesignIcon.FAVORITE.button());
                appBar.getMenuItems().addAll(new MenuItem("Settings"));

                Swatch.PURPLE.assignTo(home.getScene());
            }
        });
    }

    @FXML
    public void onClick() {
       System.out.println("click");
    }
}
Then, a view can be created:
public class HomeView extends FXMLView {

}
This View can be loaded in a MobileApplication:
public class MyApp extends MobileApplication {

    @Override
    public void init() {
        addViewFactory(HOME_VIEW, () -> {
            final HomeView homeView = new HomeView();
            return (View) homeView.getView();
        });
    }
}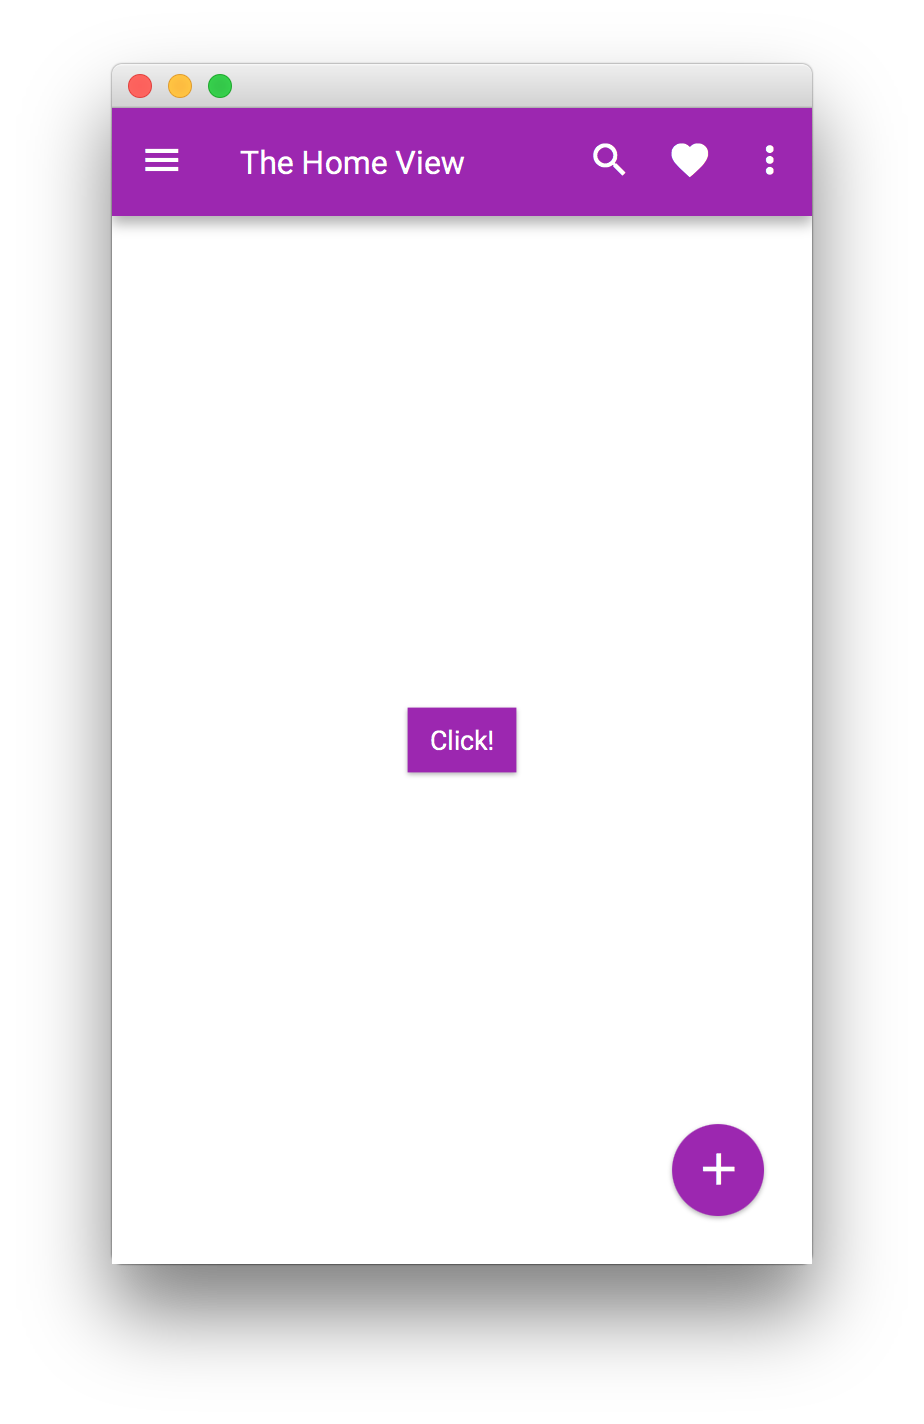
In order to perform some actions while the transition is running or when it finishes, a custom ActionEvent
can be provided to the end of the transition.
This can be done as well based on the LifecycleEvent events. The following code snippet will set the view transparent
to mouse clicks just during the time it is added to the scene and the transition ends.
public class MyApp extends MobileApplication {

    @Override
    public void init() {
        addViewFactory(HOME_VIEW, () -> {
            final HomeView homeView = new HomeView();
            final View view = (View) homeView.getView();
            view.addEventHandler(LifecycleEvent.SHOWING, e ->
                view.setMouseTransparent(true));
            view.addEventHandler(LifecycleEvent.SHOWN, e ->
                view.setMouseTransparent(false));
            return view;
        });
    }
}
6.1.3. Layers
A Layer is an overlay that can be shown above any View.
Layers can be provided as factories by using MobileApplication.getInstance().addLayerFactory(), and
can be shown on demand by using MobileApplication.getInstance().showLayer().
public class MyApp extends MobileApplication {

    @Override
    public void init() {
        addViewFactory(HOME_VIEW, () -> new View(new Label("Hello Glisten!")) {
            @Override
            protected void updateAppBar(AppBar appBar) {
                appBar.setNavIcon(MaterialDesignIcon.MENU.button(e -> showLayer("New Layer")));
            }
        });

        addLayerFactory("New Layer", () -> {
            final StackPane stackPane = new StackPane(new Button("Click"));
            stackPane.setStyle("-fx-background-color: white; -fx-padding: 10;");
            SidePopupView sidePopupView = new SidePopupView(stackPane);
            return sidePopupView;
        });
    }
}
Layers can also be be shown and hidden, without the use of factories, by calling show() and hide() respectively.
SidePopupView sidePopupView = new SidePopupView(stackPane);
sidePopupView.show();
By calling setBackgroundFade(double) the developer will be able to fade the background of a layer to a darker color,
obscuring the main application and drawing focus to the popup.
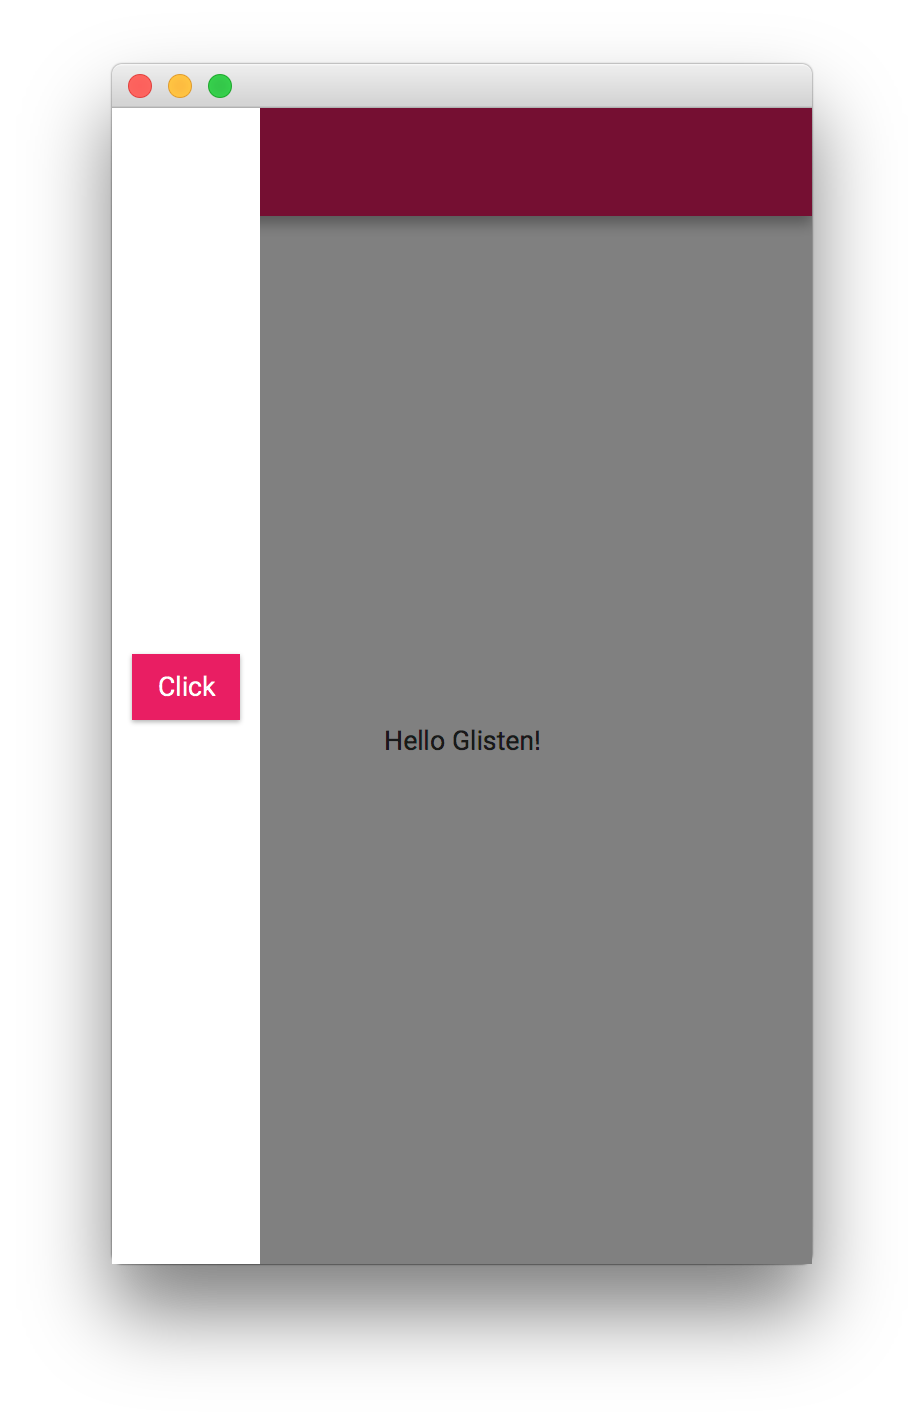
Creating a Layer
Developers can create custom Layer nodes. This is a minimal implementation, including a faded background when the layer is shown.
public class MyApp extends MobileApplication {

    @Override
    public void init() {

        addViewFactory(HOME_VIEW, () -> new View(new Label("Hello Glisten!")) {
            @Override
            protected void updateAppBar(AppBar appBar) {
                appBar.setNavIcon(MaterialDesignIcon.MENU.button(e -> showLayer("New Layer")));
            }
        });

        addLayerFactory("New Layer", () -> new Layer() {
            private final Node root;
            private final double size = 150;
            final GlassPane glassPane = MobileApplication.getInstance().getGlassPane();

            {
                setBackgroundFade(0.5);
                root = new StackPane(new Button("A custom layer"));
                root.setStyle("-fx-background-color: white;");
                getChildren().add(root);
            }

            @Override
            public void layoutChildren() {
                super.layoutChildren();
                root.setVisible(isShowing());
                if (!isShowing()) {
                    return;
                }
                root.resize(size, size);
                resizeRelocate((glassPane.getWidth() - size)/2, (glassPane.getHeight()- size)/2, size, size);
            }
        });
    }
}
Layers can also be created and shown without using the factory methods.
public class MyApp extends MobileApplication {

    private Layer layer;

    @Override
    public void init() {

        addViewFactory(HOME_VIEW, () -> new View(new Label("Hello Glisten!")) {
            @Override
            protected void updateAppBar(AppBar appBar) {
                appBar.setNavIcon(MaterialDesignIcon.MENU.button(e -> {
                    if (layer == null) {
                        layer = createLayer();
                    }
                    layer.show();
                }));
            }
        });
    }

    private Layer createLayer() {
        return new Layer() {
            private final Node root;
            private final double size = 150;
            final GlassPane glassPane = MobileApplication.getInstance().getGlassPane();

            {
                setBackgroundFade(0.5);
                root = new StackPane(new Button("A custom layer"));
                root.setStyle("-fx-background-color: white;");
                getChildren().add(root);
            }

            @Override
            public void layoutChildren() {
                super.layoutChildren();
                root.setVisible(isShowing());
                if (!isShowing()) {
                    return;
                }
                root.resize(size, size);
                resizeRelocate((glassPane.getWidth() - size)/2, (glassPane.getHeight()- size)/2, size, size);
            }
        };
    }
}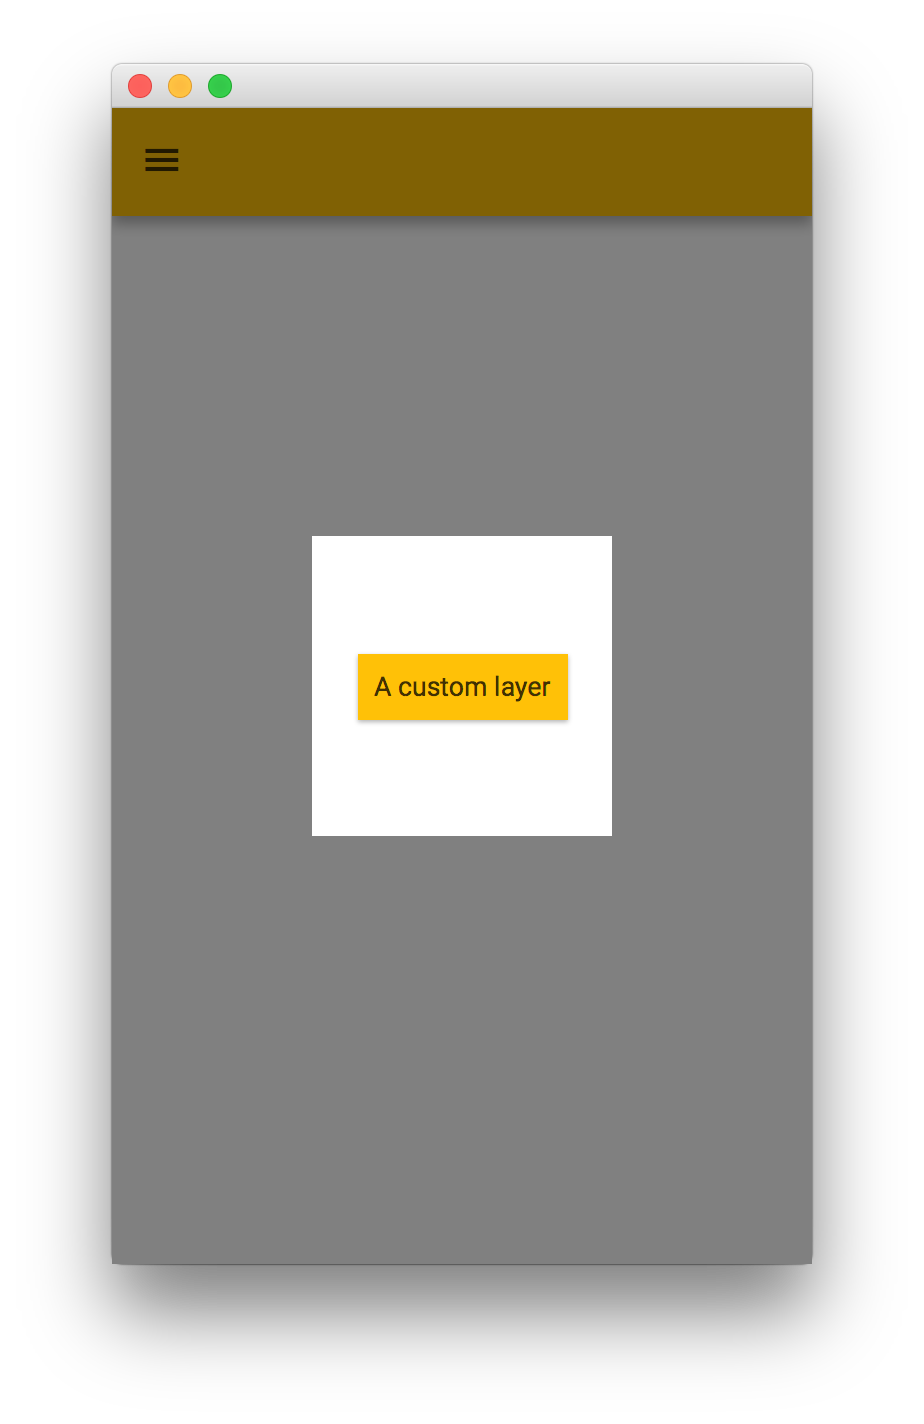
However, Glisten already provides a series of built-in layers, so creating custom layers won’t be necessary in most of the occasions.
Using built-in layers
Glisten uses layers to show additional information. The most commonly used layers are:
-
MenuPopupView
-
MenuSidePopupView
-
PopupView
-
SidePopupView
For a description of each layer, check the API documentation: Glisten layers.
Many Glisten controls use layers internally, including FloatingActionButton, NavigationDrawer, Snackbar and Toast.
6.1.4. UI Controls
Glisten comes with a collection of cross platform UI controls based on the Material Design Specification: Glisten Controls.
6.2. Glisten CSS Overview
An overview of the CSS style classes and properties that are available to users of the Gluon Charm Glisten library. Users of Glisten CSS should be familiar with the JavaFX CSS functionality.
6.2.1. Glisten Themes
Glisten ships with two CSS themes: light and dark. Despite the connotation, the amount of CSS required to specify these themes is incredibly minimal - and as a courtesy is reproduced here:
.root {
  -fx-background: white;
  -fx-text-fill: -text-light;
  -fx-prompt-text-fill: rgba(0,0,0,.3);

  -text-disabled: -text-disabled-light;
  -background-disabled:rgba(0,0,0,.12);
  -background-fill: -text-light;

  -flat-button-hover-background: rgba(#999999,.2);
  -flat-button-pressed-background: rgba(#999999,.4);
  -flat-button-disabled-fill: rgba(#000000,.26);
}.root {
-fx-background: #333333;
-fx-text-fill: -text-dark;
-fx-prompt-text-fill: rgba(255,255,255,.3);
-text-disabled: -text-disabled-dark;
-background-disabled:rgba(255,255,255,.12);
-background-fill: -text-dark;
-flat-button-hover-background: rgba(#CCCCCC,.15);
-flat-button-pressed-background: rgba(#CCCCCC,.25);
-flat-button-disabled-fill: rgba(#FFFFFF,.3);
}6.2.2. Glisten CSS Properties
There are a number of global properties that can be used by any application that uses Glisten. These properties allow for custom controls to be styled in a way that should relatively closely match up with the Glisten-styled controls. What follows is a list of such properties.
Swatches
Perhaps most importantly, Glisten supports swatches, where each swatches populates a series of pre-specified CSS properties which can be used within your own CSS. The properties that are populated for each swatch are the following:
-primary-swatch-50
-primary-swatch-100
-primary-swatch-200
-primary-swatch-300
-primary-swatch-400
-primary-swatch-500
-primary-swatch-600
-primary-swatch-700
-primary-swatch-800
-primary-swatch-900
-alternate-swatch-100
-alternate-swatch-200
-alternate-swatch-400
-alternate-swatch-700
Each of these properties is simply a color along a certain color spectrum. All swatches provided by Glisten are based on the Material Design color style guide. The Glisten CSS files do not typically make use of all swatch colors, so it is also advised that any use of these colors be restrained, outside of the -primary-swatch-500, and possibly -primary-swatch-200, -primary-swatch-600, and -primary-swatch-700.
An example of how such a property could be used is shown in the sample code below:
.button {
  -fx-background-color: -primary-swatch-500;
}

.button:hover {
  -fx-background-color:-primary-swatch-600;
}
Other Properties
There are a number of other properties that are available to use. Some of these are custom Glisten properties, but many are standard JavaFX CSS properties that Glisten simply modifies to the appropriate value. Some notable properties include the following (refer to the JavaFX CSS Reference Guide for more details of any that start with -fx-) :
-
-text-light: This is a light-colored text, best used on a dark background. -
-text-dark: This is a dark-colored text, best used on a light background. -
-fx-text-fill: This is populated based on the theme that is currently set (i.e. light or dark). -
-text-disabled: This is used in controls where the control is disabled.
Text Fill
It is important to understand how text fill works in Glisten, as the underlying JavaFX CSS engine is significantly more powerful than normal CSS engines. In particular, when it comes to deciding what color text fill to use, you can use JavaFX CSS laddering to decide. In other words, it is never a good idea to use -fx-text-fill directly, as -fx-text-fill does not take into account the background color behind the text (so it is possible that the text is unreadable).
In cases where a custom text fill is desired, it is much better to do something such as the following:
.button {
  -fx-background-color: -primary-swatch-500;
  -fx-text-fill: ladder(-primary-swatch-500, -text-dark 49%, -text-light 50%)
}
This code states to use -text-dark or -text-light, depending on the darkness of the first value, in this case -primary-swatch-500. The result of this is that when -primary-swatch-500 is a very light color (such as a bright yellow), the -fx-text-fill will be -text-light (and therefore appear as a dark color). When -primary-swatch-500 is a very dark color, -text-dark is used, and is therefore a light color that is readable on a dark background.
6.2.3. Glisten Style Classes
By default, when a UI control is instantiated in Glisten, the control does not receive any additional style classes over what is provided by the underlying JavaFX technology. However, depending on the use case for each individual control, it can make sense to apply additional style classes to have Glisten apply additional styling to these controls.
There exists a class called GlistenStyleClasses that is located in the com.gluonhq.glisten.visual package. This class provides a number of predefined style classes that can be applied to a control, via one of two methods:
final ToggleButton toggleVisibilityButton = new ToggleButton("Toggle Visibility");

/*
 * TOGGLE_BUTTON_SWITCH is a static import from GlistenStyleClasses.
 * It is simply a String consisting of 'switch'.
 */
toggleVisibilityButton.getStyleClass.add(TOGGLE_BUTTON_SWITCH);final ToggleButton toggleVisibilityButton = new ToggleButton("Toggle Visibility");
/*
* Both applyStyleClass and TOGGLE_BUTTON_SWITCH are static
* imports from GlistenStyleClasses
*/
applyStyleClass(toggleVisibilityButton, TOGGLE_BUTTON_SWITCH);Both approaches are more or less equivalent, but the second approach is recommended.
Once these additional style classes have been applied, both Glisten CSS and your own CSS can be applied as applicable. For example, a button that has been styled to be flat (using GlistenStyleClasses.BUTTON_FLAT) will be able to receive alternate styling via css such as the following:
.button.flat {
  ...
}
Of course, as noted, any styling of UI controls based on style classes from the GlistenStyleClasses class will be styled differently by Glisten CSS, so there is no need (unless desired) to apply additional styling.
What follows is a list of additional CSS style classes that are available to some UI controls:
Buttons have the CSS style class .button. There are the following additional style classes that are available in Glisten:
Style Class |
GlistenStyleClasses Property |
Description |
|
|
The |
|
|
The |
Toggle buttons have the CSS style class .toggle-button.
Style Class |
GlistenStyleClasses Property |
Description |
|
|
The |
6.2.4. Other Questions
If this document does not answer all your questions regarding Glisten CSS functionality, please reach out to Gluon staff and ask any questions. They will help us to improve future versions of this document.
6.3. Release Notes
This page provides information about the releases of Charm Glisten, including known issues, limitations, and general advisories. Please review the notes before using the library.
To discuss issues or ideas with other developers, please reach out to us.
6.1.0
Glisten 6.1.0 deprecates MobileApplication and provides a new AppManager that will manage the JavaFX Application flow and integrate the Glisten features.
The following code snippet shows the implementation of a typical Application class that includes the application manager:
public class MyApplication extends Application {

    private final AppManager appManager = AppManager.initialize(this::postInit);

    @Override
    public void init() throws Exception {
        appManager.addViewFactory(HOME_VIEW, () -> new View() {...});
    }

    @Override
    public void start(Stage primaryStage) throws Exception {
        appManager.start(primaryStage);
    }

    private void postInit(Scene scene) {
        Swatch.BLUE.assignTo(scene);
    }

}
This change is backward compatible, and you can still use Charm 6.1.0+ with MobileApplication, which will be marked as deprecated on your IDE.
If you have an existing project, you can simply bump your Glisten dependencies, without needing to modify your code.
If you use the Glisten-Afterburner framework, GluonPresenter has been deprecated too. Any presenter class doesn’t need to extend from GluonPresenter<Application>, but it is still supported for compatibility reasons.
However, it is advisable to adapt to the new API and introduce the AppManager as shown above or in the different Gluon Samples.
Migration guidelines
The required steps to do the migration are:
Application class
-
Change
MobileApplicationtoApplication -
Add the
AppManagerand initialize it, passing thepostInitcallback. -
Remove the
@Overrideannotation from thepostInitmethod, and optionally make it private. -
Override the
Application::startmethod, which should simply call thestartmethod of the application manager and pass it thestageparameter. -
The home view name should be taken from
AppManager.HOME_VIEW, and the view factories can be added fromAppManager::addViewFactory(same forAppManager::addLayerFactory). -
If you use an
AppViewManagerto manage the view creation, you don’t need to pass it theApplicationinstance, as theAppManagerinstance can be always accessed viaAppManager.getInstance().
Presenter class
-
Remove
extends GluonPresenter<YourApplication> -
Replace the calls to
getApp()withAppManager.getInstance().
6.0.0
Glisten 6.0.0 comes with JavaFX 11 support.
5.0.0
Glisten 5.0.0 release has a significant number of breaking changes. For a detailed document on how to migrate to 5.0.0, please refer Migration Guide to Gluon Mobile 5.
New Features
-
MobileApplication exposes a new method
getDrawer()which should be used to access the application wide NavigationDrawer -
New control Snackbar replaces SnackbarPopupView
-
MobileTransition has been added to pause and resume animation along with the change in the life-cycle of the mobile application
-
View has defined
centeras the default property, which enables setting a center child in fxml without using the <center> tag -
Layer is managed using life-cycle. They are four life-cycle events: showing, shown, hiding, hidden.
-
Layers can now be shown on MobileApplication without adding them to GlassPane or View.
-
NavigationDrawer has been improved to automatically show and hide without the need to add it to a SidePopupView.
-
NavigationDrawer closes automatically when an item is selected
-
Support for notch in iPhone X devices.
Package Changes
-
FAB has been moved from
com.gluonhq.charm.glisten.layout.layertocom.gluonhq.charm.glisten.control
API changes
-
MobileLayoutPane has been removed
-
GlassPane and View extend from BorderPane instead of MobileLayoutPane
-
GlassPane and View no longer expose the list of layers. The method
getLayers()has been removed -
View no longer exposes a
nameproperty -
View’s show transition factory has been changed from
Function<View,Transition>toFunction<View,MobileTransition> -
Layers can be shown using the new API. In order to show and hide a layer, call
show()andhide()respectively -
ActionItemsin BottomNavigation only accept instances of BottomNavigationButton instead of Node -
Deprecated method
createButton()has been removed from BottomNavigation -
New constructor has been added to most of the Transitions to help developers define custom duration
-
PopupView gives more control to the developer by allowing them to control the
sideandpaddingof the popup. Additionally, height and width of the popup can now be changed using the pref*, min* and max* properties. -
PopupView has dropped
autofix property. AutoFix is now set to true for all usage of PopupView. -
AutoCompleteTextField has a new
converterfor easy conversions between strings and objects. -
FAB can bind to a View using
showOn(View view) -
New methods have been added to NavigationDrawer to open and close the drawer -
open()andclose()
Bug Fixes
-
MenuPopupView and AutoCompletePopup support text wrapping
-
AutoCompleteTextField selection of a node from the popup, converts the selected object to a string and shows it in the TextField.
-
Animation duration for PopupView and SidePopupView has been reduced to match Material Design specification
-
Floating text translates to the top when TextField has text, irrespective of state of focus property
-
Nag window no longer throws exception when no home view has been defined
-
ToggleButtonGroup minWidth should never outgrow prefWidth
-
SettingsPane is updated after any change in the options list
-
Layer has been updated to fix multiple issues
-
Javadoc has been updated to fix multiple issues
7. Device Interface
Gluon Attach addresses the integration with low-level platform APIs. Using Attach, you write code that accesses device and hardware features using a uniform, platform-independent API. At runtime, the appropriate implementation (desktop, android, ios) makes sure the platform specific code is used to deliver the functionality.
The following sections provide a high-level overview of the current Attach features.
More information can be found in the Gluon website, and you can find different samples using different Attach services.
This library is being actively extended, so if you think an important feature is missing, feel free to log an issue or contribute a pull request at our Attach repository.
Attach project is split up into different services. Each service takes care of implementing a certain hardware or device feature, like access to general device information, information about the display, outputs of different sensors that are found on the device, etc.
The full list of services can be found here.
7.1. Using Attach
7.1.1. Prerequisites
Attach prerequisites are in line with those required by each Platform for developing Gluon application.
7.1.2. Adding Attach to the project
Configuring your project to include an Attach service is done via adding the dependency to the project and the name of the service to attachList configuration.
When creating a project with the Gluon IDE plugin, the attachList is already available
and pre-configured with the following four services: display, lifecycle, statusbar and storage.
The list of services can be extended with any of the available services.
For instance, the Position service, that allows accessing the device’s GPS, can be added as follows:
<dependency>
    <groupId>com.gluonhq.attach</groupId>
    <artifactId>position</artifactId>
    <version>${attach.version}</version>
</dependency>
...
<plugin>
    <groupId>com.gluonhq</groupId>
    <artifactId>gluonfx-maven-plugin</artifactId>
    <version>1.0.27</version>
    <configuration>
        <target>${gluonfx.target}</target>
        <attachList>
            ...
            <list>position</list>
        </attachList>
        <mainClass>${main.class}</mainClass>
    </configuration>
</plugin>
7.1.3. Using Services
Each Attach service provides the functionality to access a given feature in every platform where it is supported.
Each service can be accessed via its create() method, which returns an Optional which contains an instance of the requested service.
The returned optional object might be empty if the runtime platform has no available implementation for that specific service.
PositionService positionService = PositionService.create().orElseThrow(() -> new RuntimeException("PositionService not available."));
positionService.positionProperty().addListener((obs, ov, nv) -> {
    System.out.println("Latest known GPS coordinates from device: " + nv.getLatitude() + ", " + nv.getLongitude());
});
positionService.start();
Another useful class is the enum com.gluonhq.attach.util.Platform, which provides an easy way to detect what
platform the application is currently running on: ANDROID, IOS or DESKTOP.
7.2. Services Overview
For an overview of all the available services, we refer you to the services package overview page in the Attach javadoc:
7.2.1. Service Requirements
Each service has certain requirements that need to be addressed before deploying the mobile applications, either on Android, or on iOS, or both.
Attach javadoc provides detailed information on these cases.
Android
For instance, the Dialer service requires a CALL_PHONE permission included in the Android manifest file:
<manifest ...>
    <uses-permission android:name="android.permission.CALL_PHONE"/>
    ...
</manifest>
The AndroidManifest.xml file is generated for the project with the gluonfx:package goal, and it is available at target/gluonfx/aarch64-android/gensrc/android.
GluonFX plugin takes care of most of these modifications, and usually, there is no need to modify this manifest.
Only in case you need to make any change, copy this file to src/android and make any modification that might be needed. For every new run of gluonfx:package, the manifest found at src/android will be used.
iOS
For instance, the Position service requires a few keys included in the Default-Info.plist file:
<plist ...>
<dict>
    ...
    <key>NSLocationWhenInUseUsageDescription</key>
    <string>This app needs location services</string>
    <key>NSLocationAlwaysAndWhenInUseUsageDescription</key>
    <string>This app needs location services</string>
    <key>NSBluetoothAlwaysUsageDescription</key>
    <string>This app needs bluetooth services</string>
</dict>
</plist>
The Default-Info.plist file is generated for the project with the gluonfx:link goal, and it is available at target/gluonfx/arm64-ios/gensrc/ios.
GluonFX plugin takes care of most of these modifications, and usually, there is no need to modify this plist file.
Only in case you need to make any change, for instance, adding a new key or modifying the description of an existing one, you can create a partial plist file under src/main/resources/META-INF/substrate/ios/Partial-Info.plist, and apply the required changes, like:
<?xml version="1.0" encoding="UTF-8"?>
<!DOCTYPE plist PUBLIC "-//Apple//DTD PLIST 1.0//EN" "http://www.apple.com/DTDs/PropertyList-1.0.dtd">
<plist version="1.0">
<dict>
    <key>NSBluetoothAlwaysUsageDescription</key>
    <string>My custom description</string>
</dict>
</plist>
Alternatively, you can copy target/gluonfx/arm64-ios/gensrc/ios/Default-Info.plist into src/ios and make any modification that might be needed. For every new run of gluonfx:link, the plist found at src/ios will be used.
7.3. Building Attach
|
The following sections are intended only for developers who want to create a native service or understand how the Attach native services are created. |
If you want to build Attach from code, you need JDK 11+, Xcode 11+, the Android SDK 29 and the Android NDK.
Clone the repository, and from macOS, run:
export ANDROID_SDK=$ANDROID_HOME
export ANDROID_NDK=$ANDROID_HOME/ndk-bundle
./gradlew clean build publishToMavenLocal
It will build all services for all possible platforms (desktop, iOS and Android), and it will install them to your .m2 local repository.
You can try to build from Linux or Windows, however the iOS implementation won’t be built.
Single service builds can be done as well. For instance, to build and install locally the Display service, run:
./gradlew :display:publishToMavenLocal
7.3.1. Platform builds
The tasks under mavenPublish.gradle and native-build.gradle perform the native build for desktop, iOS and Android.
The goal is to produce an artifact that can be used as dependency by the GluonFX plugin when creating a native image that will be deployed to the target platform.
Such artifact (a jar file), bundles Java classes, configuration files and native libraries.
The builds are done with the nativeBuild task. For instance, to build the native libraries for the three platforms, run:
./gradlew :display:nativeBuild
or in case you want to build a given platform, run:
./gradlew :display:iosBuild
Desktop
For a given service, its Java code (GraalVM) is compiled against JDK 11+, and with the desktopJar task it is added to the ${service}-${version}-desktop.jar file.
Reflection and jni configuration json files are added under META-INF/substrate/config (see config files).
Native code, if present, will be compiled, and the native library will be added to the jar to a native folder.
iOS
For a given service, its Java code (GraalVM) is compiled against JDK 11+, and with the iosJar task it is added to the ${service}-${version}-ios.jar file.
Reflection and jni configuration json files are added under META-INF/substrate/config (see config files).
Native code using Objective-C and found for each service under:
def osSources = []
osSources = "$projectDir/src/main/native/ios/${name}.m"
is compiled and linked, using the iOS SDK with certain flags and iOS frameworks, to create a native library under:
def linkerOutput = "$buildDir/native/ios/$arch/lib${name}.a"
The native library is then added to the jar to a native folder.
Android
For a given service, its Java code (GraalVM) is compiled against JDK 11+, and with the androidJar task it is added to the ${service}-${version}-android.jar file.
Reflection and jni configuration json files are added under META-INF/substrate/config (see config files).
Native code using C and found for each service under:
def nativeSourcesDir = []
nativeSourcesDir = "$projectDir/src/main/native/android/c/*.c"
is compiled and linked, using the Android SDK with certain flags, to create a native library under:
def linkerOutput = "$buildDir/native/android/lib${name}.a"
The native library is then added to the jar to a native folder.
Finally, Java code for Android (Dalvik) is compiled against JDK 1.7, using the Android SDK. An Android library project is generated and bundled under META-INF/substrate/dalvik/${name}.aar. It will contain mainly a jar with classes and an AndroidManifest.xml file with the service requirements (like permissions or activities).
7.3.2. Attach with GluonFX plugin
An Attach service is added to a project as regular dependency but it has also to be included in the attachList:
<!-- dependencies -->
<dependency>
    <groupId>com.gluonhq.attach</groupId>
    <artifactId>display</artifactId>
    <version>4.0.23</version>
</dependency>

<!-- plugin -->
<configuration>
    <attachList>
        <list>display</list>
    </attachList>
</configuration>
If needed, the platform classifier can be used to run the project on HotSpot with the JavaFX Maven plugin:
<!-- dependencies -->
<dependency>
    <groupId>com.gluonhq.attach</groupId>
    <artifactId>display</artifactId>
    <version>4.0.23</version>
</dependency>
<dependency>
    <groupId>com.gluonhq.attach</groupId>
    <artifactId>display</artifactId>
    <version>4.0.23</version>
    <classifier>desktop</classifier>
    <scope>runtime</scope>
</dependency>
This can be done with the Maven profiles, so these platform dependencies are only activated for the correct profile.
When running the GluonFX plugin goals, for each Attach service, the plugin will apply the correct classifier based on the target and resolve the artifact.
Then, for every ${service}-${version}-${platform}.jar file found in the classpath, the plugin will:
-
add the Java classes (GraalVM) to the native-image classpath to be compiled with
gluonfx:compile, -
merge the configuration json files with others found in the classpath,
-
extract the native libraries into
target/gluonfx/$arch-$os/gvm/lib/lib${name}.a, so they can be linked withgluonfx:link, -
and when targeting Android, extract the Android libraries (
.aar) intotarget/gluonfx/$arch-$os/gvm/android_project/libs. These libraries can be added as regular dependencies for the Android project when creating the apk/aab bundles in thegluonfx:packagegoal.
7.3.3. Gluon Attach Extended
Gluon Attach Extended is a demo project that shows how to create custom Attach services, using the LogService as a sample, following the previous explanations, but using a different package name for the service.
8. Data Binding
Gluon Connect is a client-side library that simplifies binding your data from any source and format to JavaFX UI controls. It works by retrieving data from a data source and converting that data from a specific format into JavaFX observable lists and objects. It is designed to allow developers to easily add support for custom data sources and data formats.
By default, Gluon Connect already provides easy-to-use implementations for the most commonly used data sources:
-
File provider
-
REST provider
8.1. File provider
The File provider enables reading from and writing to a file that is located on the file system of the device. You can
find the complete sample from our gluon-samples repository on GitHub: https://github.com/gluonhq/gluon-samples. Inside
the repository, look for the folder named gluon-connect-file-provider.
8.1.1. Retrieving a list
Let’s assume that we have a file on the local file system with the following JSON content:
[
  {"name":"Java","ratings":20.956},
  {"name":"C","ratings":13.223},
  {"name":"C++","ratings":6.698},
  {"name":"C#","ratings":4.481},
  {"name":"Python","ratings":3.789}
]
And the following POJO that will map the JSON objects from the file above to a Java object:
public class Language {
    private String name;
    private double ratings;

    public String getName() {
        return name;
    }

    public void setName(String name) {
        this.name = name;
    }

    public double getRatings() {
        return ratings;
    }

    public void setRatings(double ratings) {
        this.ratings = ratings;
    }
}
We can then assign a list of programming language objects to a JavaFX ListView control with the following code:
// create a FileClient to the specified File
FileClient fileClient = FileClient.create(new File("languages.json"));

// create a JSON converter that converts the nodes from a JSON array into language objects
InputStreamIterableInputConverter<Language> converter = new JsonIterableInputConverter<>(Language.class);

// retrieve a list from a ListDataReader created from the FileClient
GluonObservableList<Language> languages = DataProvider.retrieveList(fileClient.createListDataReader(converter));
8.1.2. Retrieving an object
Retrieving a single object from a file resource looks similar to retrieving a list. Assume that we have a user.json
file with the following JSON content:
{"name":"Duke","subscribed":true}And the following POJO for mapping the JSON object to a Java object:
public class User {
    private String name;
    private boolean subscribed;

    public String getName() {
        return name;
    }

    public void setName(String name) {
        this.name = name;
    }

    public boolean isSubscribed() {
        return subscribed;
    }

    public void setSubscribed(boolean subscribed) {
        this.subscribed = subscribed;
    }
}
The user object can then be retrieved from the JSON file with the following code:
// create a FileClient to the specified File
FileClient fileClient = FileClient.create(new File("user.json"));

// create a JSON converter that converts a JSON object into a user object
InputStreamInputConverter<User> converter = new JsonInputConverter<>(User.class);

// retrieve an object from an ObjectDataReader created from the FileClient
GluonObservableObject<User> user = DataProvider.retrieveObject(fileClient.createObjectDataReader(converter));
8.1.3. Storing an object
We can use the same file and POJO again to show you how to store an object into a file:
// create an instance of a User to store
User user = new User();
user.setName("Duchess");
user.setSubscribed(false);

// create a FileClient to the specified File
FileClient fileClient = FileClient.create(new File("user.json"));

// create a JSON converter that converts the user object into a JSON object
OutputStreamOutputConverter<User> outputConverter = new JsonOutputConverter<>(User.class);

// store an object with an ObjectDataWriter created from the FileClient
GluonObservableObject<User> gluonUser = DataProvider.storeObject(user, fileClient.createObjectDataWriter(converter));
8.2. REST provider
The REST provider enables reading from and writing to an HTTP URL resource. For demonstrating this we will make use of
the public StackExchange API. You can find the complete sample from our gluon-samples
repository on GitHub: https://github.com/gluonhq/gluon-samples. Inside the repository, look for the folder named
gluon-connect-rest-provider.
8.2.1. Retrieving a list
The URL we are going to use for retrieving a list, is the error REST endpoint. Here is how you would retrieve a list from a URL with Gluon Connect:
// create a RestClient to the specific URL
RestClient restClient = RestClient.create()
        .method("GET")
        .host("https://api.stackexchange.com")
        .path("/2.2/errors");

// retrieve a list from the DataProvider
GluonObservableList<Error> errors = DataProvider.retrieveList(restClient.buildListDataReader(Error.class));

// create a JavaFX ListView and populate it with the retrieved list
ListView<Error> lvErrors = new ListView<>(errors);
As you can see, we didn’t specify any Converter. That is because the RestClient will try to find a suitable Converter
based on the Content-Type response header. If the response header is not specified, it assumes that the response will
be formatted in JSON. Sometimes, the automatic detection of the Converter fails or you need to use a custom Converter.
In that case, you use the second method for creating a ListDataReader where you provide the converter that you want to
use.
// create a RestClient to the specific URL
RestClient restClient = RestClient.create()
        .method("GET")
        .host("https://api.stackexchange.com")
        .path("/2.2/errors");

// create a custom converter
InputStreamIterableInputConverter<Error> converter = new ItemsIterableInputConverter<>(Error.class);

// retrieve a list from the DataProvider using the custom converter
GluonObservableList<Error> errors = DataProvider.retrieveList(restClient.createListDataReader(converter));
8.2.2. Retrieving an object
For retrieving a single object, we will use the questions REST endpoint.
// create a RestClient to the specific URL
RestClient restClient = RestClient.create()
        .method("GET")
        .host("https://api.stackexchange.com")
        .path("/2.2/questions/36243147")
        .queryParam("order", "desc")
        .queryParam("sort", "activity")
        .queryParam("site", "stackoverflow");

// retrieve an object from the DataProvider
GluonObservableObject<Question> question = DataProvider.retrieveObject(restClient.createObjectDataReader(Question.class));

// show information on the retrieved object
Label lbTitle = new Label();
question.initializedProperty().addListener((obs, ov, nv) -> {
    if (nv && question.get() != null) {
        lbTitle.textProperty().bind(question.get().titleProperty());
    }
});
8.3. Deep Dive
In the following section we will dive deeper into the concepts of Gluon Connect and what the relation is between these concepts. The two implementations that we talked about above also make use of the same concepts, but they hide them for the user in the internal implementation. If you want to know a bit more about the inner workings of these providers or if you are interested in adding support for a custom DataSource, you should continue reading the following sections.
8.3.1. Concepts
Gluon Connect consists of the following basic concepts:
-
DataSource: specifies where the data is read from and/or written to
-
Converter: converts the read data into objects and vice versa converts objects into data to be written
-
DataProvider: takes care of mapping the data into usable observable lists and objects
DataSource
The DataSource defines where Gluon Connect should read and/or store the data. The DataSource makes use of the
standard java.io.InputStream and java.io.OutputStream classes. It is split up into two parts: the
InputDataSource
that provides an InputStream to read the data from; the OutputDataSource
that provides an OutputStream to write the data into. For convenience purposes, there is also an
IODataSource
that has access to both the InputStream and the OutputStream.
Gluon Connect includes by default two DataSource implementations:
-
FileDataSource: reads and writes data from a File that is accessible from the local system -
RestDataSource: reads and writes data from an HTTP URL resource
Converter
The Converter is able to convert data from an Object into a specific data format or convert data from a certain data format back into an Object. The Converter is split up into three different parts:
-
InputConverter: converts data into an object -
OutputConverter: converts an object into data -
IterableInputConverter: provides anIteratorthat converts data into a list of objects
All three interfaces do not specify where the data is coming from. This allows for maximum extensibility. Gluon Connect
provides an abstract implementation for these Converters. The InputConverter and IterableInputConverter both have an
implementation where the data to convert is taken from an InputStream. The OutputConverter has an analogous
implementation that converts the object by writing into an OutputStream.
Gluon Connect provides Converter implementations for JSON and String out of the box.
DataProvider
The DataProvider
is the class that will ultimately provide the observable lists or objects that you can use with your JavaFX UI controls.
Gluon Connect provides a custom observable list and observable object called
GluonObservableList
and GluonObservableObject
respectively.
The DataProvider itself has four methods:
-
retrieveList: this retrieves aGluonObservableListusing aListDataReader -
storeObject: this stores an object using anObjectDataWriterand responds with aGluonObservableObject -
retrieveObject: this retrieves an existing Object using an ObjectDataReader and responds with aGluonObservableObject -
removeObject: this removes aGluonObservableObjectusing anObjectDataRemover
All these methods will return the GluonObservableList or GluonObservableObject instances immediately. The actual
process of retrieving, storing or removing the list or object happens asynchronously in a background thread. For
example, when retrieving a list or object you can listen for the initialized property
to know when the list or object is fully initialized by the provided reader.
If we for instance look at the retrieveObject method, we see that it has an ObjectDataReader as parameter. The
ObjectDataReader is an interface that is able to create a new instance of GluonObservableObject and read an object
of a certain type. The source where the object is read from and the format of the data is completely left open to the
actual implementing classes. Usually though, you will combine a DataSource with a Converter to implement this
functionality. The most basic DataProvider that you can use as an ObjectDataReader is the InputStreamObjectDataReader.
This class takes an InputSource as the DataSource and an InputStreamConverter as the Converter. When an instance of
InputStreamObjectDataReader is passed into the Dataprovider.retrieveObject method, the object will be retrieved by
getting the InputStream from the InputSource and then pass the InputStream to the InputStreamConverter, which will
read the data from the InputStream and convert it into the desired object.
8.3.2. Sample
The following sample will use the three concepts by providing a DataSource that reads from a classpath resource,
a Converter that converts JSON into objects and a DataProvider that combines the DataSource with the Converter to get
access to GluonObservable objects. The complete sample for this can be found in our gluon-samples repository on GitHub:
https://github.com/gluonhq/gluon-samples. Inside the repository, look for the folder named gluon-connect-basic-usage.
Retrieving a list
Let’s presume we have the following simple languages.json file that is accessible from the root of the classpath.
[
  {"name":"Java","ratings":20.956},
  {"name":"C","ratings":13.223},
  {"name":"C++","ratings":6.698},
  {"name":"C#","ratings":4.481},
  {"name":"Python","ratings":3.789}
]
And the following POJO that will map the JSON objects from the list above to a Java object:
public class Language {
    private String name;
    private double ratings;

    public String getName() {
        return name;
    }

    public void setName(String name) {
        this.name = name;
    }

    public double getRatings() {
        return ratings;
    }

    public void setRatings(double ratings) {
        this.ratings = ratings;
    }
}
We can then assign a list of programming language objects to a JavaFX ListView control with the following code:
// create a DataSource that loads data from a classpath resource
InputDataSource dataSource = new BasicInputDataSource(Main.class.getResourceAsStream("/languages.json"));

// create a Converter that converts a json array into a list
InputStreamIterableInputConverter<ProgrammingLanguage> converter = new JsonIterableInputConverter<>(ProgrammingLanguage.class);

// create a ListDataReader that will read the data from the DataSource and converts
// it from json into a list of objects
ListDataReader<ProgrammingLanguage> listDataReader = new InputStreamListDataReader<>(dataSource, converter);

// retrieve a list from the DataProvider
GluonObservableList<ProgrammingLanguage> programmingLanguages = DataProvider.retrieveList(listDataReader);

// create a JavaFX ListView and populate it with the retrieved list
ListView<ProgrammingLanguage> lvProgrammingLanguages = new ListView<>(programmingLanguages);
Retrieving an object
Retrieving an object looks somewhat similar to retrieving a list. However, instead of converting a JSON array into a
list, we will convert a JSON object directly into a Java object. Below we have the user.json file and the POJO that
will hold the information in the JSON object:
{"name":"Duke","subscribed":true}public class User {
private StringProperty name = new SimpleStringProperty();
private BooleanProperty subscribed = new BooleanProperty();
public String getName() {
return name.get();
}
public void setName(String name) {
this.name.set(name);
}
public StringProperty nameProperty() {
return name;
}
public boolean isSubscribed() {
return subscribed.get();
}
public void setSubscribed(boolean subscribed) {
this.subscribed.set(subscribed);
}
public BooleanProperty subscribedProperty() {
return subscribed;
}
}As you can see, we use JavaFX properties here instead of native Java types. This allows us to bind the properties to a JavaFX UI control, e.g. a Label. To retrieve the object from the JSON file, we use the following code:
// create a DataSource that loads data from a classpath resource
InputDataSource dataSource = new BasicInputDataSource(Main.class.getResourceAsStream("/user.json"));

// create a Converter that converts a json object into a java object
InputStreamInputConverter<User> converter = new JsonInputConverter<>(User.class);

// create an ObjectDataReader that will read the data from the DataSource and converts
// it from json into an object
ObjectDataReader<User> objectDataReader = new InputStreamObjectDataReader<>(dataSource, converter);

// retrieve an object from the DataProvider
GluonObservableObject<User> user = DataProvider.retrieveObject(objectDataReader);

// when the object is initialized, bind its properties to the JavaFX UI controls
Label lbName = new Label();
CheckBox cbSubscribed = new CheckBox("Subscribed?");
user.initializedProperty().addListener((obs, oldValue, newValue) -> {
    if (newValue) {
        lbName.textProperty().bind(user.get().nameProperty());
        cbSubscribed.selectedProperty().bindBidirectional(user.get().subscribedProperty());
    }
});
9. Samples
9.1. HelloFX - Native application
9.2. HelloSharedLib - Native shared library
To learn how to build the HelloSharedLib shared library sample natively on each platform, using GluonFX plugin for Maven, check the "HelloSharedLib Sample" section under each of the platforms:
9.3. Gluon Samples
Gluon also has curated a list of samples to help you get started with our products. These samples include everything including mobile, native images, cloudlink etc. We walk through the process of creation of each of these samples to make it easier for you to work with them.
Please check our Samples page for more information.
10. Scene Builder
The latest version of Scene Builder can be downloaded from the Gluon website.
10.1. Installation
Download the correct installer for your platform from the Scene Builder download page. The installation details are different for each platform but should be straight-forward.
| As of Scene Builder 8.3.0, the Windows installer will let you choose the installation folder, but please note that you will need to run as administrator (right-click, run as administrator) if you want to install in a system-wide location. |
10.2. Library Manager
Up until Scene Builder version 8.1.1, custom controls could be added with the menu button available at the Library panel. Selecting the option Import JAR/FXML File… from the drop down menu allowed the user browsing locally for jar or FXML files in his file system.
Those files were added to the Custom Library Folder, a local folder that the user could access and manually add more files or remove them.
From Scene Builder version 8.2.0, a new function was added, allowing the user not only to import local jar or FXML files as before, but also to import jars from a number of repositories, remote and local, public and even private ones.
To import libraries either from disk or from repositories, the menu item JAR/FXML Manager gives access to a new dialog, and replaces the old menu item.
10.2.1. The Library Manager dialog
The top part of the dialog contains a list of the existing libraries (jars and FXML files), if any.
For each library, the user can edit or delete it. Editing an FXML will open it in Scene Builder. Editing a jar file will open a dialog where the user can preview and select or unselect different components (if any) of that jar that will be added to the Custom panel.
On the lower part of the dialog, there are different actions that the user can perform.
Search Repositories
The user can type a name of a library: full name or part of its group id, or full name or part of it of the artifact id, following the usual naming convention.
For instance, if the user wants to download and install the latest release of com.gluonhq:charm, he can search just for charm:
All the results listed from all possible artifacts with that keyword, are retrieved from a given set of repositories:
-
Maven Central
-
Jcenter
-
Sonatype (releases)
-
Gluon Nexus (releases)
-
Local M2 (releases)
The results don’t include the version number, and this is only retrieved if the artifact is finally installed.
Note: Only latest releases will be resolved with this option. For any other version, including snapshots, the user has to use the option Manually Add Libraries from repository (see below).
By selecting the desired artifact, and clicking Add JAR, the artifact will be resolved from one of the repositories, downloading the latest release version, and installing it into the local M2 repository.
Then the jar will be scanned and a dialog will show any component that can be added to the Custom panel, typically classes that are assignable from Node. The user can select or unselect those components that should be added or excluded from the Custom panel. Also, some components can be previewed. The user has to click on Import Components to finish the process.
Once the dialog is closed, the new library will show up on the list. Again, it can be edited, to modify the list of included components, or deleted, to remove the jar and its components from the Custom panel.
Note: When an artifact is removed from the list, it will just be removed from Scene Builder, but the artifact won’t be removed from the local M2 repository.
Manually add Library from repository
If the user knows the exact names of groupID and artifactID, he can select from all the available versions for that artifact, including snapshots, from an initial set of repositories:
-
Maven Central
-
Jcenter
-
Sonatype (releases and snapshots)
-
Gluon Nexus (releases)
-
Local M2 (releases and snapshots)
that can be extended as it will be shown later.
Once a version is selected, clicking Add JAR will resolve the artifact, downloading and installing it into the local M2 repository.
The jar will be scanned and available components can be imported, after the user clicks on Import Components.
Add Library/FXML from file system
This option allows the user browsing locally for jar or FXML files, as in previous versions of Scene Builder. The files will be installed in the Custom Library Folder.
Manage Repositories
Finally, the user can manage the repositories where artifacts are resolved from.
Initially, the preset list of remote repositories is listed. These are not editable and can’t be removed.
By clicking on Add Repository, the user can add new repositories to the list, both public or private.
A new repository requires a name and a valid URL. If it is private, the credentials are required as well. The test button will perform a connection to the given URL to check if it is valid or not, and if private, if the credentials are valid as well.
Note: The credentials will be stored locally in the user preferences. They will be used only when installing libraries from the private repository.
Finally, the user repository will be added to the list, with the possibility of edition or deletion.
10.3. Custom Panel
Finally, all the components imported from either local or remote repositories or from the local file system, will be listed in the Custom panel, ready to be used.
10.4. Developing Applications Using Gluon
10.4.1. Gluon Panel
Since Scene Builder 8.3.0, a Gluon panel is included by default to support the easy creation of Gluon based apps using Scene Builder and Gluon Mobile.
When using Gluon controls, don’t forget to use the Gluon Mobile preview theme as shown in the screenshot below, or controls might not work correctly.
As of Scene Builder 8.4.0 you can also preview your controls using a Gluon Swatch and Theme. The theme can either be Gluon Mobile Light or Gluon Mobile Dark, the Swatch is the primary color used, it is what affects the appearance of the controls the most. In your code you should then use the Swatch and Theme API to effectively have the same appearance.
10.4.2. Designing Screens
With Gluon a screen is typically created using a View. That View is usually composed of an AppBar at the top and some content at the center.
| When creating Views don’t forget to set their name. |
If you want to create your View in FXML with an AppBar also defined, you should disable the globally provided AppBar in your code by toggling its visibility:
MobileApplication.getInstance().getAppBar().setVisible(false);
View also has a bottom property, for instance you can set a BottomNavigation on that position.
10.4.3. Testing Your Designs In Different Form Factors
Scene Builder 8.4.0 brings with it the possibility of testing your designs against different form factors. To this effect you have several options:
As you can see on the previous image there are sizes for Desktop, Tablet and Mobile Phones. The default size can be changed in the Preferences window.
If you want to preview your design live, you can by selecting the Preview → Show Preview in Window (or Ctrl + P) menu item. This will open up a window with a Scene containing the FXML you defined.
With the preview window open you can change it’s size by dragging the window borders or to a specific value from the menu:
11. Conclusion
In case you have any questions, your first stop should be the Gluon support page, where you can access the latest samples, documentation and more. Gluon also recommends the community to support each other over at the Gluon StackOverflow page. Finally, Gluon offers commercial support as well, to kickstart your projects.
We encourage you to start developing new projects using Gluon offering. We can’t wait to see what you create!
